


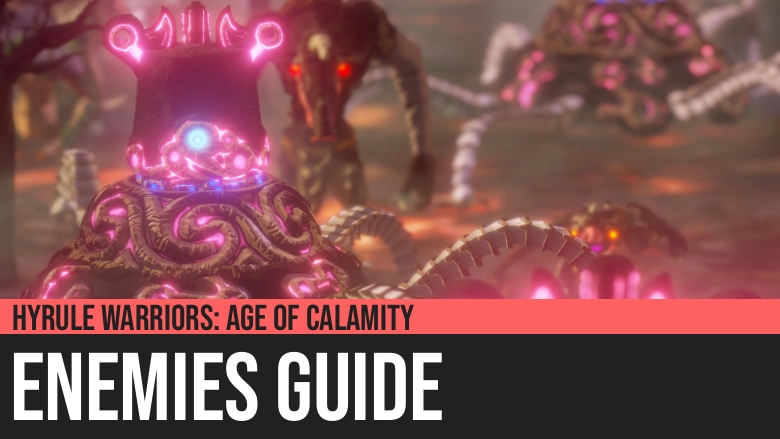
Hyrule Warriors: Age of Calamity - Enemies Guide
Our Hyrule Warriors: Age of Calamity - Enemies Guide is the best source of information for the enemies of the game, giving comprehensive details on the full list of enemies, their behavior, attack patterns, weaknesses, and combat tips to defeat them.
One of the common complaints in Breath of the Wild is the limited types of enemies present in the game. With BOTW, these are the typical monsters you face while adventuring:
- Bokoblin
- Lizalfos
- Moblin
- Hinox
- Lynel
There are other monsters like the Chuchu and Keese, but those above are the major weapon-wielding ones.
In the Age of Calamity, they kept the same types of enemies as in BOTW. However, they drastically increased the variations in actions among them. The creators of AoC upgraded all of the enemies in the game, from the major bosses to the small monsters.
Our goal in this guide is to list all of the known enemies in the game and show their behavior and attacks.
Bosses are Excluded
We did not put any of the bosses in this guide, as we created a separate guide for them. View our Bosses Guide to see them.

And with that, let's go through the enemies in the Age of Calamity.
Bokoblin
The most common enemies in the game are the Bokoblins. They have similar default attacks to those in BOTW. However, as they appear in huge groups in this game, their aggressiveness got reduced. So don't be surprised to be surrounded by twenty Bokoblins, yet none of them are attacking you.
However, in exchange for this reduced aggressiveness, the game introduced the concept of a miniboss Bokoblin. These are the larger size Bokoblins that you can target with the Lock-On mechanic. These minibosses are aggressive and relentless.
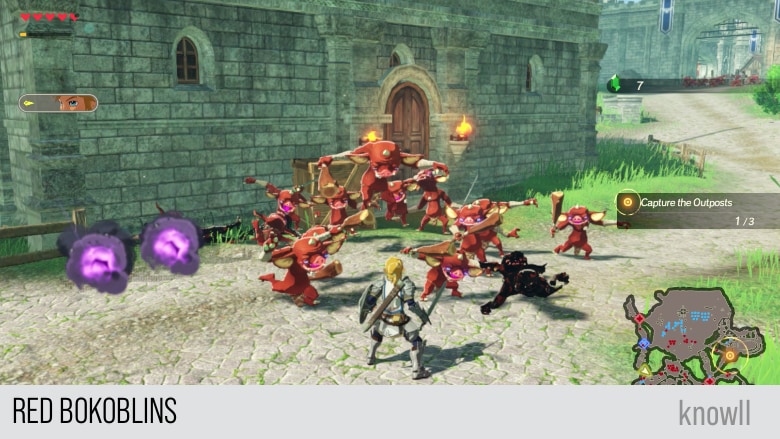
Red Bokoblin
The first enemies you will in the game are the Red Bokoblins, starting from Chapter 1, The Battle of Hyrule Field. You will soon find out that you are killing them by the dozens.
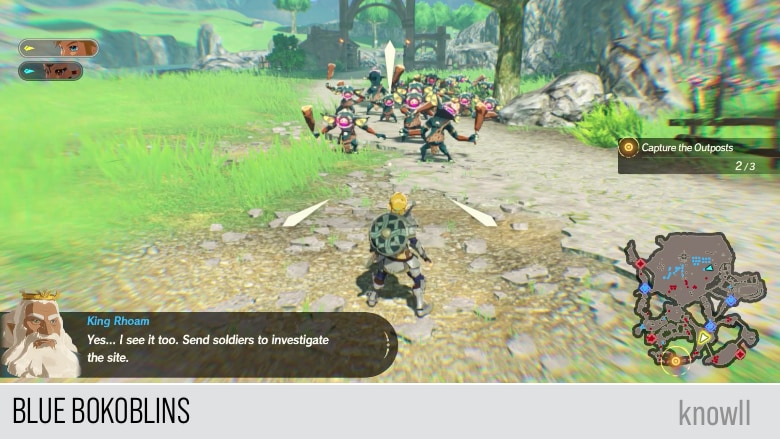
Blue Bokoblin, Black Bokoblin, and Silver Bokoblin
Like in BOTW, there are variations in color for the monsters, signifying the increase in health and attack power. But there is no real observable difference between various colors of Bokoblins.
Bokoblin Miniboss
As shared earlier, the new change in AoC is the introduction of miniboss Bokoblins. You will quickly notice them for being larger in size and more aggressive.
They are the only Bokoblin that you can lock-on, plus they have attacks that you can counter.
In the scene below, a miniboss Bokoblin is making a spear attack, which you can counter with Cryonis.

Most miniboss Bokoblins with one-handed weapons typically make spinning attacks, which you can counter with Stasis.
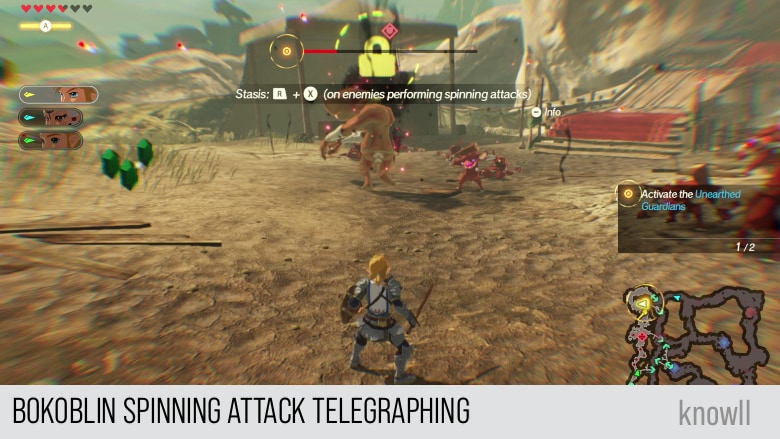
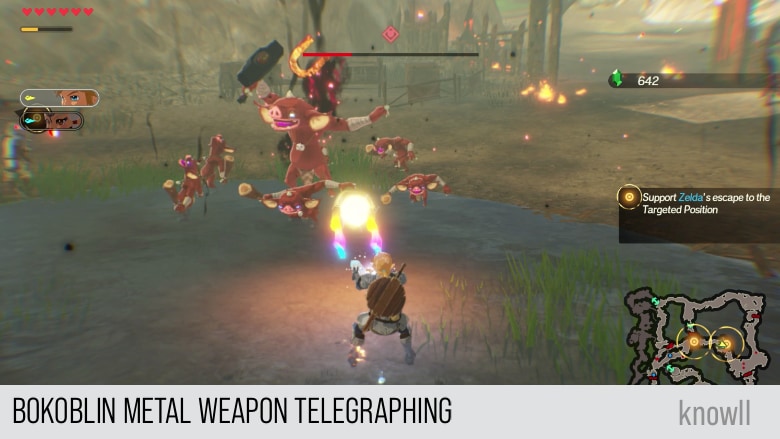
And finally, those carrying a metal hammer typically make a throwing attack, which you can counter with Magnesis.
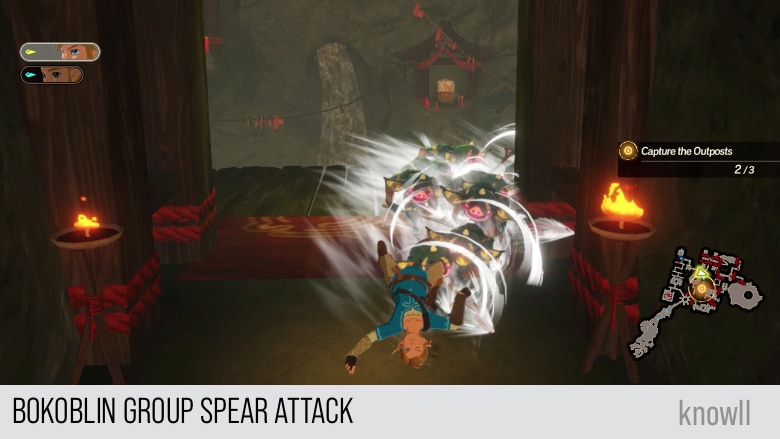
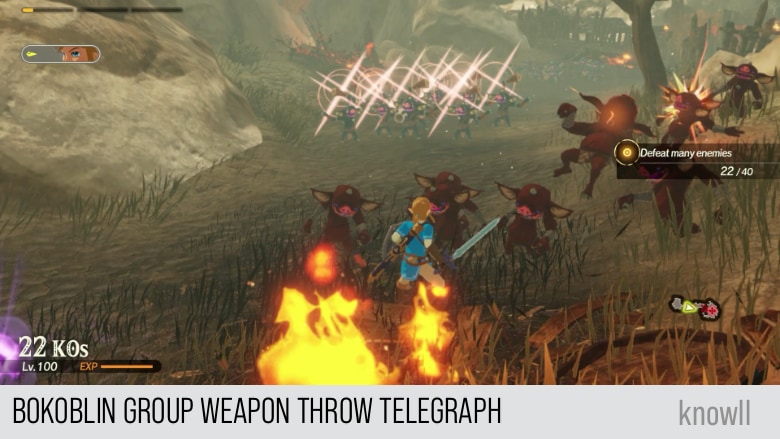
Bokoblin Group Spear Attack
A new introduction in AoC is the group attack. For Bokoblins, they have two group attacks, the Group Spear Attack and the Group Weapon Throw Attack.
The telegraph for both attacks is a horn blow. It's similar to what you hear in BOTW when you are sneaking into an enemy camp, and you get seen.
There is also a visual telegraph as shown below; a reddish cross appears on the monsters.
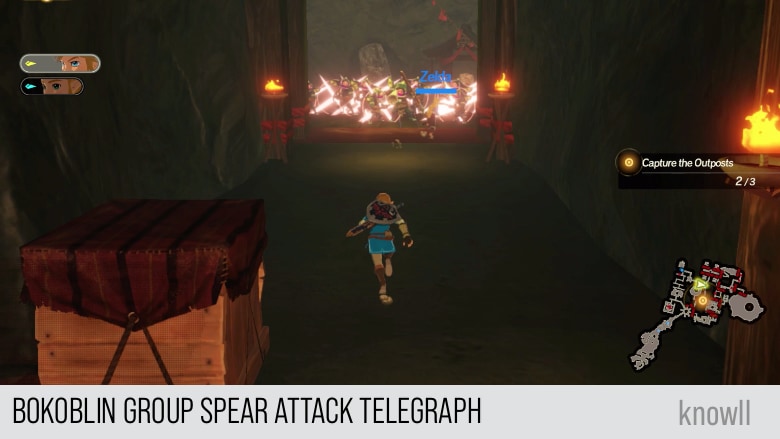
Once the wind up is over, they will immediately rush towards your direction. If you are running towards them, you will be knocked back.
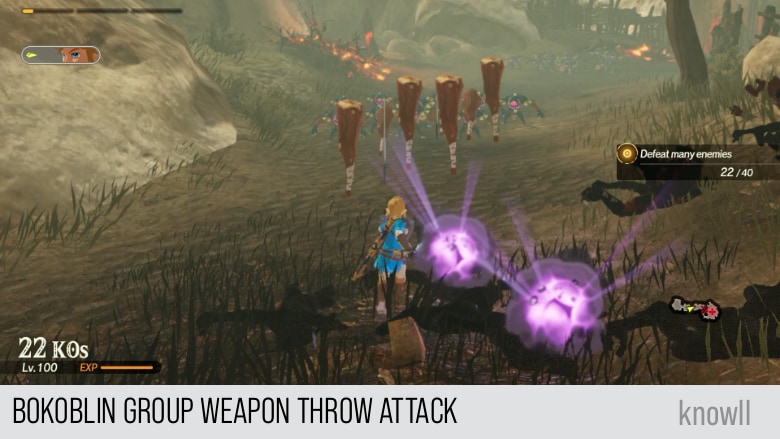
Bokoblin Group Weapon Throw Attack
The second type of group attack is the Group Weapon Throw. First, you will hear the horn blow and see the flash reddish cross.
Then they will immediately throw all of their weapons toward you, knocking you back if you do not block.
Lizalfos
Lizalfos are the second most common monsters you will face in the game. You will see them as early as the first Chapter 1 The Battle of Hyrule Field. In BOTW, Lizalfos are more challenging than Bokoblins, and this is true as well in AoC.
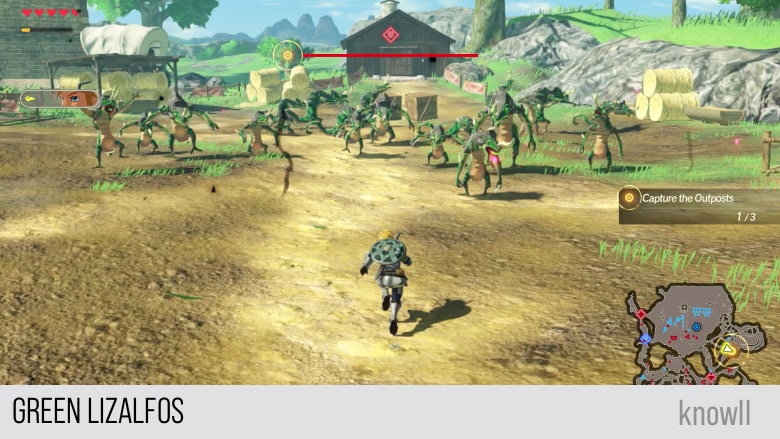
Green Lizalfos
The default Lizalfos are the green ones, the water type Lizalfos. Similar to the Bokoblins, they have reduced aggressiveness. Imagine fighting fifteen Lizalfos in BOTW, that will be quite the challenge. But in AoC, that's the typical number you slay per three swings.
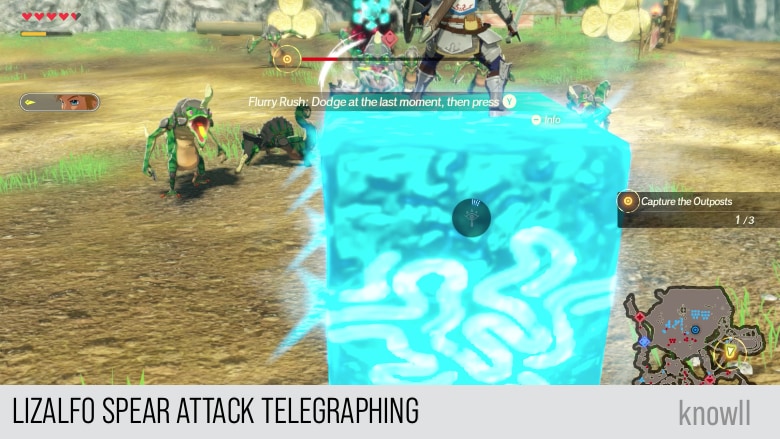
Lizalfos Miniboss
Similar to the Bokoblins, the aggressiveness of the Lizalfos moved to the miniboss ones. They typically use spears and one-handed weapons.
You can counter their spear attacks with Cryonis.
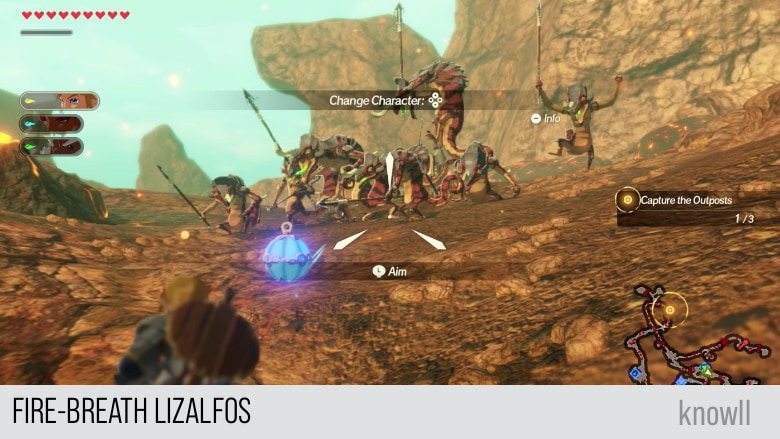
Fire-Breath Lizalfos
Unlike the Bokoblins, Lizalfos have elemental varieties. This has been the case since BOTW. But in AoC, their elemental attacks have been upgraded.
You will typically find the Fire-Breath Lizalfos in the Goron areas. You will first see them in Daruk, the Goron Hero.
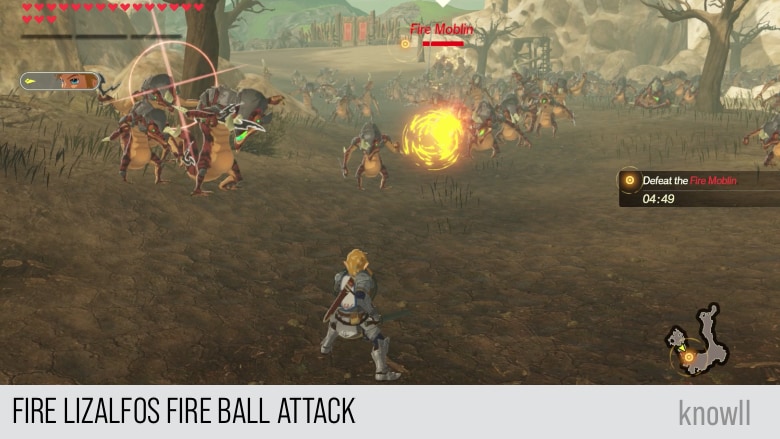
Fire Ball Attack
Lizalfos in AoC gained the Fire Ball attack, which was absent in BOTW. You can see a Lizalfos telegraphing this attack with a reddish cross. If you see that, you know it will make its Fire Ball Attack.
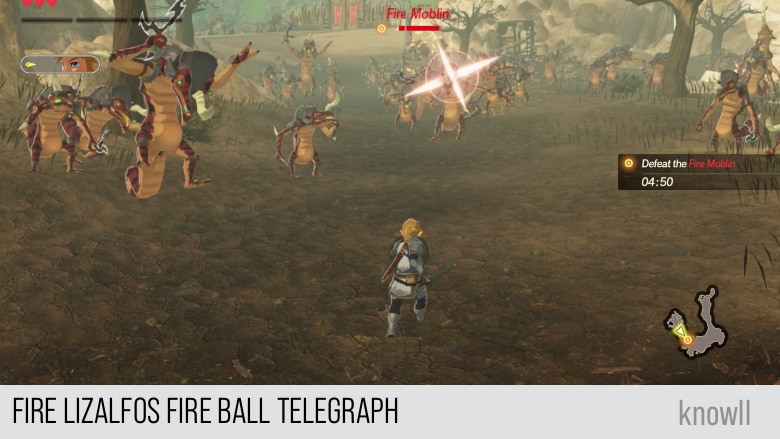
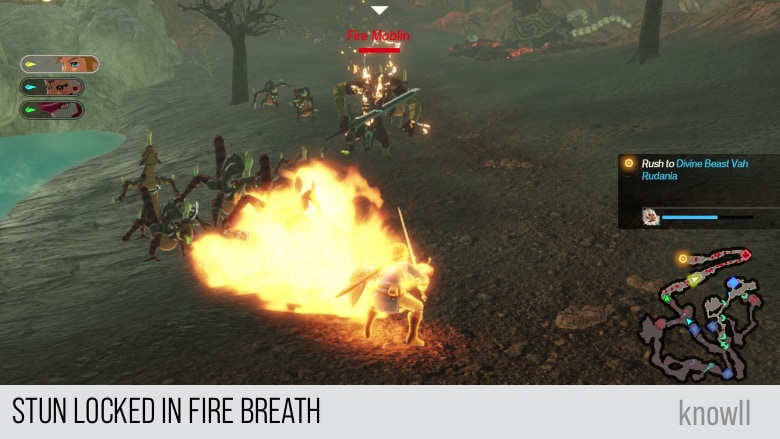
If the attack hits you, it will cause damage as well as a burning effect. There will be a Chapter entry in the game where the aggressiveness of the Lizalfos is not restricted, and you will see first hand what happens when Lizalfos make their Fire Ball attacks like they really mean it. They can easily stun-lock your hero, forcing you to stop ignoring them.
Fire Breath Attack
The Fire Breath Attack is the signature attack of the Lizalfos. It has been present since BOTW. Since their aggressiveness has been reduced, Lizalfos in AoC rarely do this attack, though. But in some quest objectives, their programming requires them to slow you down.
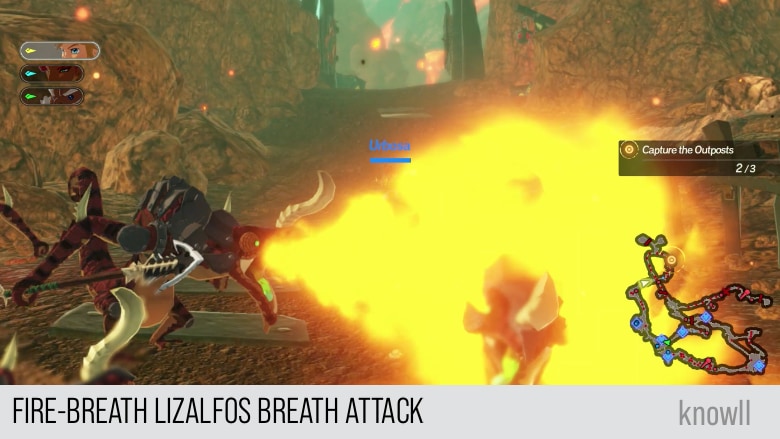
When they are required to be aggressive, they just keep on spewing their fire breath. This can easily stun lock, and you have to press the dodge button to gain control of your character.
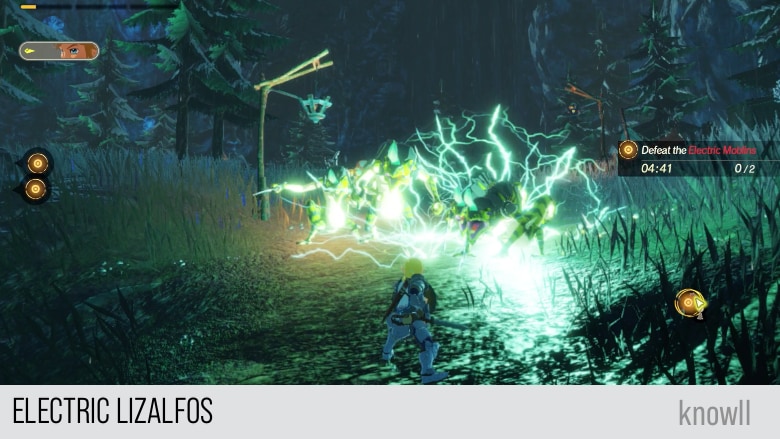
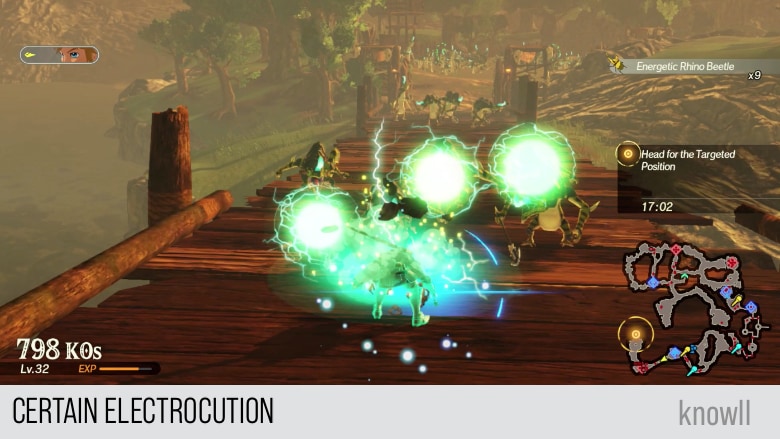
Electric Lizalfos
If the Fire-Breath Lizalfos are annoying, the Electric Lizaflos are even more so. This is because they can surround themselves the electricity, which can easily stun you if you come near them.
Like the Fire-Breath Lizalfos, they also gained new attacks. You will first see them in Mipha, the Zora Princess.
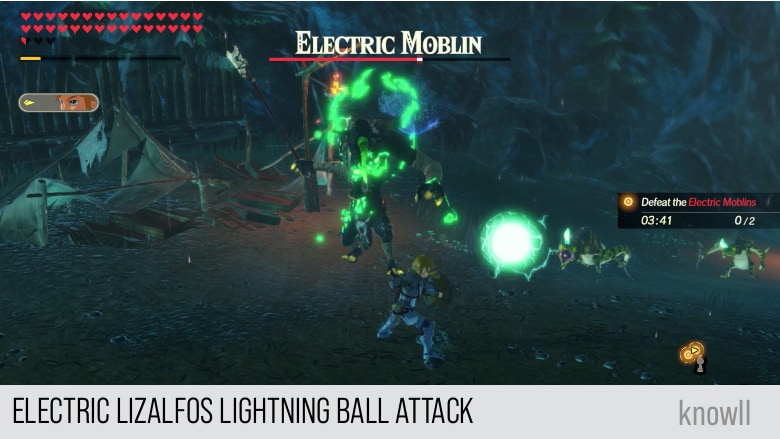
The Electric Lizalfos also have a projectile attack that they telegraph with a reddish cross. Individually, they rarely do this.
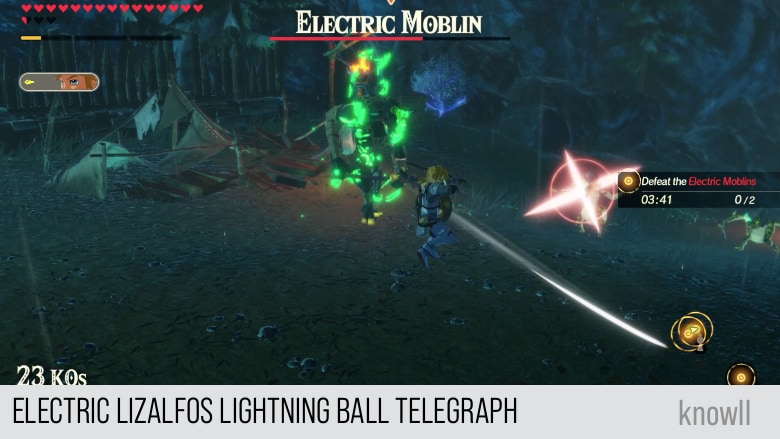
After the telegraph, the Lightning Ball will show up and float towards your direction. Getting hit by one will damage and electrocute you.
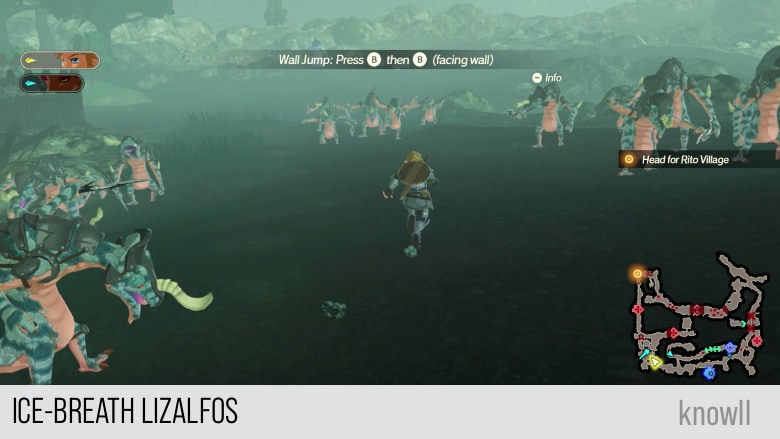
Ice-Breath Lizalfos
The Ice-Breath Lizalfos are more similar to the Fire-Breath Lizalfos, that is, they are less annoying than the Electric Lizalfos. That's because they don't have a freezing ability by just being near them.
You will typically find the Ice-Breath Lizalfos in the Rito areas. You will first see them in Revali, the Rito Warrior.
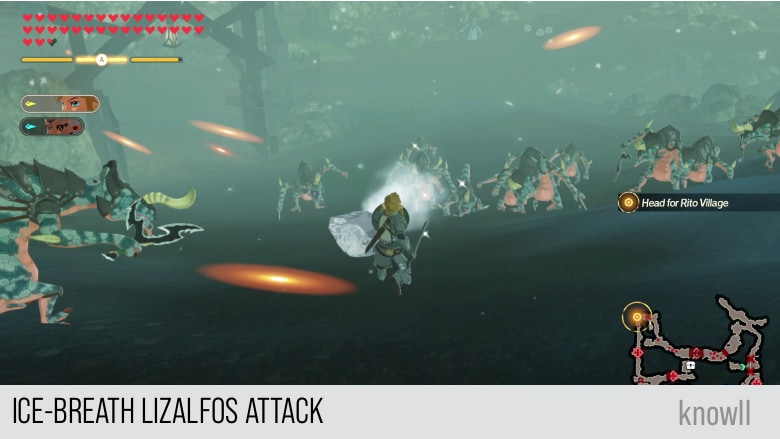
Similar to the two earlier varieties, the Ice-Breath Lizalfos also gained a projectile attack.
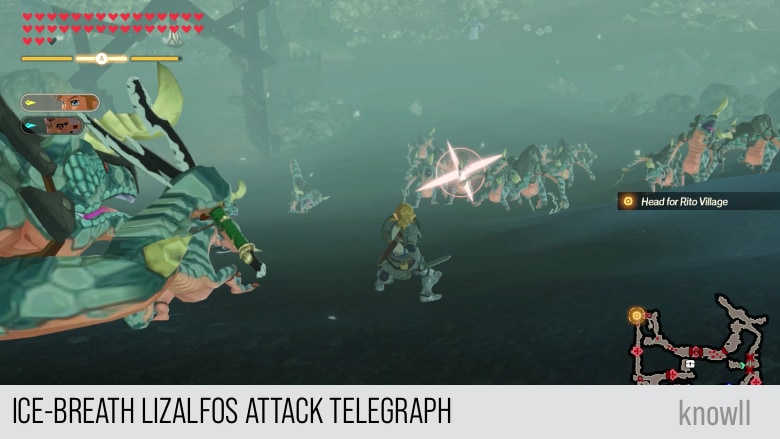
After the telegraph shown above, a block of ice will get thrown at you, causing damage and freezing you.
Group attack
Like the Bokoblins, the Lizalfos gained group attacks. As their group attacks are elemental projectiles, they are more challenging and can't easily be blocked.
Also, they do not have the telegraph where you can hear a horn sound. It's only visual. The moment you see the multiple reddish marks below, prepare for the projectiles.
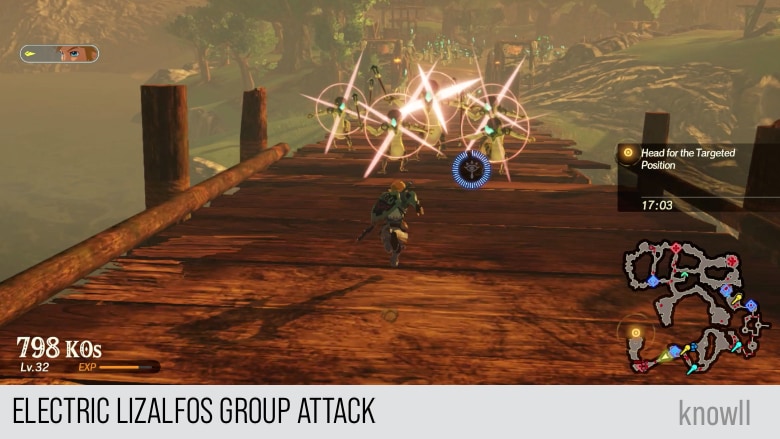
As shared earlier, it's hard to dodge or block such elemental attacks, as the elemental effect will happen if they get in contact.
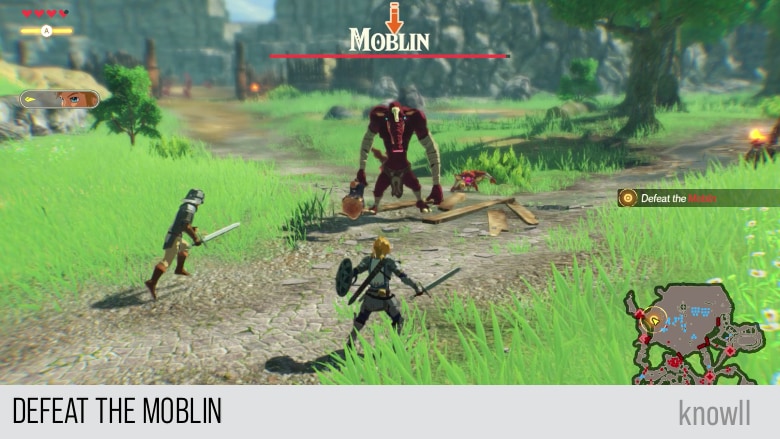
Moblin
The most common strong enemies in the game are the Moblins. And unlike the Bokoblins and Lizalfos, they were not designed to be easily killed by the dozens. In fact, the Moblins in AoC got elevated to miniboss level by default. If ever you find a Moblin anywhere in the game, it is automatically a miniboss.
This is shown by having their own visible health bar, signature attacks that you can counter with Runes, and being able to locked-on.
You will first see a Moblin in Chapter 1 The Battle of Hyrule Field.
Moblin: Two-Handed Weapon
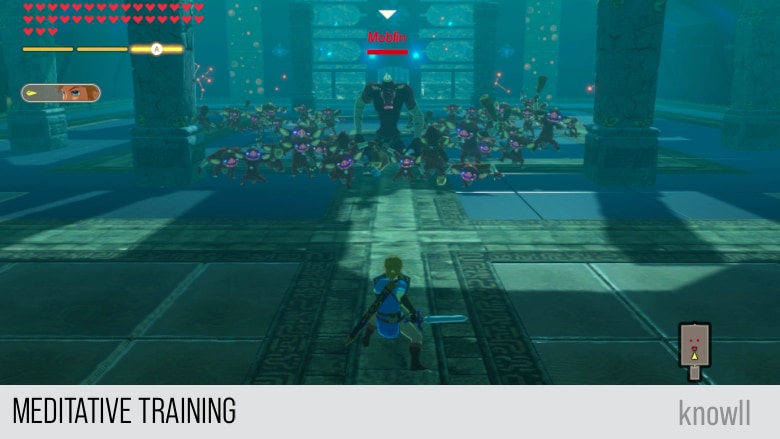
The game uses the Moblin to explain the basics of combat against any strong enemies. That is also the main reason why it is the miniboss you always see when you access the Meditative Training service.
It would have been better, though, if you can set up the kind of miniboss you want to face when training.
We will quickly review the basics of combat for any strong enemies using the Moblin.
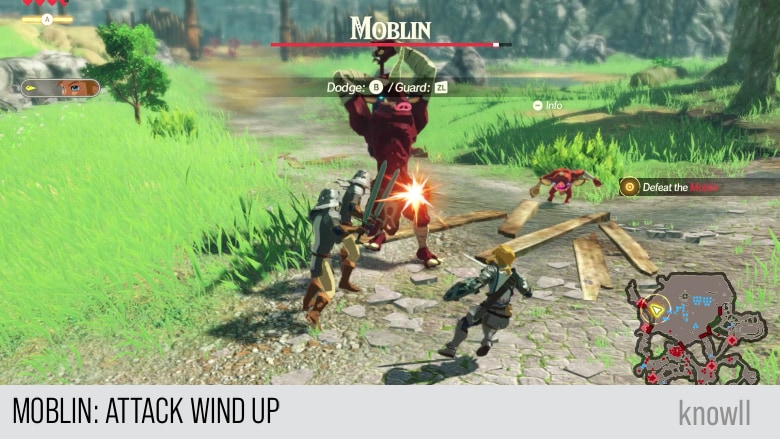
Attack Wind Up
All of the strong attacks in the game have some kind of wind up, the slower and the more visible, the more powerful the impact on you. It is the game's way of saying, "it is your fault if you get wrecked by this attack."
So in the case of the Moblin carrying a two-handed weapon, he pulls back for the wind up and does a pose that says, "someone is going to get hurt by a big stick."
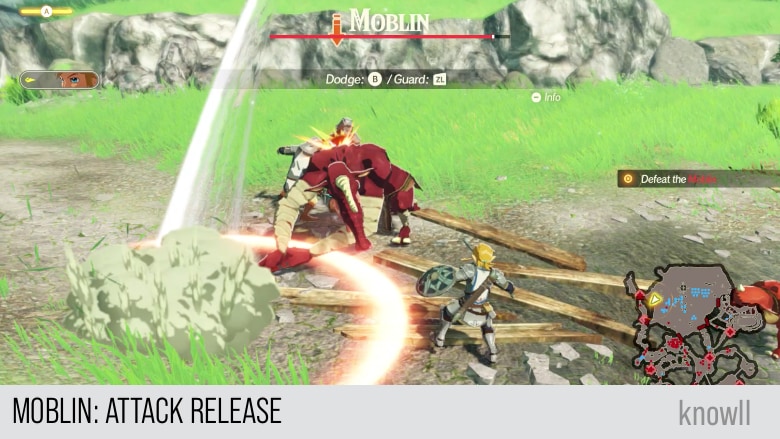
Attack Release
After the wind up, the actual attack immediately occurs, typically causing damage at that moment. These attacks also often have an AOE, a certain radius where you will still get some damage even if you didn't receive the main brunt of the attack.
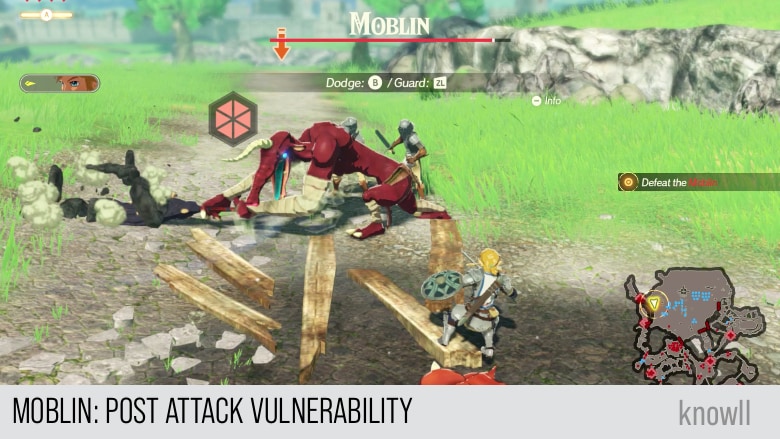
Post Attack Vulnerability
Immediately after the main attack, a strong enemy will undergo a state of vulnerability where its Weak-Point Gauge (WPG) gets shown. That is your chance to punish the strong attack.
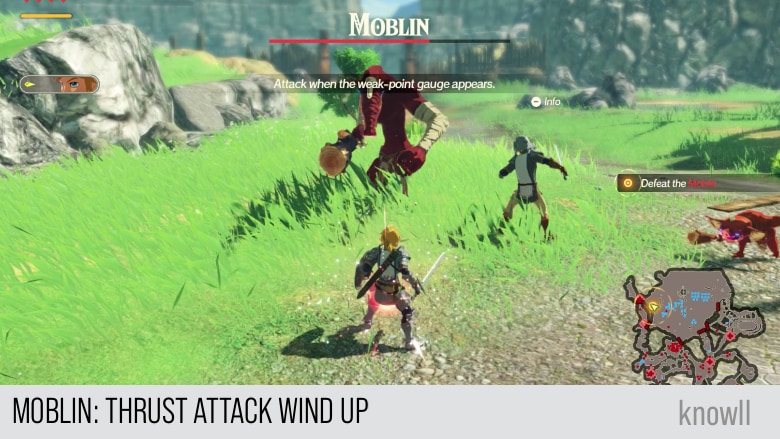
Thrust Attack Wind Up
Sometimes, Moblins also one-hand their two-handed weapons and perform a one-handed thrust attack like below. You will know it is coming when he pulls back his right arm and do a pose that says, "someone is going to get poked with a big stick."
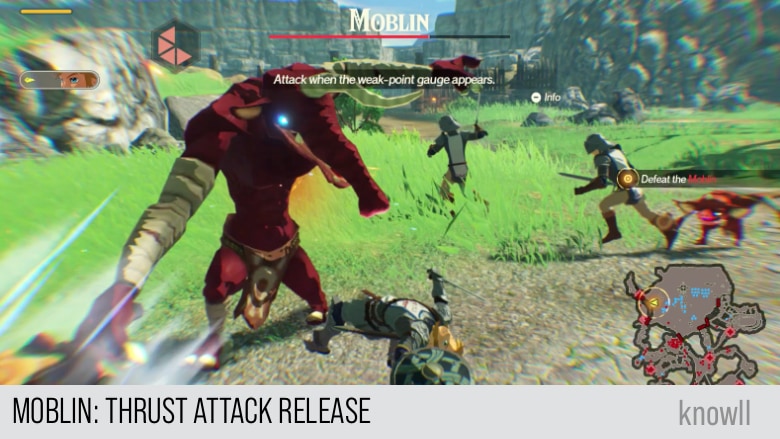
Thrust Attack Release
Immediately after that, he will make a thrust attack, which you can easily avoid by dodging to the side. If you do not dodge or block, you will get damaged and knocked back.
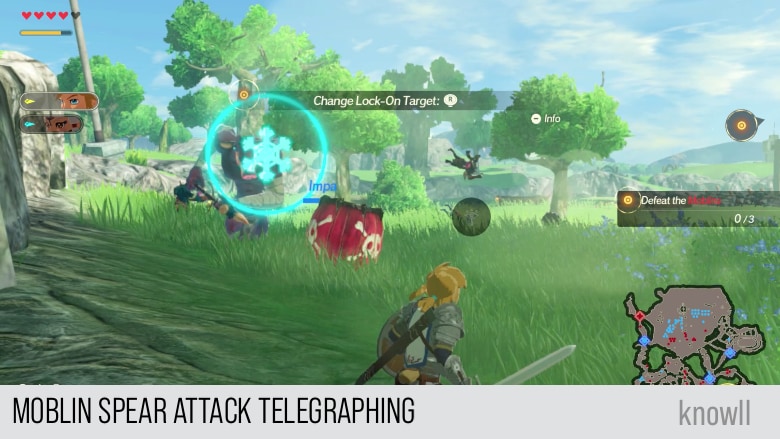
Moblin: Spear Weapon
With the spear, a Moblin will make telegraphed attacks that you can counter with Cryonis. They have a very interesting tracking mechanic. They will follow you even after they have initiated the attack. You will normally expect that they will move in a straight line.
This mechanic is even worse for Guardians, Lynels, and Bosses. They can perfectly track your location when they execute their attack after the wind up. The lesson here is, you can't dodge a telegraphed attack before it executes.
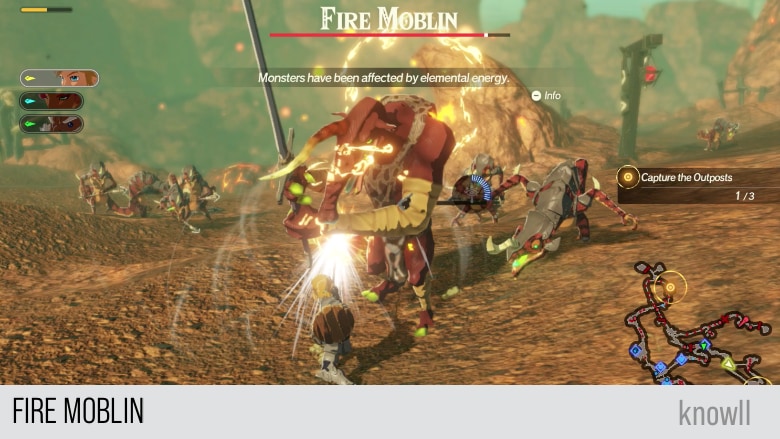
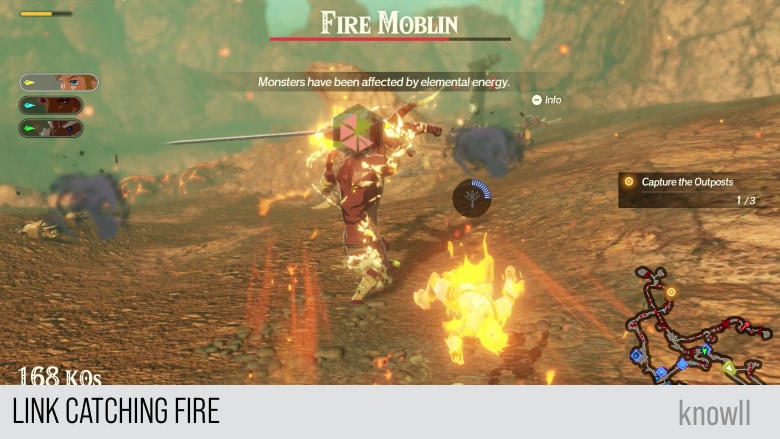
Fire Moblin
The true challenge of facing the new elemental enemies begin with the Moblins. This is one of the excellent improvements of AoC over BOTW. Even though they kept the same number of monster types, the varieties in behavior and combat increased with the introduction of new elemental enemies.
The elemental Moblins have all the base attacks plus new moves. These new moves are unique to the elements they belong to.
You will first see a Fire Moblin in Daruk, the Goron Hero.
In addition to its normal moves, the Fire Moblin gains two new elemental attacks:
- Fire Slam Attack
- Sword Beam
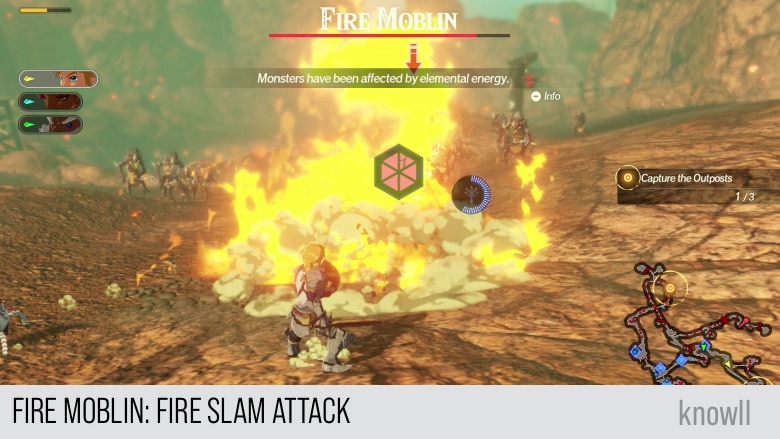
Fire Slam Attack
Beware of its Fire Slam attack, as it can take one full heart from your character. This is the attack where the Moblin slams its two-handed weapon on the ground, causing a large AOE impact. This will cause a burning effect as well.
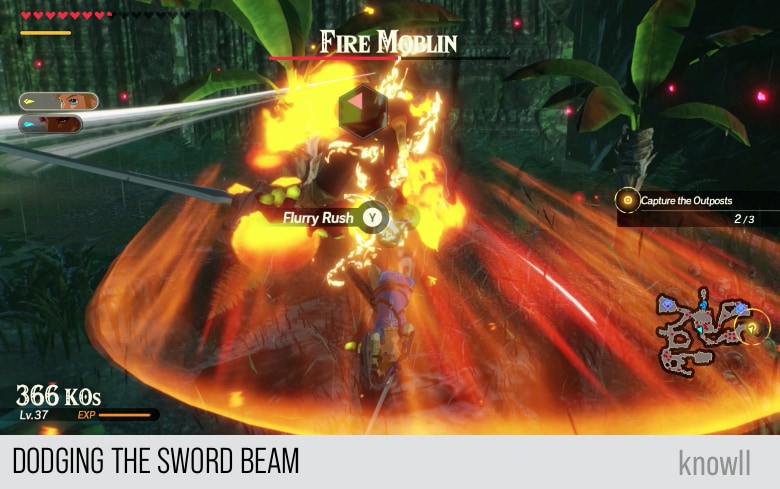
Sword Beam Attack
Equally dangerous is its Sword Beam attack. This one takes preparation and has a long wind up. Hence, it takes large damage, as well.
You will notice that it is being prepared when the Moblin poses like it will hit a baseball using his sword as the bat. This is the windup. Unfortunately, it does not have any rune telegraph, aside from this unique pose.
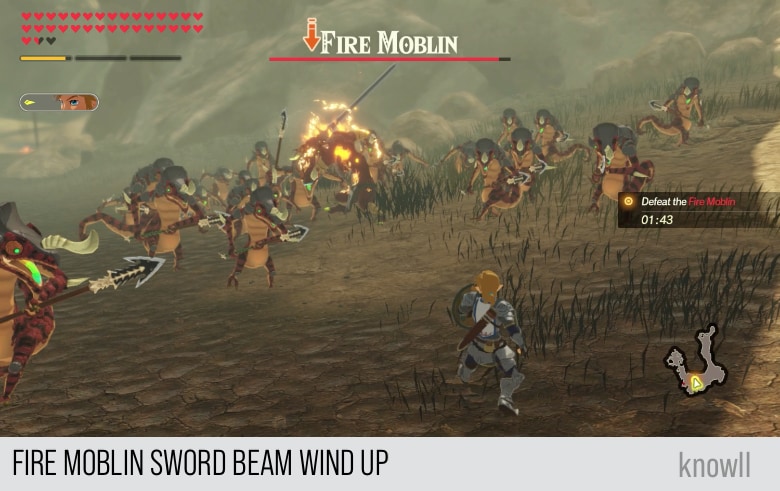
Once you see this pose, it's to guard with your shield. This attack will produce a sword beam that will reach you, similar to the beam from a Yiga Blademaster.
Note that it will cause a burning AOE, even breaking your guard after it hits you.

If you didn't guard with your shield, it will damage you and give a burning effect.
You can dodge this attack by doing a backflip, giving you the chance to clear the Moblin's WPG.
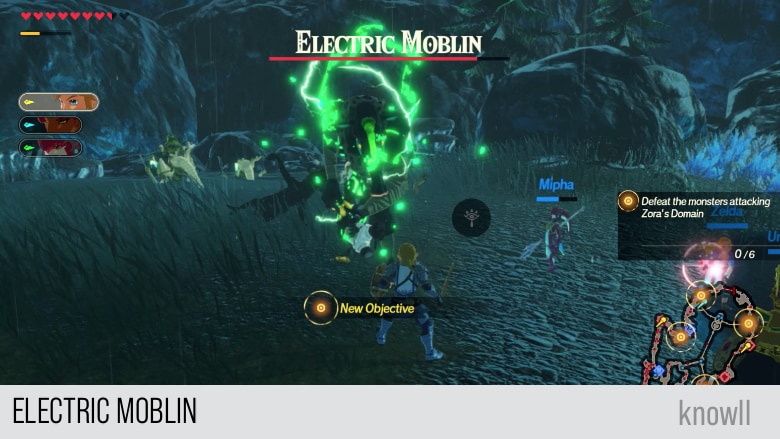
Electric Moblin
You will first meet the Electric Moblin in Mipha, the Zora Princess.
This enemy behaves like the normal ones, but with two new attacks:
- Lightning Thrust
- Lightning Swipe
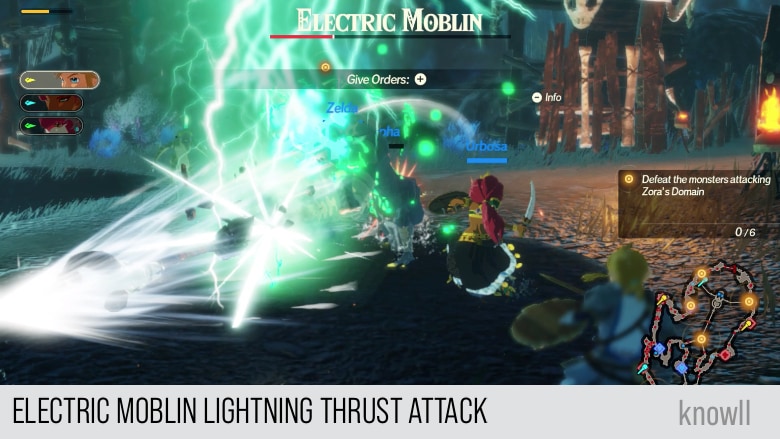
Lightning Thrust
The Lightning Thrust is similar to the normal spear attack, except that it gives an electric AOE after its impact. This can electrocute you if you are in the range of the AOE.
Lightning Swipe
The Lightning Swipe is both flashy and scary-looking at the same time. It is the third swipe in the combo of a spear-wielding Electric Moblin.
It produces an electric AOE that can electrocute you if not avoided or blocked.
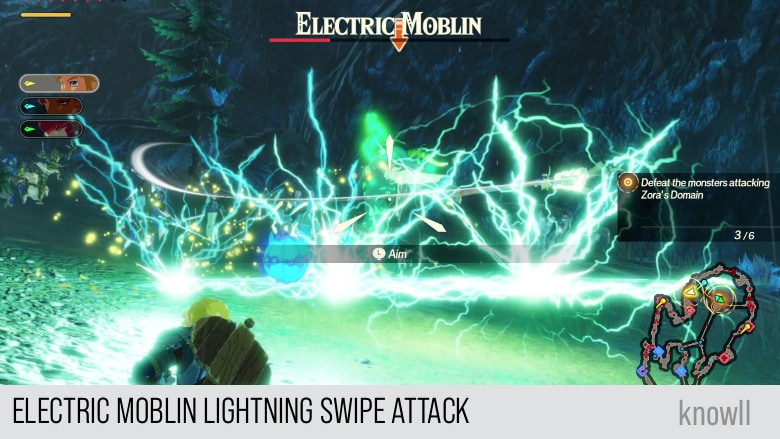
As this attack does not have any rune telegraph, your option is to avoid it or block it.
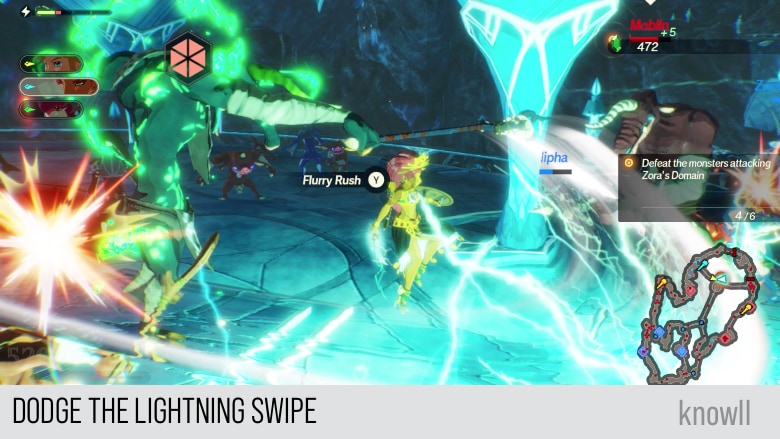
You can dodge the swipe to fish for a Flurry Rush, as shown below.
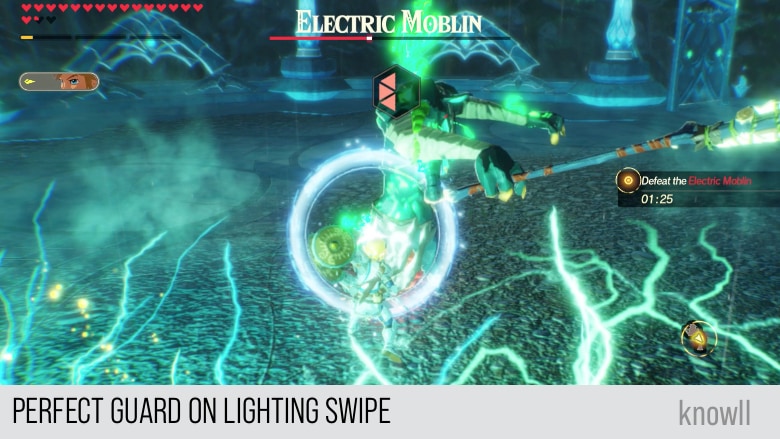
If you feel confident, you can do a perfect guard on the Lightning Swipe, as shown below. It will give you two advantages. It will damage the Moblin as well as put him immediately in a state of vulnerability. You can then damage him more and reduce his WPG.
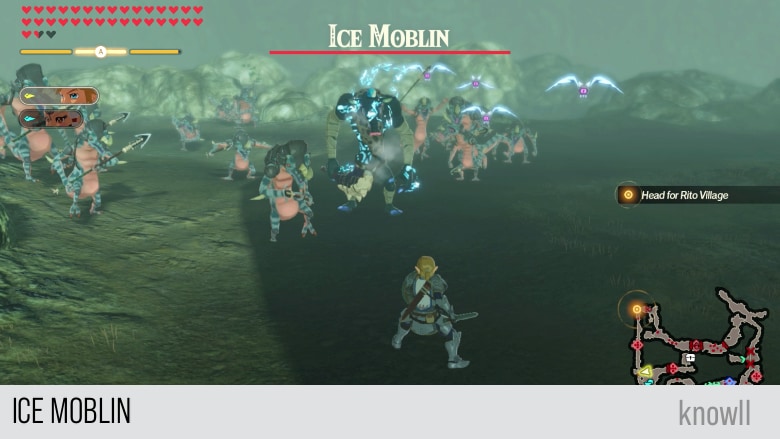
Ice Moblin
You will first meet the Ice Moblin in Revali, the Rito Warrior.
Similar to the other elemental Moblins, this one gains a new elemental attack.
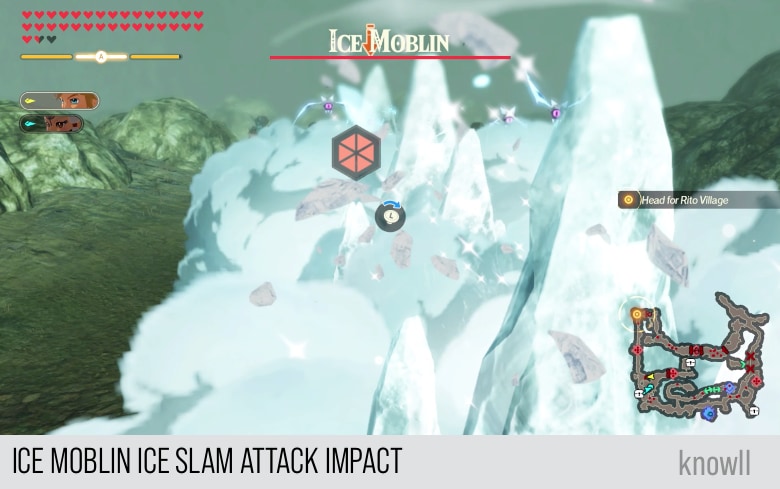
Ice Slam Attack
The Ice Moblin gains an ice slam attack that brings a large freezing AOE upon impact.
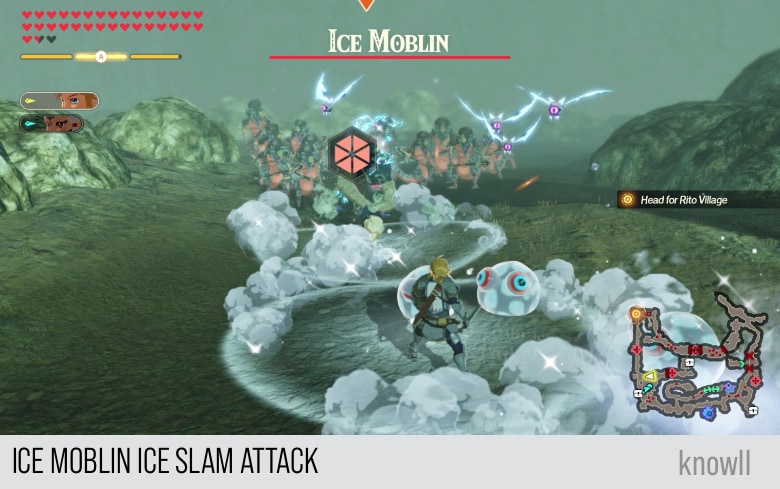
If you don't guard or dodge, you will surely get frozen and receive huge damage.
Wizzrobe
Wizzrobes are challenging enemies in BOTW, but once you discover their weaknesses, you can easily one-shot them in that game.
This one-shot mechanic against Wizzrobes has been removed in AoC. They are still weak, but they can now present some challenges, especially when they are combined with another enemy in an outpost.
We shared in another guide that the most powerful weapons in the game are the elemental rods. If you like to find out why then view our Elemental Rods Guide.
All of the Wizzrobes in the game have the following attacks:
- An elemental ball attack
- An elemental orb attack
- An elemental AOE attack
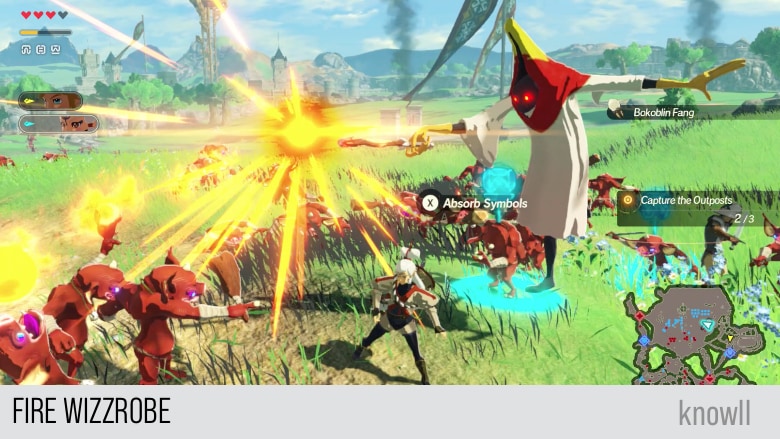
Fire Wizzrobe
You will first meet a Fire Wizzrobe in The Battle of Hyrule Field. This will lead to you acquiring the Fire Rod once you defeat it.
Fire Ball Attack
The Fire Ball is a small projectile attack by the Fire Wizzrobe. It is a fast attack with minimal wind up.

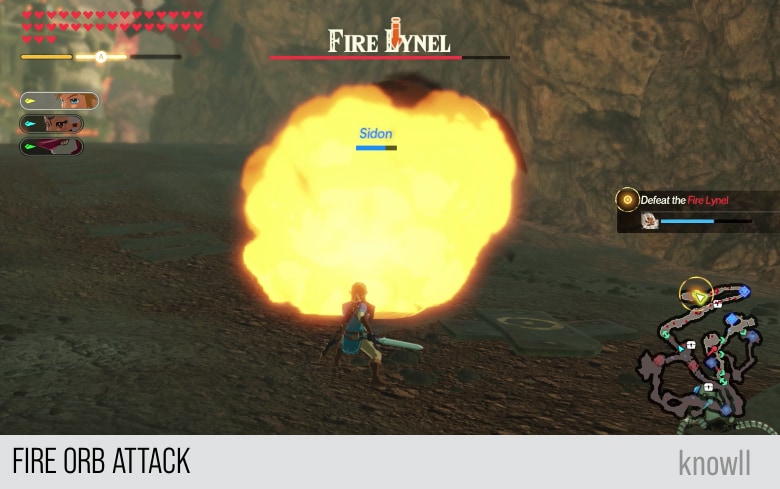
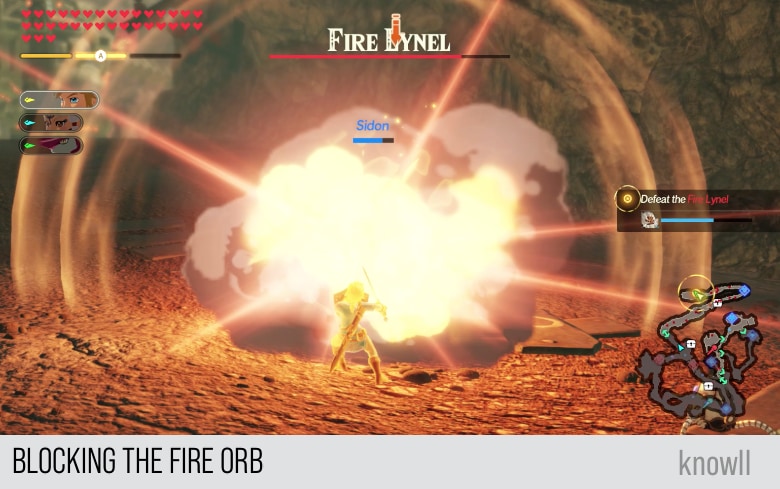
Fire Orb Attack
The Fire Orb attack is a larger and stronger version of the Fire Ball. You will notice that it has a longer wind up as well and a very noticeable pose before the attack.
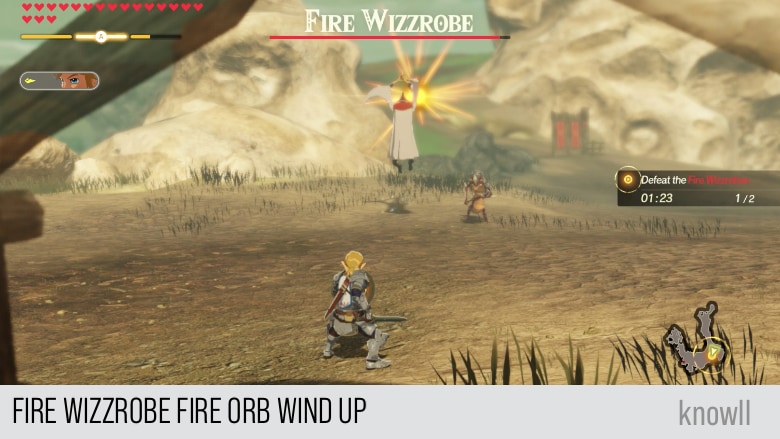
Once the wind up is complete, a large fiery orb approaches your character. It will cause damage and burn effects if it hits.
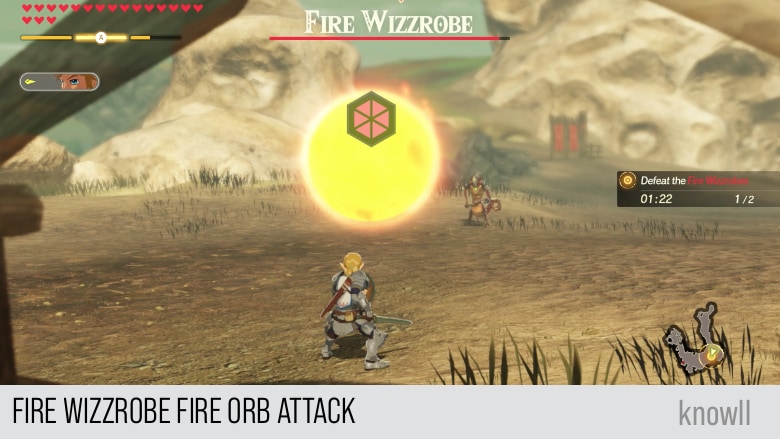
You can easily dodge this, or if you are confident, do a perfect guard on it. This will make the Fire Orb move in a different direction.

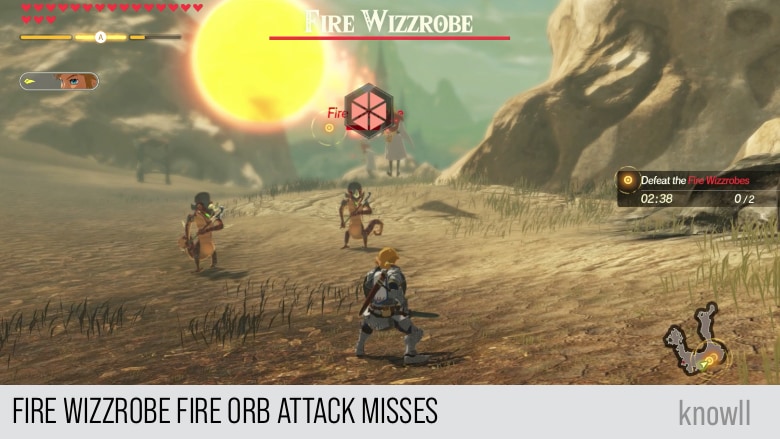
Because of the elevated position of a Fire Wizzrobe, it will typically miss its target, even if you do not dodge. This will not be the case for the Electric Wizzrobe, which does not use an orb projectile for its strong attack.
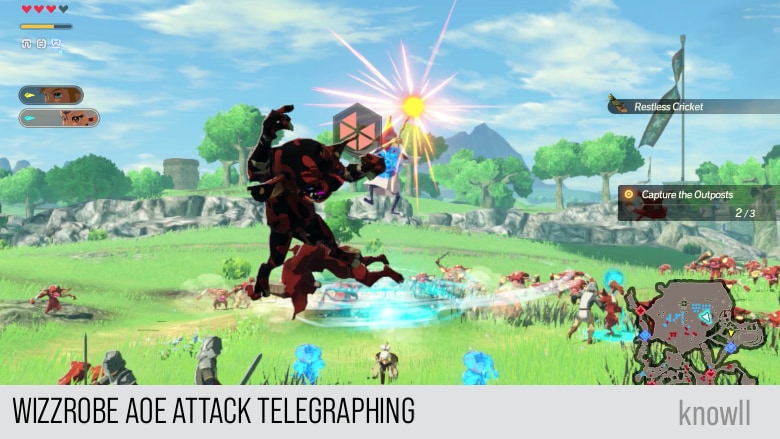
AOE Attack
The only attack that can be countered with a rune for the Wizzrobe is its AOE attack. You can see the telegraph with the bomb icon.
In BOTW, these Wizzrobe AOE attacks are a lot scarier. In AoC, they are less spammed as well by the Wizzrobes.
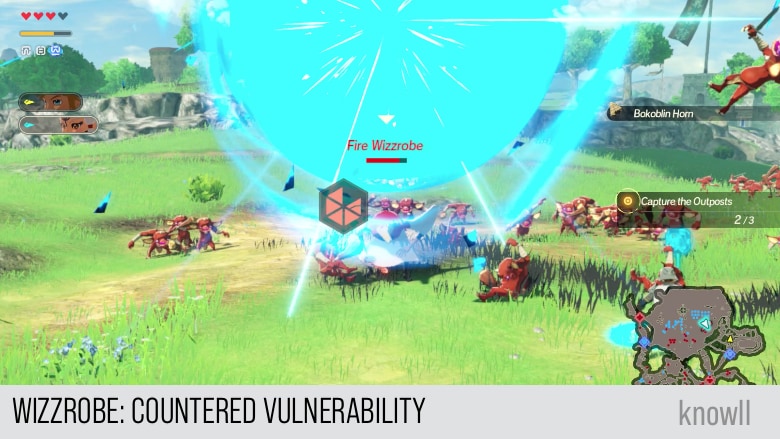
Once you counter the AoE attack, the Wizzrobe can be punished. And since this monster is weak, this will typically lead to its defeat.
Ice Wizzrobe
You will first meet a Fire Wizzrobe in Road to the Ancient Lab. You will then acquire the Ice Rod after you defeat it.
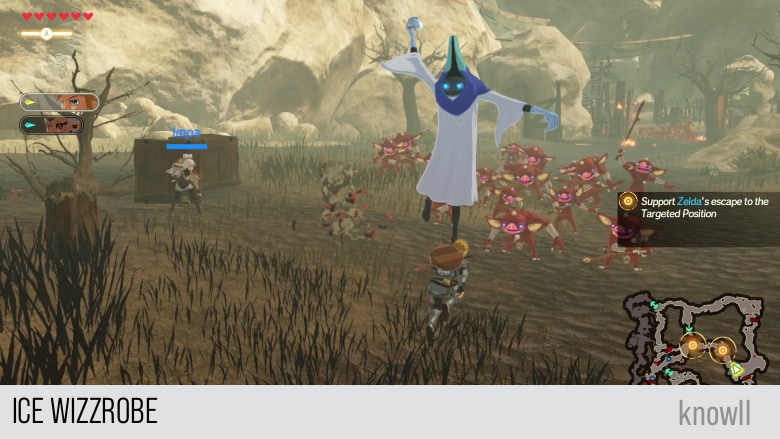
The Ice Wizzrobe is very similar to the Fire Wizzrobe. But instead of fire attacks, it uses ice attacks:
- Ice Ball Attack
- Ice Orb Attack
- AoE Attack
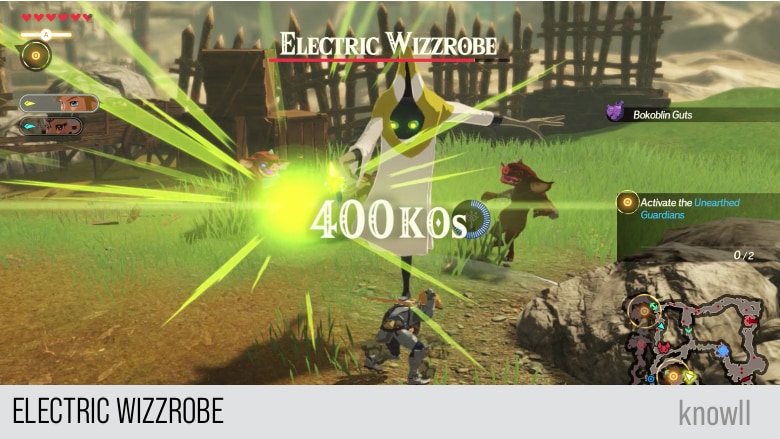
Electric Wizzrobe
The Electric Wizzrobe is the most dangerous version of the Wizzrobes. Even in BOTW, you have to be careful when facing it.
Firstly, it does not have those one-shot mechanics as the two Wizzrobes. You can't counter the Electric elemental in BOTW, unlike Fire and Ice. That means you really have to fight it.
And the moment the Electric Wizzrobe sees you in BOTW, it will typically summon the AoE attack, leading you to get hit and drop your weapon. Without a weapon, Link is pretty much helpless.
Secondly, the Electric Wizzrobe does not use the orb attack, which normally misses its target. The attacks of this Wizzrobe has a higher chance to hit their target.
You will first meet an Electric Wizzrobe in Road to the Ancient Lab.
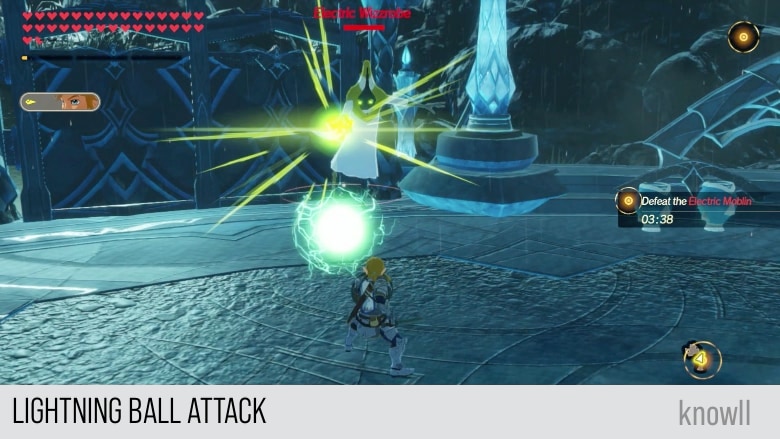
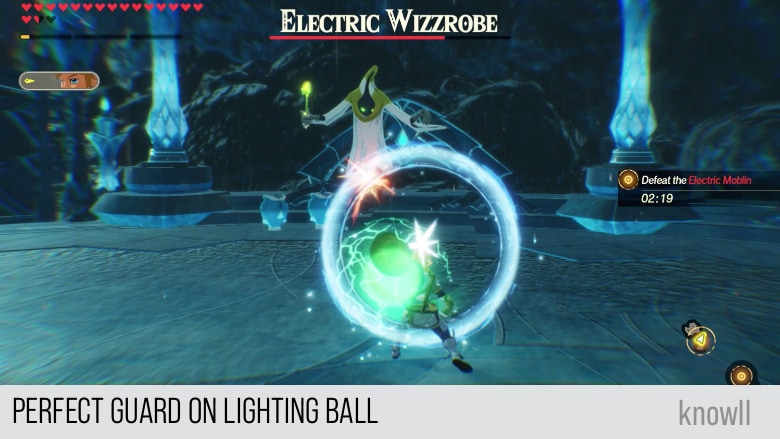
Lightning Ball Attack
Similar to the Fire and Ice Wizzrobes, the Electric Wizzrobe has an elemental ball as well for its basic attack, the Lightning Ball.
If you feel confident, you can do a perfect guard on the Lightning Ball. It does not go back to the Wizzrobe, though, just to a random opposite direction. Knowing about elemental immunity, this will not damage or affect the Electric Wizzrobe, even if it bounces back to it.
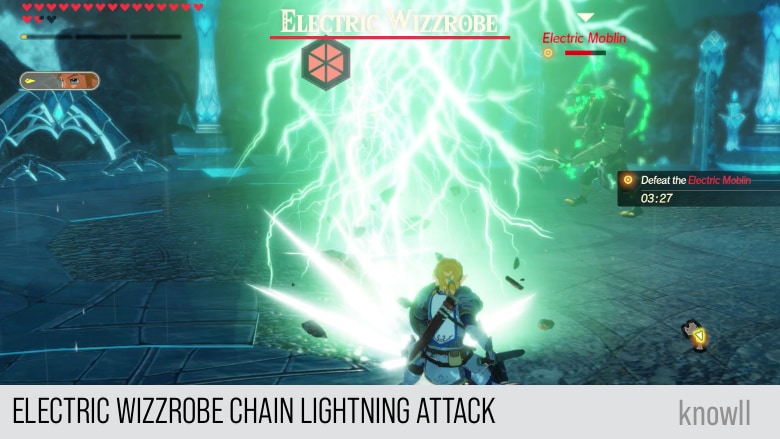
Chain Lightning Attack
This is where the Electric Wizzrobe differed from the other two. For its strong attack, it does not use an elemental orb. The wind up for its Chain Lightning is very similar to the wind up of the orb attacks.

After the wind up, the Wizzrobe will immediately release the Chain Lightning, a series of lightning bolts that approach you. If you do not guard or dodge, they have a very high chance of hitting you, unlike the orb attacks.
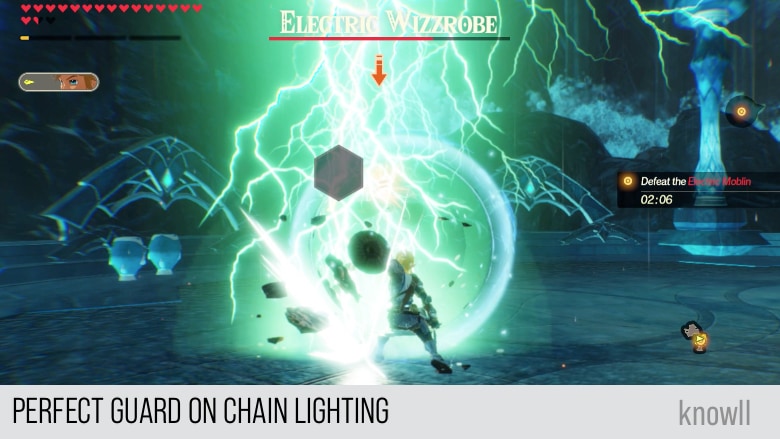
And like the projectile attacks earlier, you can also perfect guard this, as shown below.
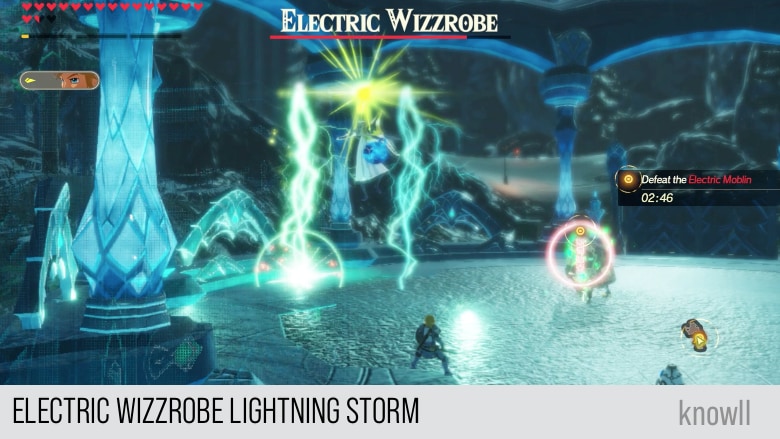
Lightning Storm
You can see the AOE attack of the Electric Wizzrobe below, the Lightning Storm. This is what we meant when we say the AOE attacks of the Wizzrobes in AoC have been nerfed. In BOTW, you know something big is coming when they start their AoE attacks. The weather changes, and the whole screen reflect that. In AoC, the AoE attacks are limited to the Wizzrobe's area.
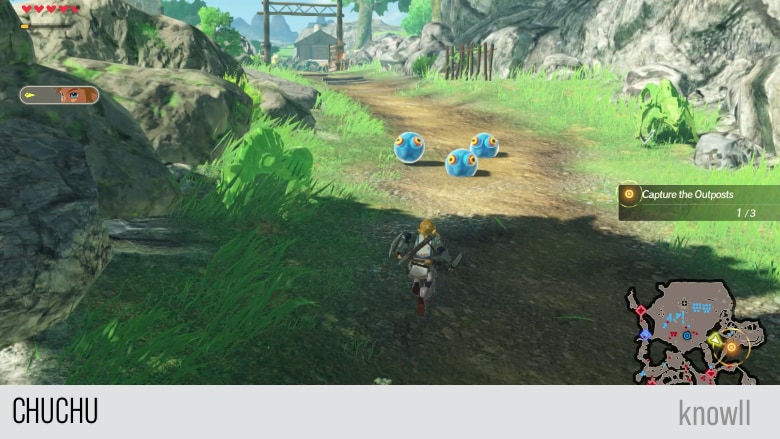
Chuchu
Chuchus are the most basic enemies in BOTW. If you missed the Bokoblin during your descent from the Shrine of Resurrection, this monster is what you most probably first fought. They are basically harmless monsters that push you to do damage.
You first meet the Chuchu in The Battle of Hyrule Field.
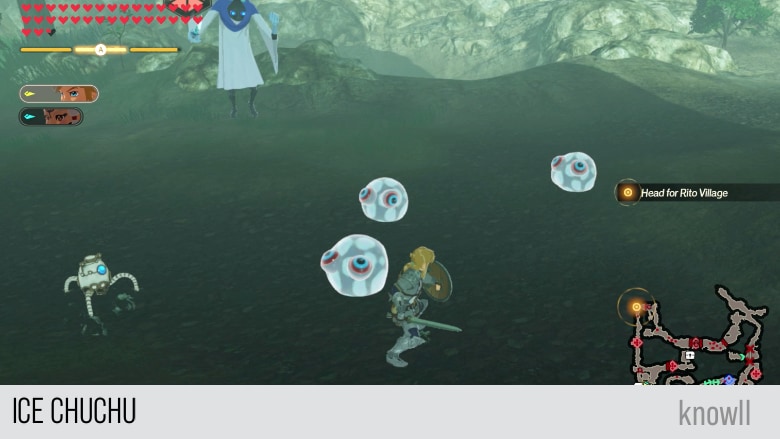
However, that harmlessness will quickly change when they become elemental. Like the Lizalfos, the Chuchu has three varieties:
- Fire Chuchus - typically seen in the Goron region
- Ice Chuchu - typically seen in the Rito region
- Electric Chuchu - typically seen in the Zora region
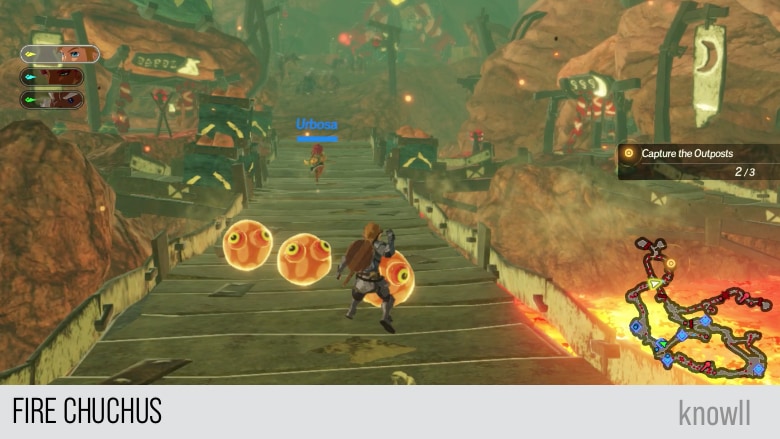
The Chuchu got upgraded as well in AoC, but not much. Instead of bursting immediately after getting hit, the Chuchu will bounce a large distance before exploding. This gives it some unpredictability in its explosion and makes it harder to avoid.
However, their elemental impact has been nerfed as this mechanic has been removed:
- Attacking frozen enemies no longer deals double damage
- Electrocution no longer make you drop your weapon
- Burning does not damage any weapon
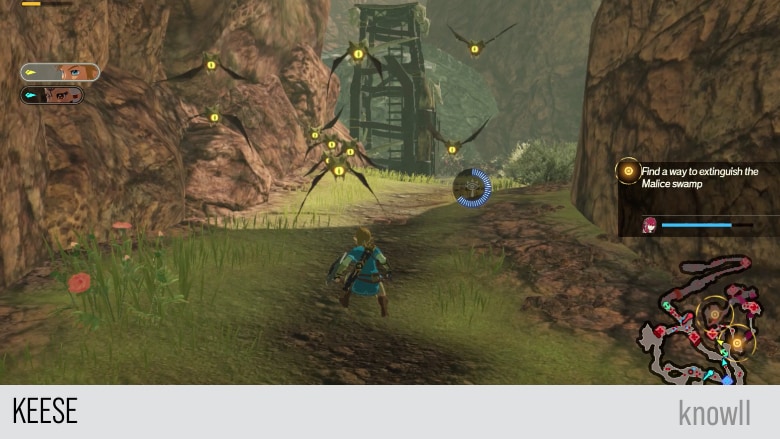
Keese
The Keese is another small and almost harmless monster in AoC. And like the Chuchu, it becomes more dangerous when it becomes elemental.
Fire Keese
You will first see the Fire Keese in Daruk, the Goron Hero.
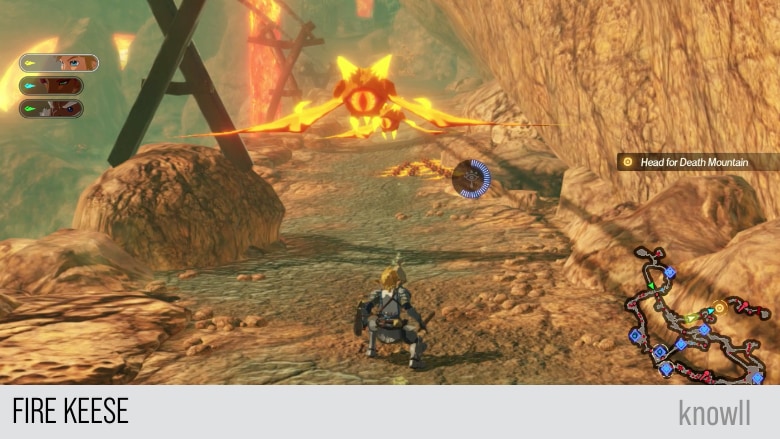
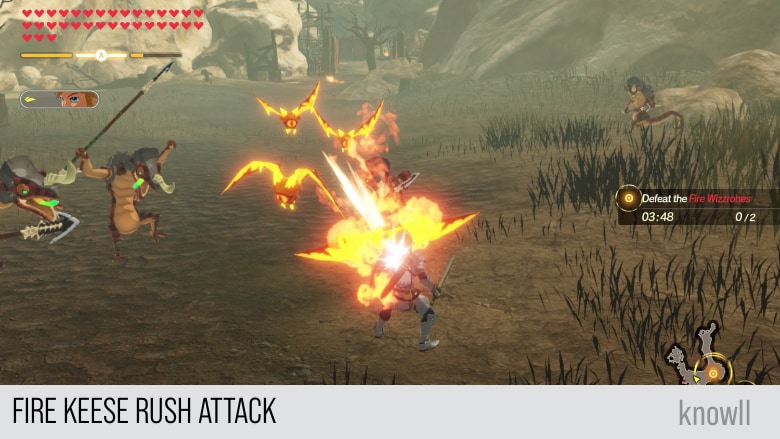
Keeses are normally harmless and do not attack until they start showing the telegraph below. A Keese that is about to make a rush attack will form a fiery orb around itself.
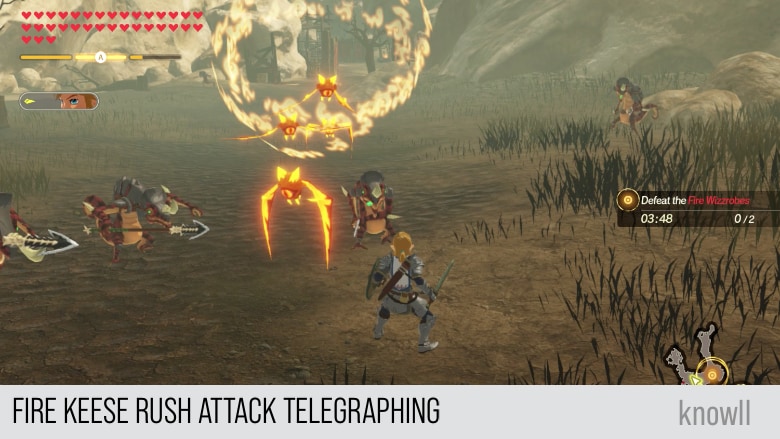
Then it will immediately blast towards you, causing damage and burning if not dodge or blocked.
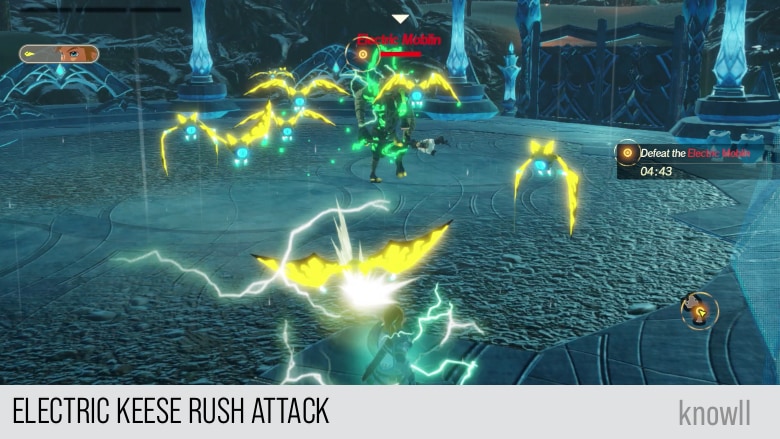
Electric Keese
In BOTW, the most dangerous of all Keeses is the Electric Keese. In fact, it is more dangerous than a Moblin, as it can repeatedly attack and disarm you. And you can't get near it without getting electrocuted.
This mechanic has been removed in AoC for obvious reasons. You can't go slaying monsters by the dozen if you get interrupted multiple times by a small bat.
You will first see them in Mipha, the Zora Princess.
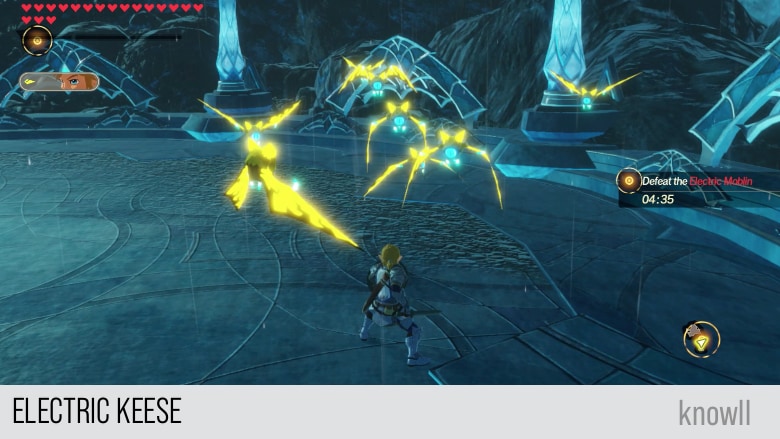
Like the Fire Keese, the Electric Keese has a rush attack. In its wind up, it will form an electric orb around itself.
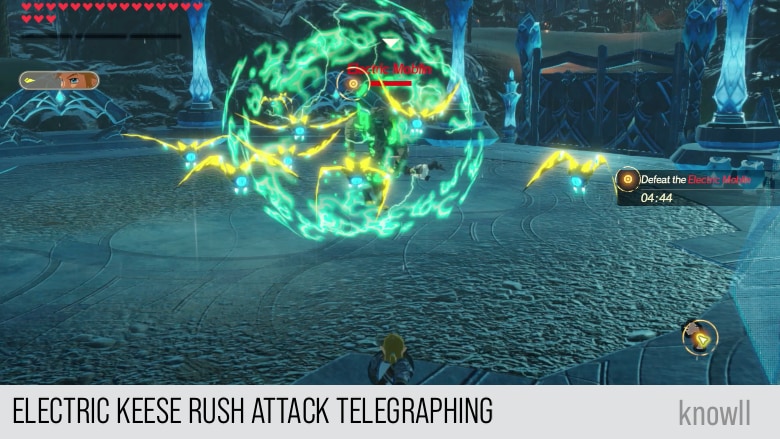
Then it will blast to you, causing damage and electrocution.
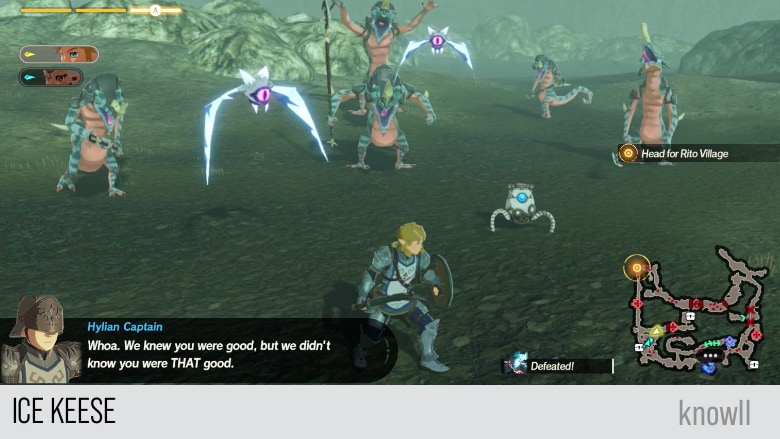
Ice Keese
The second most dangerous type of Keese is the Ice Keese. In BOTW, they can freeze both you and your horse. This is why they are very dangerous when exploring the Rito region. The moment one appears, you sure must avoid it or shoot it with an arrow.
You will first see them in Revali, the Rito Warrior.
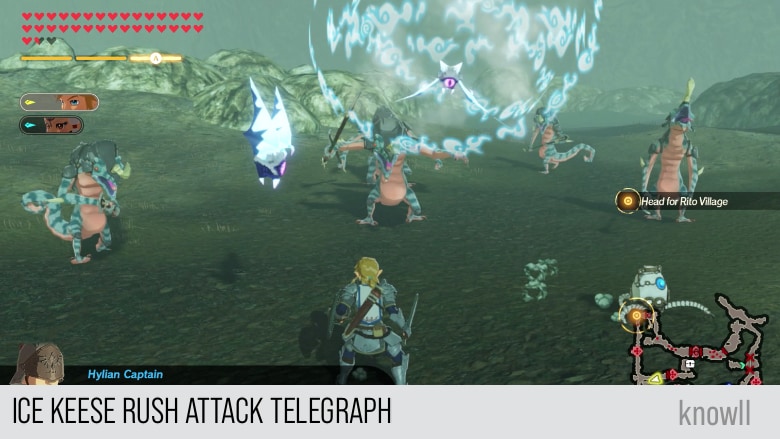
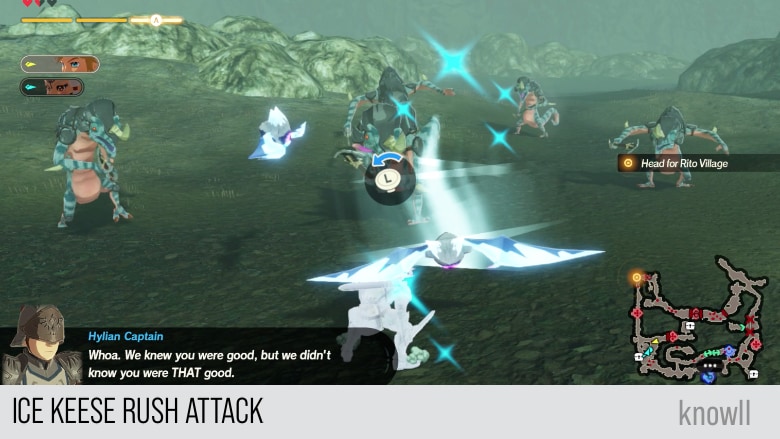
Like the first two elemental Keeses, the Ice Keese will form an ice orb around itself before making the attack.
Then it will blast towards you, causing damage and freezing.
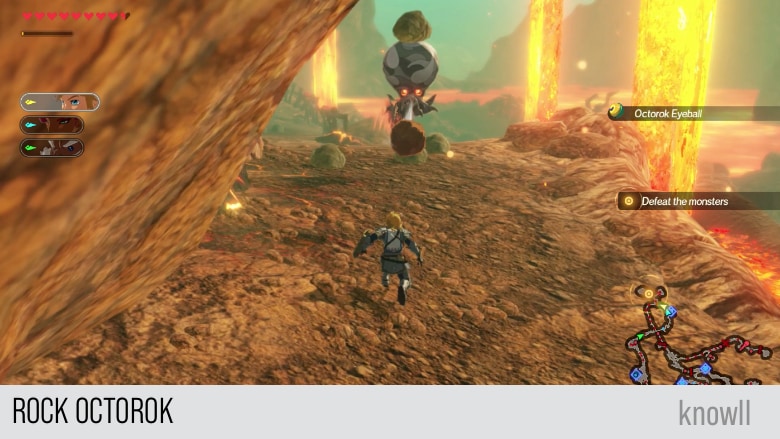
Octorok
Octoroks are back as well in AoC. They are still as annoying as ever because they almost don't miss on their attack. Be careful of them when you do the challenges where you can't take any damage. They will easily one-shot you if left ignored.
Blocking their attacks will do the trick. And once you know their location, you can clear them out.
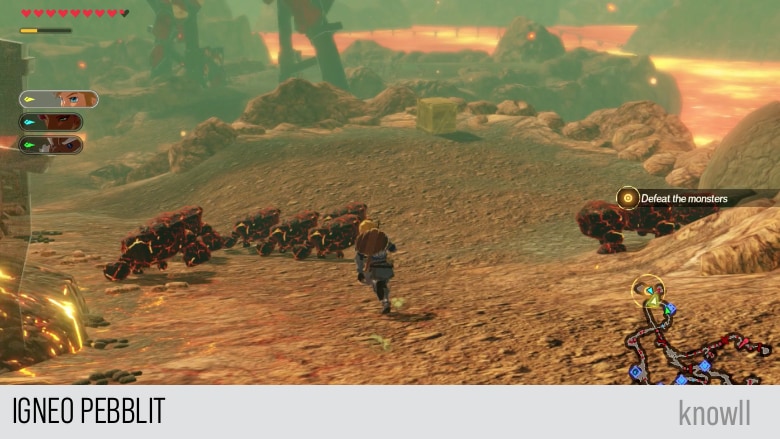
Stone Pebblit
The Pebblits are back as well in AoC. However, they no longer drop anything when killed. In BOTW, you have a guaranteed reward for killing one.
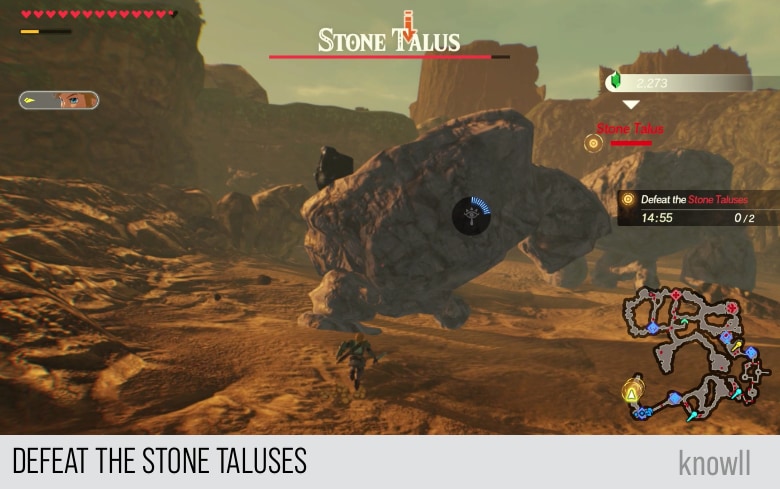
Talus
Taluses are among the large enemies in BOTW. In AoC, they got upgraded and gained more attack moves.
True to Pokemon principles, there are only two elemental Taluses, Fire and Ice. You will never find an Electric Talus in either BOTW or AoC. Why? Because Ground and Electric do not mix together.
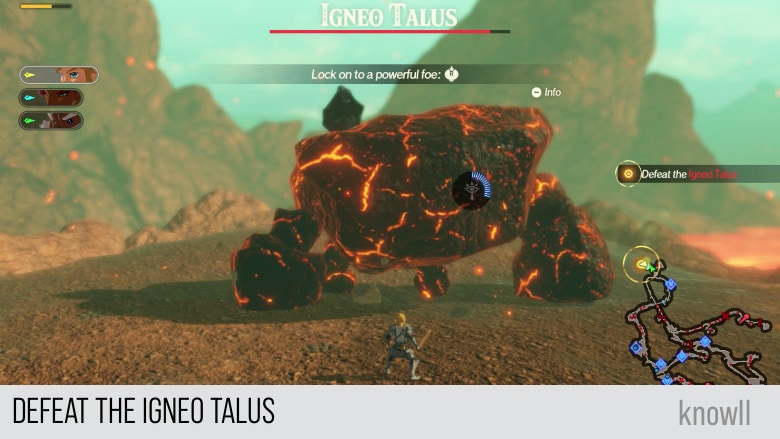
Igneo Talus
The first Talus you will meet in the game is immediately elemental. Elemental Taluses are present in BOTW as well, so this should not be a surprise for BOTW players.
You will first meet an Igneo Talus in Daruk, the Goron Hero.
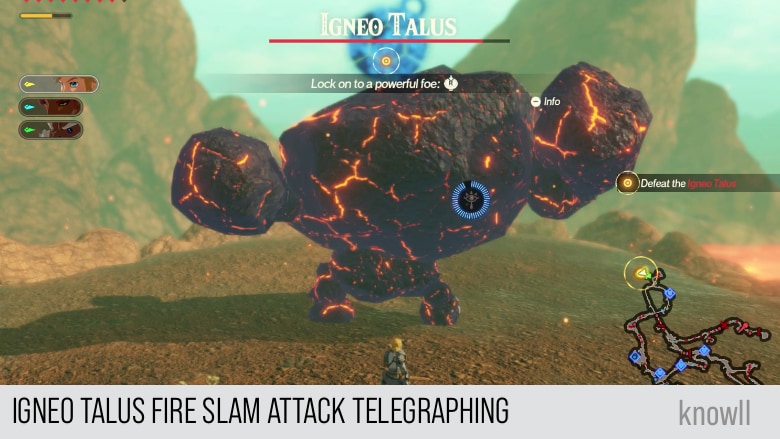
Fire Slam Attack
The Fire Slam is the strong attack of the Igneo Talus. It gives a telegraph before it makes the attack. This is the best time to counter, as once the attack continues, you can only make avoidance moves.
Counter the Fire Slam using a Remote Bomb, as shown below.
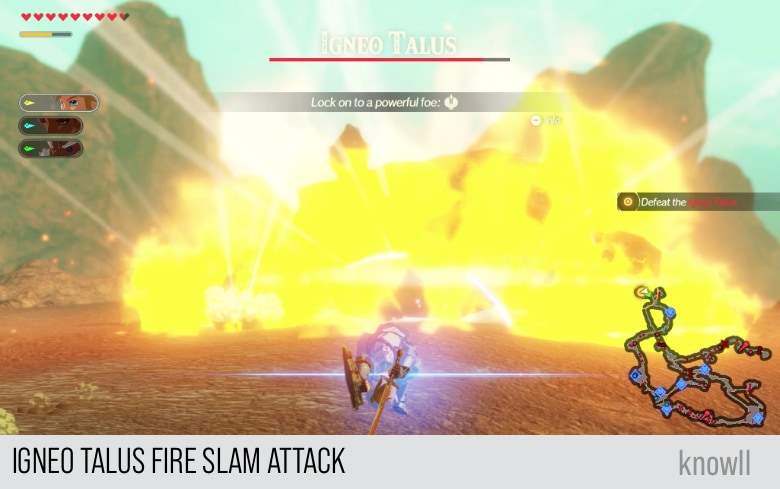
If you were not able to counter the attack, it would progress, and the Talus will give a large AOE fire attack.
Magma Bomb Attack
This attack is equally powerful as the Fire Slam. The Talus will summon Magma Bombs marks on the ground and then explode them all, causing a large AOE impact.
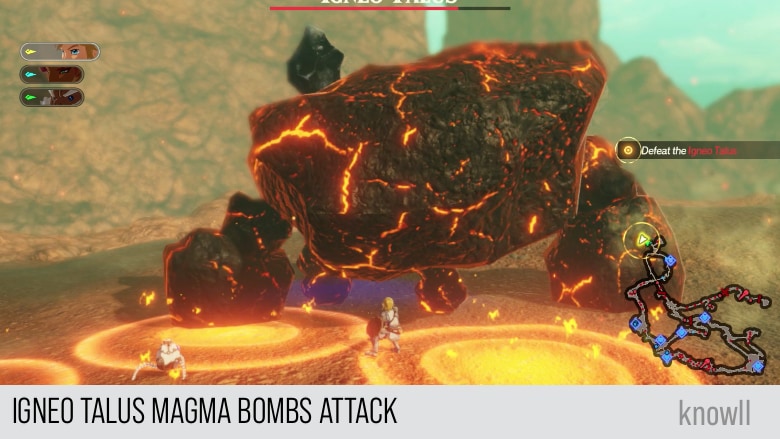
This attack has no rune telegraph for an easy counter. However, you can fish for a Flurry Rush by backflipping via the default dodge.

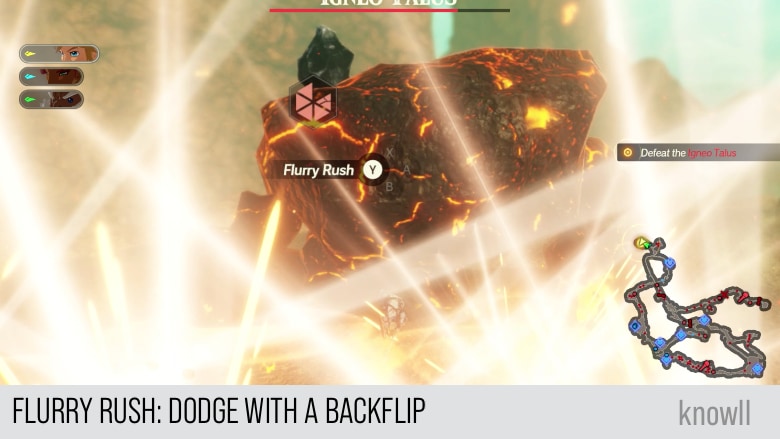
In the image above, instead of taking damage, Link was able to do a Flurry Rush on the Talus during the Magma Bomb attack.
Occasionally, the Talus will become staggered and rest on the ground, either to recharge or to recreate its hands. Use this chance to Ride him and damage the vulnerable spot on its back.
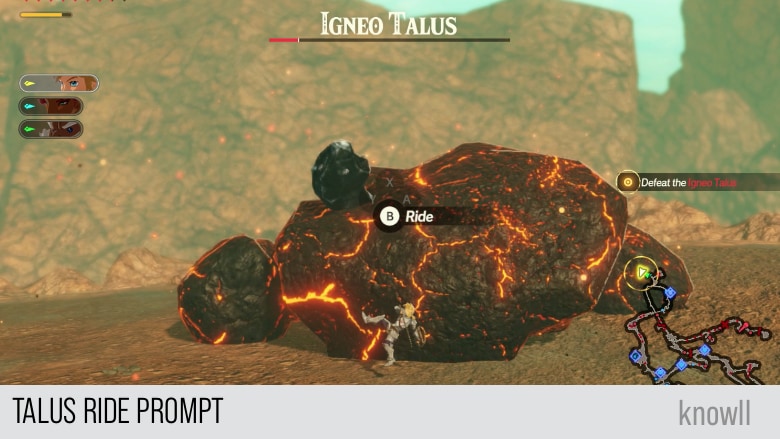
You will be able to hammer away on its weakness, the piece of crystal on its back. However, while riding an elemental Talus, you will get damage a little as well.
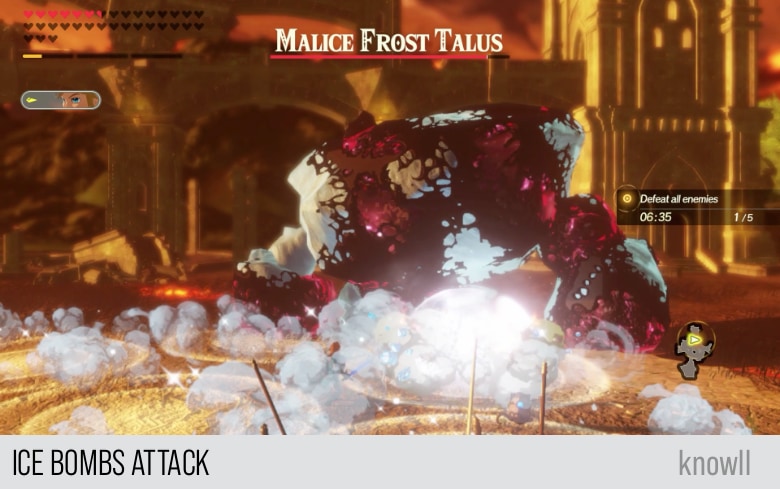
Frost Talus
The Frost Talus is very similar to the Igneo Talus, just a difference in the element. They also have the same attack moves, with different elements.
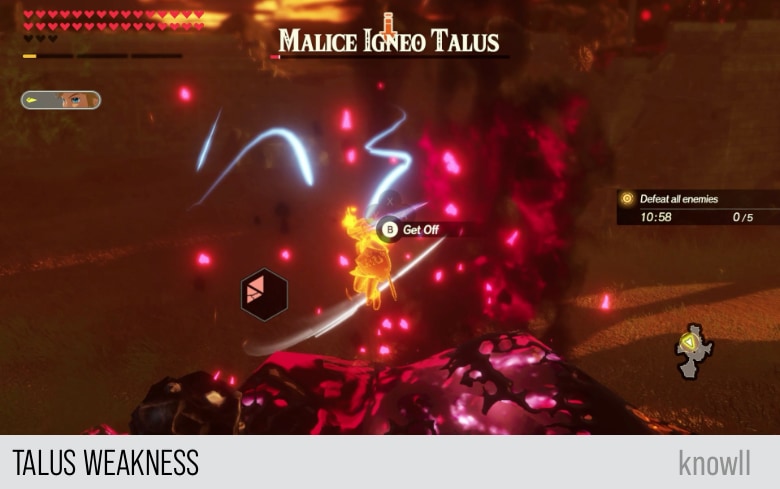
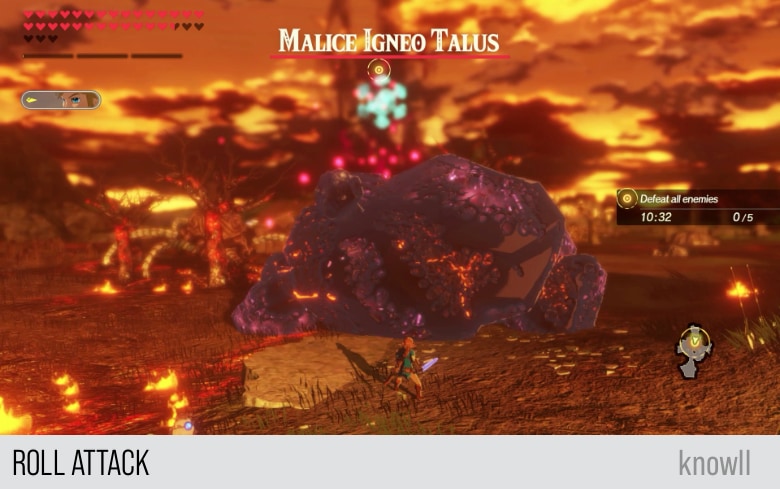
Malice Talus
The Malice Talus is the upgraded and final version of the elemental Taluses. They have more attack moves as well.
In addition to having the Malice modifier, they also have a default element as well. You will meet both the Malice Igneo Talus and Malice Frost Talus in All Hyrule United.
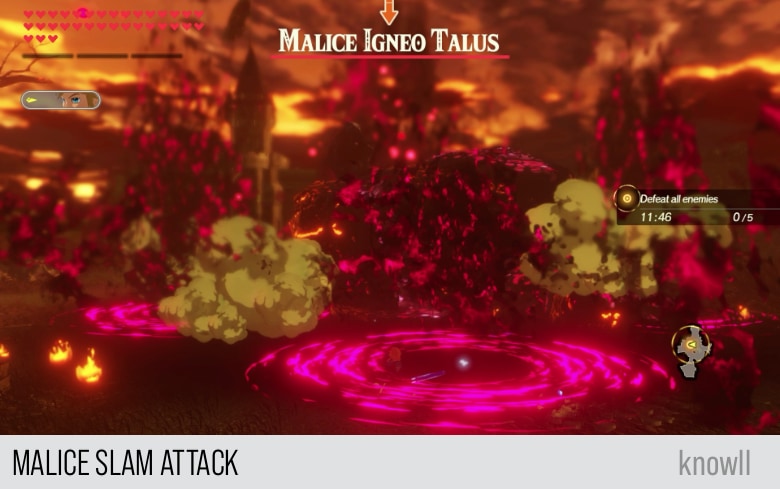
Malice Slam
In this attack's wind up, the monster shakes his arms with a very noticeable audio hint, sounding like hitting two stones together.
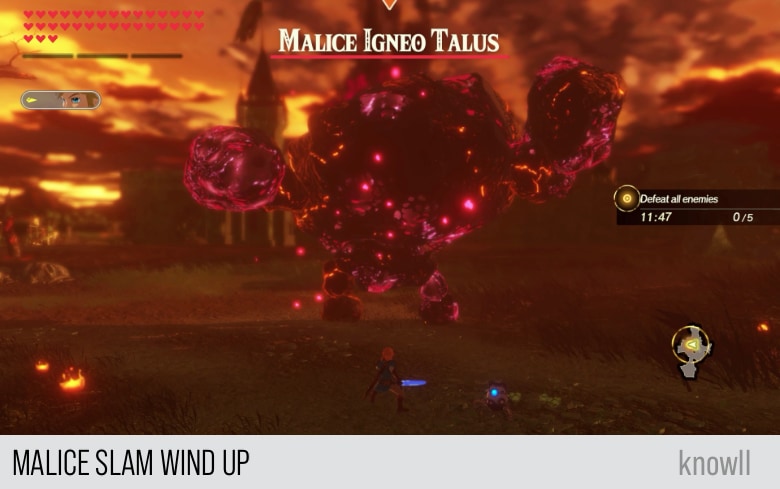
And then it will immediately slam its body to the ground, causing a large eruption of malice circles in front of it.
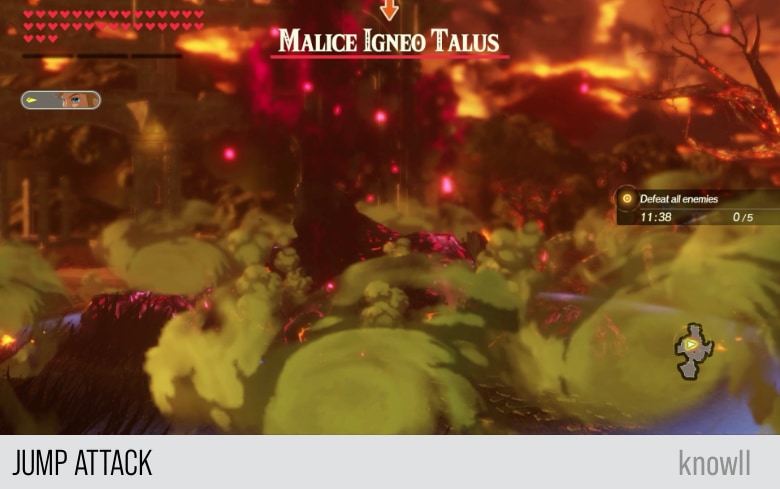
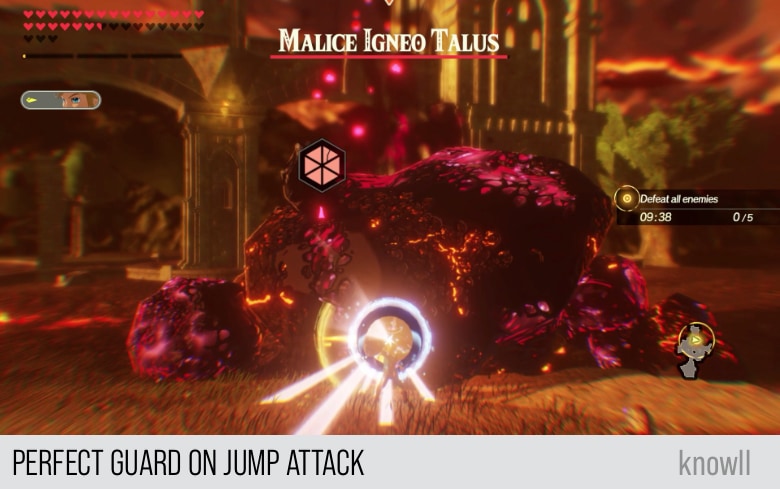
Jump Attack
In this attack's wind up, the monster will jump high, giving you the signal to either guard or move away.

Then it will immediately land itself on its target.
If you are confident, you can do a perfect guard on the jump attack. It's better to just dodge, though, as it is less risky.
Roll Attack
This is an attack that was not present in BOTW. In the attack's wind up, the Talus prepares itself and shows the Cryonis icon. This is your chance to counter and create ice pillars.
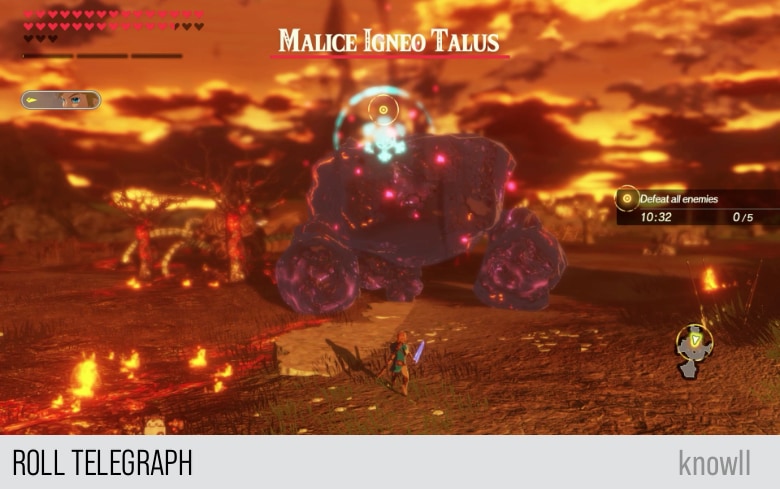
The roll attack is pretty fast. It is lockable, though, and as it is a one-time attack with no follow-ups, you will not take any damage after it breaks your guard and passes you.
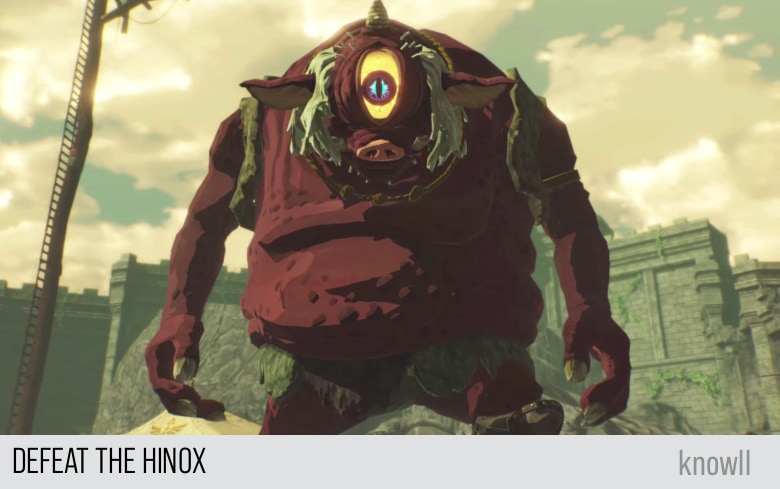
Hinox
Next to the Molduga, the Hinox is the largest common monster you will face in both BOTW and AoC.
Unlike the Moblins, the moveset of the Hinox changes as it upgrades its color, that is, the Blue Hinox and the Black Hinox have their own additional moveset.
Red Hinox
You will first see the Red Hinox in The Yiga Clan Attacks! The weakest of the three types, it has some formidable attacks as well. This type of Hinox does not use any weapon.
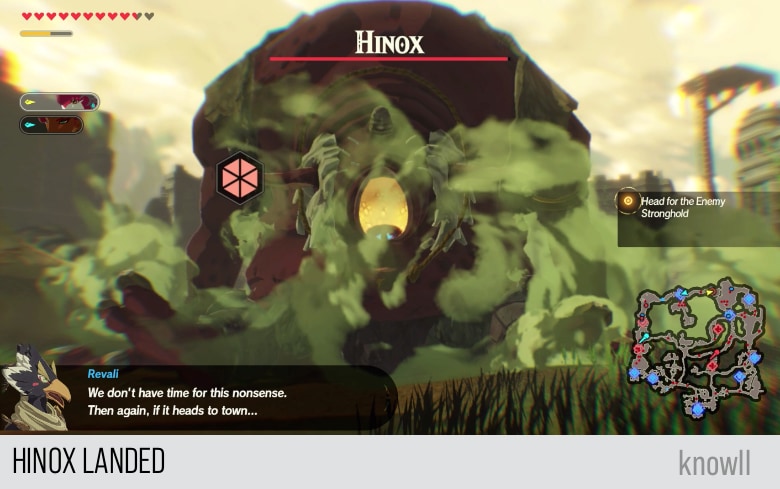
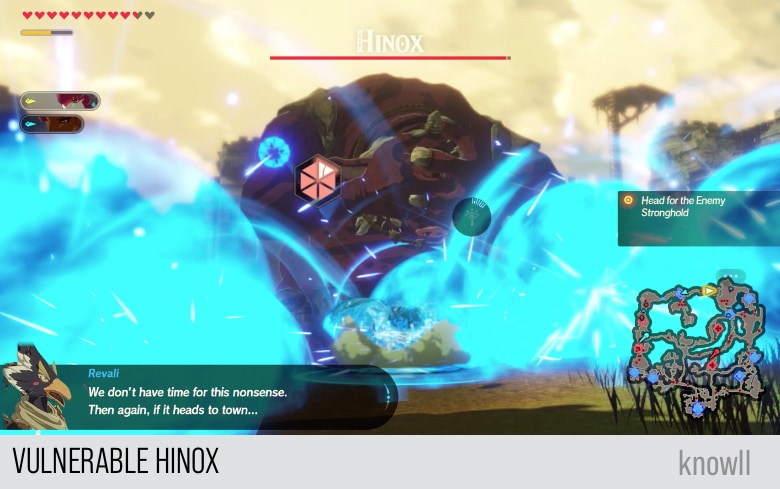
Jump Attack
This is one of the most common attacks of a Red Hinox. It has a large AOE. You might be able to get a Flurry Rush by doing a backflip, which is the easiest of all forms of dodge.
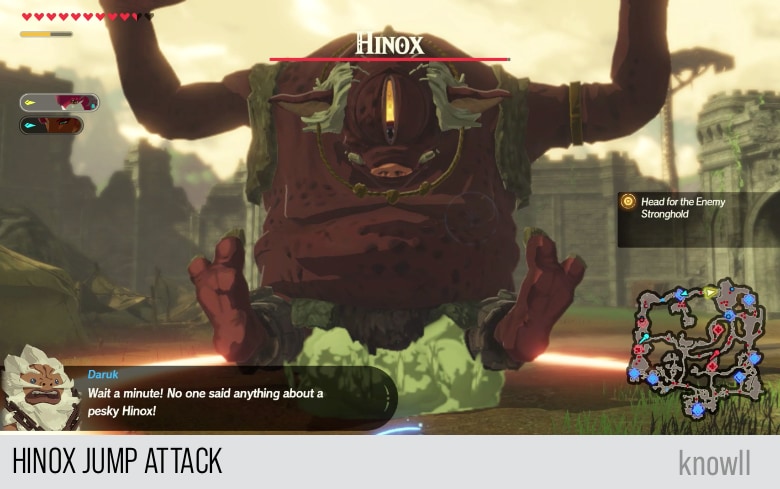
Once a Hinox lands from its jump, it is vulnerable. It also shows its WPG.
If you are able to land an attack that can hit its eyes - either through Remote Bombs or Link's arrows, you can make more attacks and reduce its WPG further.
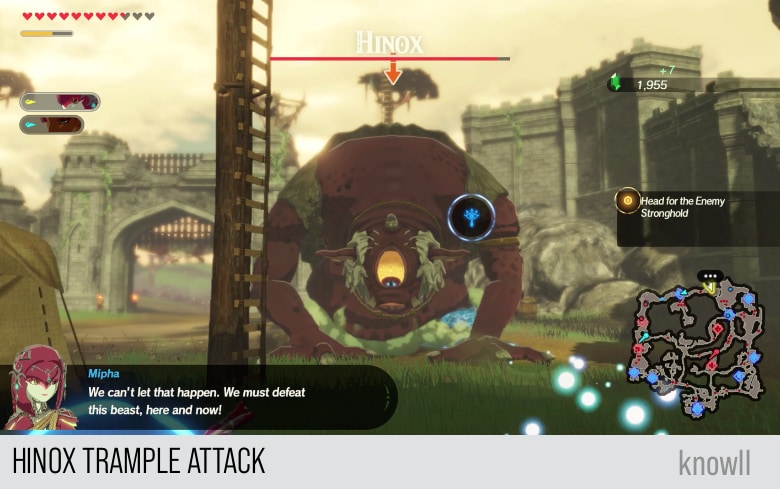
Trample Attack
In this attack, the Hinox uses its two hands and starts trampling you in the ground like an ant. Using a backflip, you can punish it with a Flurry Rush.
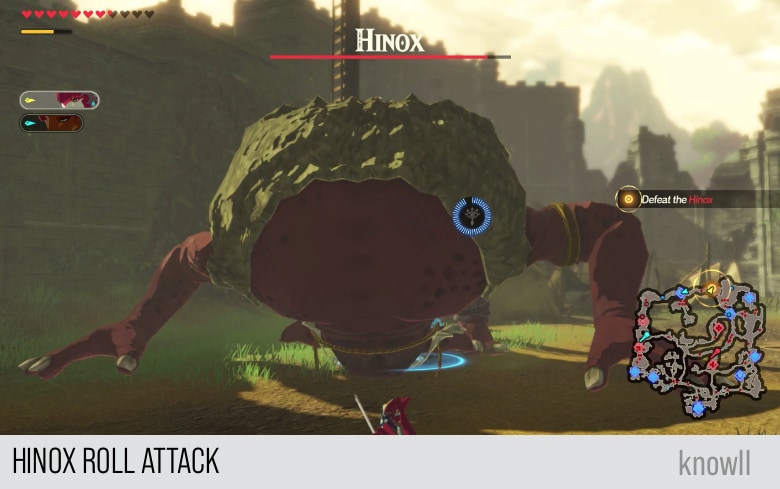
Roll Attack
This one is linked to the next attack. It serves as a telegraph, as the second attack has stronger damage.
You will observe the Hinox preparing to roll as below and then perform the second part of its combo.
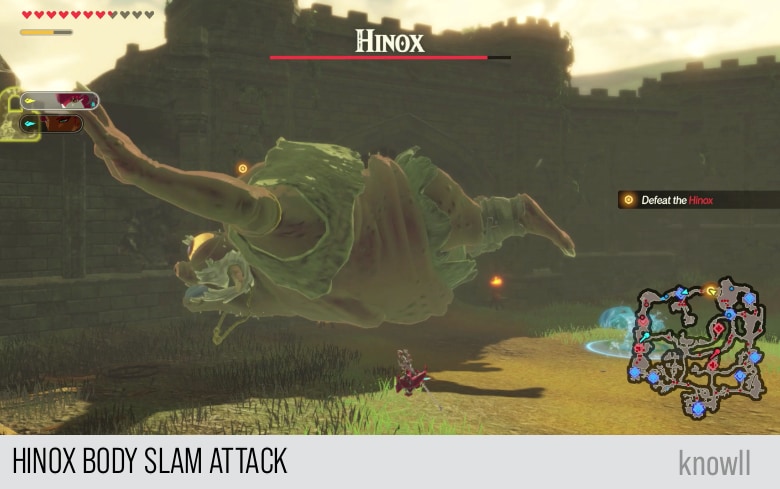
Body Slam Attack
After the Hinox makes the first part of the attack, which is rolling on you, it will do a body slam like a wrestler.
Like most attacks with high damage, this one has a telegraph with a counter. You can use Stasis to counter the attack and punish it.
Blue Hinox
The Blue Hinox is the strong version of the Red Hinox. You will first meet it in When Courage Fails. Size-wise, they are the same.
As this is a Blue Hinox, it has new attacks in its moveset. Plus, it is much stronger than the one you face earlier.

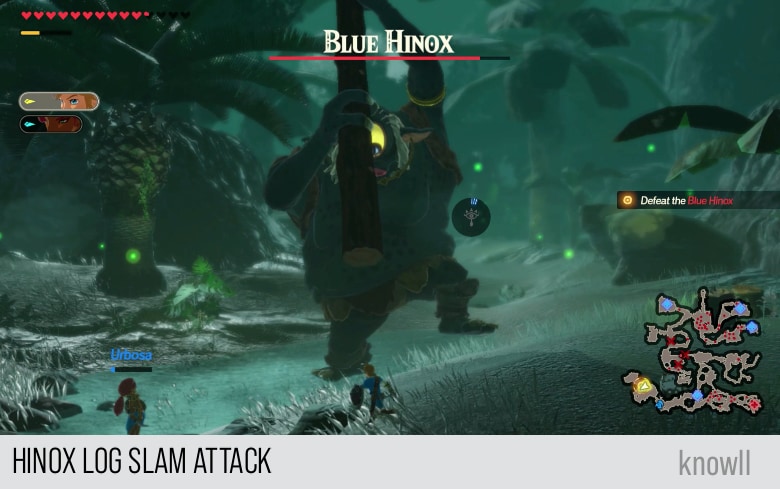
Log Slam Attack
This is one of the new attacks of a Blue Hinox. It pulls a large log and uses it like a sword, which he swings towards you.
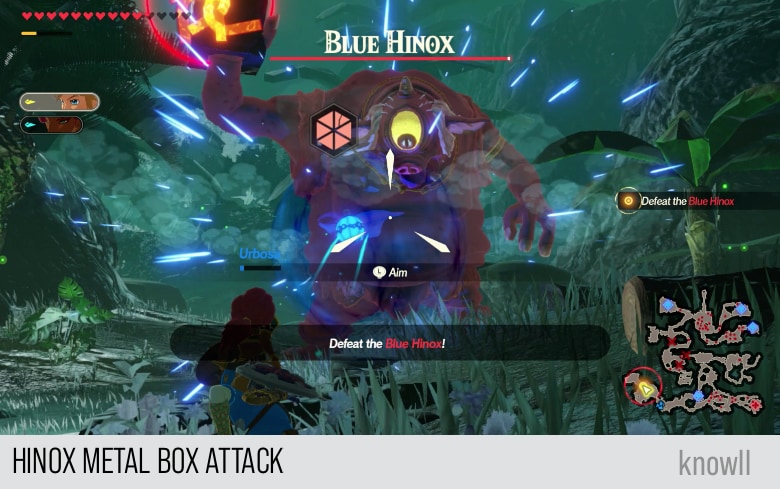
Metal Box Attack
In this attack, the Hinox summons a metal box, which he throws at you. It has a telegraph that you can counter using Magnesis.
Pound Attack
The Pound Attack is very similar to the Trample Attack, but instead of using his two arms, he only uses one. He will do this repeatedly, being opened for a punishment using a simple backflip dodge.
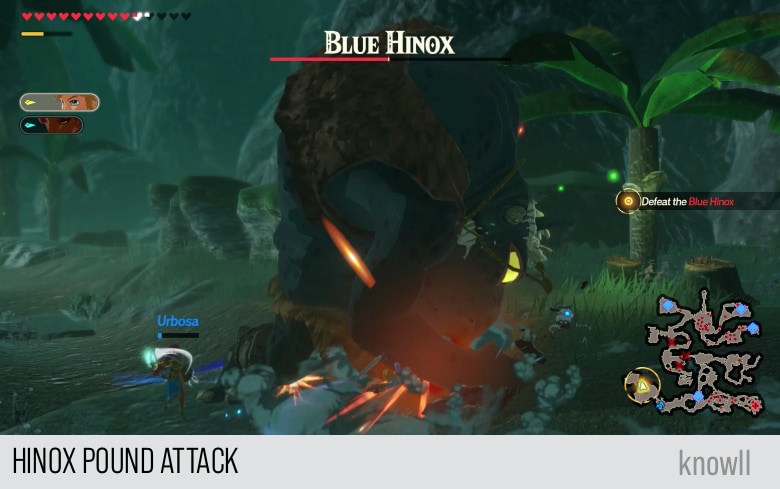
You can fish for a Flurry Rush and punish the monster.

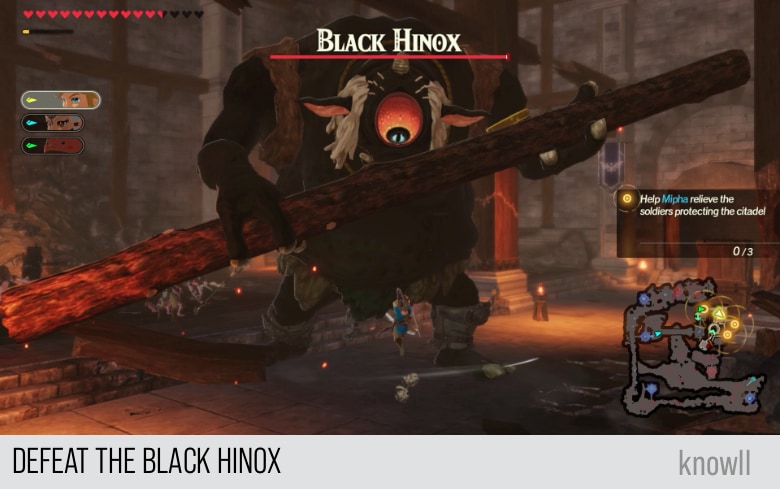
Black Hinox
The Black Hinox is the strongest version of the non-elemental Hinoxes. You will first meet it in Relentless as a Waterfall.
Like the Blue Hinox, this one can summon a weapon which it will use to attack you. The Black Hinox has increased attack moves based on this weapon.
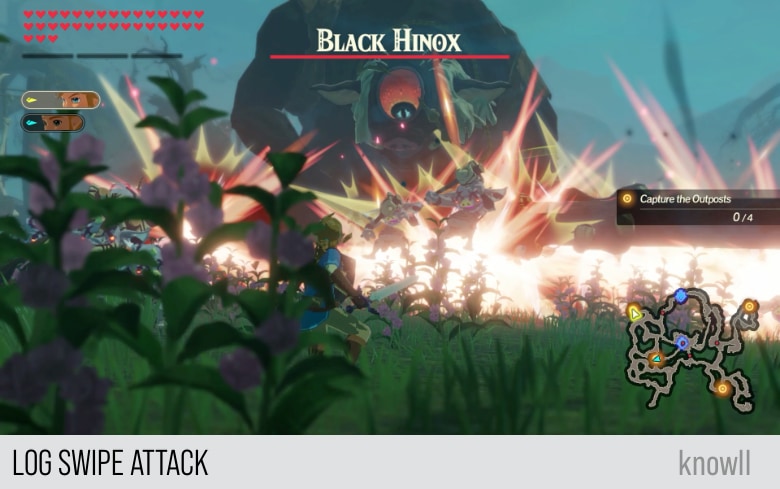
Log Swipe Attack
The first new attack is the Log Swipe Attack. In the attack's wind up, the Hinox pulls back the log, preparing it for the incoming attack.
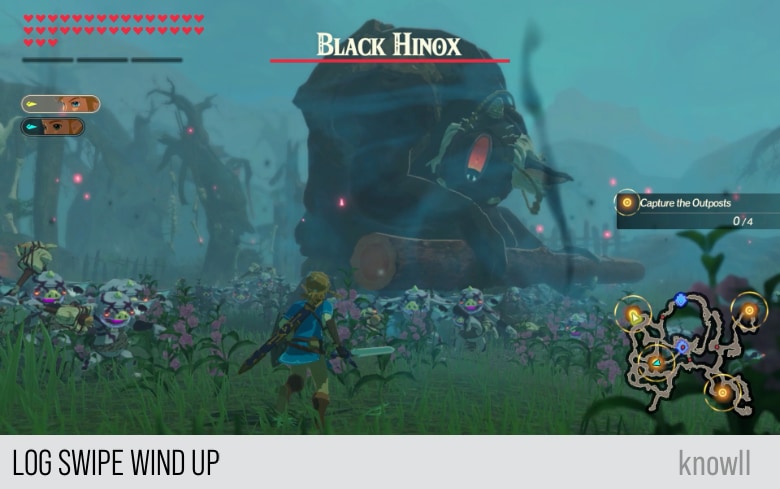
Immediately after the wind up, the Black Hinox will swing the giant log, sweeping everything in the path in a 180-degree arc, including the enemies. You can either block or dodge this attack. This is very similar to Waterblight Ganon's Ice Swipe attack.
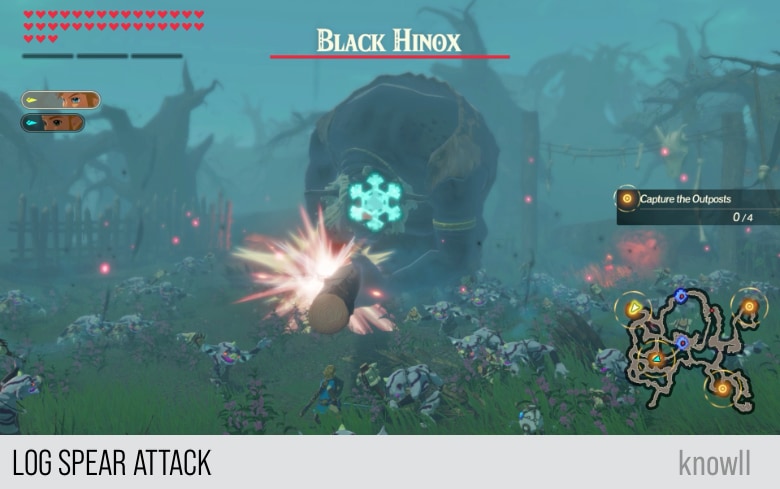
Log Spear Attack
This is one of the rare attacks of the Black Hinox, where it uses the giant log as a spear. As it is a thrusting attack, it will produce a telegraph with the Cryonis icon.
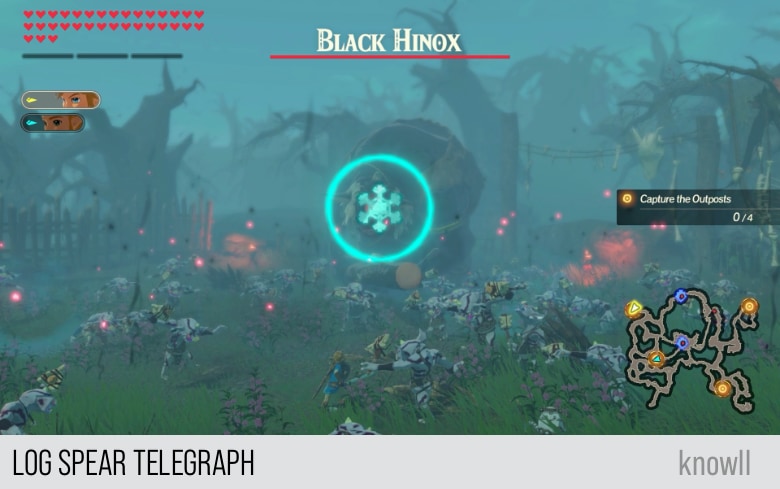
After the telegraph, the Black Hinox will thrust the spear toward your direction. You can counter it by creating ice pillars with Cryonis.
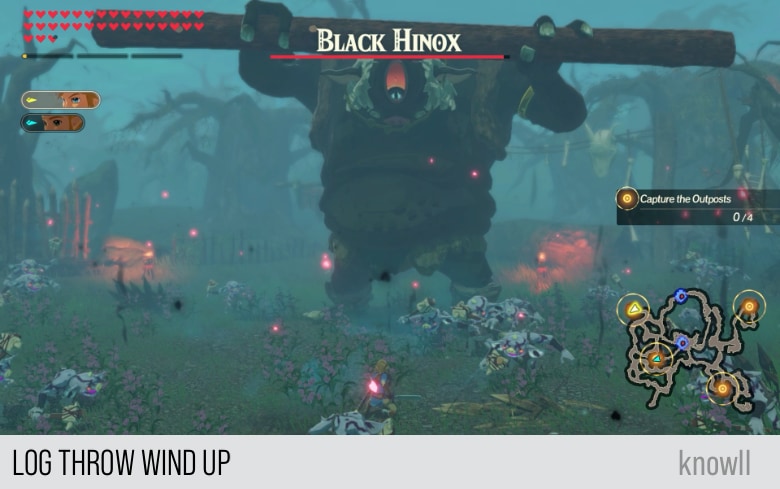
Log Throw
This could be the rarest attack by the Black Hinox. You can fight this monster multiple times, and you might not even see this attack done.
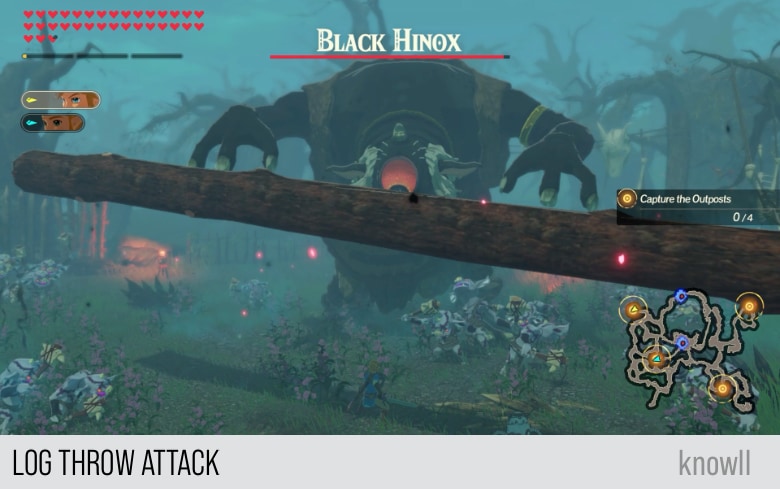
During its wind up, the monster raises the giant log high. This is the sign for you to block or prepare to dodge.
Then the monster will immediately throw, making land on top of you. This will cause damage and knockback if it hits.
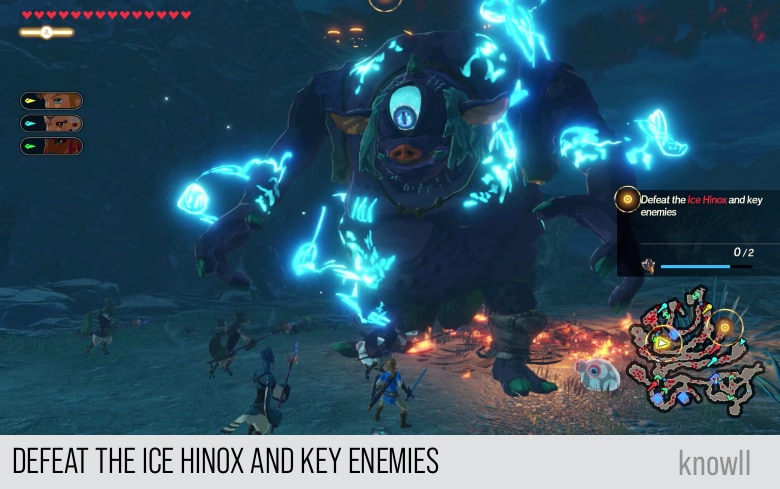
Ice Hinox
The Ice Hinox has the base attack moves of the Black Hinox, plus new elemental attacks. You will first meet the Ice Hinox in Air and Lightning.
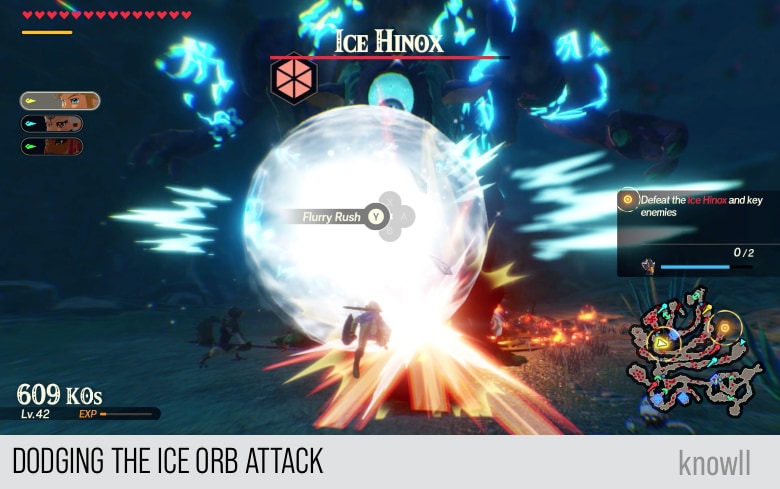
Ice Orb Attack
In this attack, the Hinox gathers up his power and shows a telegraph, which you can counter using a Remote Bomb.
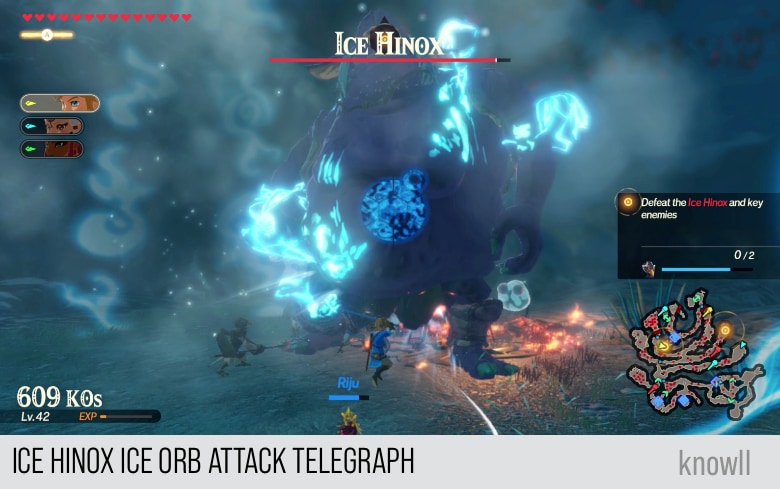
If you do not counter, the Hinox will continue his attack and produce a giant Ice Orb.
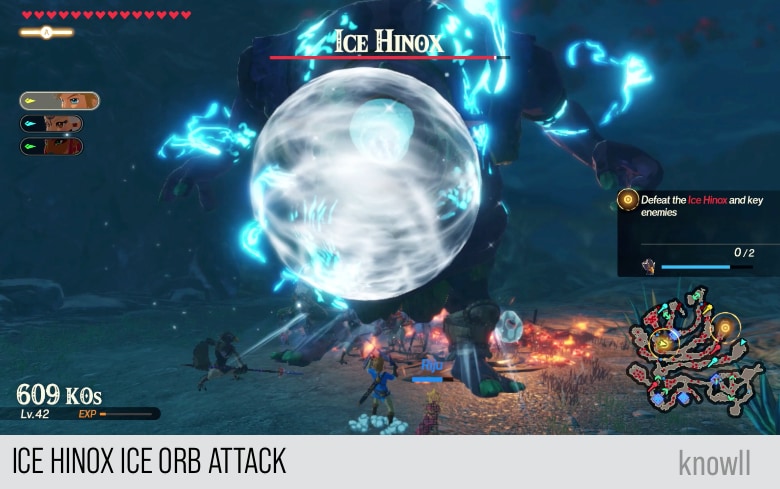
The Ice Orb will freeze all enemies in front of the Hinox and produce considerable damage.
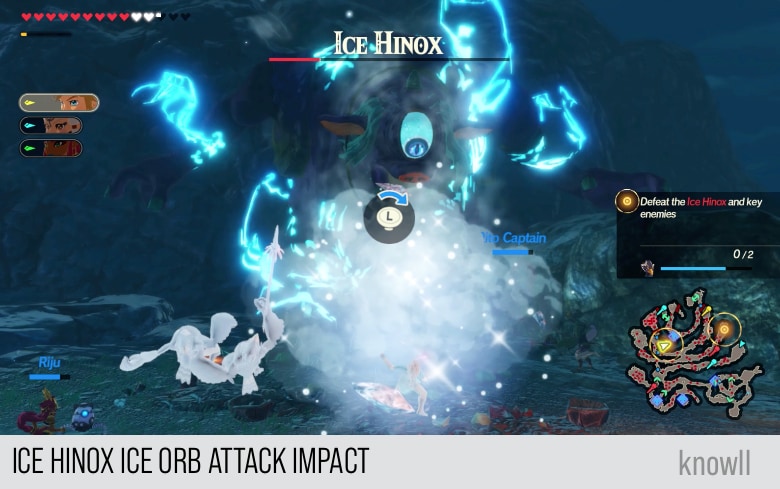
You can punish this attack by simply doing a backflip dodge so you can gain a Flurry Rush.
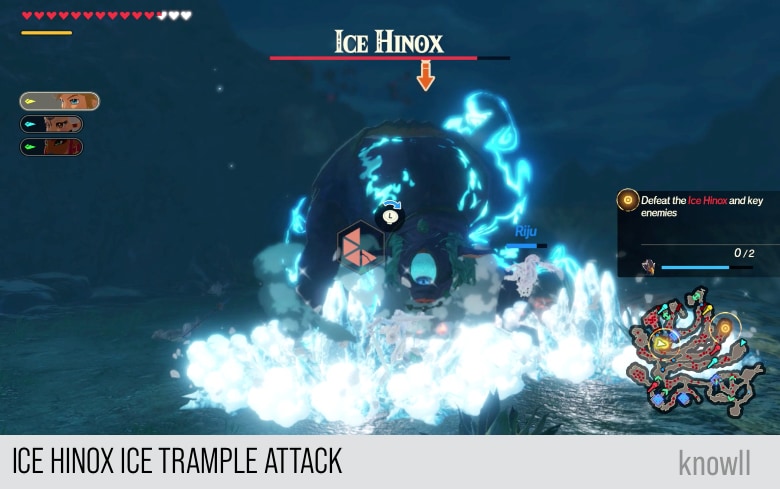
Ice Trample
All Hinoxes make the Trample Attack, where they hammer both of their hands on the ground. In the Ice Trample, the Hinox produces a freezing effect on its last attack.
Fire Hinox
Similar to the Ice Hinox, the Fire Hinox has the base attack moves of the Black Hinox, plus new elemental attacks. You will first meet the Fire Hinox in Air and Lightning.
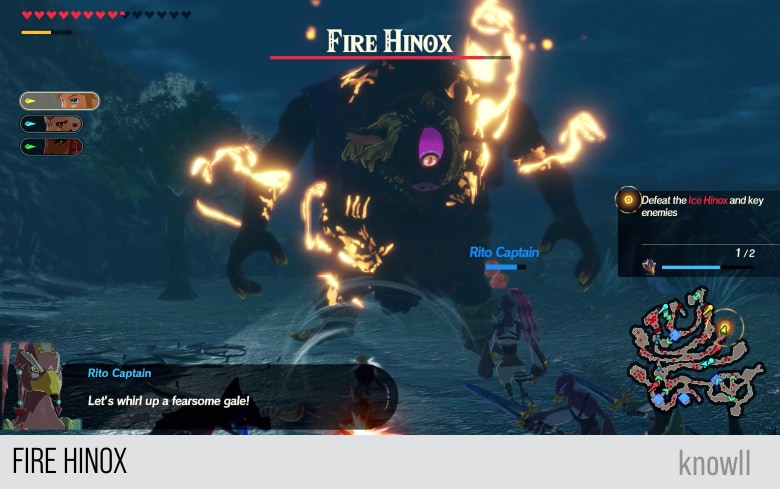
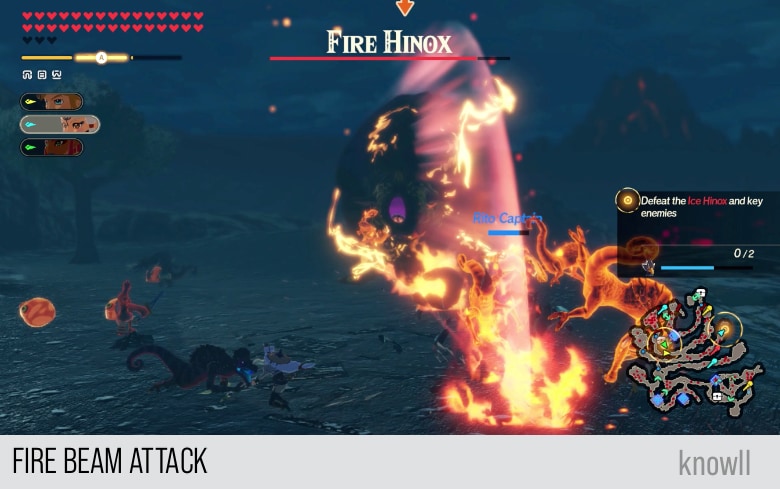
Fire Beam Attack
A normal Hinox uses a large log that he swings on you like a sword.
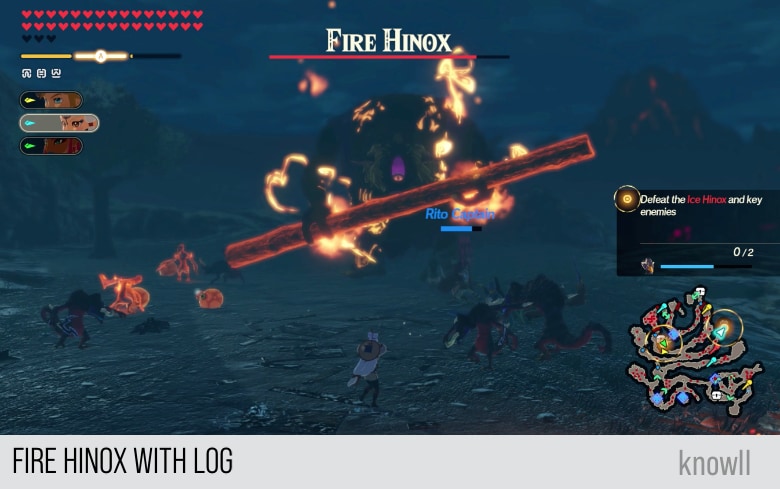
The Fire Hinox gains the Fire Beam attack, which sends a long-distance beam that will burn everything that it hits, even other monsters.
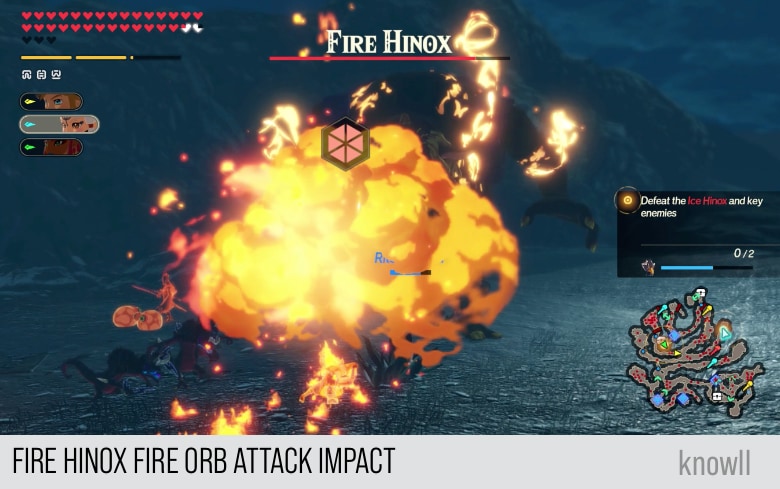
Fire Orb Attack
Similar to the Ice Hinox, the Fire Hinox has a Fire Orb, which you can counter using a Remote Bomb.
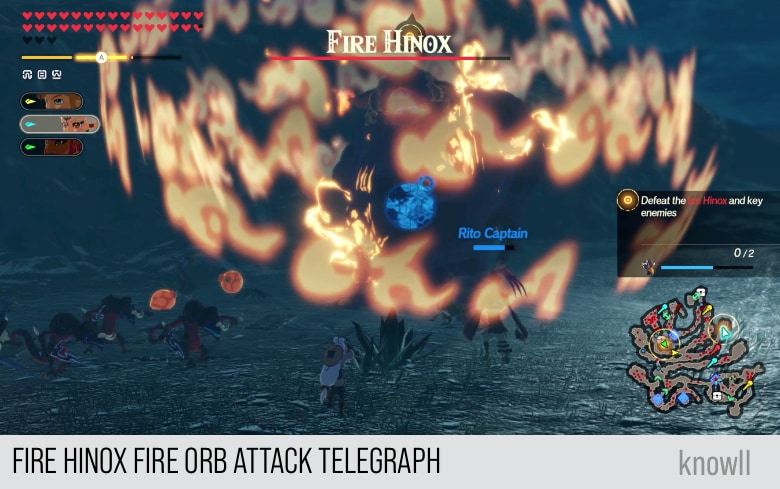
The Fire Orb is of the bouncing type, though. It keeps on bouncing until it hits a target.
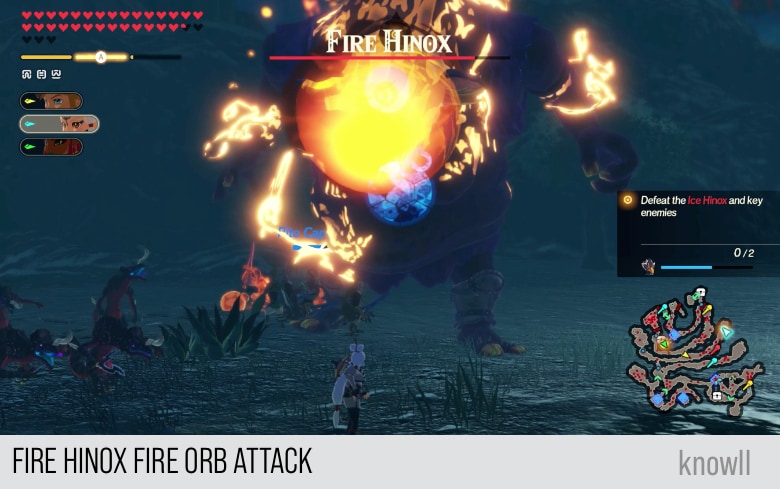
It will produce a huge burning effect once it hits you.
Electric Hinox
Like the first two elemental Hinoxes above, the Electric Hinox has the base moves of the Black Hinox. You will first meet this monster in the entry Relentless as a Waterfall.
Lightning Orb Attack
Similar to the first two Hinoxes, this monster releases its own Lightning Orb attack.

In addition to the AOE of its melee attacks, it also produces a Lightning Burst once these strong attacks end.
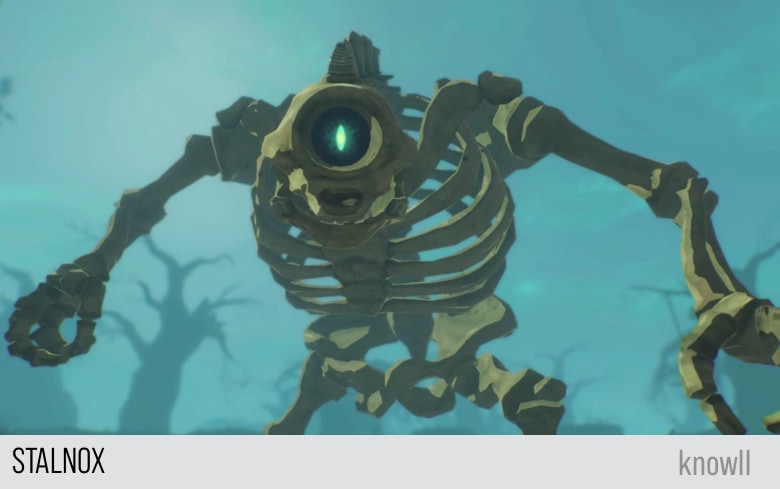
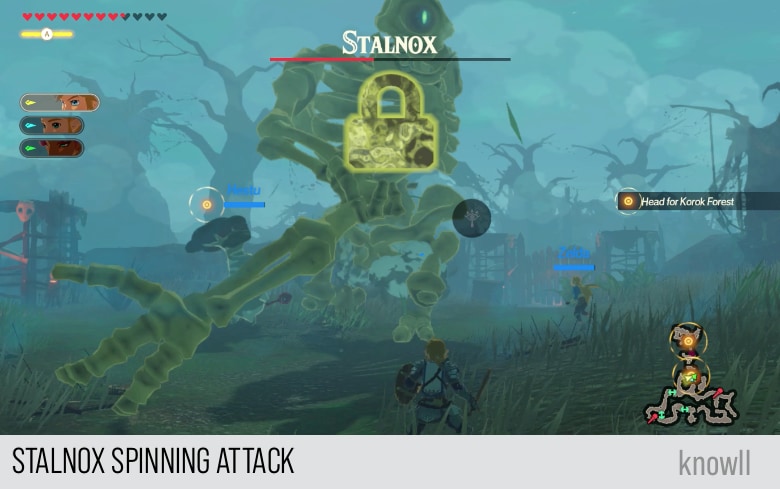
Stalnox
The Stalnox has all the standard attacks and moveset of a Red Hinox, which we have covered above. In addition to based moves of a Red Hinox, the Stalnox gains an attack unique to its nature.
You will first face a Stalnox in the entry Freeing the Korok Forest.
Spinning Attack
There is one attack that is unique to a Stalnox, the Spinning Attack. With this attack, the Stalnox uses one of his arms and uses it as a weapon as he spins.
Like other spinning attacks, you can counter this with Stasis.
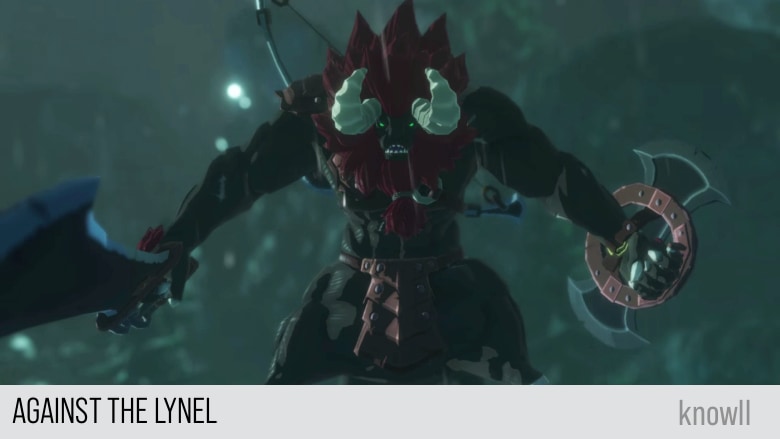
Lynel
If there is an enemy in BOTW that is equally as challenging as Calamity Ganon, that would be the Lynels, especially the Silver and Gold varieties.
In BOTW, there is a variety of weapons wielded by Lynels. You will find some using a spear, or a two-handed crusher, or a one-handed sword. This is still present in AoC. However, the other weapons were reserved for the elemental and malice varieties. The non-elemental Lynels only use one-handed swords.
This does not make them less challenging. In fact, all monsters, including the Lynels, got improved in AoC. They have more moves than those in BOTW.
What obviously got removed, though, is their vertical shot that does not miss even if you are not visible to them. That surely got nerfed.
The color variations of the non-elemental Lynels only make them stronger. Weapon-wise and attack-wise, they are all the same.
Hence, you should be comfortable in fighting the non-elemental Lynels, as becoming familiar with the Red Lynel means you can already anticipate the attack patterns up to the Silver Lynel.
You will first meet the non-elemental Lynels in this sequence of Chapter entries:
- Red-Maned Lynel - Mipha, the Zora Princess
- Blue Lynel - Akkala Tower
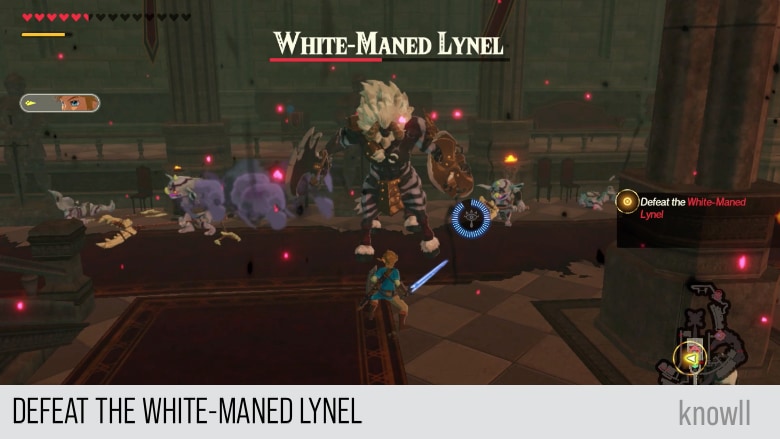
- White-Maned Lynel - Calamity Strikes
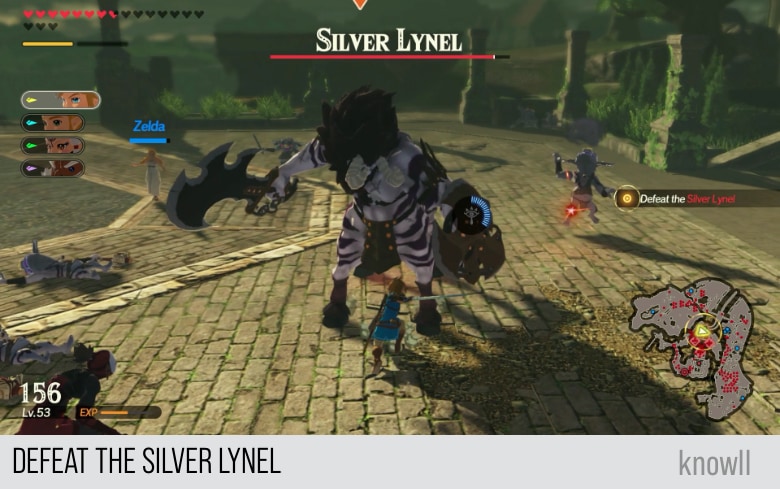
- Silver-Maned Lynel - The Great Plateau
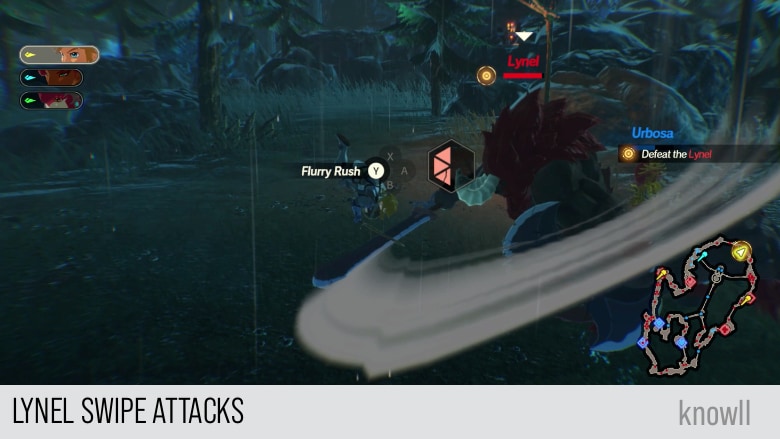
Swipe Attack
This move is similar to the one present in BOTW and can easily be punished with a backflip, as dodging is much easier in the Age of Calamity. Backflips in BOTW takes three inputs, as compared to one button press in the Age of Calamity.
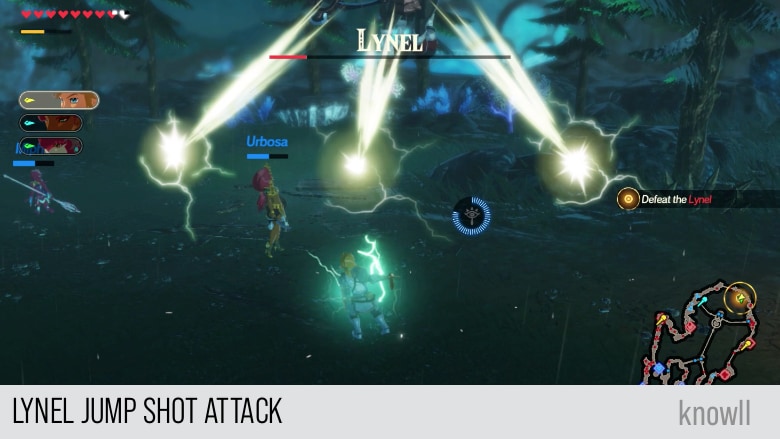
Jump Shot Attack
This is a new move for the Lynels of Age of Calamity. The Lynel jumps and shoots three arrows. You either guard or dodge this attack.
Rush Attack
This attack exists in BOTW as well. However, it opens up a lot of choices in handling it. The rush attack now gives a telegraph that you can easily counter using Cryonis. This stops a Lynel's attack and puts him immediately in a state of vulnerability.

Like the Rush Attacks of other monsters, you can counter this after the attack begins executing.
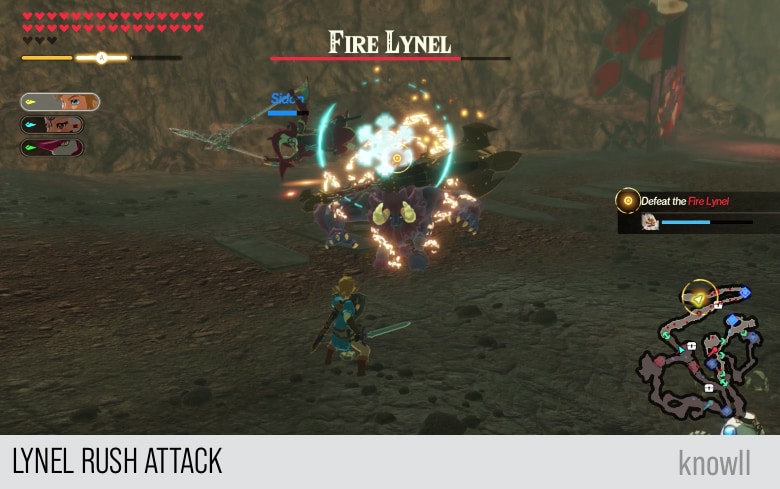
You can easily counter and punish this attack with an Ice Pillar, but if you are confident, stop the Lynel and remind it who is the boss by doing a Perfect Guard on the attack.

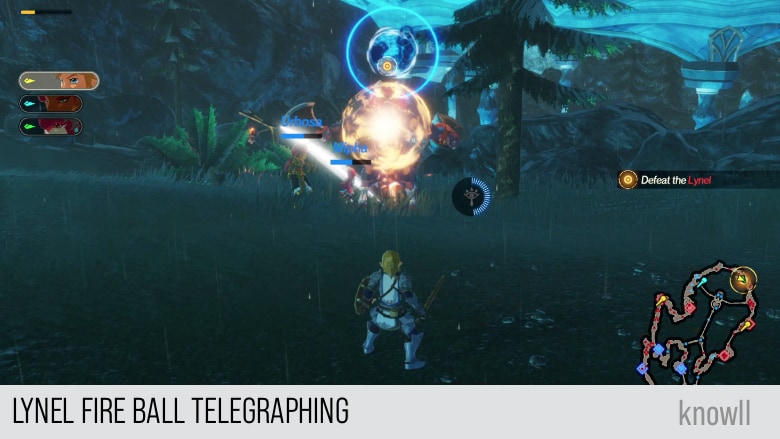
Fire Ball Attack
Similar to the above attack, this is present as well in BOTW. However, it gained a telegraph, which you can counter using a Remote Bomb.
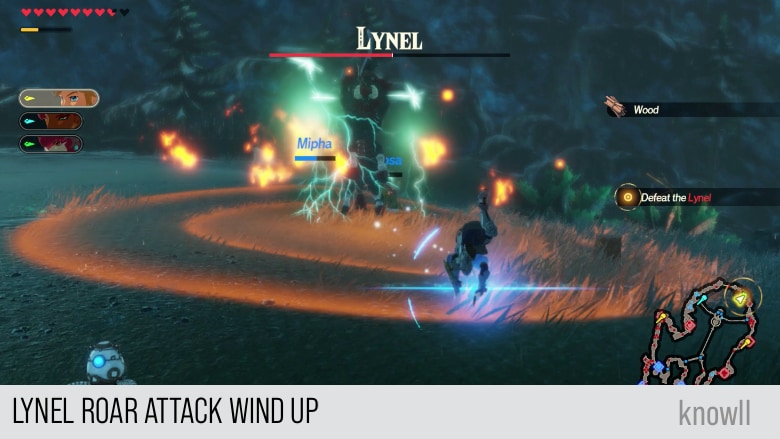
Roar Attack
This is the strongest attack of a Lynel and is present in BOTW, as well. There is no easy rune to counter this, but it has a long wind up.
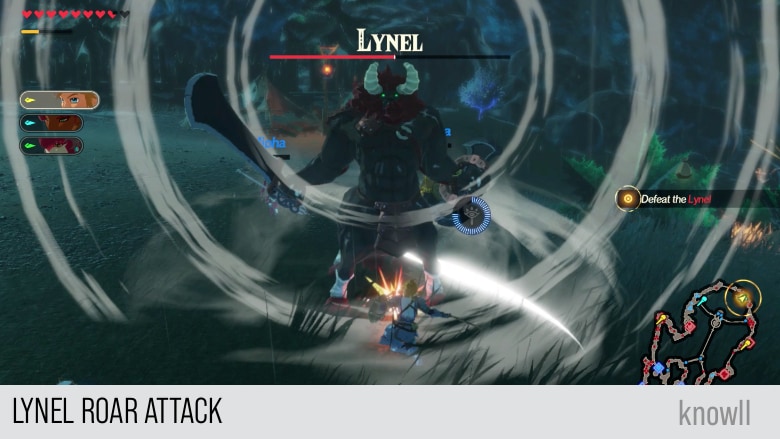
Use that wind up to position yourself and avoid the radius of the attack. You can then use your arrow and fish for a stager, which can stop the attack from continuing.
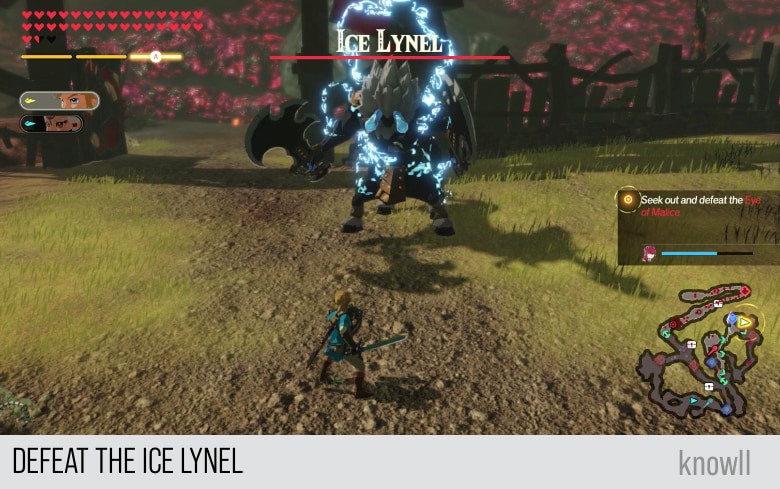
Ice Lynel
Among the best additions in AoC are the elemental Lynels. The introduction of the Ice element also introduced the dual-wielding Lynel. The only other Lynel having similar weapons is the Malice Lynel.
You will first meet an Ice Lynel in Water and Fire. This one definitely gained new attacks.
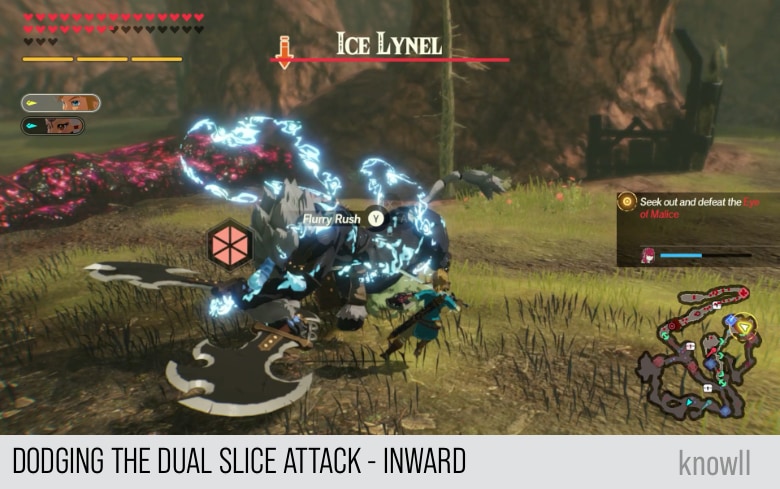
Dual Slice Attack - Inward
The first attack pattern we will cover is the Dual Slice Attack. It is a non-elemental attack that is unique to Lynels with two swords.
In this attack, the Lynel raises up its two swords as below and then rushes towards you to slice inwards.
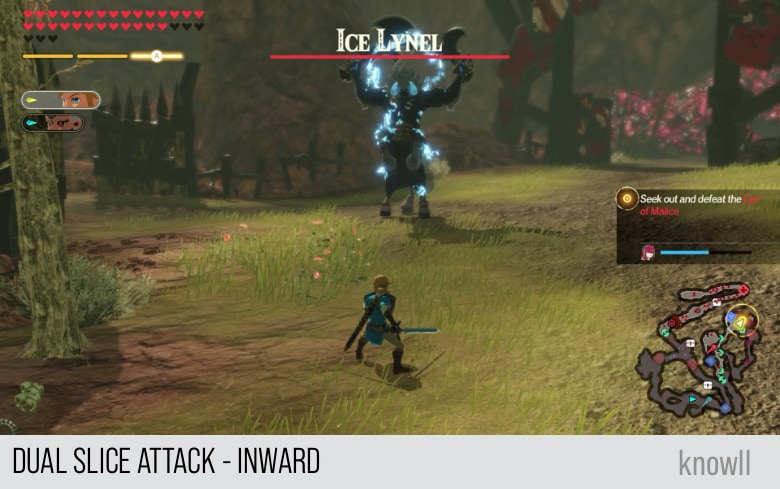
You can see the direction is from outwards, closing in.
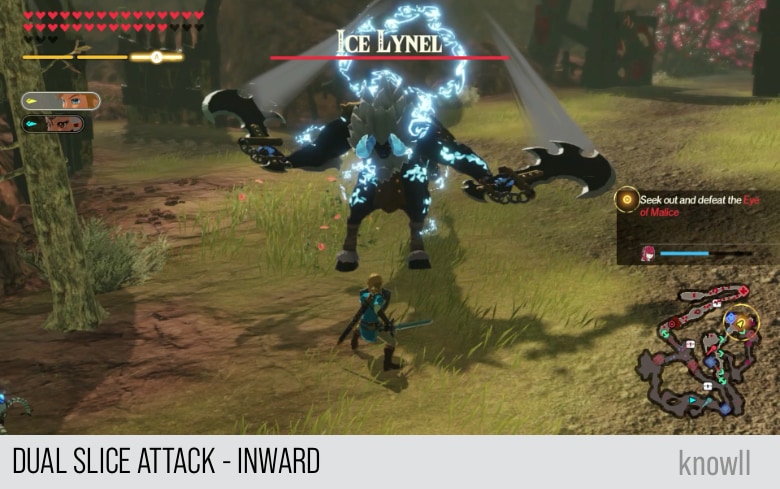
You can easily punish this attack by doing a dodge to your side, so you can gain a Flurry Rush on the Lynel.
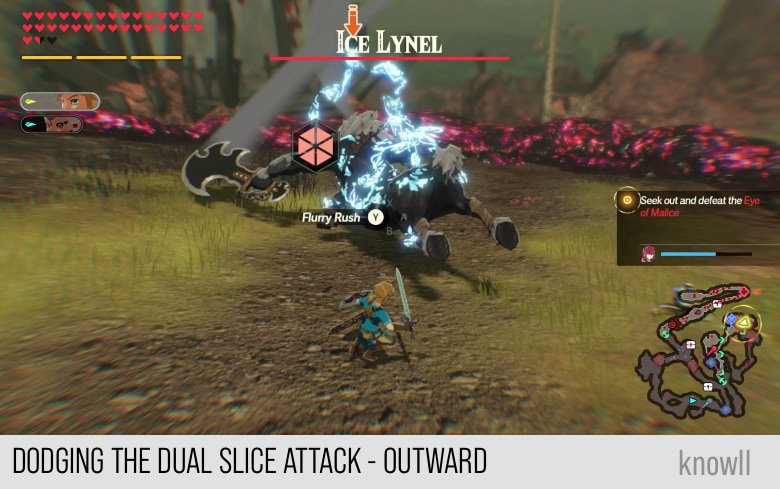
Dual Slice Attack - Outward
This is similar to the earlier attack, except it from inside moving out. This attack actually follows the earlier attack. They belong to the same combo that the Lynel always follows.
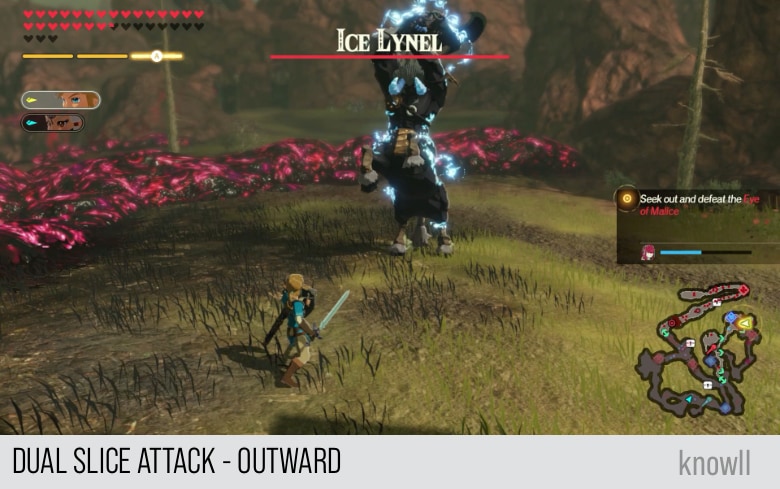
You can see the direction of the blades. They are moving from being close to each other to being separated.
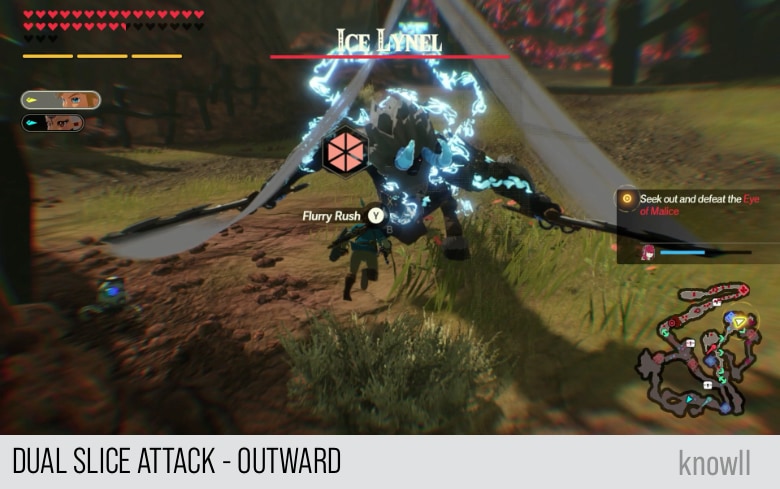
Similar to the first attack, you can punish this by doing a side dodge, as shown below.
Ice Orb Attack
Every Lynel has a projectile attack. For the Ice Lynel, it becomes an Ice Orb. He will release three orbs, each of which can freeze you.
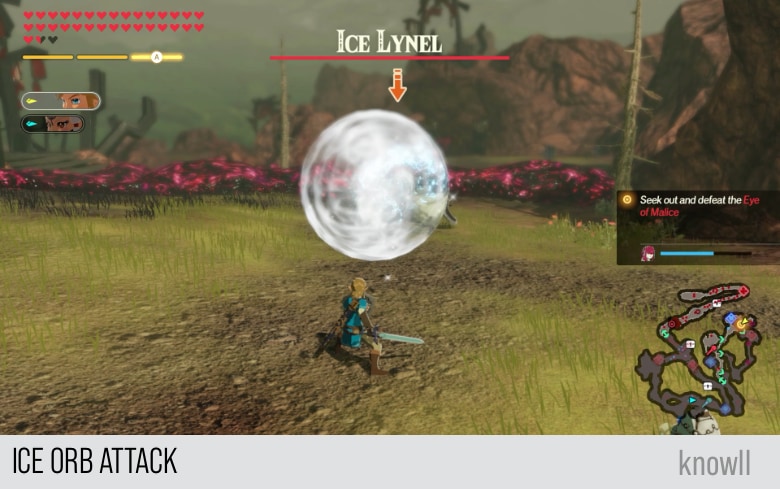
You can punish this attack by doing a side dodge as the orb is about to hit you.
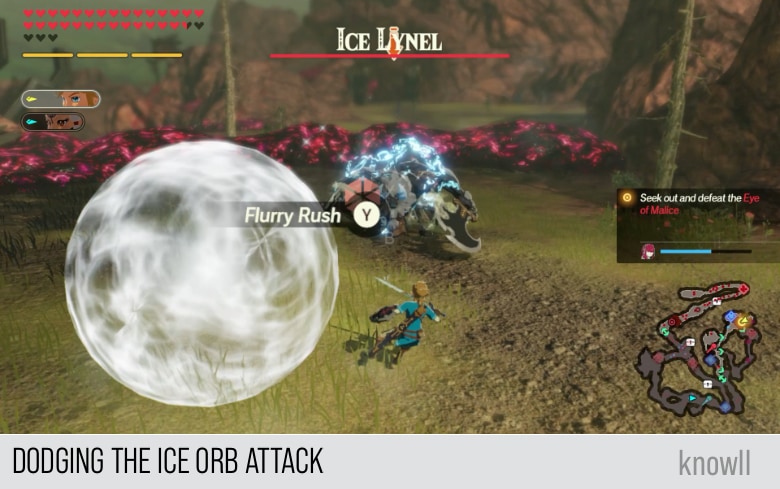
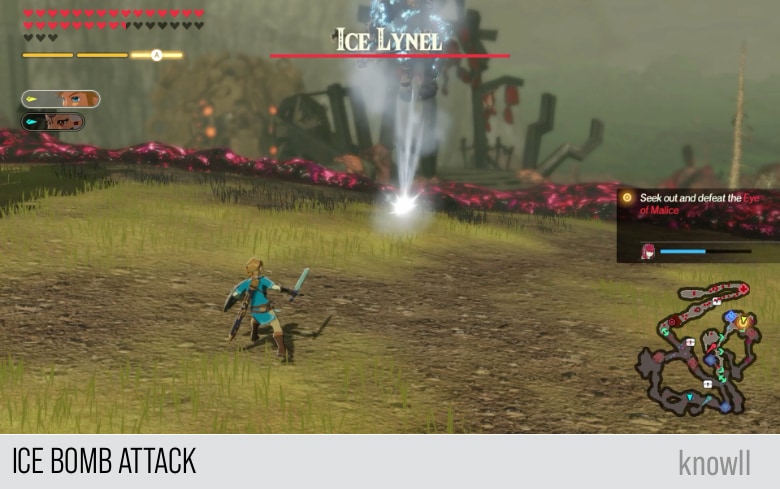
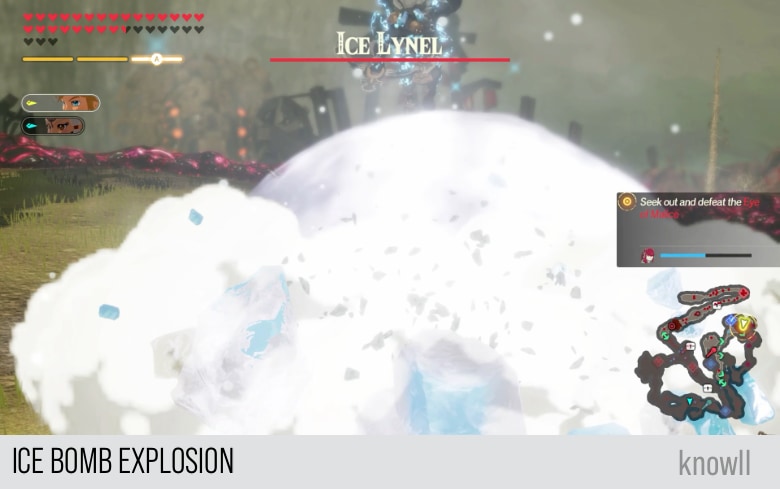
Ice Bomb Attack
Every Lynel has an attack where it jumps and shoots one or more arrows at you. The Ice Lynel uses an Ice Bomb that he aims at you while it is up in mid-air.
The ice bomb will then explode into a large sphere of freezing ice.
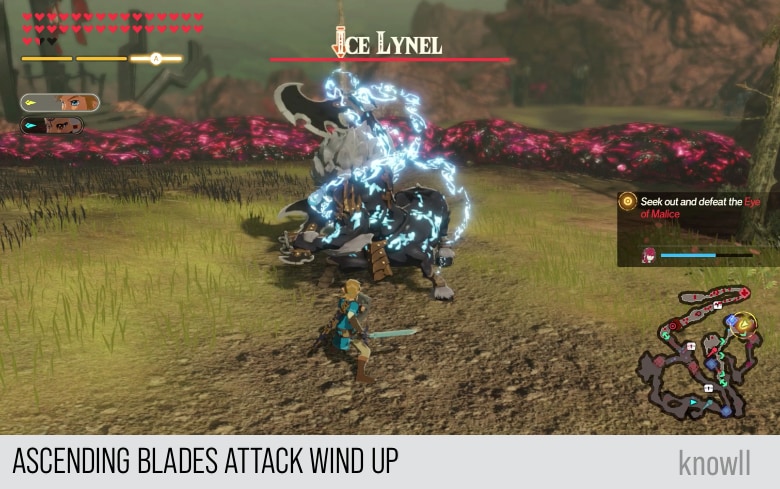
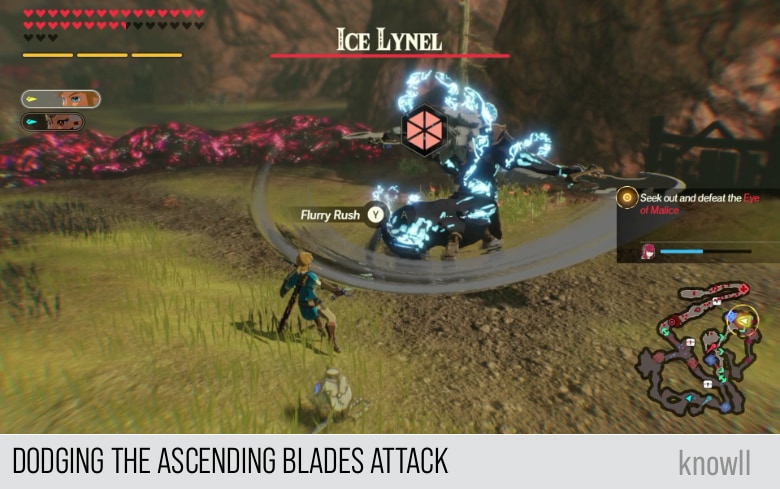
Ascending Blades Attack
The Ascending Blades is one of the most beautiful attacks in the whole game. This attack is unique to Lynels, who are dual-wielding swords.
It has two parts: the ascent attack and the slam attack.
Like all powerful attacks in the game, this one has a wind up. The Lynel first makes the pose below, where it gathers its strength and prepares its momentum.
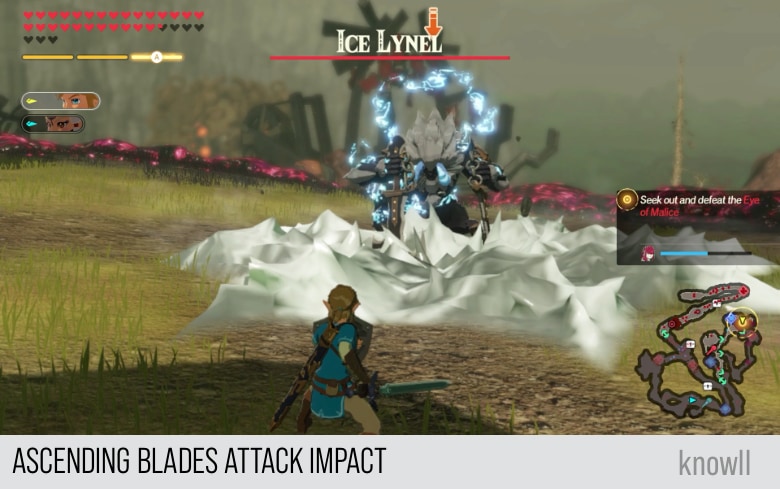
And then it will swing its two blades in 360 degrees, making it fly up in the air. Once it has reached a few meters up, it will reposition itself in midair, target you, and then slam its two blades on your position.
If you don't move or dodge, you will receive the full force of his attack, which causes an AOE, as shown below.
You can punish this attack while it's doing the first part of the combo, while it is ascending. You can dodge the ascent by doing a backflip dodge.
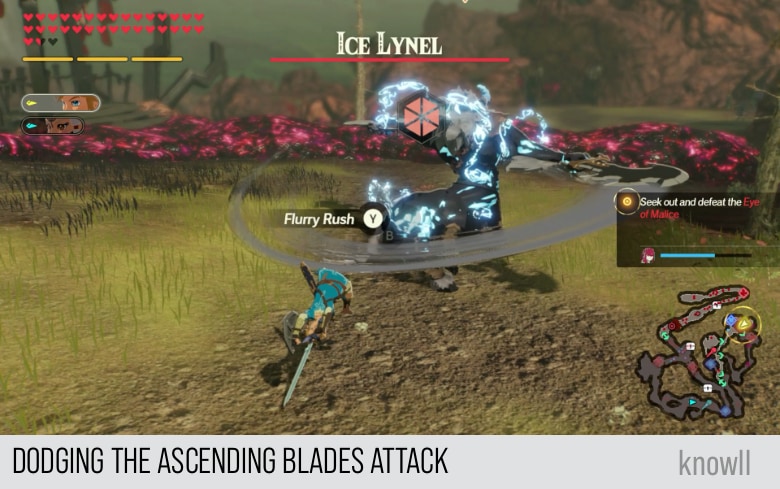
You can also gain a Flurry Rush by doing a side dodge, as shown below.
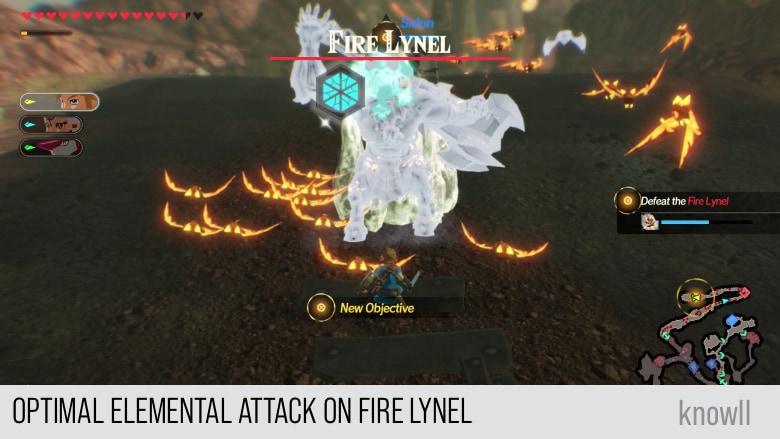
Fire Lynel
Like the Ice Lynel, you will first meet the Fire Lynel in the entry Water and Fire. This Lynel is always dual-wielding a Savage Crusher.
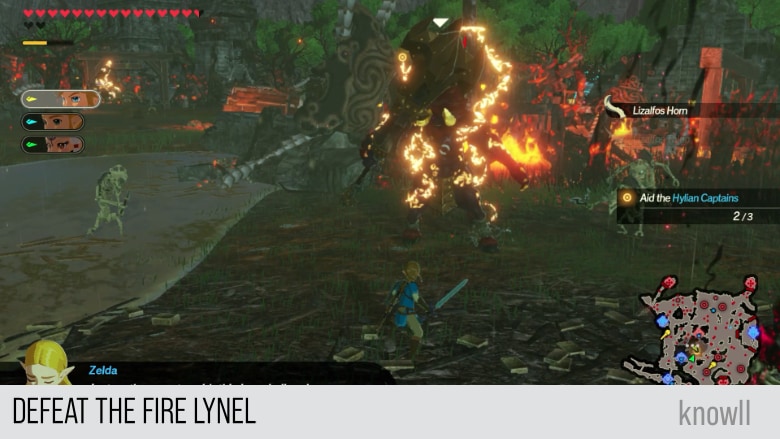
You can perform an optimal attack on this Lynel using the Ice Rod.
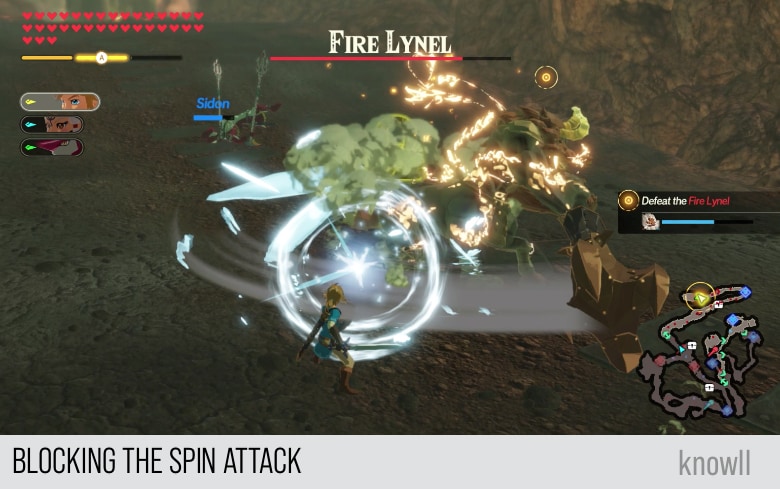
Spin Attack
The Spin Attack for Lynels is unique to those who are using a Two-Handed weapon. It does not gain an elemental attribute, though, unlike the Spear when handled by an Electric Lynel.
As this is a spinning attack, it shows a telegraph that you can counter with Stasis.
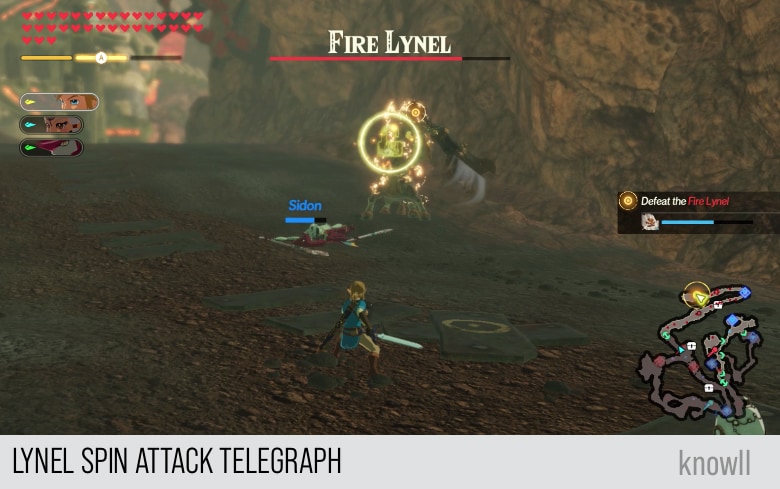
You can block this attack, but it will break your guard on the first hit. If the monster is still spinning after that, you will take damage.
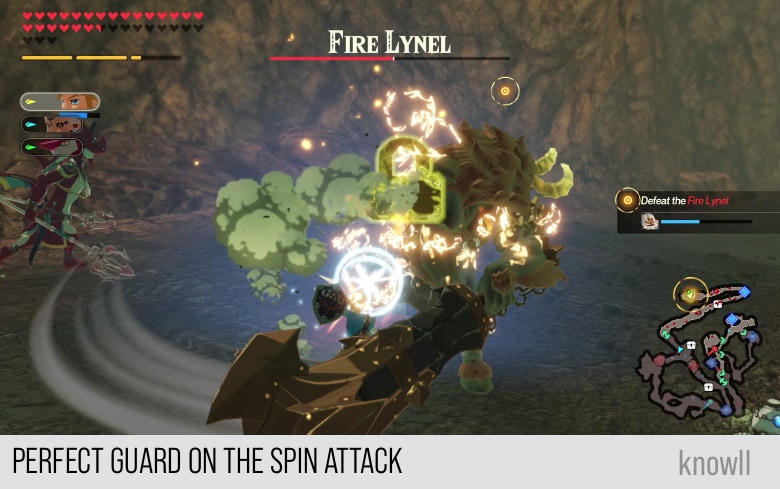
If you are confident and feeling lucky, you can do a perfect guard on the spin attack, which will cause the attack to get interrupted. This will leave the Lynel vulnerable for a brief moment.
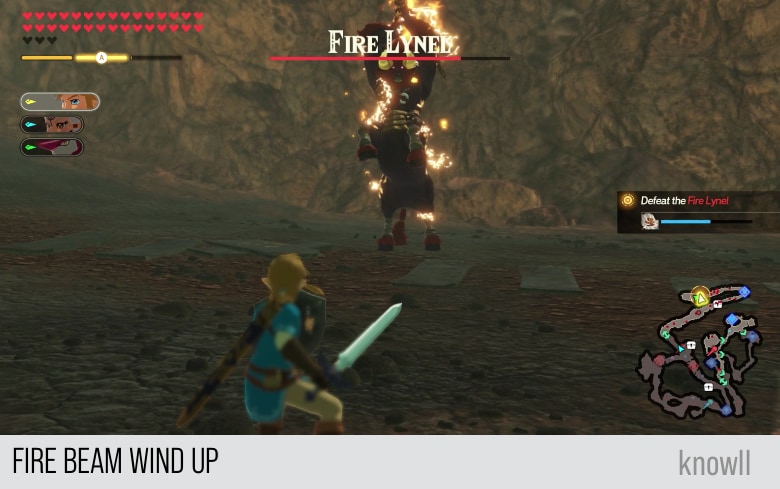
Fire Beam Attack
The Fire Beam attack is common among Fire elemental enemies, like the Fire Moblin and the Fire Hinox. They all have the Fire Beam.
In the Lynel's attack, the wind up shows when he raises his legs and positions the weapon as shown below. Once you see this, you know something highly damaging is coming.
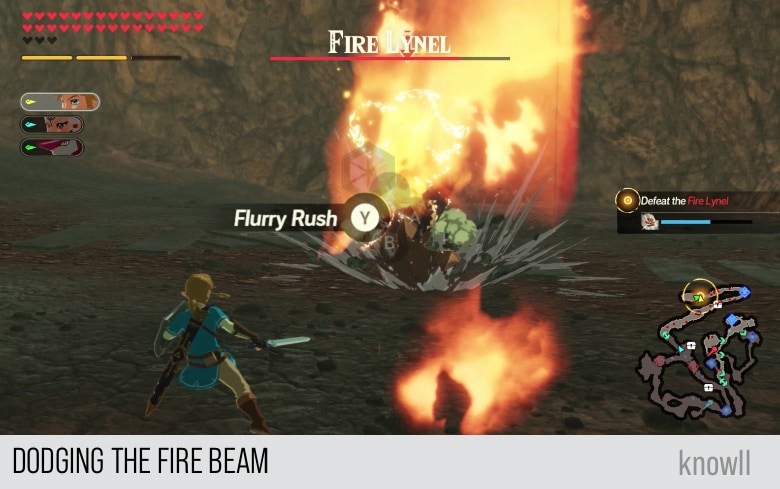
The Fire Beam gets emitted the moment the Lynel crusher hits the ground. The beam will approach and will cause damage and burning. You can easily avoid it by dodging to your side, as shown below.
Fire Orb Attack
The default projectile attack of Lynels is fire-based. With the Fire Lynel, the projectile becomes stronger and more explosive.
If you block this attack, it will break your guard and cause burning. This will leave you vulnerable to the next Fire Orb, as Lynels always emit three projectiles.
If you are confident, you can do a perfect guard on the Fire Orb, which will send it moving in a different direction. We do not suggest it, though, as there will be two more Fire Orbs flying your way. The best way to avoid this attack is by dodging to your side.

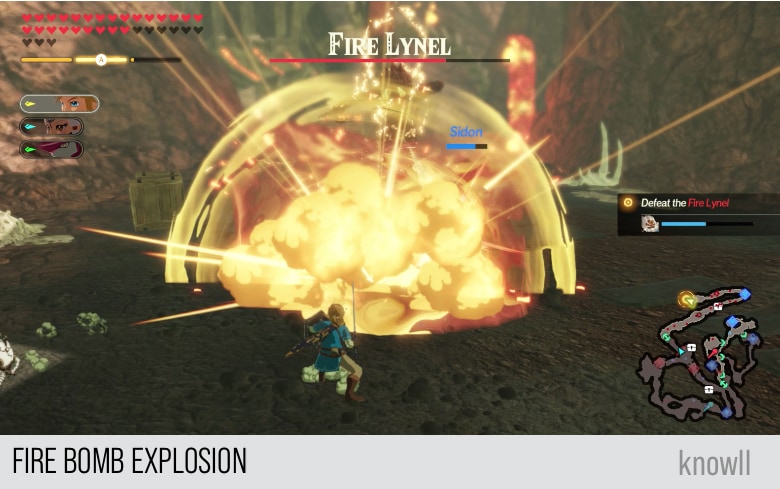
Fire Bomb Attack
Every Lynel has an attack where it jumps and shoots one or more arrows at you. The Fire Lynel uses a Fire Bomb that he aims at you while it is up in mid-air.
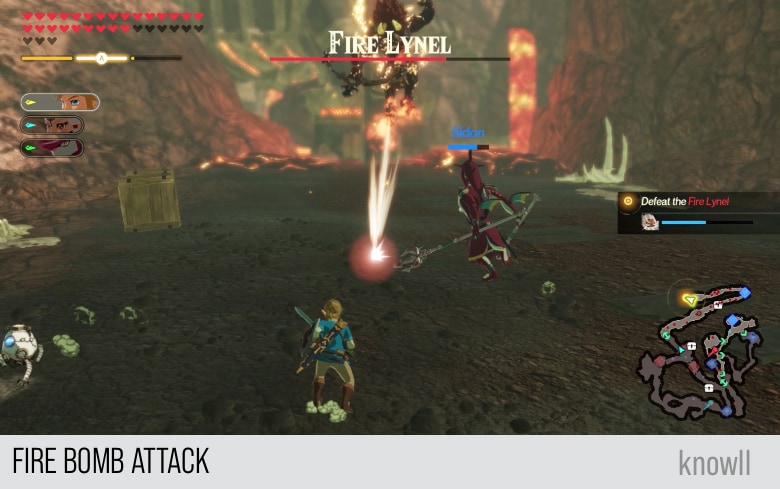
The Fire Bomb will then explode into a large burning sphere.
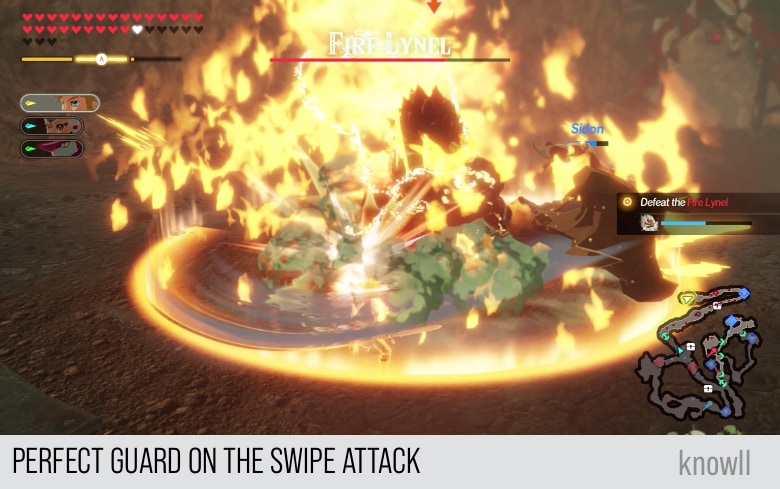
Fire Swipe Attack
This is one of the attacks of the Fire Lynel that gained an elemental attribute. In this attack, the Lynel swings his crusher in a 360 degrees arc.
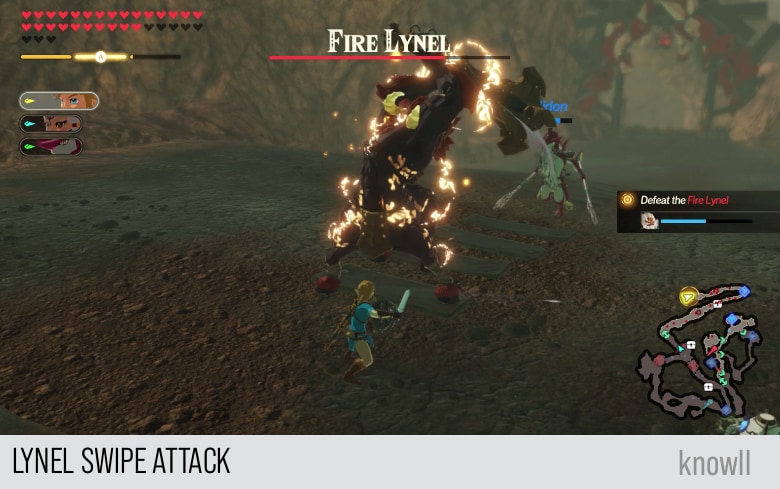
Near the end of the attack, the swipe will cause a large explosion, burning everything within the radius of the attack.
Though it's very risky, you can do a perfect guard on this swipe, as shown below.
It's easier to just do a backflip dodge and fish for a Flurry Rush.
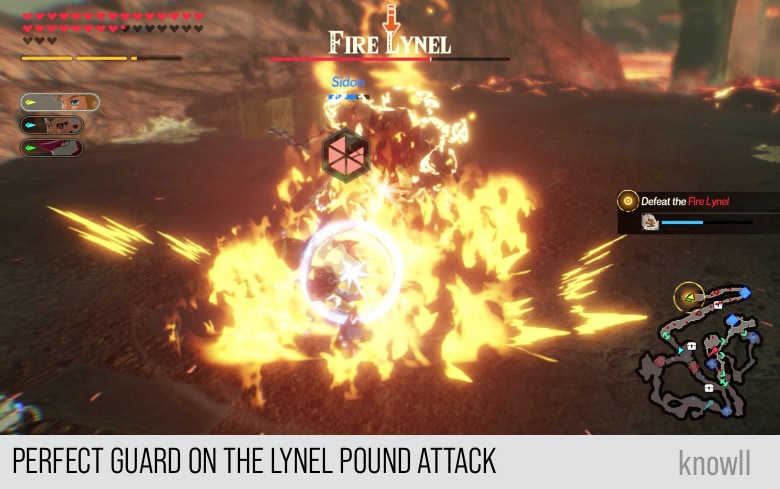
Fire Pound Attack
This is another attack that gained an elemental attribute. In this attack, the Lynel pounds the target multiple times using his crusher.
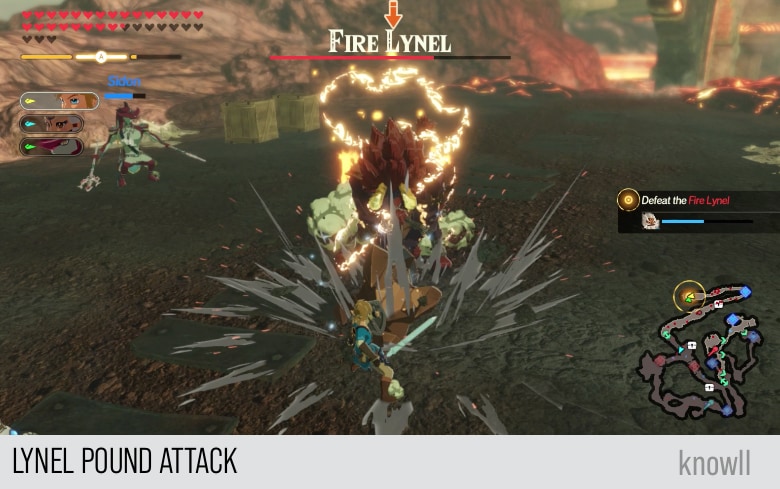
In the last part of the attack, the crusher will cause an explosion of fire, similar to the Swipe Attack.
If you are confident, you can do a perfect guard on the attack, which will interrupt it and stager the Lynel for a brief moment.
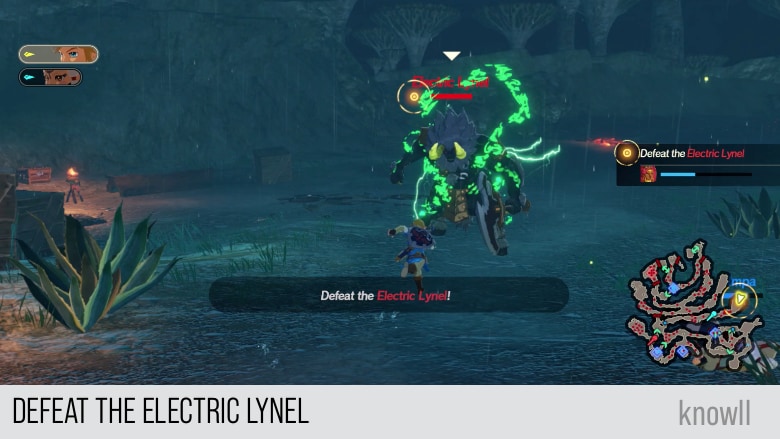
Electric Lynel
Unlike the Fire and Ice Lynels, the Electric Lynel does not have a default elemental weakness. You will first meet this monster in the entry Air and Lightning.
The Electric Lynel always uses a Savage Spear as a weapon.
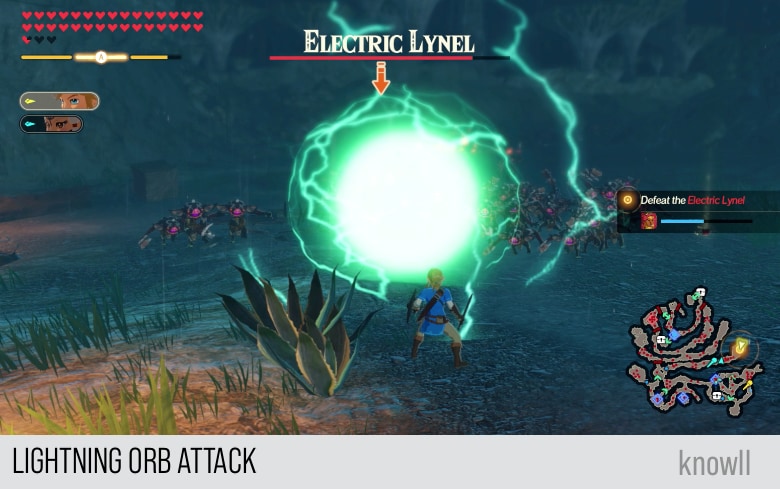
Lightning Orb Attack
The Electric Lynel uses a Lightning Orb instead of a Fire Orb. This will electrocute you if it hits.
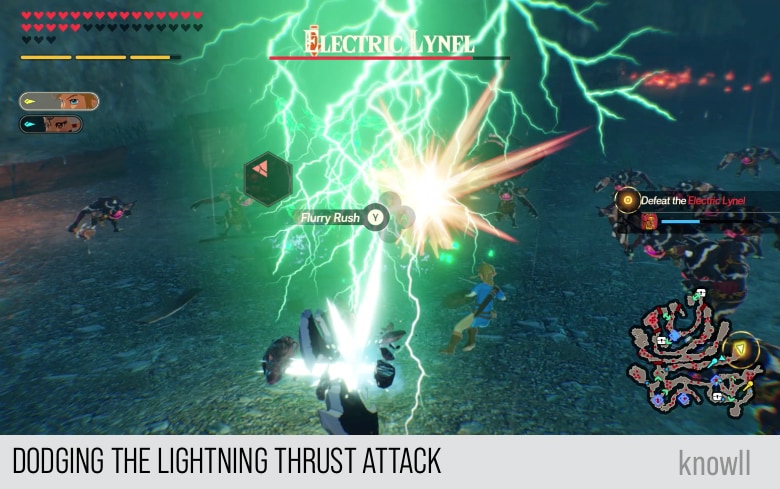
Lightning Thrust Attack
The Electric Lynel uses a three-move combo where the third part is a thrust that has an electric AOE, as shown below.

You can dodge this and get a Flurry Rush by backflipping, which is the easiest dodge of all.
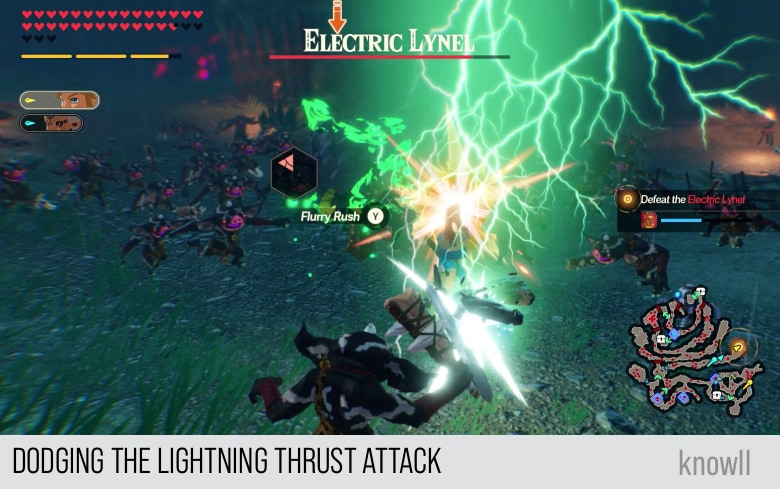
Alternatively, you can dodge by moving to the side and gain a Flurry Rush.
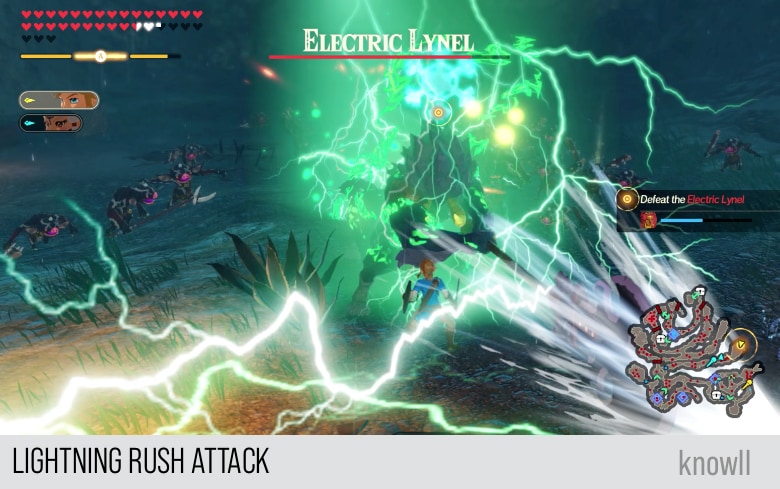
Lightning Rush Attack
All Lynels have a rush attack. The Electric Lynel gains a Lightning Rush where it emits an electric AOE in the last part of the attack. This will electrocute you once a spark hits you.
Lightning Smash Attack
This is an attack unique to the Electric Lynel. In the Lightning Smash, the Lynel jumps and then slams his spear in the ground, causing lightning circles to appear on the ground.
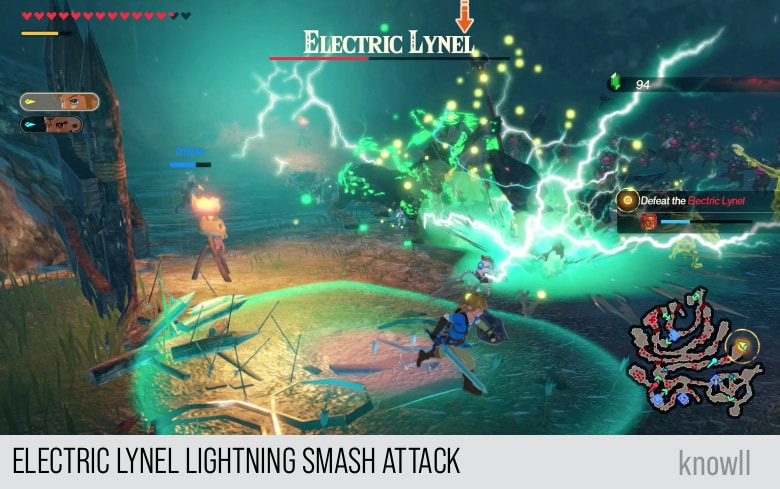
When the Lynel pulls his spear up, the circles will explode and electrocute anyone within them.
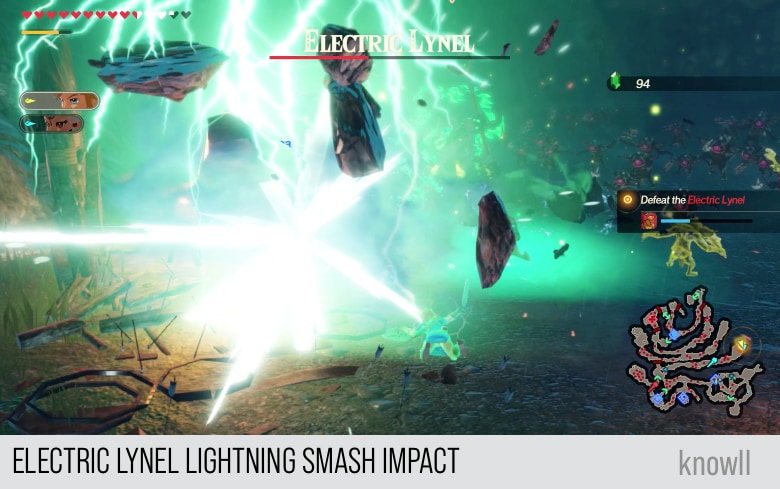
Note that the damage for getting hit by the initial slam is separate from the explosion of the circles later. You can get hit by both, making this one of the Electric Lynel's most powerful attacks.

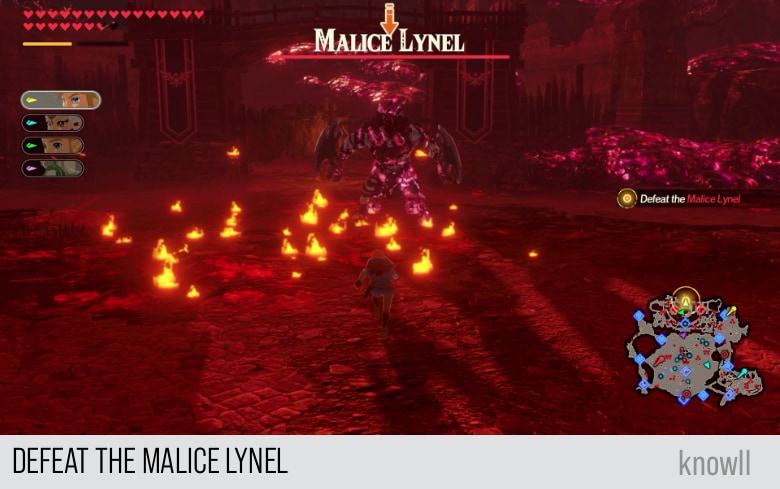
Malice Lynel
The last variety of the Lynel, the Malice Lynel, is similar to the Ice Lynel. They both wield the same weapons, and hence, have similar attacks.
You will first meet a Malice Lynel in All Hyrule United.
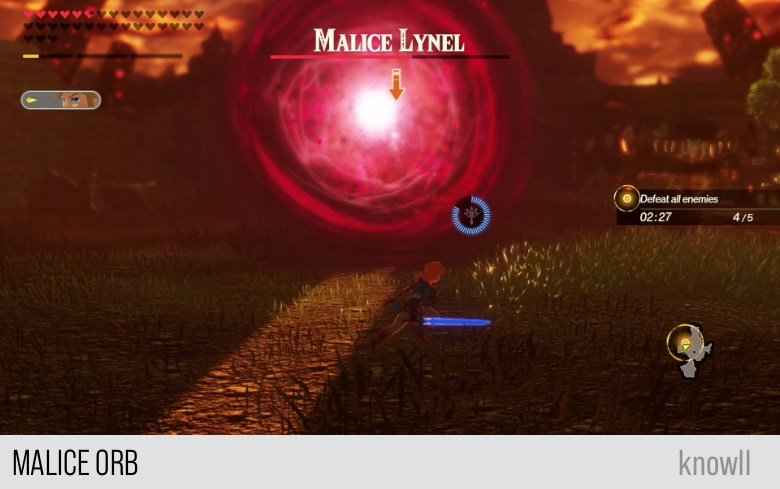
Malice Orb
One big difference between this Lynel and the Ice Lynel is with the Orb Attack. You will still see the telegraph with the icon of a bomb and can counter with the Remote Bomb.
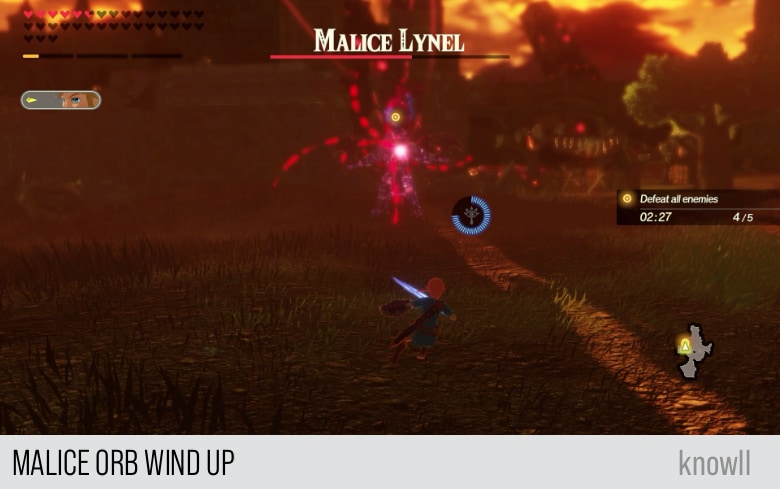
However, instead of producing three orb projectiles, it will just release one really huge Malice Orb.
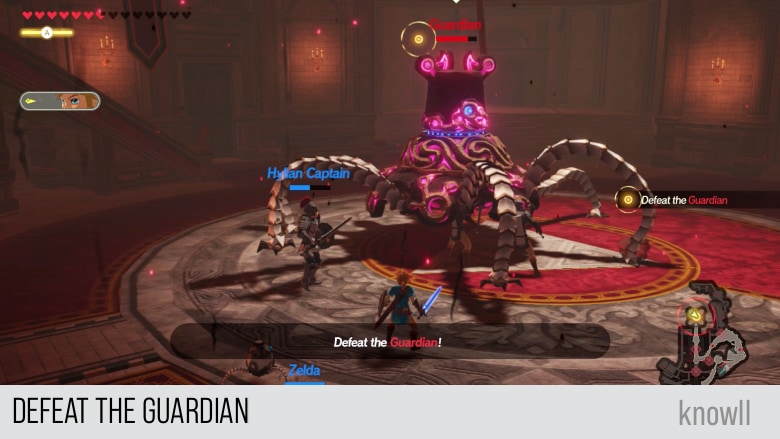
Guardian
Excluding the Lynels, which you don't really see much and are positioned in secluded areas, the Guardians are the most terrifying enemies in BOTW. And these strong enemies are everywhere, unlike the Lynels.
Like the rest of the enemies, the Guardians also got several improvements in AoC. They are the major enemies in the last chapters of the game.
You will first fight a Guardian in the entry Road to the Ancient Lab. This is a weakened Guardian, though, and its fight is scripted. You will first experience fighting a lot of Guardians in Calamity Strikes.
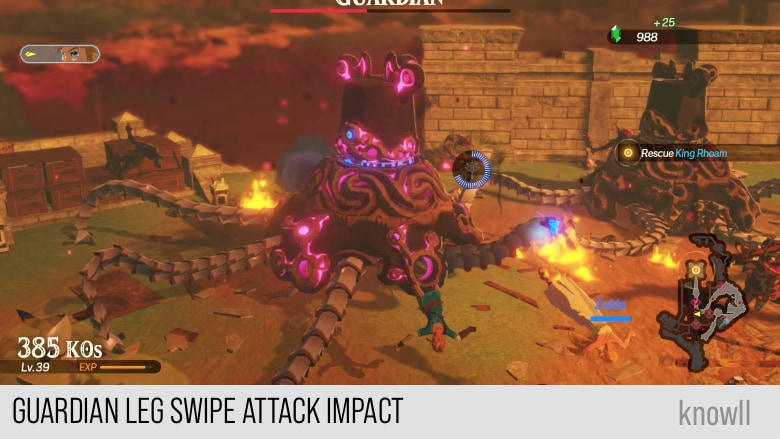
Leg Swipe Attack
This is one of the basic Guardian attacks. It moves one of its legs and then swipes you with it.
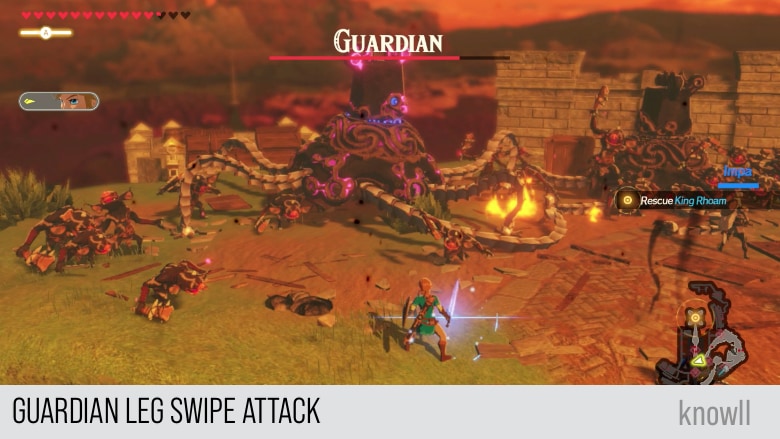
This will stop your attacks and throw your character.
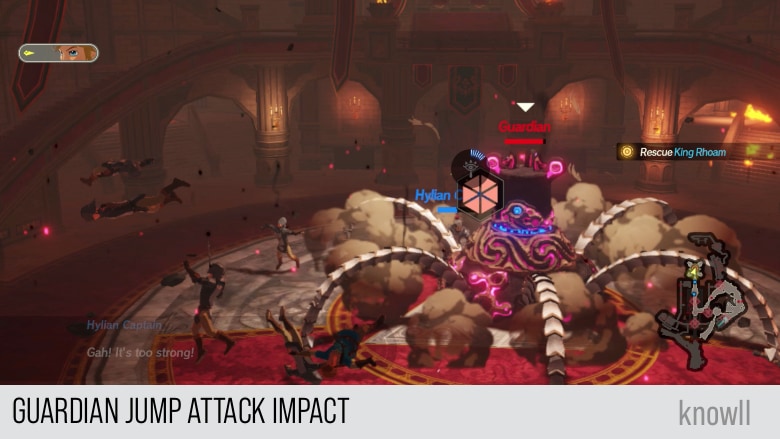
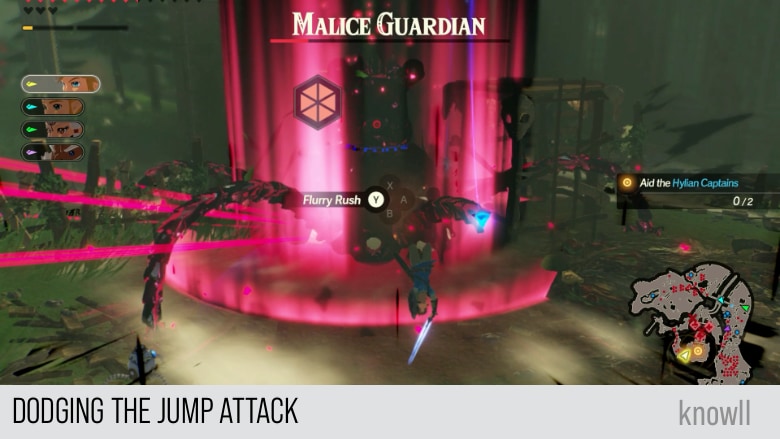
Jump Attack
The Jump Attack has a large telegraph. You will notice the Guardian raising itself before the attack actually happens.
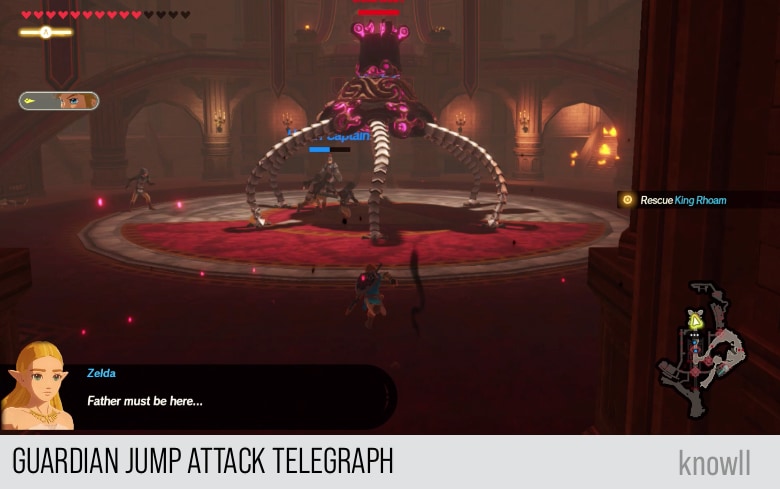
Once it is up, the Guardian will drop on you, causing damage and throwing your character.
By doing a backflip dodge, you might be able to fish for a Flurry Rush and punish the attack.
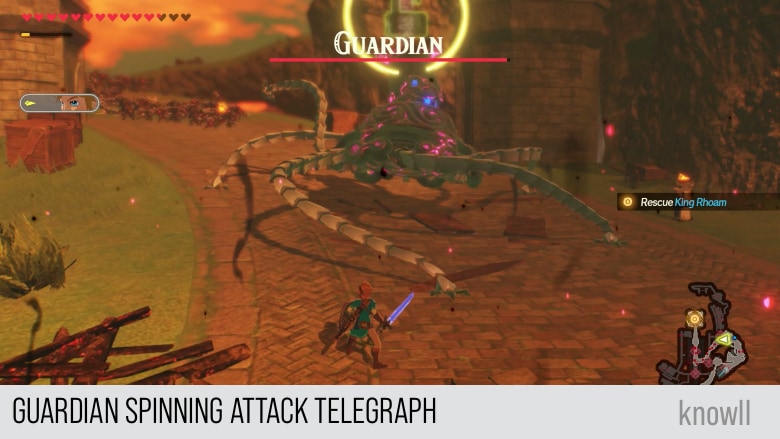
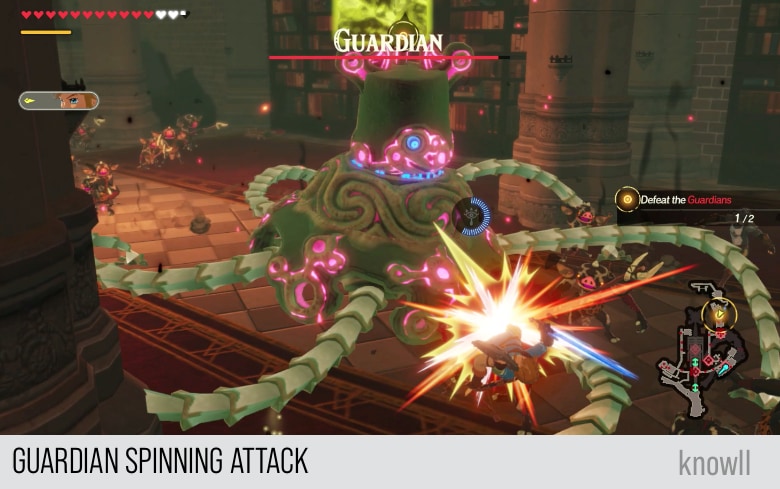
Spinning Attack
This is one of the powerful Guardian attacks. Like other powerful attacks, it has a telegraph. It will position its legs menacingly, as shown below. If you are going to counter, this is the best time. Counter it with a Statis.
If you fail to counter, dodge, or block, the Guardian will execute the attack and repeatedly hit you with its legs while spinning. This can easily remove more than two hearts from your life bar.
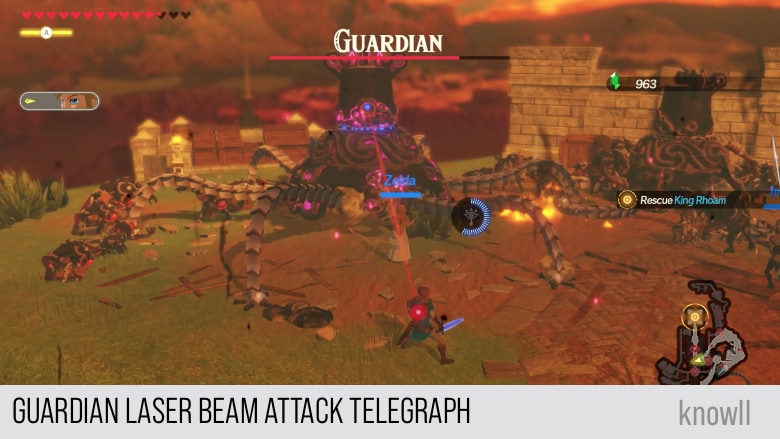
Laser Beam Attack
This is the most famous of all Guardian attacks and one of the most powerful in BOTW. It starts with a laser beam pointed at your character.
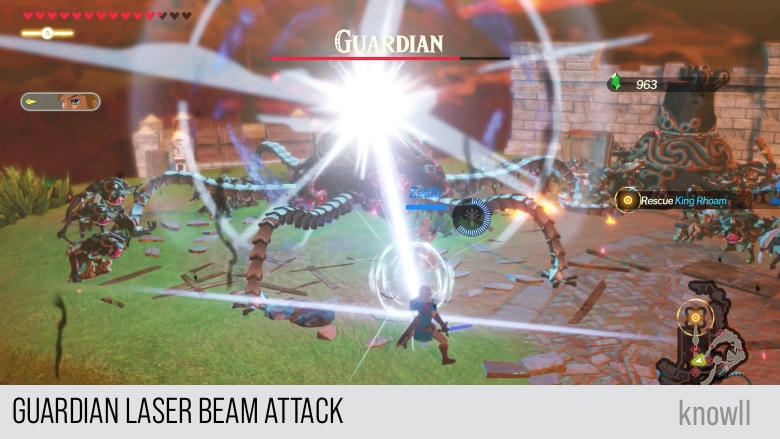
After that will be the actual attack, a large, powerful beam that will bring huge damage to your character.
With the Age of Calamity, you can reliably block this attack. However, for every attack, your guard will be broken. In other words, if there is another attack that comes immediately, you will receive its full damage.
Fire Guardian
Like in the case of Lynels, the elemental Guardians contribute a lot to the engaging combat mechanics of the game. They give you more attacks to be wary of as well as new means to defeat them.
You will first meet a Fire Guardian in the entry Relentless as a Waterfall.
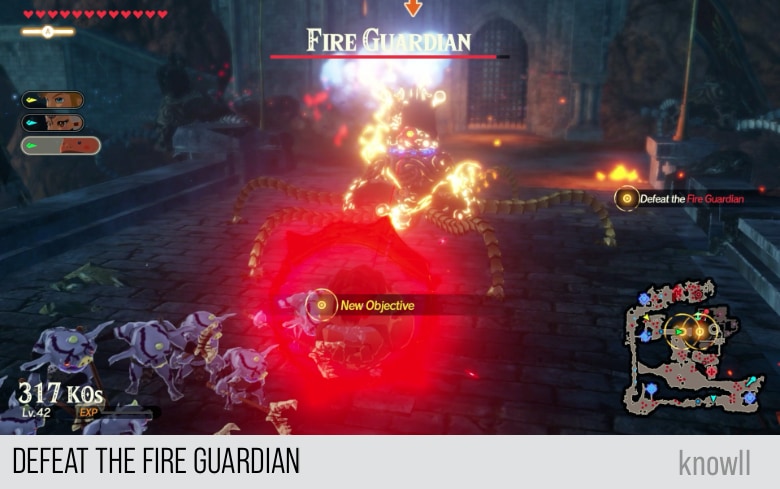
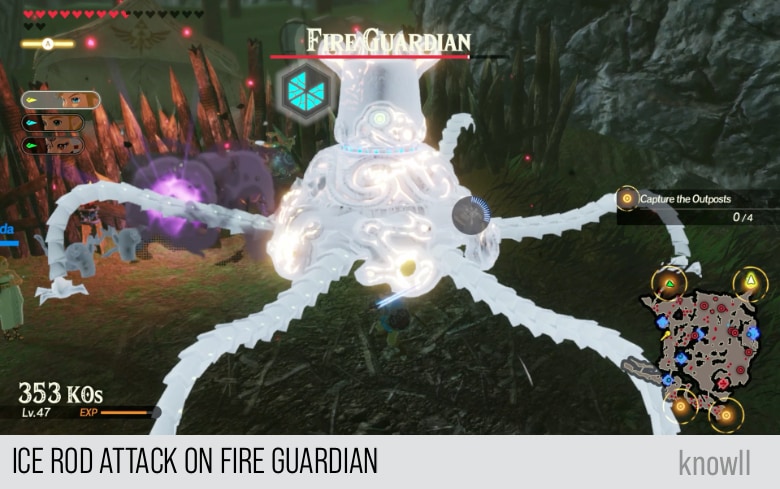
Being a fire elemental, this Guardian is naturally weak to the Ice rod. Hence, it will produce an optimal elemental attack and cause the Guardian's WPG to be easily cleared.
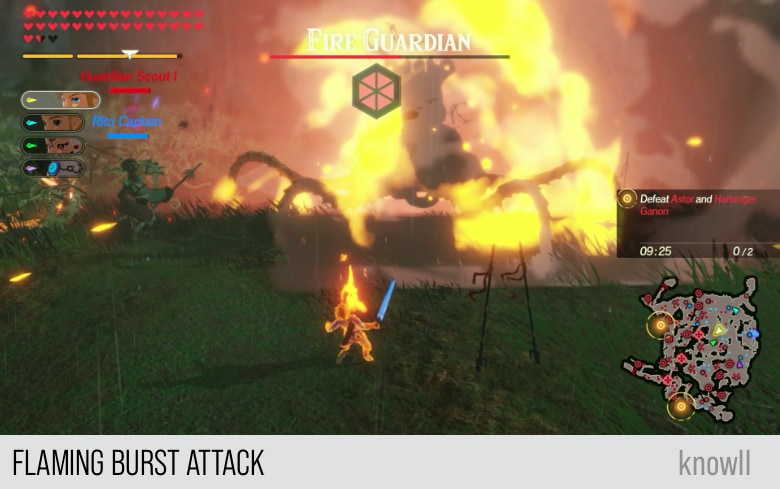
Flaming Burst Attack
All the elemental Guardians will have an elemental AOE after their strong attacks. The Fire Guardians do the Flaming Burst, which burns and damages the target.
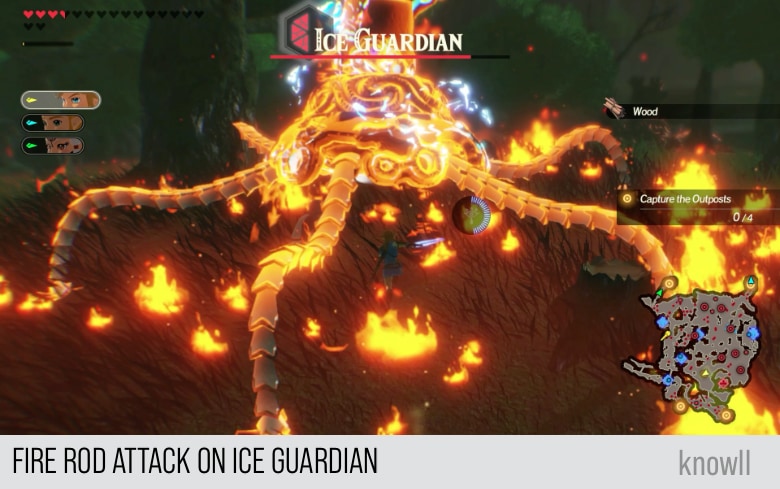
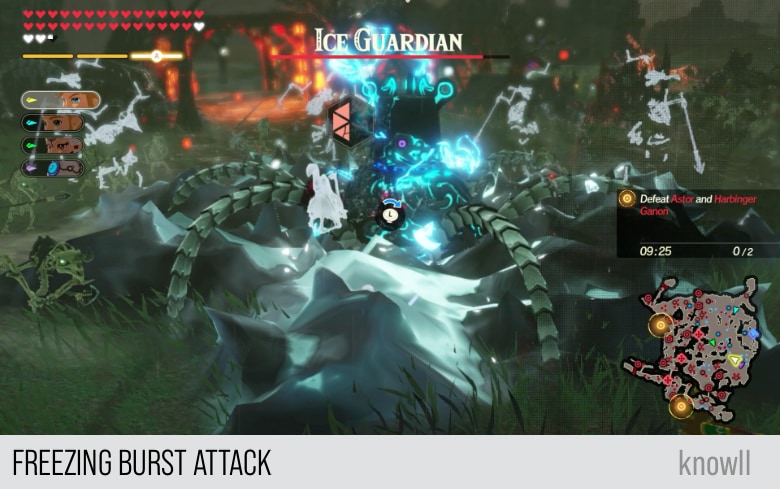
Ice Guardian
You will first meet an Ice Guardian in the entry Each Step Like Thunder. Use the Fire Rod on the Ice Guardian will produce an optimal elemental attack.
Freezing Burst Attack
Similar to the Fire Guardian, the Ice Guardian creates an elemental AOE after its strong attacks. It produces a Freezing Burst, which damages and freezes the targets hit.
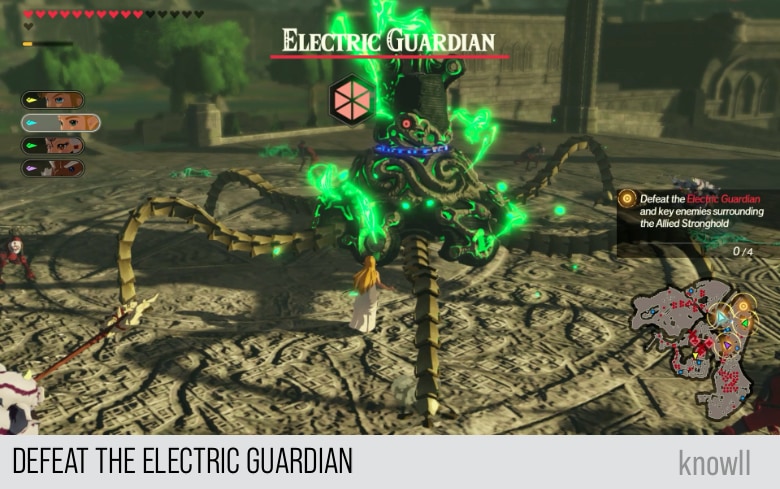
Electric Guardian
Like the Electric Lynel, the Electric Guardian is the only elemental Guardian without a default weakness. However, by using the environment, you might still be able to produce an optimal attack on it.
You will first meet an Electric Guardian in Each Step Like Thunder.
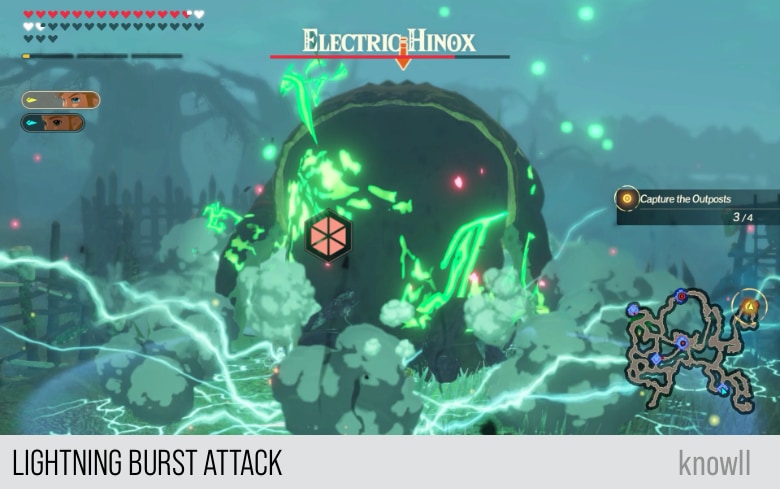
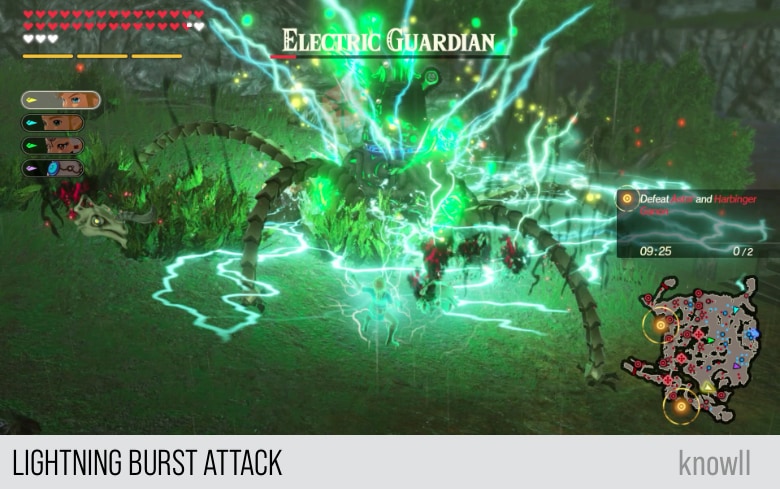
Lightning Burst Attack
The Electric Guardian produces the Lightning Burst after its every strong attack. This will damage and electrocute any targets hit.
Note that this is a high damaging attack, capable of removing more than 4 full hearts on a maxed level 100 character.
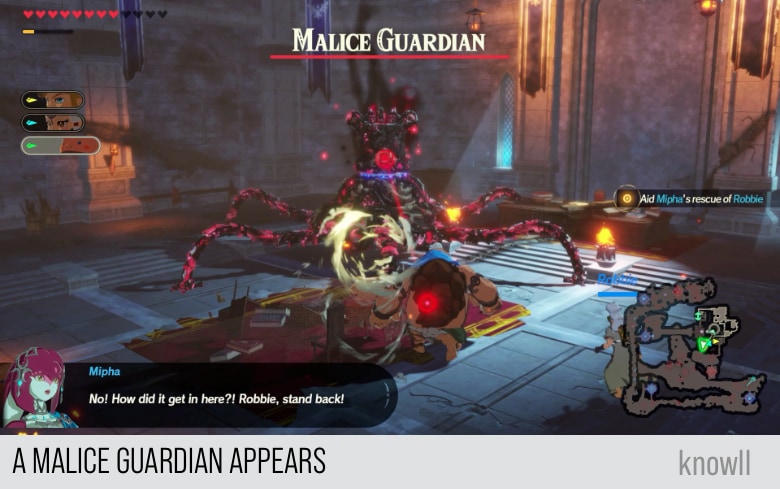
Malice Guardian
The last variety and the strongest one is the Malice Guardian. For a start, this Guardian does not have any elemental weaknesses, and its health and damage are higher than those of the non-elemental Guardians.
You will first meet the Malice Guardian in the entry Relentless as a Waterfall.
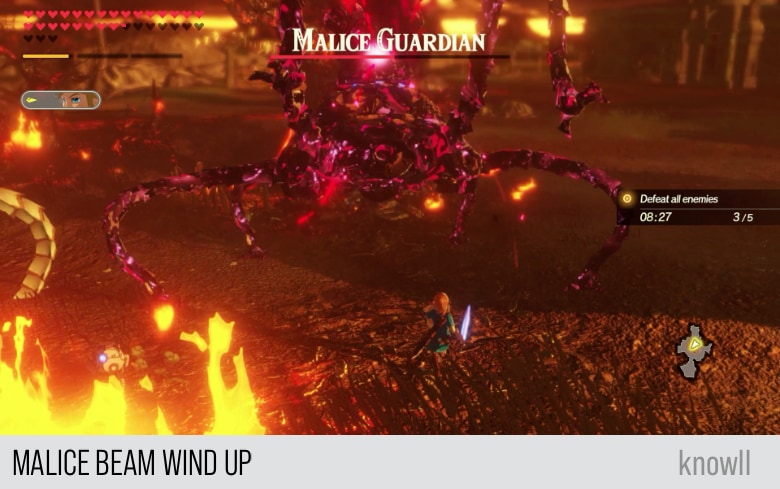
Malice Beam Attack
This is one surprising addition to the Malice Guardian. In the wind up of this attack, the Guardian poses like a spider about to pounce on its prey. However, instead of making a melee attack as expected from its pose, it produces a ranged attack instead.
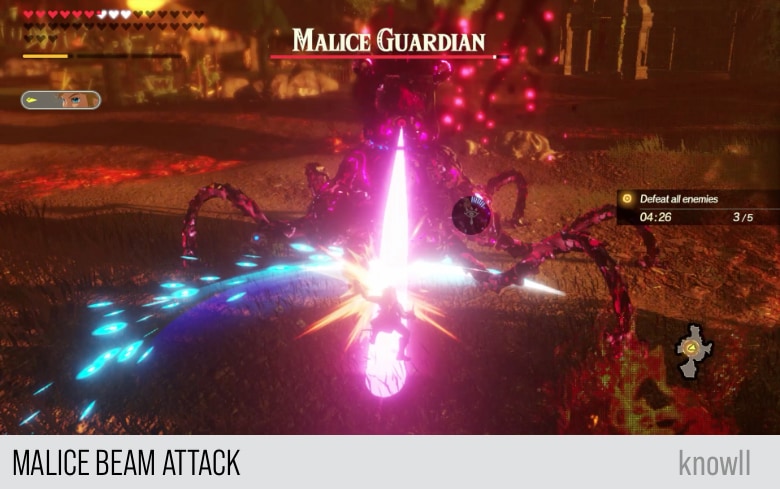
Immediately after the Malice Guardian does the pouncing pose, it will blast the target with a Malice Beam. It is visually different from the Laser Beam of the non-elemental Guardians.
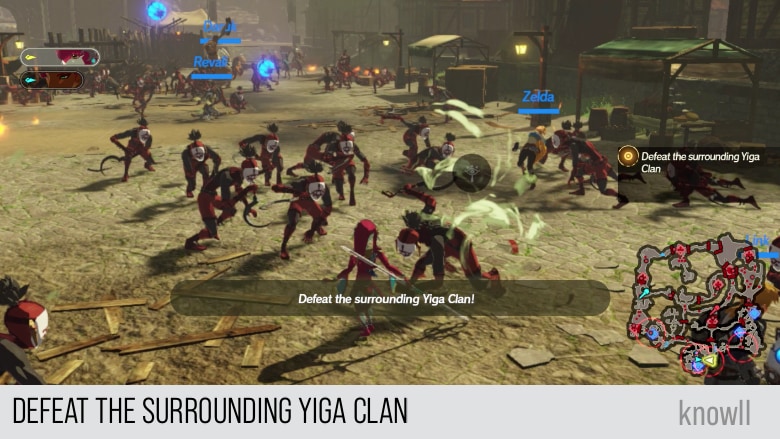
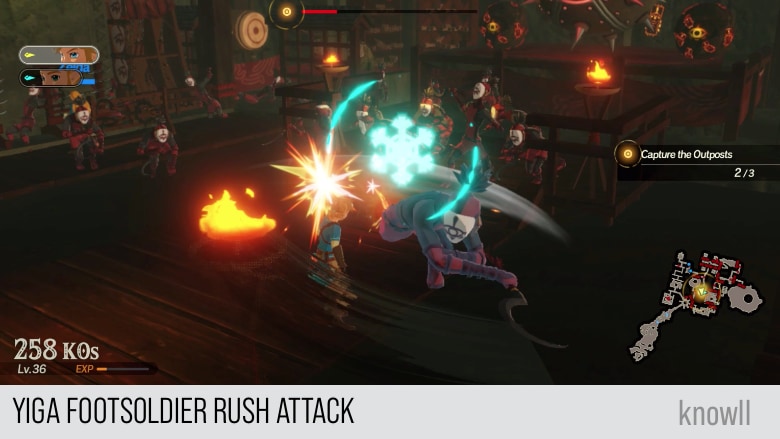
Yiga Footsoldier
Similar to the Bokoblins, the Yiga Footsoldier got nerfed on their aggressiveness. They attack less often and more like minions to be defeated by the dozens.
You will first meet these enemies in Urbosa, the Gerudo Chief.
Teleport Attack
Their miniboss version is a different case, though. Again, like in the case of the Bokoblins, the miniboss Footsoldier is larger and can be locked-on.
Their favorite move is the Teleport Attack, where they disappear and then immediately appear somewhere with a melee attack.

Rush Attack
The Footsoldier's Rush Attack is fast, and the best time to counter it is when it begins its telegraph. You will use the Cryonis to create ice pillars to punish the attack.
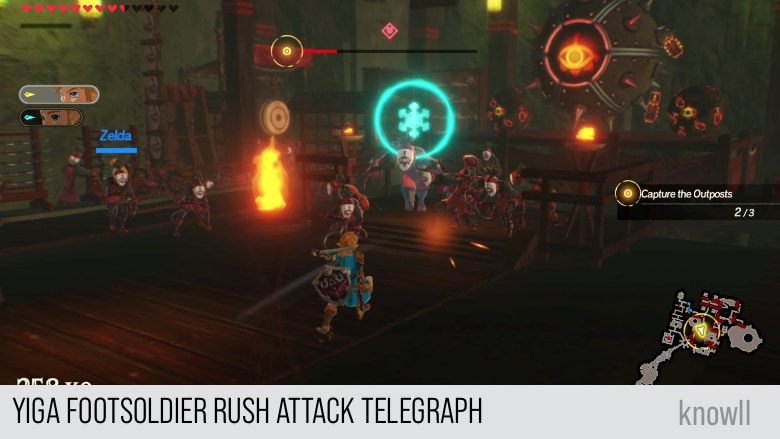
If you miss the counter, you most probably will get hit as this attack truly fast.
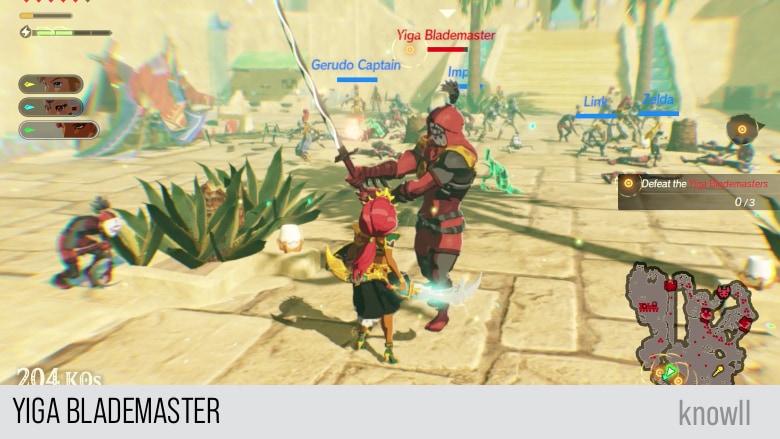
Yiga Blademaster
The Yiga Blademaster is the default miniboss version of the Yiga Footsoldier. It is equivalent to the Moblin if we consider the Footsoldiers as the Bokoblins.
You will first meet these enemies in Urbosa, the Gerudo Chief.
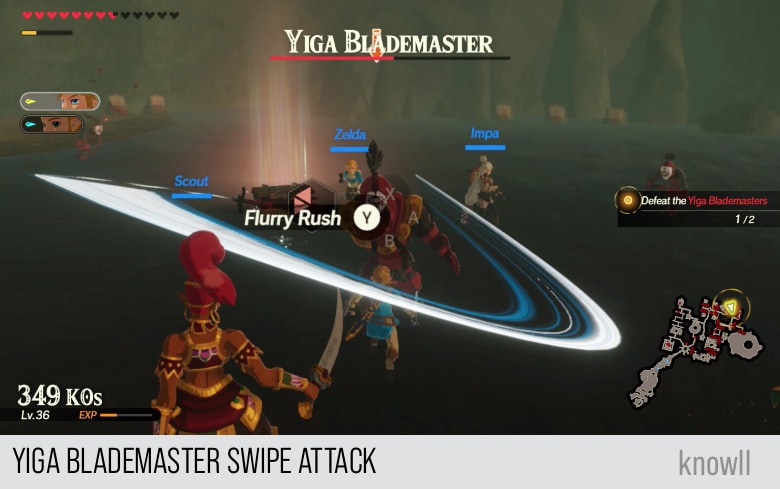
Swipe Attack
The Swipe Attack is a common melee attack of the Blademaster. As it is fast and has almost no wind up, it's damage is weak as well.
Sword Beam Attack
The first thing you will notice with the Yiga Blademasters is an attack that takes them a lot of time to execute, as it has an extreme wind up. This is a sign, though, of the attack's power.
This is the Sword Beam attack. If it hits you, it can remove three-fourths to one full heart in your character. It is a powerful attack.
Also, it does not matter if it hits you in melee distance or range; it has the same damage. No wonder it takes a long wind up. It means you really have to avoid it.
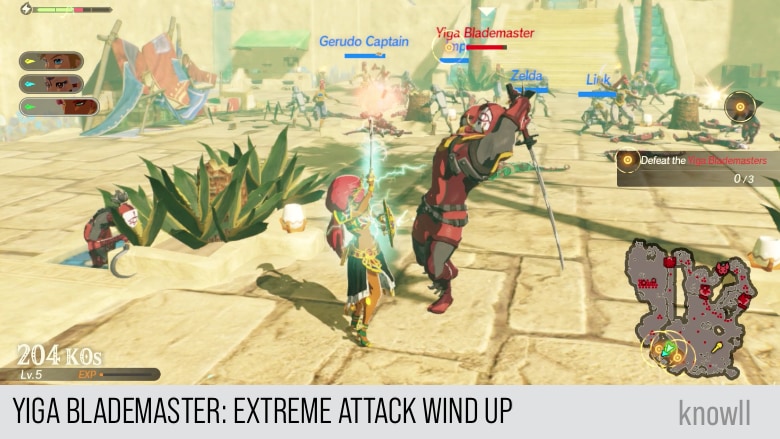
No matter the distance, the damage of this attack is the same. So, avoid it by dodging to your sides, not backward.
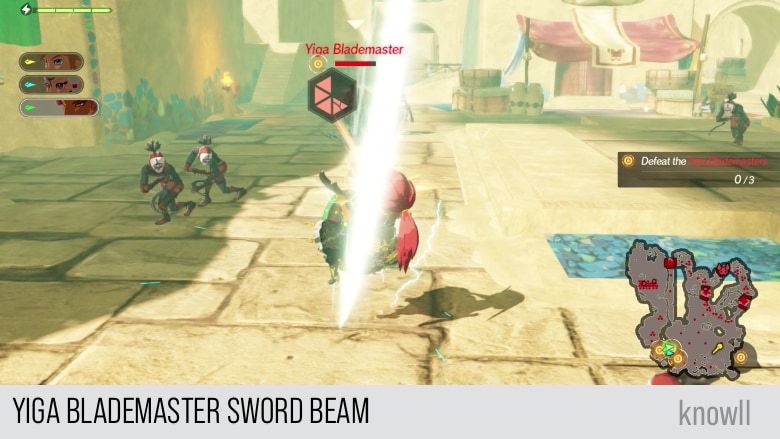
As this attack moves in a straight line, it's easier to dodge it by moving to the side rather than using a backflip. This way, you can punish it and Flurry Rush the Blademaster.

Earth Pillar Attack
This is another interesting attack, as it is one of the few attacks in the game that tracks you. It has an active tracking that will easily hit you if you don't dodge continuously until it dissipates.
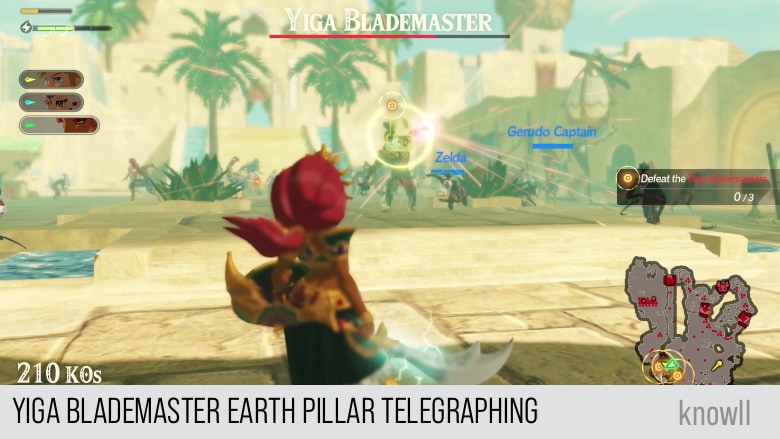
Once the attack gets released, don't stop dodging until it gets exhausted.
![]()
Teleportation Attack
This attack can be punished, but only if you become familiar with it. The Yiga Blademaster will give the telegraph similar to the below image. He raises his hand as if about to throw something on the ground.

After that hand signal, the next time the Yiga Blademaster appears, it will be immediately an attack, so dodge it. You know it will teleport, and it will attack once it appears, so don't just stand still, but move. You will definitely avoid it by just walking. Then you can punish the attack as it caused the WPG to appear after teleporting.
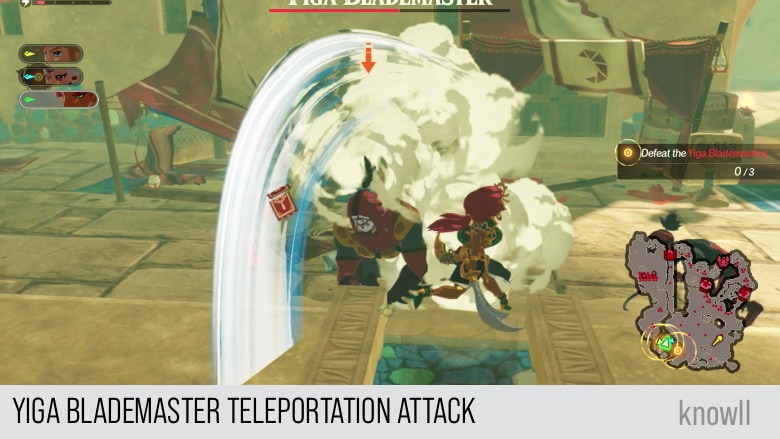
Instead of just moving or walking, dodge once the Blademaster appears, and you might be able to get a Flurry Rush and punish his attack.

View our Bosses Guide to learn about the strongest enemies in the game.