

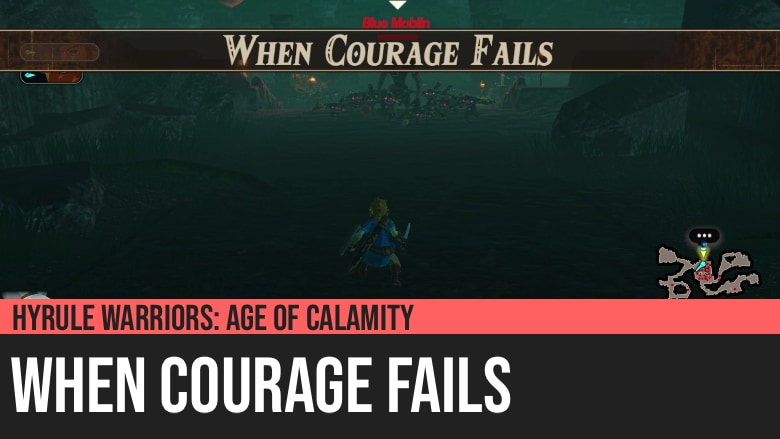
Hyrule Warriors: Age of Calamity - When Courage Fails
Hyrule Warriors: Age of Calamity - When Courage Fails is the third part of Chapter 4 of the game. While Zelda is focused on spiritual training at the Spring of Courage, a horde of monster suddenly attacks. Link and the others must protect Zelda and escape back to Hyrule Castle.
This Chapter entry gives you the first Blue Hinox that you can fight in the game. Also, it has a part where you will have an almost unlimited number of Moblins that can spawn, one after another. Most of the enemies in this entry will be electric type.
Treasure Chests and Koroks
- 5 Koroks
- 8 Treasure Chests
Battlefield-Specific Materials
- Sanke Carp
- Bladed Rhino Beetle
- Cold Darner
- Thunderwing Butterfly
- Razorclaw Crab
Special Rewards

The Calamity Revealed
As analysis of the little Guardian from the future continues, it is discovered that the date of Calamity Ganon's revival is also that of Zelda's 17th birthday. With little time remaining, the king impresses upon Zelda the need for her to focus on her training and awaken her powers.

King Rhoam: Are you certain of this?
Impa: Yes.
King Rhoam: Zelda's next birthday... will mark the date of Calamity Ganon's return.
Impa: Yes. That is what the images we recovered indicate, at least.
King Rhoam: Time has run out, then.
King Rhoam: Zelda. You and the knights will travel to the Spring of Courage. No matter what it takes, you must awaken your power before the Calamity returns.
Zelda: Understood.
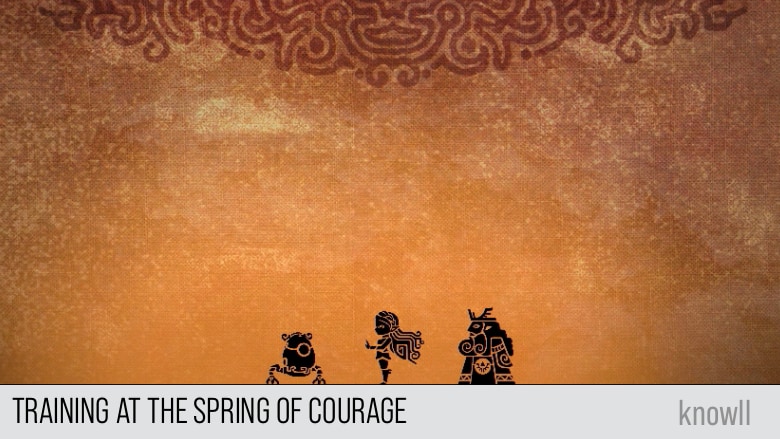
Training at the Spring of Courage
Records derived from the friendly Guardian indicated that Calamity Ganon would return on Zelda's 17th birthday. Desperate to preempt this grim future, King Rhoam ordered his daughter to train at the Spring of Courage.
The king, Princess Zelda, and every living being in Hyrule could sense the thunderous footsteps of a looming scourge.
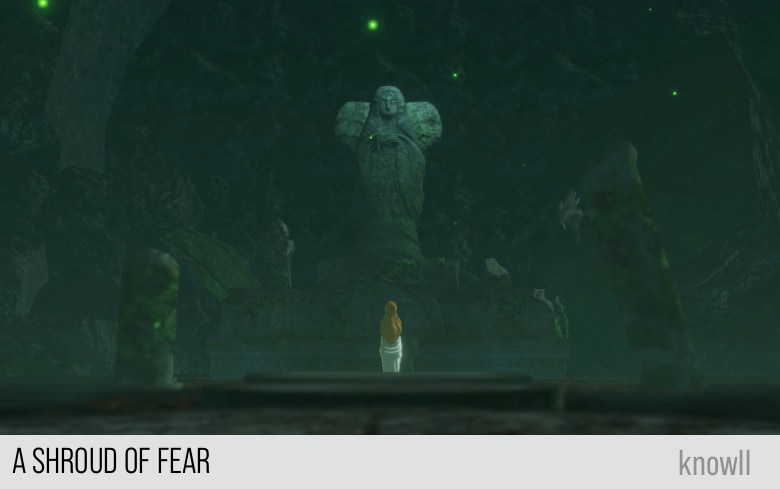
A Shroud of Fear
Knowing there is no going back, Zelda attempts to muster her conviction and motivate herself to move forward. The others can do nothing but watch as she frets over the chance that she will fail. Suddenly, a swarm of monsters attack.
Zelda: I will do whatever I can, as I am right now. Even if all I have to give is my faith that things will work out. This is the thread that I have been following all this time.
Zelda: Even so...
Zelda: All of the research into the relics - if I cannot awaken to my power - will have been in vain. Everyone else... is carrying out their duties with such grace.
Zelda: I am the only one... who cannot live up... to her own potential...
Impa tries to intervene while Zelda is praying.
Impa: Princess Zelda...
Deciding if she will go for it or not, Impa continued.
Impa: Why not... Let's go take a break somewhere! I've gotten really... Uh... Suddenly I'm really hungry!
Zelda: Impa... There's just... no more time.
Their conversation got cut when Link alerted them of the monsters approaching.
Impa: Monsters? Here? Hmm. In any case, all we can do is push them back.
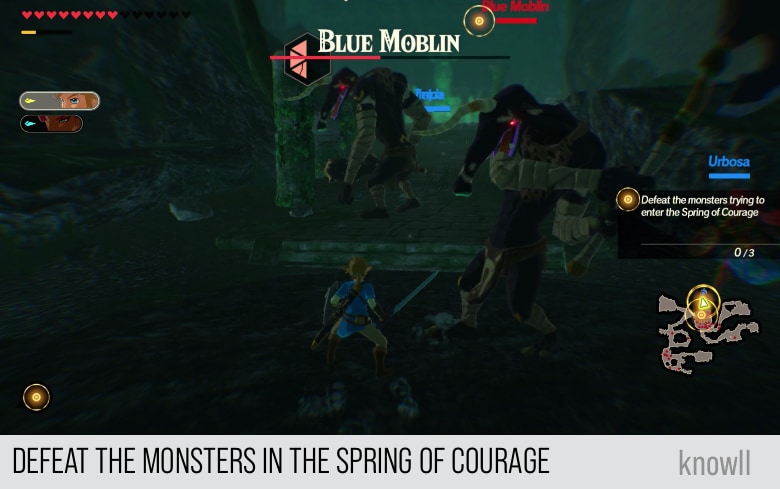
Objective: Defeat the Monsters trying to Enter the Spring of Courage
This Chapter entry begins with urgent action. Go ahead and clear the enemies trying to enter the shrine.
Zelda: I will fight too. I will be an asset rather than a hindrance.
Impa: Princess, you must be exhausted from training. Please, do not overburden yourself!
Zelda is exhausted from training!
This Chapter entry is similar to Freeing Korok Forest, where you had to be a bodyguard and protect Hestu, while he brings you to the center of the forest.
In this entry, Zelda will not be able to fight, and you will be her source of protection.
After defeating the first batch of monsters, a second one will appear.
The monster hordes have appeared!
Zelda: The monsters keep coming! Everyone, stay focused. Don't worry about me.
Impa: Princess, I appreciate your valor, but if things get bad, save yourself. Can you promise me that?
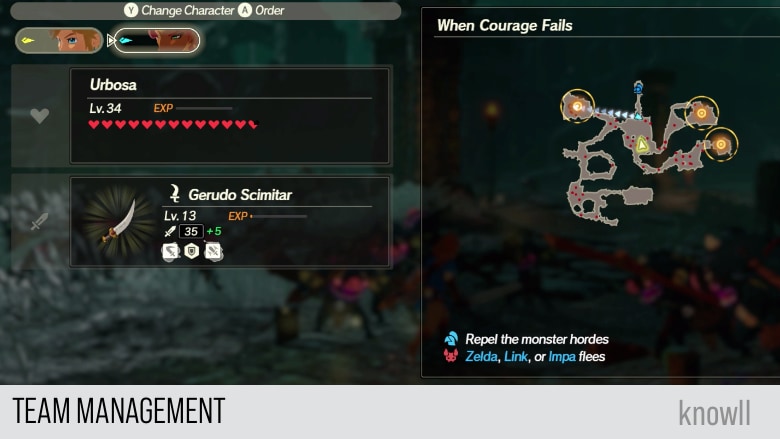
Impa: Monsters are attacking from multiple outposts. Let's split up and capture them.
Objective: Capture the Outposts
As Impa suggested, it's best to manage your team. There are three outposts in total. You can send your other character to another outpost, so you can do combat while the other is moving.
While moving to the outposts, try to clear as many monsters as you can. You will find out later that Zelda will not move forward if there are monsters in front of her. That will slow your quest completion.
After clearing the first outpost, you will get this comment from Zelda.
Zelda: Link, Impa, everyone... They're all fighting so valiantly for me, while I...
After clearing two outposts, Impa says:
Impa: I refuse to fall here!
After all the outposts are captured, another monster will appear in Zelda's location.
Impa: That should put an end to the monster incursions. That means it's time...
The Electric Moblin appeared close to Zelda!
Zelda: Monsters? Here? I wonder if they snuck through the fog...
Impa: Monsters near the princess?! We must return at once!
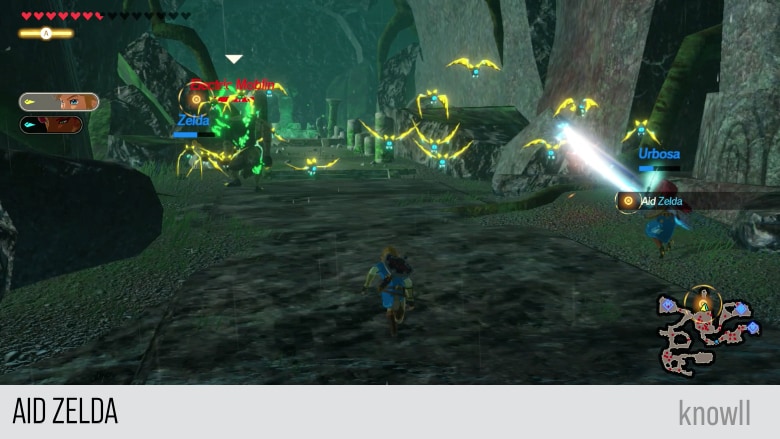
Objective: Aid Zelda
Go ahead and run towards Zelda's location. You will find the Moblin has breached the shrine's entrance.
Impa: Princess! Are you well?
Zelda: Yes. I'm fine.
Impa: What a relief! Now, please don't fret. We'll make quick work of those foul monsters.
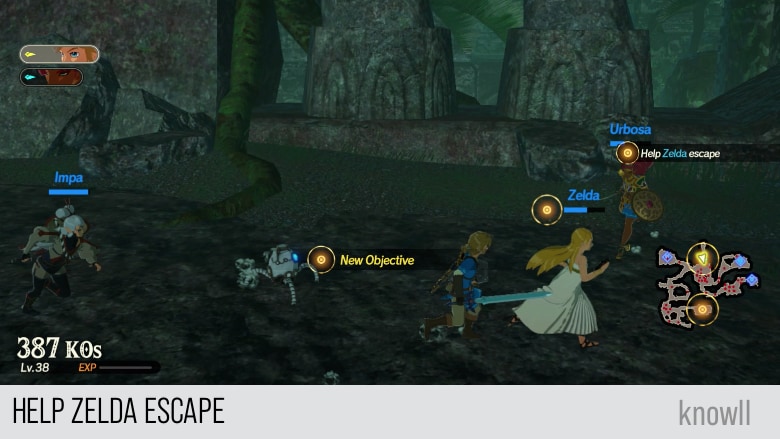
Objective: Help Zelda Escape
After defeating the monsters, the party can continue on their escape.
Impa: Finally, the monster incursions have quieted.
Zelda: Thank you, everyone. Let's return to the castle while we still can.
Zelda: I was... not successful, and we are not safe here. Let us make haste.
Leave the Deep Forest and return to Hyrule Castle
As shared earlier, you must kill any monster in front of Zelda. Otherwise, she will not progress the quest. It's best if you move ahead in advance, killing all the monsters in the path.
The monster hordes have appeared!
Zelda: Monsters are coming from both the north and the south. Unless we do something, we'll be pincered.
Impa: A sea of trees... I wonder. If we topple them, perhaps they'll block the way...
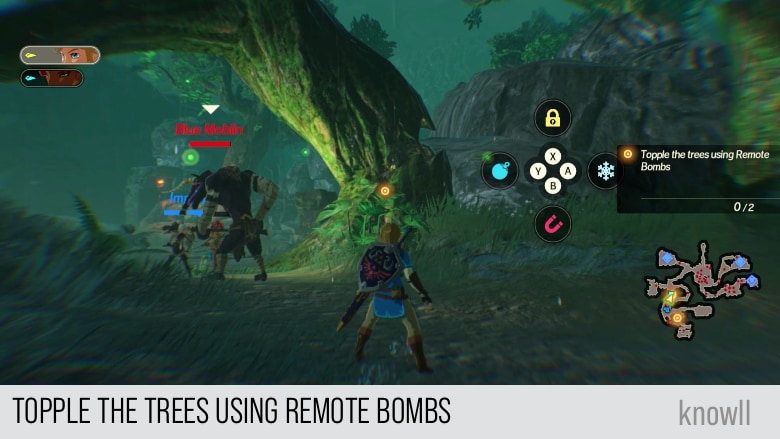
Objective: Topple the Trees Using Remote Bombs
In this objective, your goal is to topple two trees as shown on the map. Moblins will keep on appearing, but you don't have to fight them. In fact, it's best not to fight them as they will just keep on spawning.
Do not fight the Moblins that will appear.
After toppling the first tree:
Impa: It actually worked! Let's keep it up and block the road.
After toppling the second tree:
The enemy's route forward has been blocked by the toppled tree!
Impa: Now the monsters will have a harder time chasing us. Let's leave while we still can.
Zelda: Yes. Let's hurry.
Now Zelda and the party will move to the next target position. Once you reach this area, a third tree has to be toppled.
Impa: I bet we could bring down that tree... Then we could cut off the monsters to the west.
After toppling the third tree:
The enemy's route forward has been blocked by the toppled tree!
Impa: Good. We're safe for the moment. Let's hurry back!
Zelda: Ugh... so tired...
Impa: Princess! You look exhausted. Won't you please... No, I insist. Take a rest at once.
Zelda: Impa, we can't... No... you're right. I'm sorry, everyone.
Zelda has stopped advancing to recover!
Impa: I don't sense any monsters around, and yet.
The monster hordes have appeared!
Impa: I knew it was too good to be true... No matter what, we must protect the princess!
Objective: Protect Zelda
You need to defeat monsters that will come from two directions. Most of these enemies will be Lizalfos and Moblins.
Protect Zelda until they recover!

After defeating the two groups of monsters, Zelda will be able to progress the quest.
The break has allowed Zelda to recover health!
Impa: All right, let's move out! There's a lot of water up ahead, so watch your step.
Objective: Help Zelda Escape
As shared earlier, when Zelda is moving, you need to clear any monster in front of her, otherwise, she will stop.
Continue heading for the Escape Point!
Zelda: There are relics I recognize toppled all around here, but they appear broken.

Impa: I wonder if they were widely used in the past...
Zelda: It's fascinating. They also... remind me of something.
The path forward will be full of monsters, clear them all.
Impa: The way out is just up ahead, but... No! The road is blocked!
Zelda: Oh dear... Wait... The relics are... moving?
Zelda: It looks similar to Vah Ruta's draining mechanism. Perhaps we can use the little one's power.
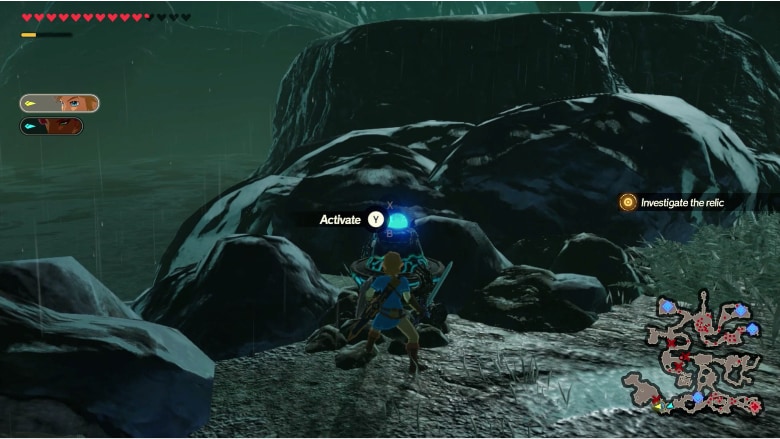
Objective: Investigate the Relic
This is similar to the entry Akkala Tower, where there are blockages that need to be removed by activating an ancient furnace.
Activate the relic so it will blast the blockage away.
Impa: Great work! You're incredible, Princess!
Zelda: No, I...
Impa: Wait a moment... Do you hear something?
Impa: I recognize that sound... Is that what I think it is? Everyone, stay on your guard!
Objective: Defeat the Blue Hinox
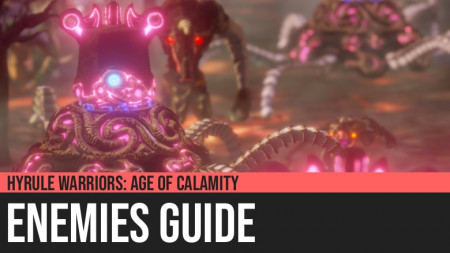
We have covered the moveset and attacks of a Hinox in the entry The Yiga Clan Attacks! You can view our Enemies Guide for tips.
The Hinox has the following attacks:
- Jump Attack
- Trample Attack
- Roll Attack
- Body Slam Attack
As this is a Blue Hinox, it has new attacks in its moveset. Plus, it is much stronger than the one you face earlier.

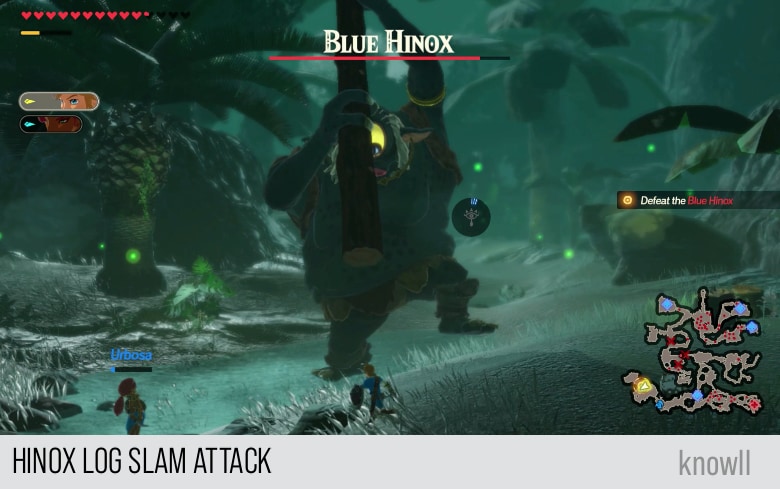
Log Slam Attack
This is one of the new attacks of a Blue Hinox. It pulls a large log and uses it like a sword which he swings towards you.
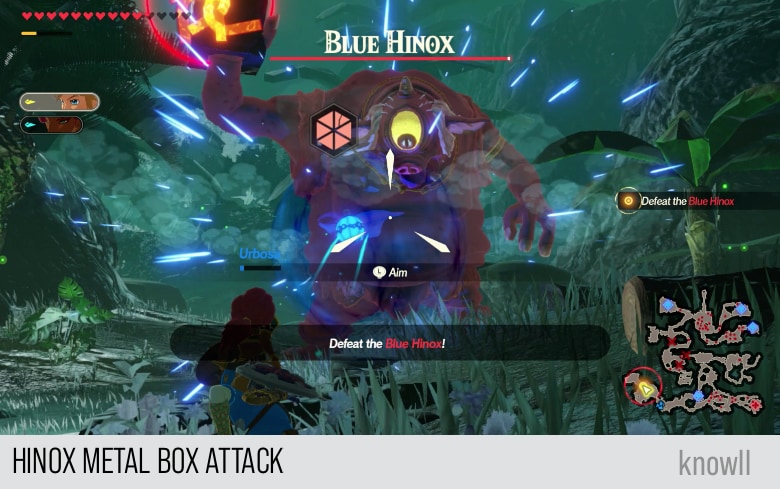
Metal Box Attack
In this attack, the Hinox summons a metal box, which he throws at you. It has a telegraph that you can counter using Magnesis.
Pound Attack
The Pound Attack is very similar to the Trample Attack, but instead of using his two arms, he only uses one. He will do this repeatedly, being opened for a punishment using a simple backflip dodge.
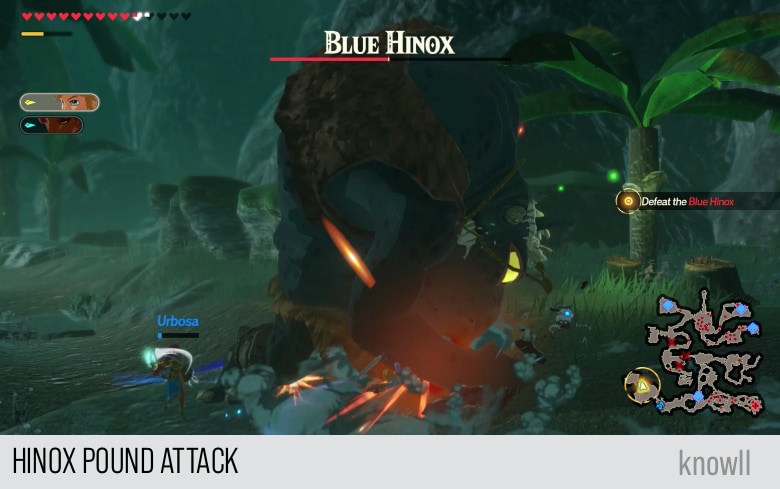
You can fish for a Flurry Rush and punish the monster.

To the Very Last
Using her knowledge of ancient technology, Zelda saves everyone from the monster threat, though she tries once more to avoid taking credit. Impa impresses upon the princess the value of all she has done, and Zelda speaks of a renewed drive to fulfill her destiny.
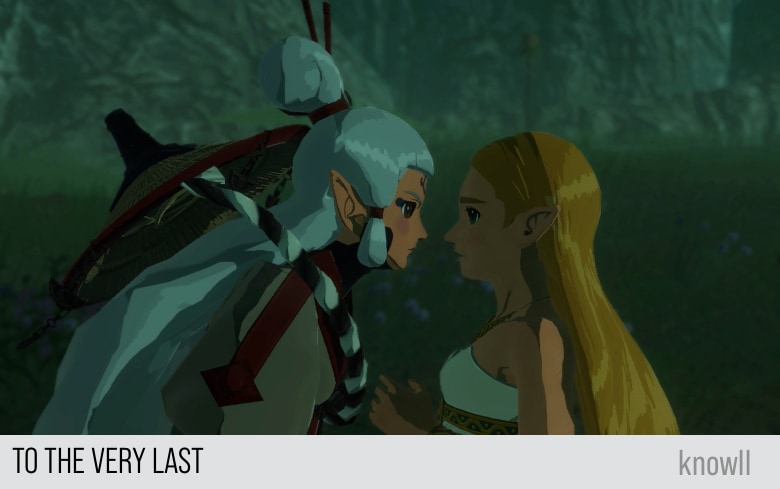
Zelda: Is... everyone all right? Ah, thank goodness.
Impa: We're all right because of you, Princess. Your keen senses saved us!
Zelda: Well, I... Really, it was thanks to your strength.
Impa: *sighs* Now, you listen to me!
Zelda: O-OK...
Impa: You said that... you are the only one who can't live up to your potential. But that's completely untrue!
Impa: I mean, you saved all of us just now! All of your effort - your research - is not in vain, Princess!
The little Guardian and Link nod in agreement.
Zelda: Thank you, Impa.
Zelda: I want... I will fight... to fulfill my duty, until the very end.
Zelda: That's really... all I can do.
Korok Locations
Every Chapter in the game contains Koroks. The main challenge is that there is no feature in the game that will make them appear on the map.
Hence, we provide all their locations on the area as well as on the map.
Total Koroks: 5
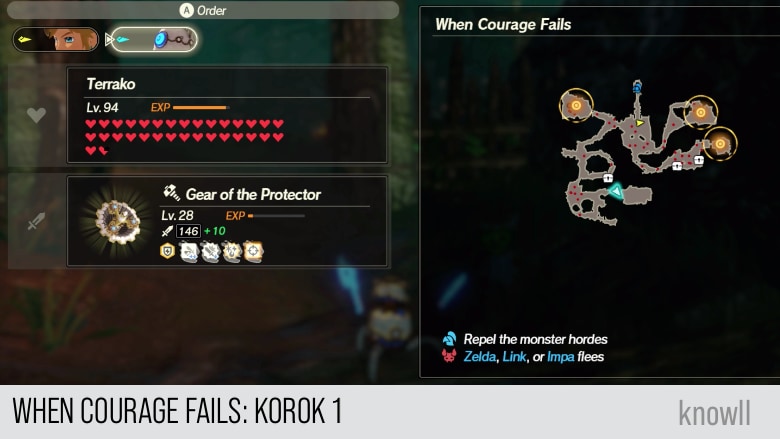
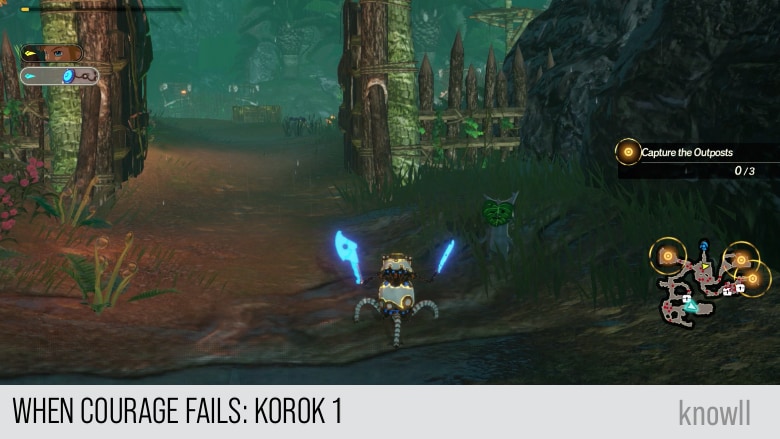
When Courage Fails Korok 1
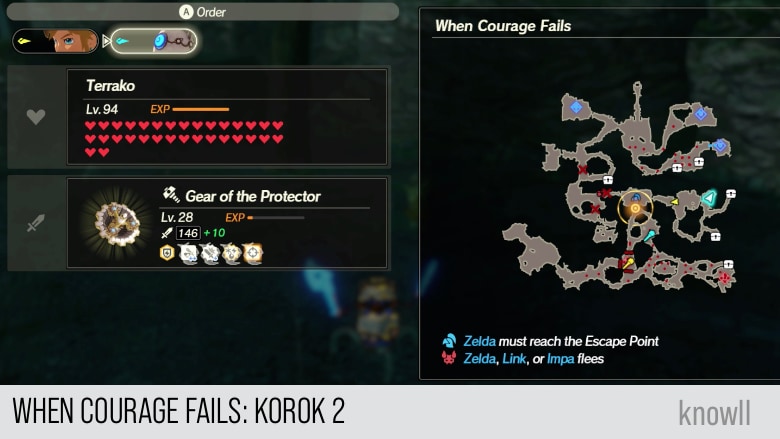
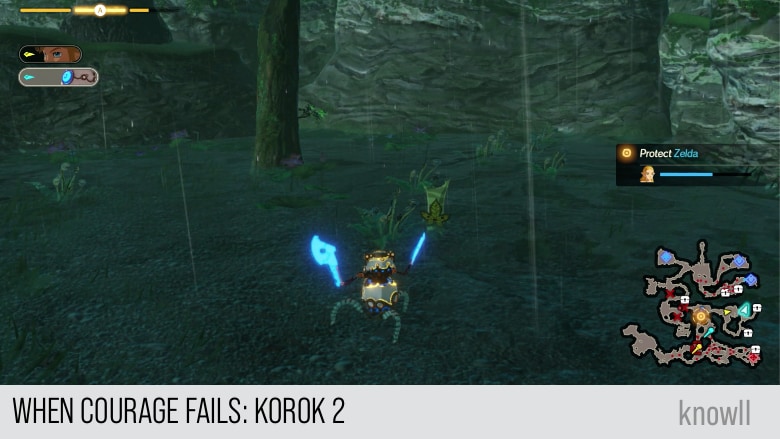
When Courage Fails Korok 2
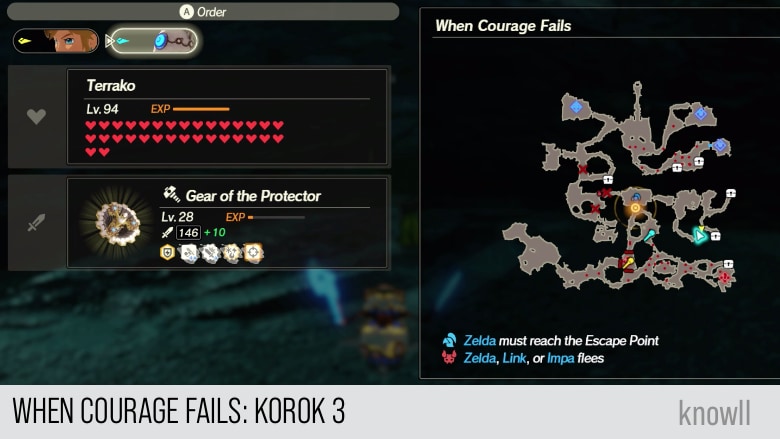
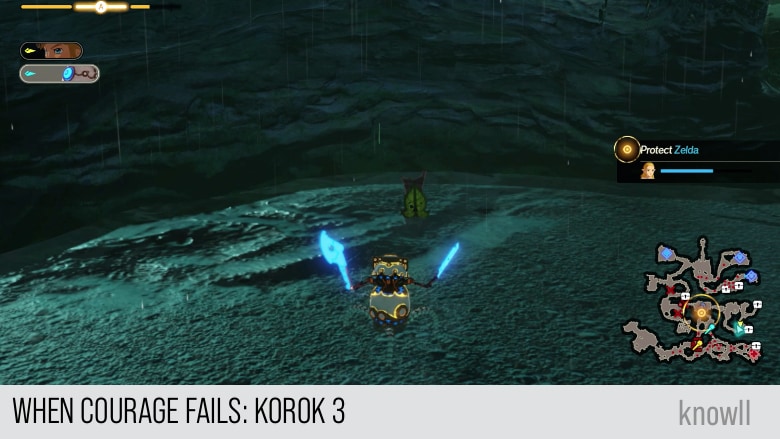
When Courage Fails Korok 3
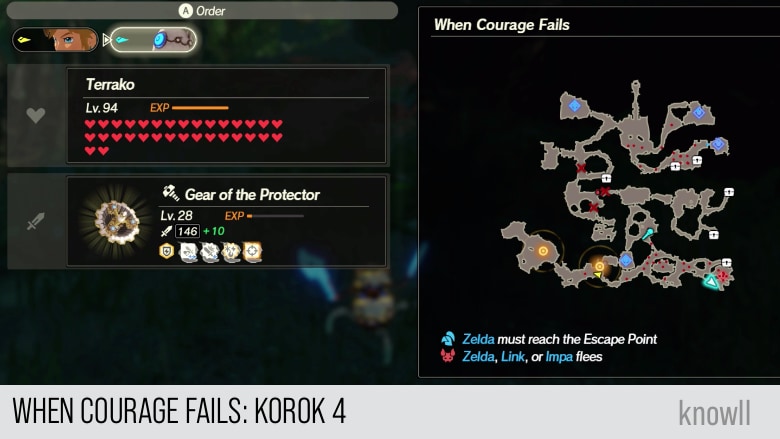
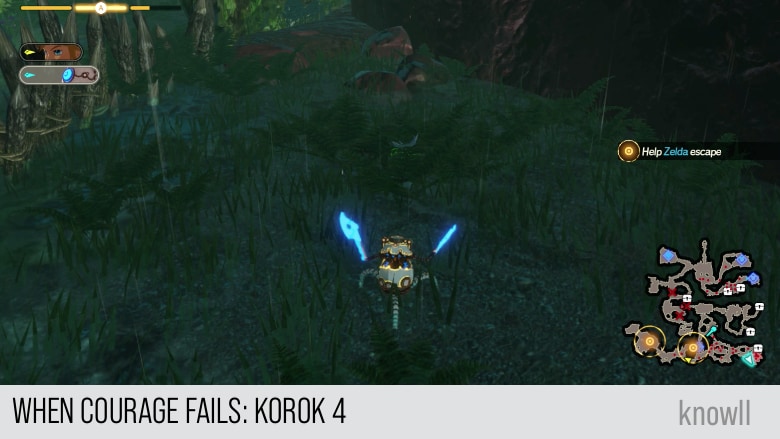
When Courage Fails Korok 4
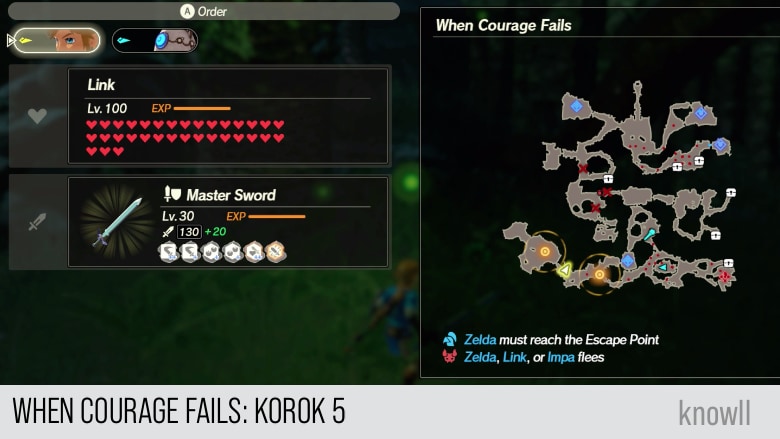
When Courage Fails Korok 5

Continue the adventure with our next Chapter entry Calamity Strikes.