
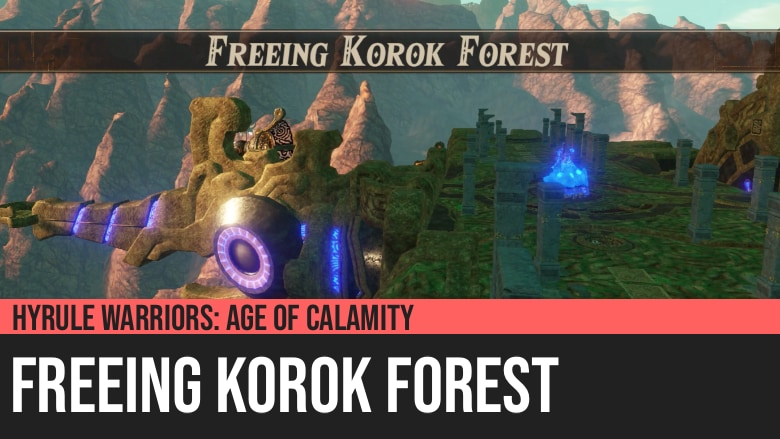
Hyrule Warriors: Age of Calamity - Freeing Korok Forest
Hyrule Warriors: Age of Calamity - Freeing Korok Forest is the first part of Chapter 3 of the game. At long last, the party sets out for the Master Sword. They use Vah Medoh to sweep away a horde of monsters, then set their sights on Korok Forest.
This Chapter entry introduces the enemies called Hollows, as well as provides one of the best boss fights of the game with Astor. It will also unlock Hestu as a playable character.
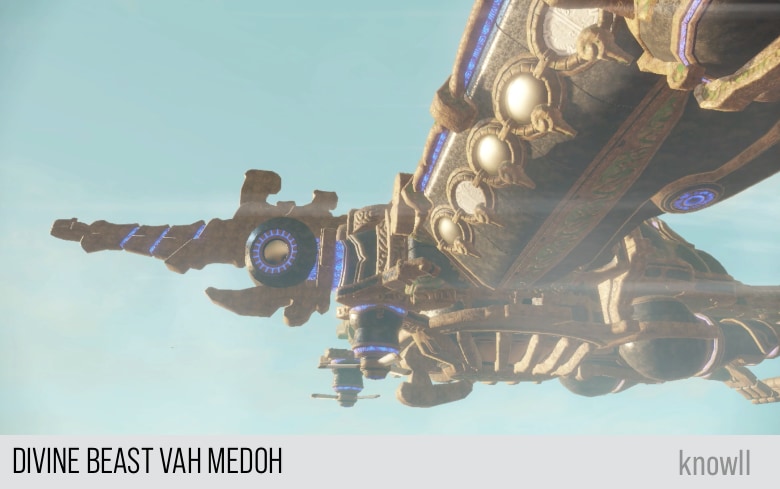
This is also the first Chapter entry where you can experience using Vah Medoh in fighting the monsters of Calamity Ganon.
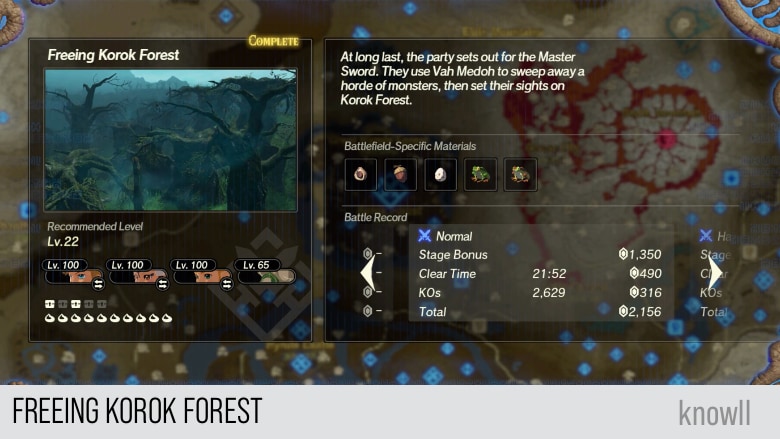
Treasure Chests and Koroks
- 10 Koroks
- 5 Treasure Chests
Battlefield-Specific Materials
- Chickaloo Tree Nut
- Acorn
- Bird Egg
- Hot-Footed Frog
- Tireless Frog
Special Rewards
Freeing Korok Forest
The king issues his first order to the Divine Beast pilots - seek out the knight who could wield the sword that seals the darkness. This would require that they vanquish the monsters in Korok Forest, where the legendary blade slept.
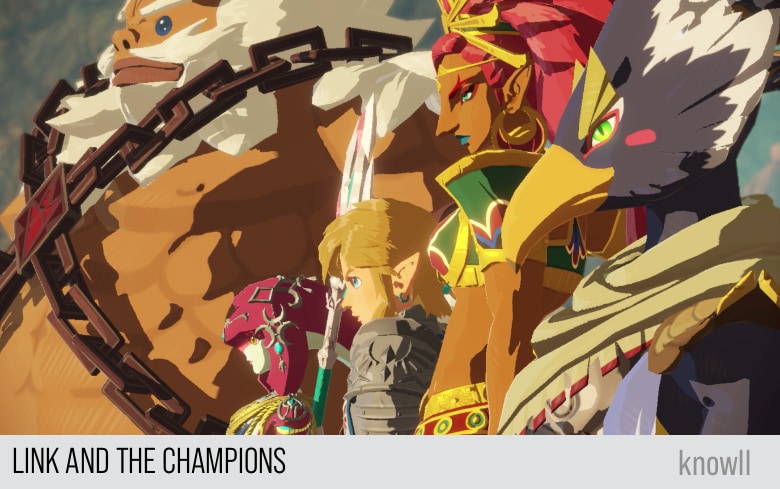
All four of the pilots were to take part. Zelda - seeking data to help calibrate the Divine Beasts - accompanied them, as did Link, for he always stayed by the princess's side.
Divine Beast Vah Medoh
In order to more easily secure the sword that seals the darkness, the Master Sword, the king of Hyrule orders all monsters within Korok Forest be eradicated. A plan centered around the Divine Beast Vah Medoh is made, but its pilot, Revali, seems unsure about their leader.
Revali: Hyrule's king chose us to perform this pivotal task. It will be my honor to excel, as always.
Revali: Then there's you, the one part that doesn't add up. Why should this nobody be trusted to lead us in the coming battle?
Daruk: It doesn't matter who's the leader. We're all in this together, right?
Revali: You are, of course, mistaken. My Divine Beast is the key! Really, now... It makes no sense.
Revali: Well... My one comfort is that your reputation... will be completely ruined once you fail. The fallen knight, heh heh!
Urbosa: Revali, how long do you expect us to put up with your prattle, huh?
Revali: I've said enough. The time has come to show you what I'm made of. Now witness... Vah Medoh's divine power!
Objective: Destroy all the Outposts
By default, the game turns on Motion-Control aiming. In other words, by using the Switch, you can target enemies and do battle.
Motion-Control Aiming - Turn On or Off?
However, we highly recommend that you turn-off Motion-Control aiming. The main reason is that it is much easier to play the game with Motion-Control aiming turned-off.
If you would like to experience it yourself, do the battle with it turned on. You can later repeat the Divine Beast battle with the Motion-Control turned off.
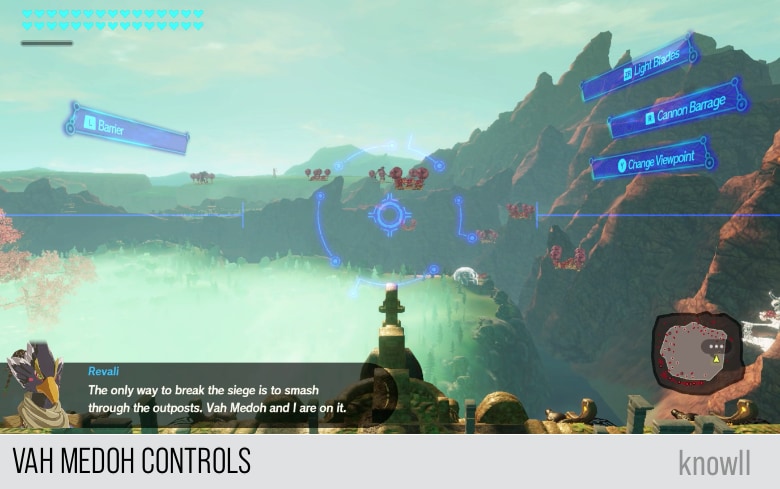
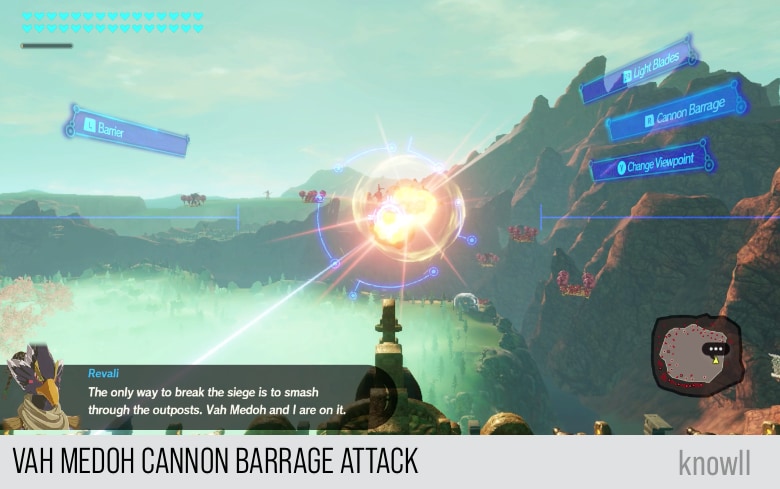
Revali: The only way to break the siege is to smash through the outposts. Vah Medoh and I are on it.
Revali: All right, Vah Medoh. Let's show them what you're made of.
Vah Medoh is equipped to do massive AOE and focused damaged.
Revali: It can fly, eh? No matter. A target is a target.
Revali: That outpost is downright convenient. Let's warm up, shall we?
Revali: OK! Let's keep going and squash any stragglers.
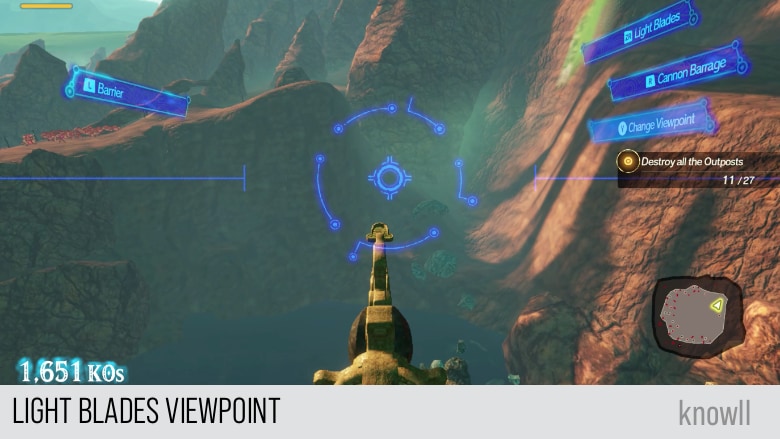
Changing Viewpoint
Vah Medoh is unique among the Divine Beasts in that it can have two perspectives.
- Light Blades
- Aerial Bombardment
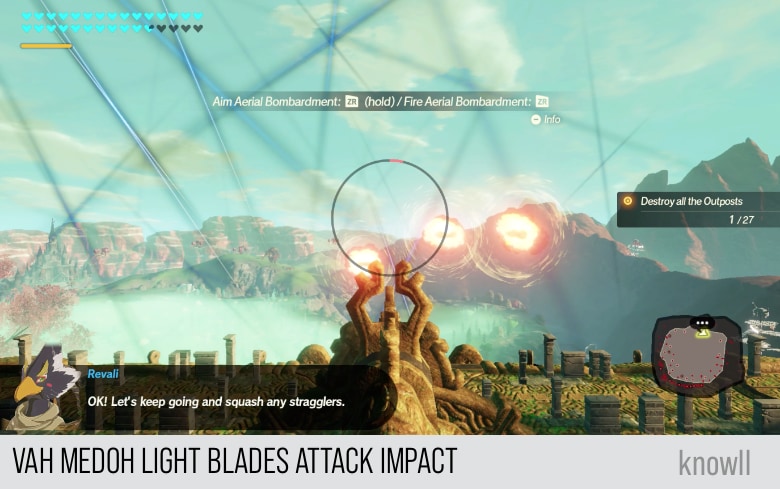
In the default perspective, you are on top of Vah Medoh. You can use Light Blades in this viewpoint. You can see Vah Medoh in this perspective.
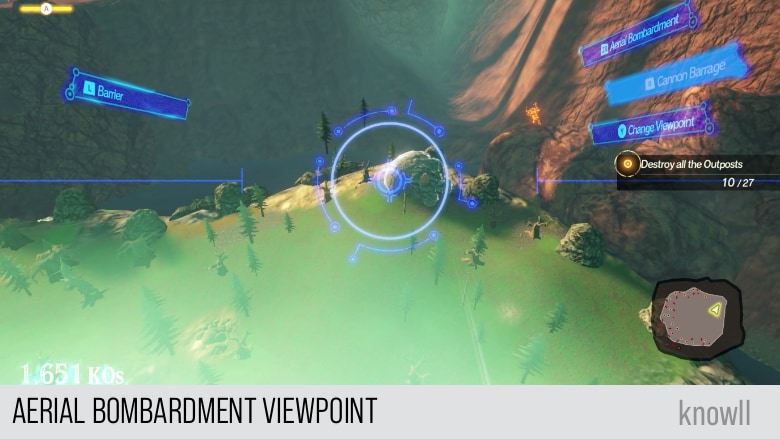
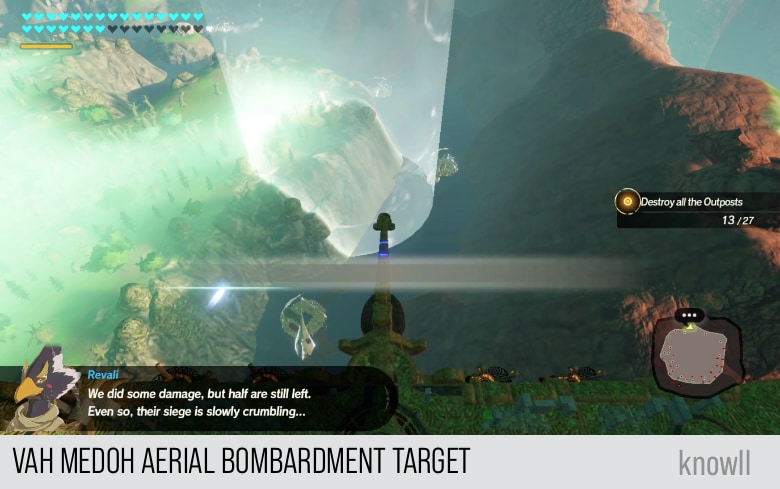
In the alternate perspective, you are below Vah Medoh. You can use Aerial Bombardment in this viewpoint. You do not see any parts of Vah Medoh in this perspective.
Light Blades Viewpoint
The default perspective is best for fighting aerial enemies and for initiating the Light Blades.
Aerial Bombardment Viewpoint
This alternate perspective is best for targeting enemies on land. It also gives you more freedom to maneuver the target, some of which you can't reach using the default viewpoint. This allows you to initiate the Aerial Bombardment.
Barrier
This is one of the strongest features of Vah Medoh, but you will not need it during this battle. You will definitely need it in later Chapter entries when the battles are more challenging.
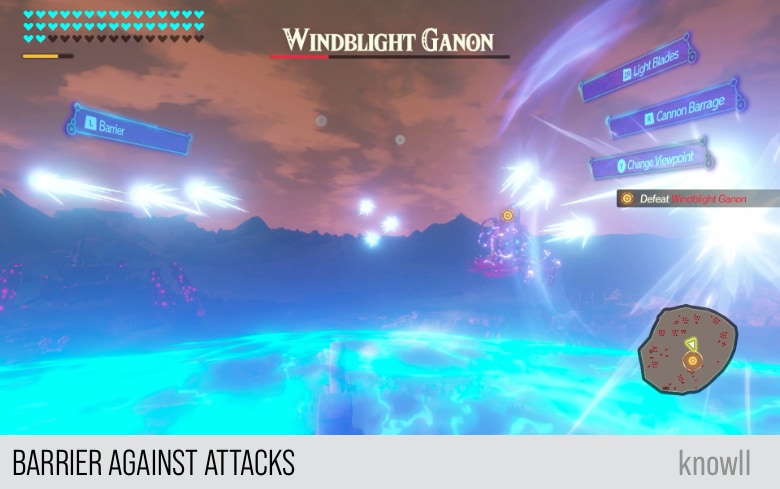
With Barrier, you can create a layer of protection surrounding Vah Medoh, which makes you invincible to any attacks. We will cover this more in later Chapters, where your success or failure in completing the quest relies on knowing how to use Barrier.
Cannon Barrage
With Cannon Barrage, you can hit enemies with a laser. It is the longest range attack of Vah Medoh. Use it while Light Blades is in cooldown.
Light Blades
Light Blades is one of the most powerful Divine Beast attacks in the whole game, second only to Vah Naboris' Lightning Onslaught. With Light Blades, you can laser any enemy that is in front of you, except those that are too far away.
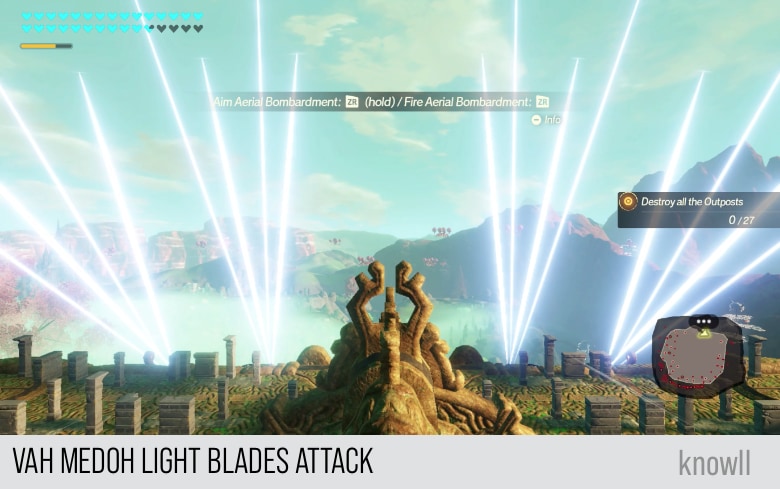
As long as the enemy is visible and is in a range that can cause you damage, it will get destroyed by Light Blades. It is too powerful so it has a cooldown. With Light Blades, you never have to worry about targeting or defeating any flying enemies in front of you.
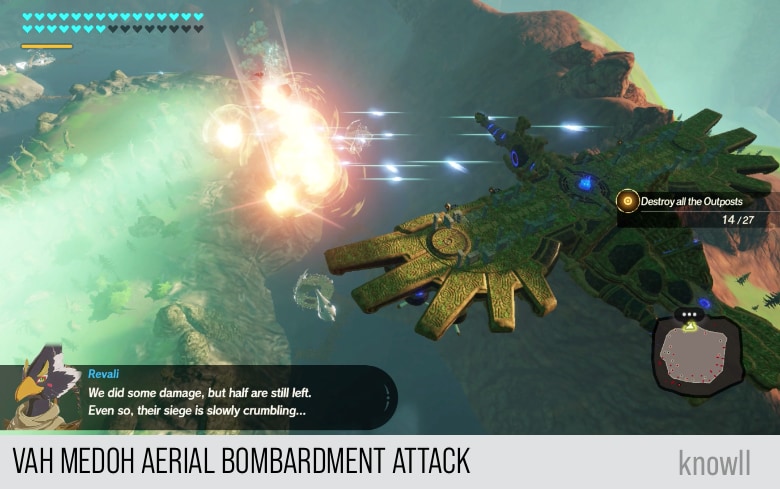
Aerial Bombardment
Though Light Blade is very powerful, it has one weakness - it can't hit any enemies on the ground. You will need Aerial Bombardment for this. You can target the enemy location as shown below, and then trigger the bombardment.
It is very destructive if properly positioned. It also has a cooldown.
After you destroy all the Outposts, the quest will continue with the party.
Revali: That's the price for messing with me and Vah Medoh. I hope the failed knight saw my display...
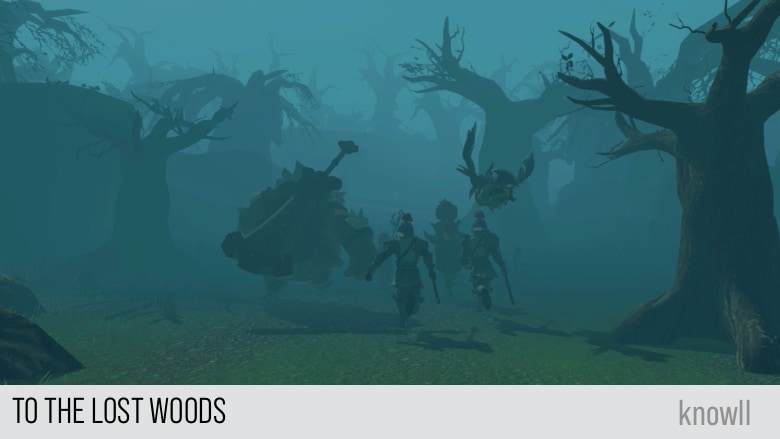
To the Lost Woods
Thanks to the power of Vah Medoh, the monsters are cleared away, and the party is able to continue on to the Lost Woods. Unbeknownst to them, however, Astor, the Yiga Clan, and others have already infiltrated the forest depths.
Revali: All clear over here!
Zelda: OK, let's go!
Deep within the forest.
Astor: And they're here.
A Guide through the Mists
Mipha: This is quite the fog...
Revali: Are we even making progress? We could just be going in circles.
Daruk: Good point. If only someone could fly above and scout the way.
Revali: As though I could see anything through this muck. Honestly, do you ever think before you speak?
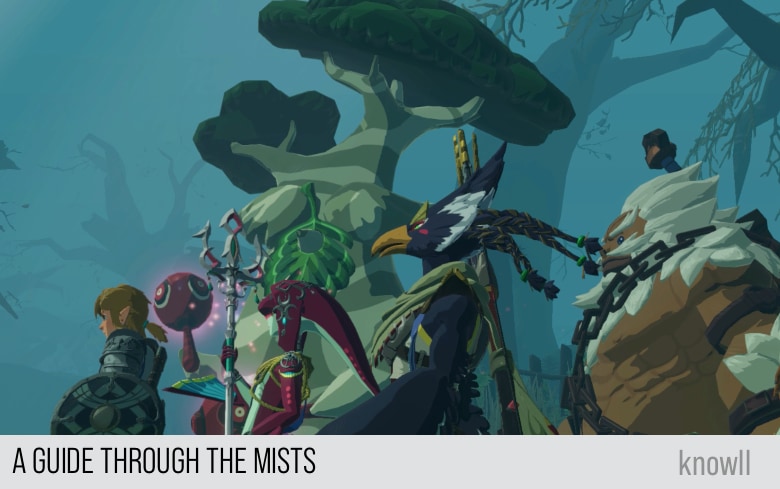
Urbosa: Getting lost is the least of our worries. If something attacked us, we wouldn't see it coming.
Zelda: Yes. We must be prepared for even the most unusual - huh?
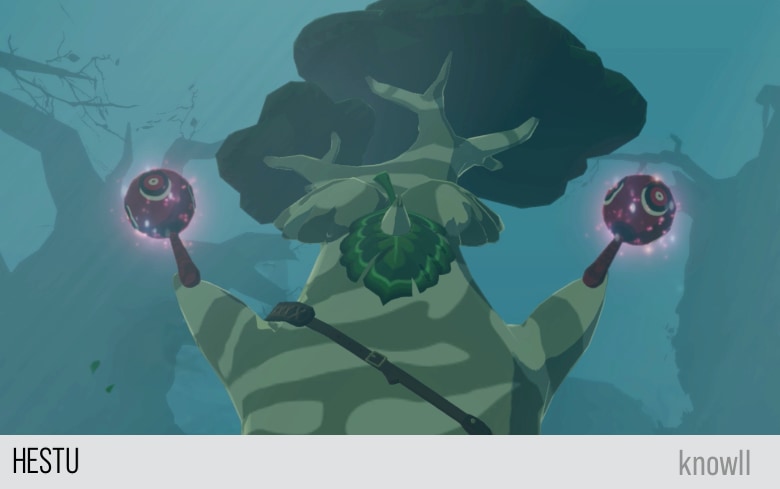
Hestu: Shaka! Whee-hee-hee! Finally, finally, finally! Somebody sees me! Shakala-laka!
Daruk: Huh? Where'd you come from?
Zelda: And who... are you?
Hestu: Oh, me? I am the one who brings song and dance to Korok Forest! Hestu!
Zelda: A Korok?
Daruk: That's great! Mind guiding us through the fog, then?
Hestu: Shoko... I'd love to get home myself... But there are scary, mean monsters in the woods, and I can't get past them...
Revali: You could probably sneak right by if you didn't have those noisy maracas.
Urbosa: Oh, never mind him. We have business in the forest. If you lead the way, we can handle the monsters for you.
Hestu: Oooh, really?! Woo-hoo! Yaaaaay! In that case, follow! Follow!
Objective: Head for Korok Forest
In this quest, you play as the bodyguard of Hestu. Just follow him and defeat any monsters that show up.
Hestu: Shokie-dokie! I'll show you the way to Korok Forest!
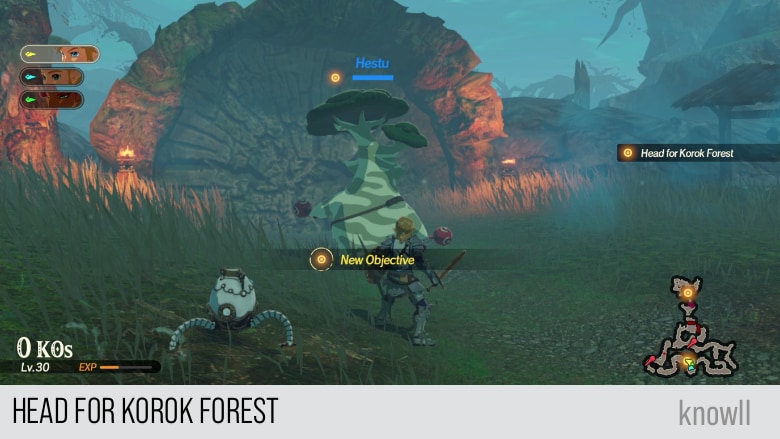
Hestu: Actually, you can pass through here!
Zelda: Such a strange place for a pathway. Without a guide, we'd never have seen it.
Hestu: Yeeeeek! Monsterrrrs! Hellllp!
Zelda: Hestu's in danger! Quickly, we have to help him!
Protect Hestu!
Hestu: You can also pass through here! But nowhere else! Watch your step!
Hestu: The Korok Forest is just ahead! This has been a breeze, thanks to you all!
Urbosa: It can't be as simple as a stroll through the woods. On your guard, everyone.
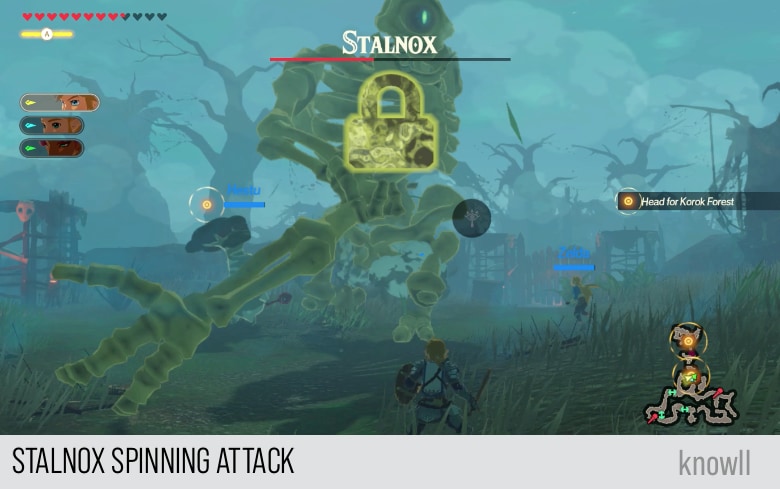
Defeat the Stalnox
Just before you can reach the target area in the forest, there will be a miniboss fight against a Stalnox.
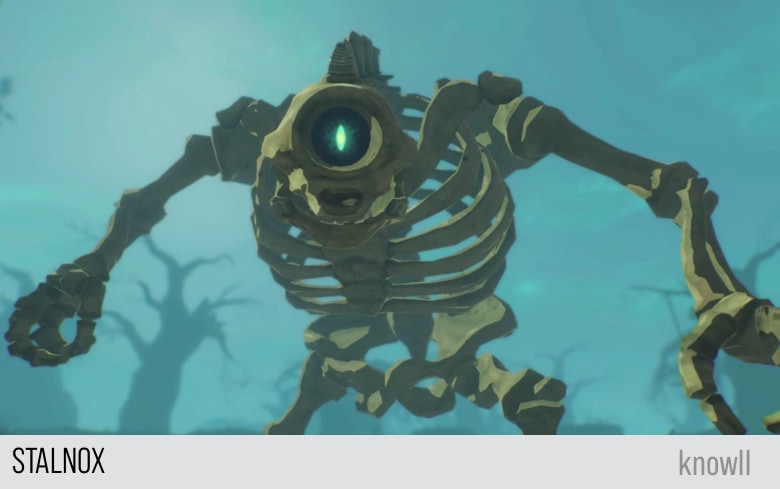
The Stalnox has all the standard attacks and moveset of a Hinox, which we covered in the previous chapter. You can also view our Enemies Guide for tips on fighting a Hinox.
Stalnox Attack Moves
Like the Hinox, the Stalnox has these attacks:
- Jump Attack
- Trample Attack
- Roll Attack
- Body Slam Attack
Stalnox Spinning Attack
There is one attack that is unique to a Stalnox, the Spinning Attack. With this attack, the Stalnox uses one of his arms and uses it as a weapon as he spins.
Like other spinning attacks, you can counter this with Stasis.
You can continue with the quest once it is defeated.
Hestu: Shoko-yay! Time to celebrate!
Hestu: If we make it past here, we'll be in Korok Forest. Shaka!
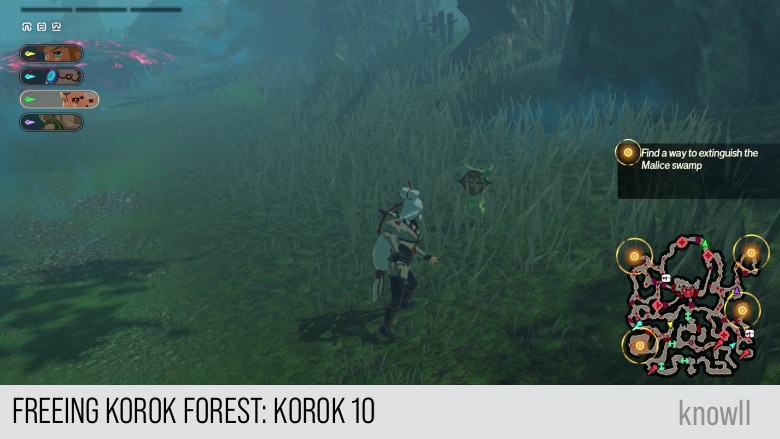
Objective: Find a Way to Extinguish the Malice Swamp
Hestu: This is the entrance, but, hey... Who put all this weird mud here? Now we can't get through!
Zelda: It might be the work of the Yiga Clan...
Hestu: Maybe if we look around, we'll figure out how to get rid of that stuff!
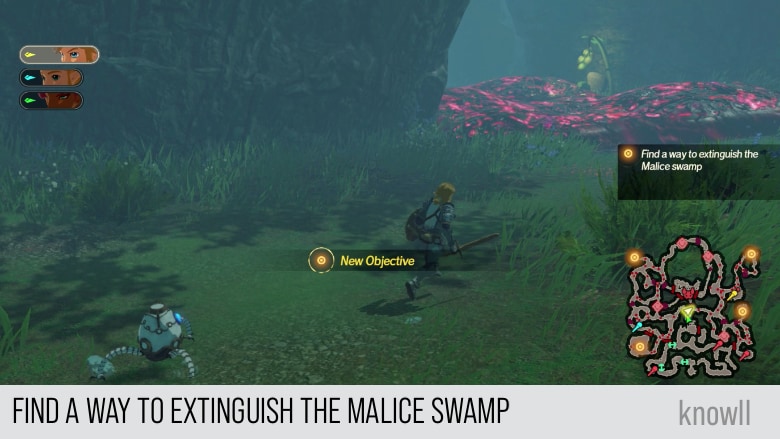
Hestu: Shaka. I'm kinda scared, but if it's for the forest, I'll do my part!
You can now play as Hestu!
From this point onwards, Hestu becomes a playable character. As you have to capture four outposts, you need to use team management to minimize running from one point to another. This will give you the chance to use your other characters as well.
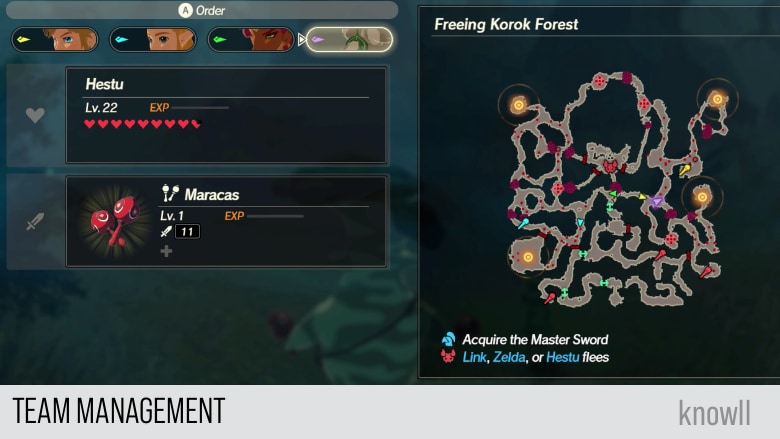
Command your three characters and make them go to the other outposts. Then you can use your current character for the fourth outpost.
If you use Hestu in clearing one of the outposts, Zelda will give this comment.
Zelda: Brilliant! That was a stunning performance!
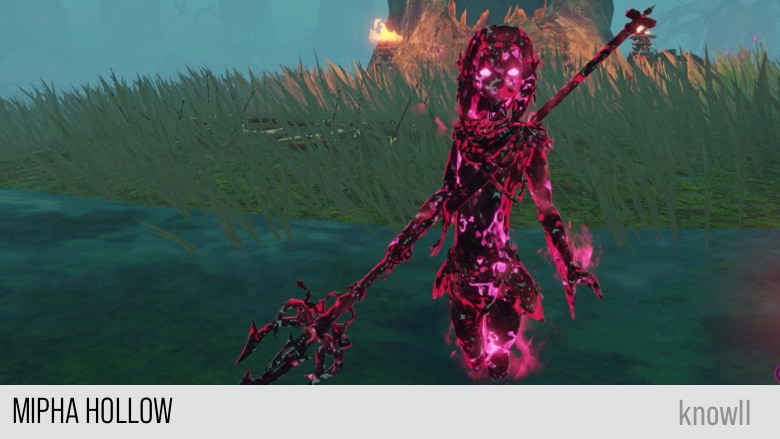
Objective: Defeat the Hollows
Each of the outposts will have a unique enemy called a Hollow. It is a malice-clone of one of the Champions.
Zelda: What is that thing? Some kind of twisted illusion?
Hestu: Shaka! It looks kinda like that mud we saw at the entrance!
Zelda: The two certainly must be related. Either way, watch out - it's on the attack!
Though they are based on the Champions, they are actually weak, definitely not at a boss-level of difficulty.
The only interesting part with the Hollows is that their attacks are based on the actual Champions. But even then, they do not pose any significant danger.
Mipha Hollow
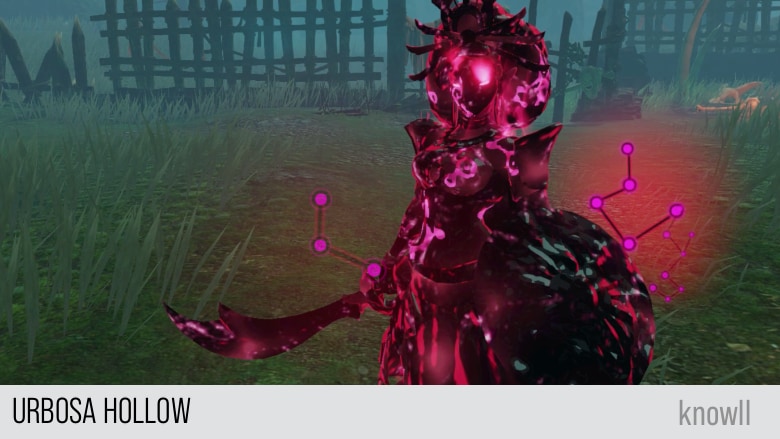
Urbosa Hollow
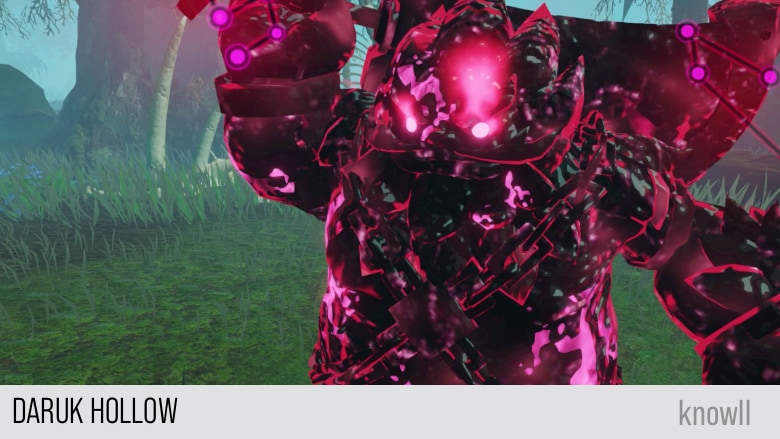
Daruk Hollow
Revali Hollow

After defeating your first Hollow, Hestu will give this comment.
Hestu: Shalaka! Some of the mud is gone! Let's keep going!
Astor: You vermin, how dare you destroy my handiwork? Minions, protect the remaining Hollows!
After you defeat all of them, the blockage will be completely gone.
Zelda: The path to Korok Forest is clear! Link, come!
Hestu: We'll keep them at bay! Hurry on, friends!
The Master Sword Emerges
The party, at last, arrives in Korok Forest, but they find their way obstructed by Astor. Despite the confusion caused by the Hollows in the shape of his allies, Link unsheathes the sword that seals the darkness.

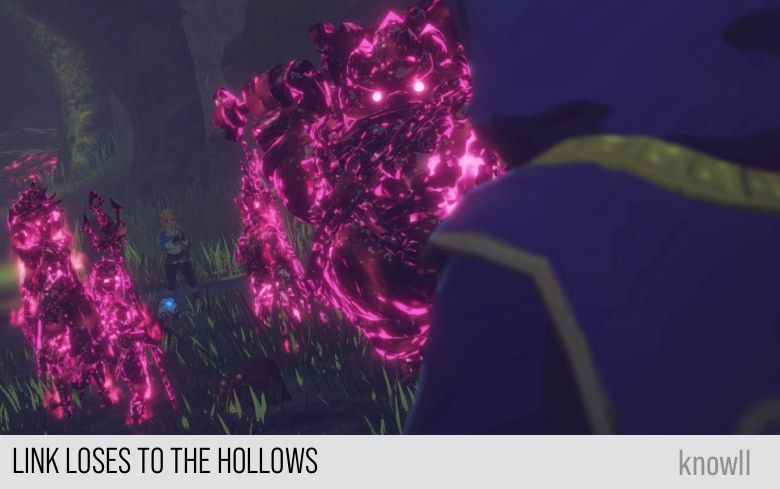
LInk Fights and Losses to the Hollows
Link will fight simultaneously the Hollows and this time he will get beaten by their combined strength. His sword gets broken, and the last attack by Daruk will send him reeling at a distance.
Zelda: Link!
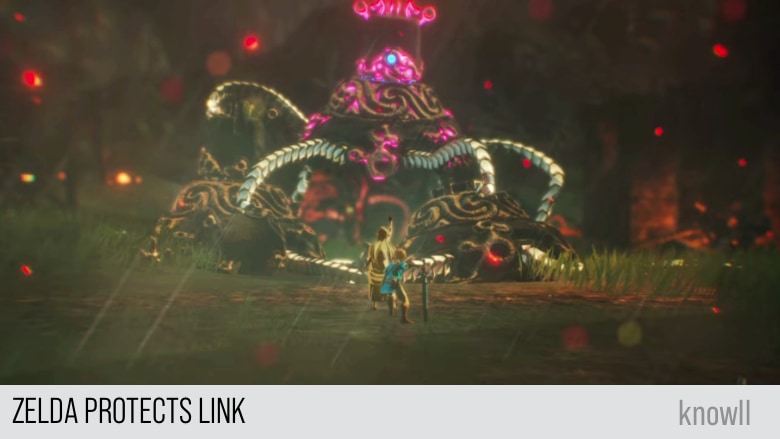
Astor: Kill her.
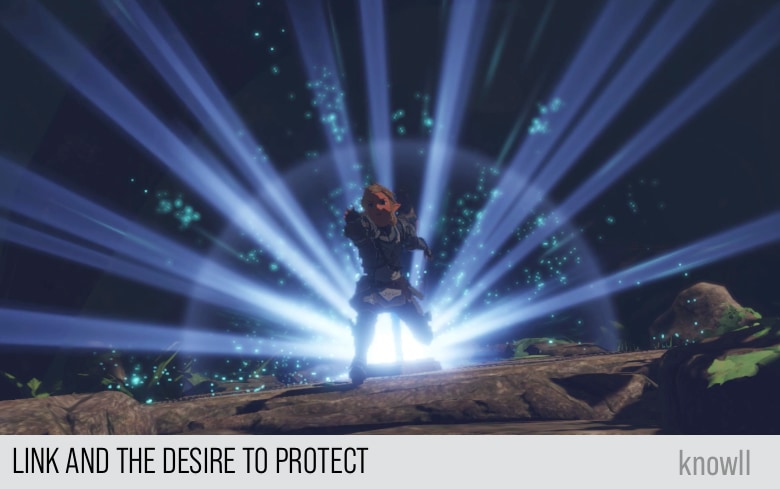
Link and the Desire to Protect
After Astor gives the command to kill Zelda, the Hollows approach her. Link stands up and, without any weapon, attempts to reach out to her, as the last chance of protecting her.
This act is on the borderline of hope and despair. It is when you still exert effort knowing that you can't do anything and yet you cling to your hope that you can make an impact.
This burning desire of Link to protect Zelda, knowing that he already lost and without any weapon, is what awakened the Master Sword to help and select him.
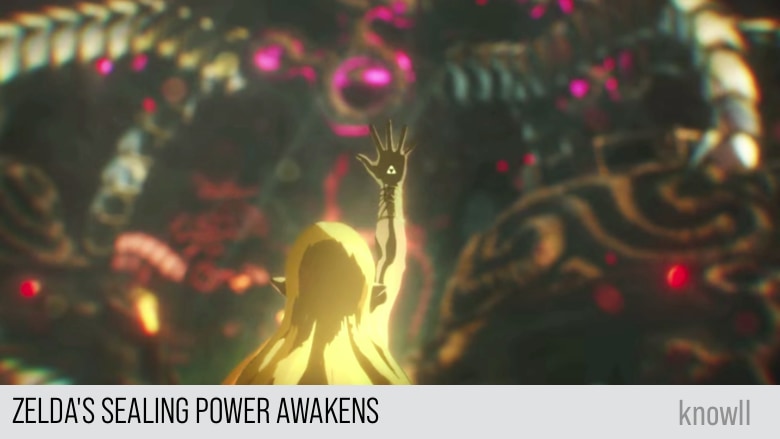
This is no different from that time in BOTW, when Zelda, between hope and despair, decides to shield Link from the Guardian's attack, knowing that she does not have any power and that could be her last act before they both get killed, by protecting Link.
It is this burning desire of Zelda to protect Link, at a moment when she is at her weakest and they are at their most desperate situation, that awakened her Sealing Power.
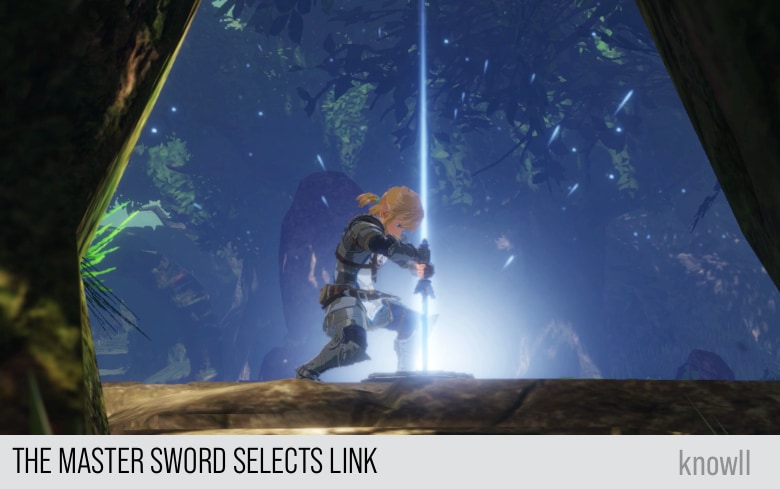
After the Master Sword enlightens the forest, Link pulls it out, with the Master Sword allowing him to do so.
Astor: What?!
Zelda: Huh?
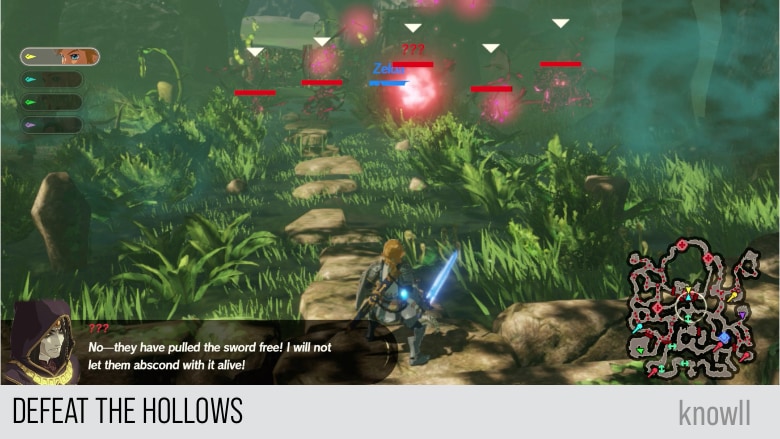
Objective: Defeat the Hollows
We have shared earlier that the Hollows in actual combat are not really that strong. Go ahead and defeat them. They are now even weaker.
Astor: No - they have pulled the sword free! I will not let them abscond with it alive!
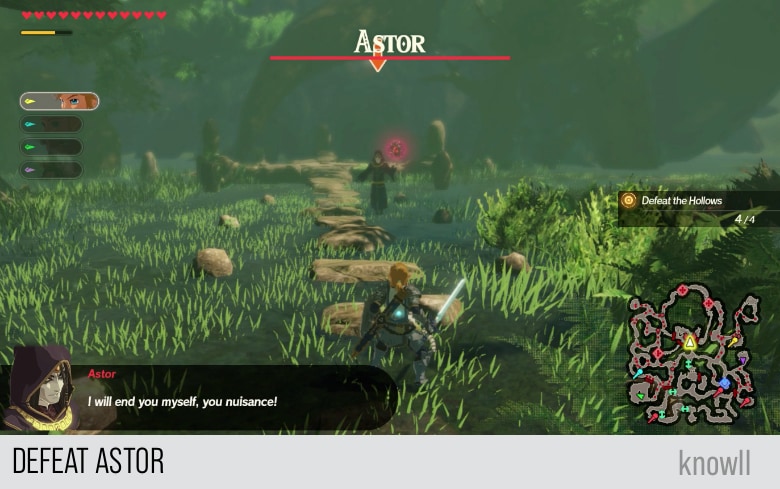
Objective: Defeat Astor
After defeating the Hollows, you will experience a better boss fight with Astor. He has a very good moveset and is the only villain in the game with purely non-melee attacks.
Astor: I will end you myself, you nuisance!
Astor: Your power is mine for the taking!
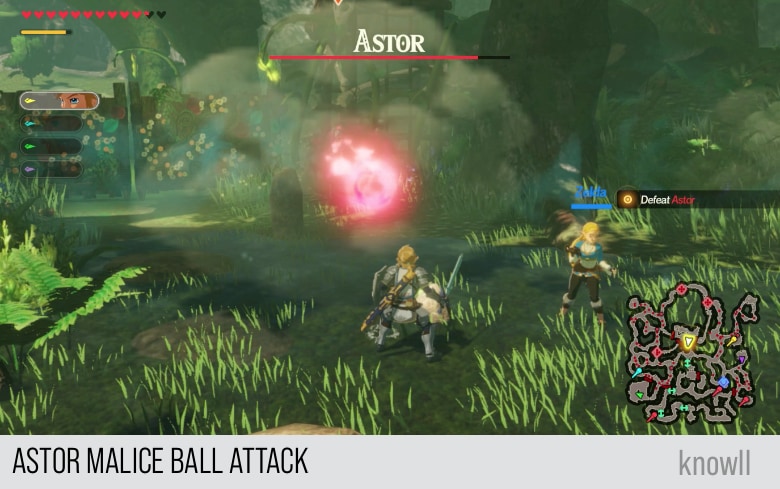
Malice Ball Attack
The Malice Ball is the most basic of Astor's attacks. He attacks you with a single Malice Ball.
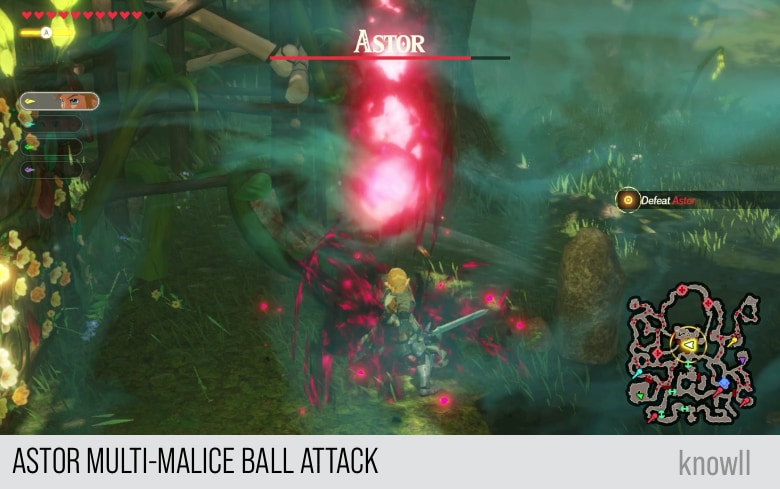
Multi-Malice Ball Attack
In this attack, he summons a Malice Ball on top of him, which then produces a number of other Malice Balls which attack you.
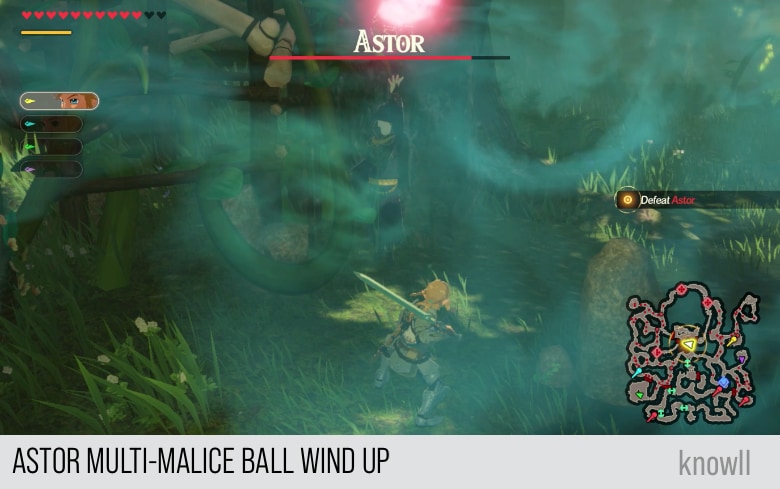
Like all powerful attacks in the game, this one has a wind up. While Astor is preparing, you can either prepare to dodge or to block.
Malice Orb Attack
In this attack, Astor summons a much large Malice Ball and then throws it at you.

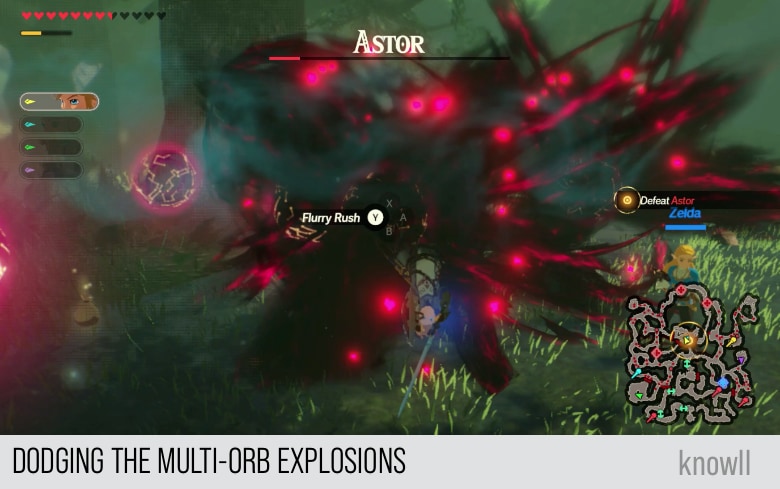
Multi-Orb Attack
We are starting to approach the more dangerous attacks of Astor. In this attack, he summons multiple Orbs that stay in place and then makes them all explode.
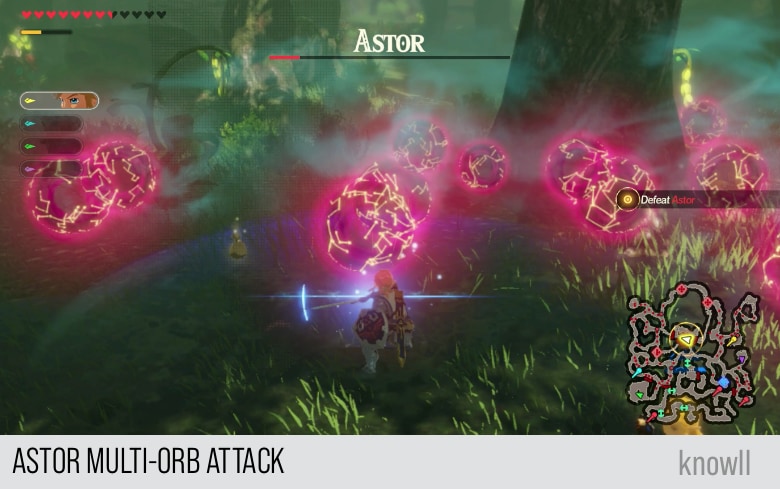
You can punish this attack by just dodging with a backflip when the orbs start to explode, as shown below.
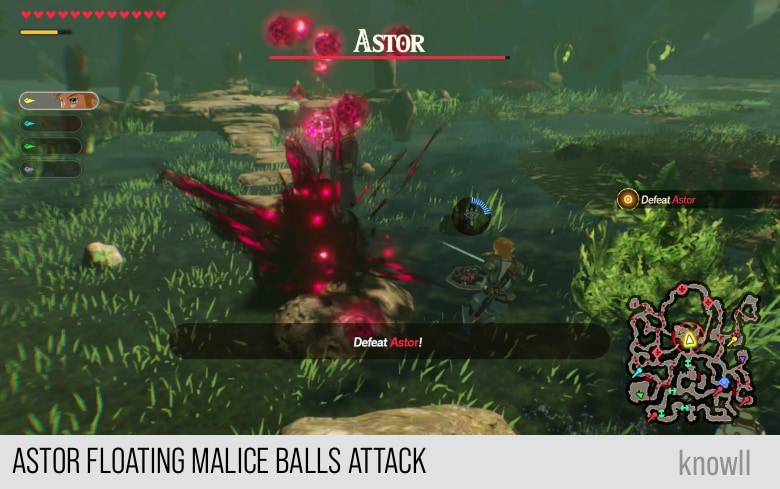
Floating Malice Balls Attack
In this attack, Astor summons multiple Malice Balls floating on top of him. They will then start tracking you and explode on contact.
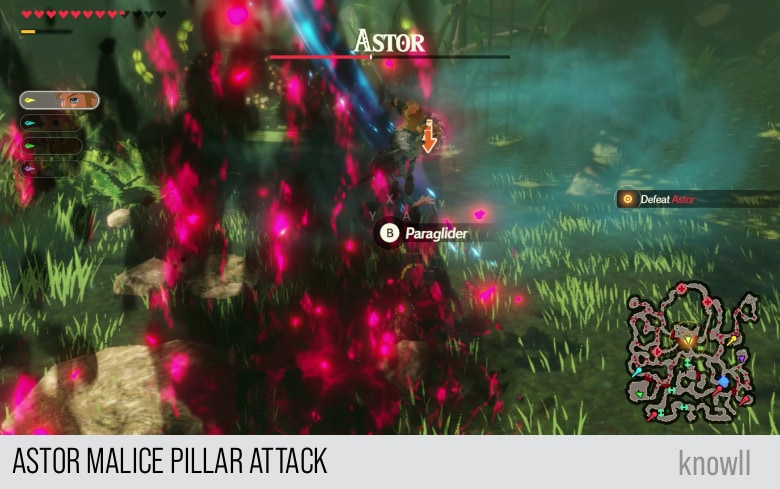
Malice Pillar Attack
This attack is very similar to that of a Yiga Blademaster, but more dangerous. You can recognize it by the wind up shown below, where Astor raises his hand to initiate it.
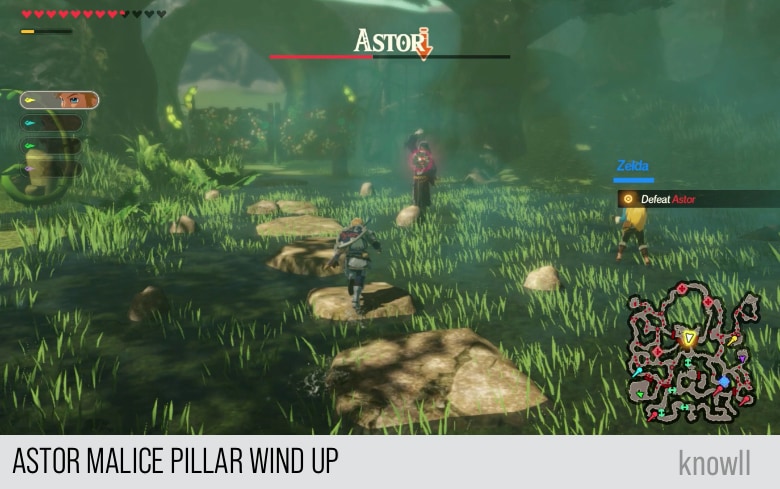
The moment you get hit by the malice, you will get damaged and get thrown out.
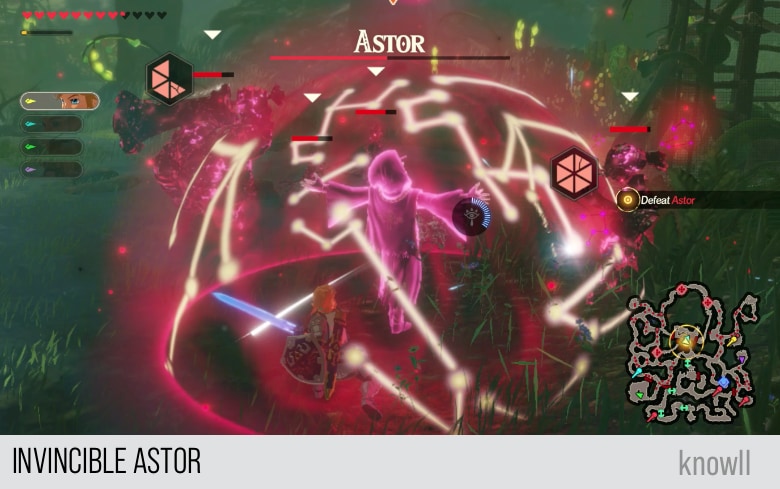
Summon Hollows Attack
Astor typically performs this attack once he loses around 50% of his health. It has a very interesting mechanic. He summons again the Hollows and, as long as one of them is alive, he becomes invincible.
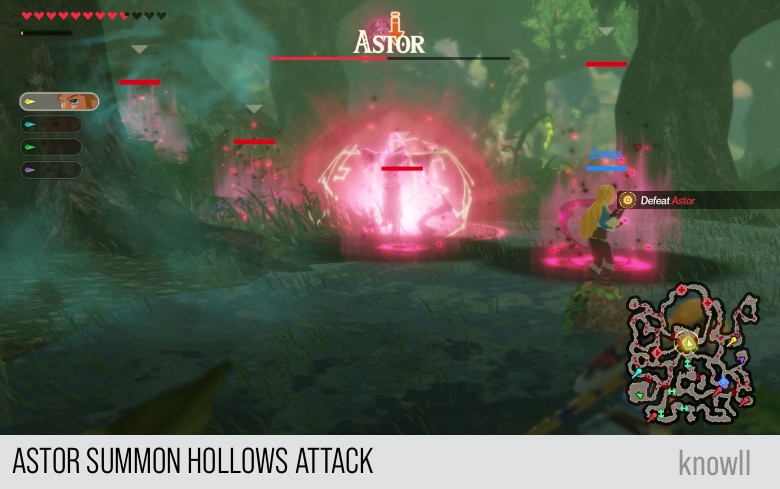
Do not attack Astor as he will not take any damage. Instead, focus your effort on any of the four Hollows. They are very weak though and can be easily defeated.
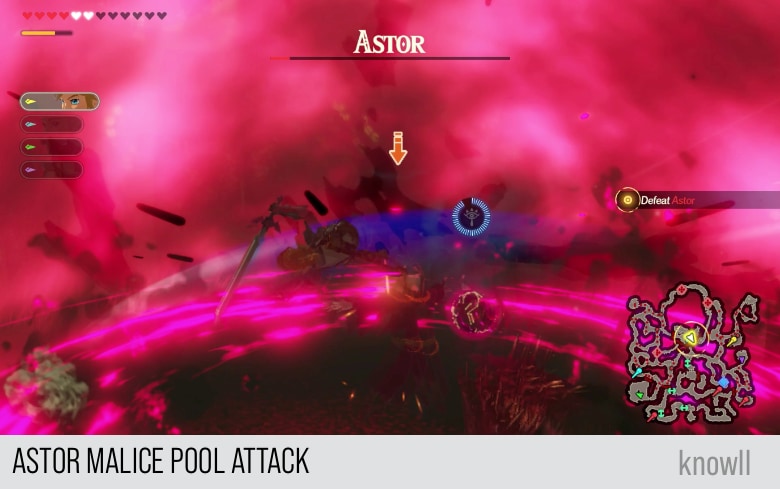
Malice Pool Attack
The Malice Pool is the strongest attack of Astor and among the most powerful attacks in the whole game. Like other highly damaging attacks, it has a large wind up.
You will notice it when Astor summons a swirling pool of Malice. There is no damage done yet and you can still use this time to re-position yourself.
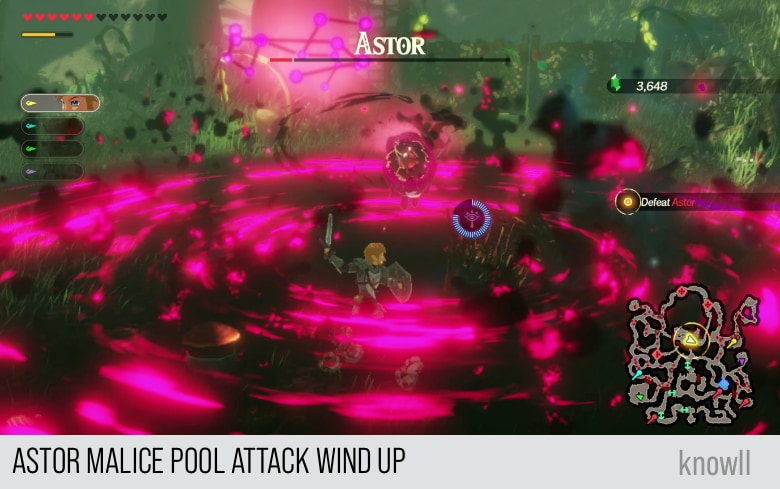
But after the wind up, the attack fully executes, you will get thrown out, and get a minimum of two hearts removed from your health. It also makes the whole screen bloody red like below.
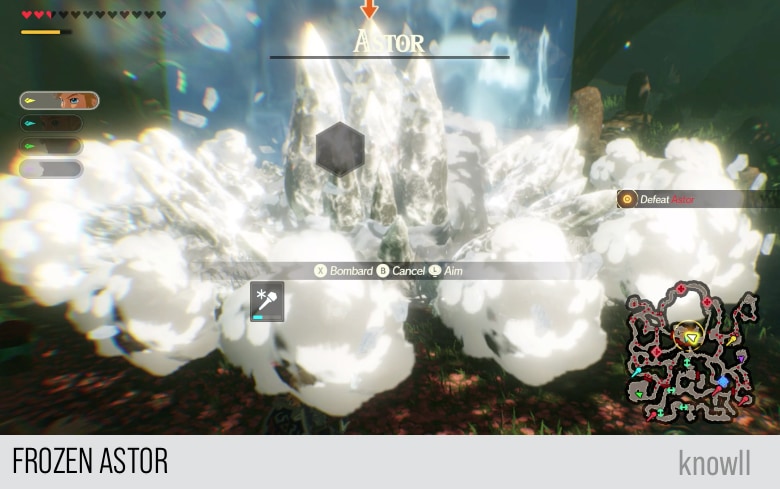
Defeating Astor
Being a boss, Astor has a large health pool. To effectively defeat him, use optimal elemental attacks. You can see our Combat Guide for more info on optimal elemental attacks.
As there is water in the area where you fight Astor, using the Ice Rod will produce an optimal elemental attack. It shows clearly on the radius of the attack, as shown below.
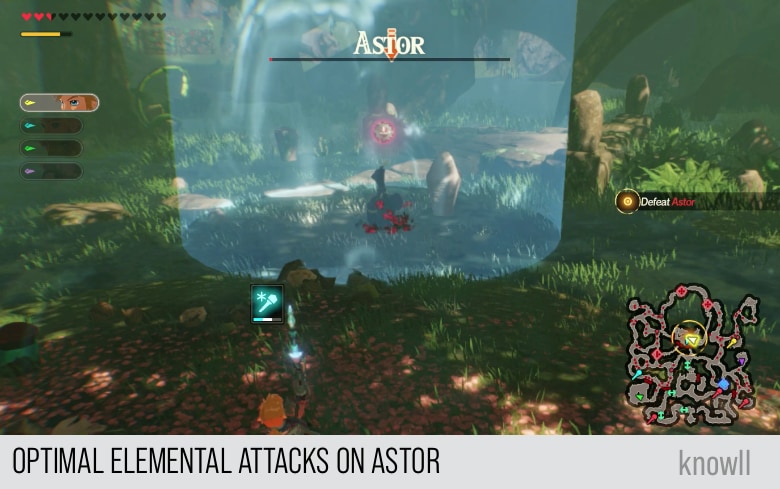
It also shows in the size of the freezing ice that gets formed after the attack.
Astor: That sword... It is too powerful...
It seems Astor has escaped...
The Knight Who Seals the Darkness
With the Great Deku Tree's wait for the hero now complete, it passes along words of advice to Link, who wields the sword that seals the darkness. It also offers Zelda encouragement with awakening her power, before setting back into a deep slumber to nurse its wounds.
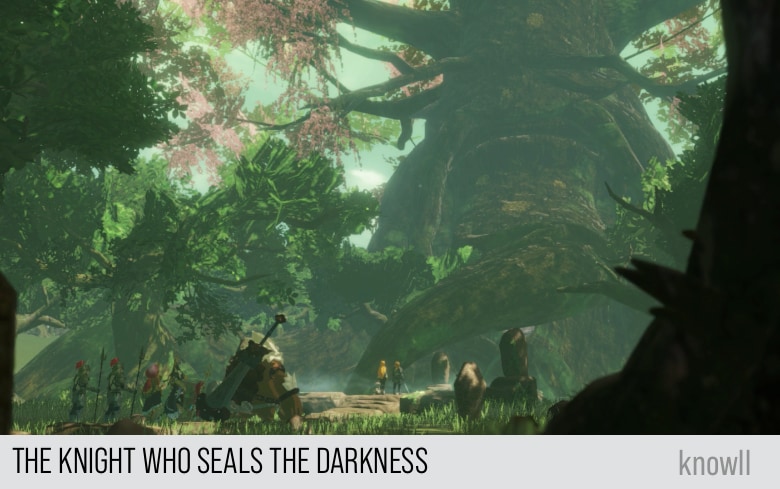
Zelda: Great Deku Tree.
Deku Tree: All is well. The sword you hold is the key to defeating the Calamity - to sealing the darkness.
Deku Tree: Young hero, you have been chosen by the sword to wield its power and vanquish the Calamity.
Deku Tree: And you, Princess. Do not lose hope. The path will open for you soon.
Zelda: I see...
Deku Tree: Forgive me. A deep slumber beckons and even I cannot refuse. You have all that is needed to face whatever destiny awaits.
Deku Tree: Hyrule's fate... is in your hands...
Characters Unlocked
As you move through the Chapters and later on with the Challenges and Quests, you will be unlocking characters that you can use for your party. This Chapter entry that you just completed rewards you with Hestu.
If you would like to learn Hestu's moveset and combat guide, view our Hestu Guide.
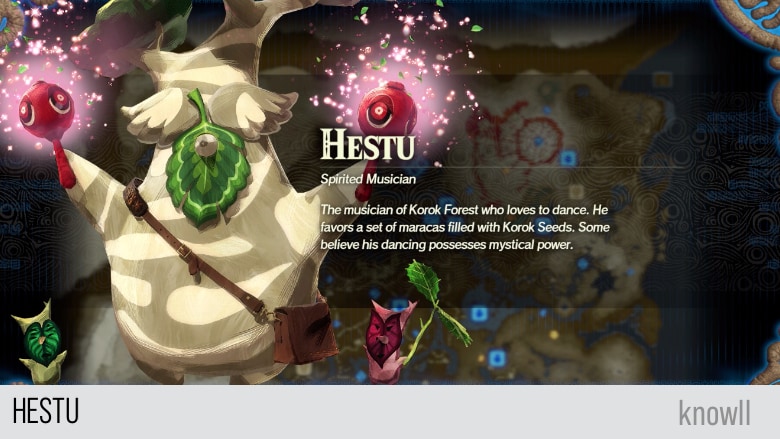
Spirited Musician. The musician of Korok Forest who loves to dance. He favors a set of maracas filled with Korok Seeds. Some believe his dancing possesses mystical power.
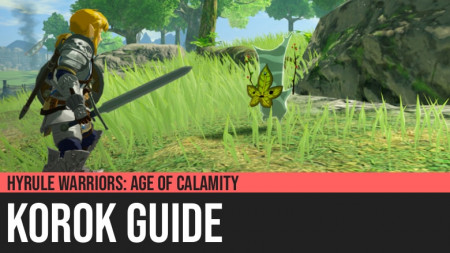
Korok Locations
Every Chapter in the game contains Koroks. The main challenge is that there is no feature in the game that will make them appear on the map.
Hence, we provide all their locations on the area as well as on the map.
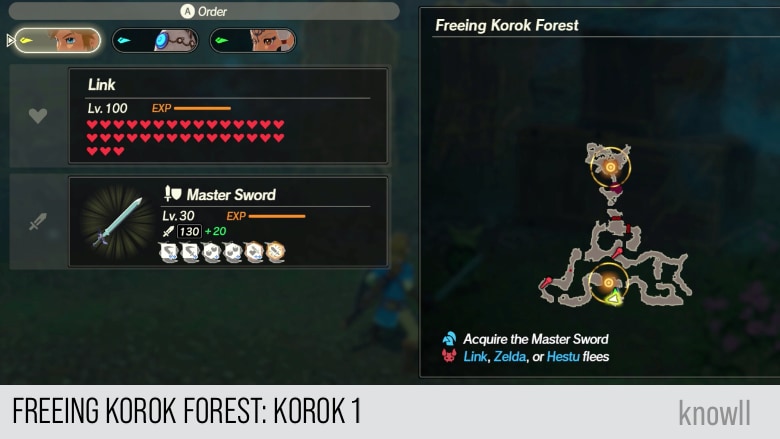
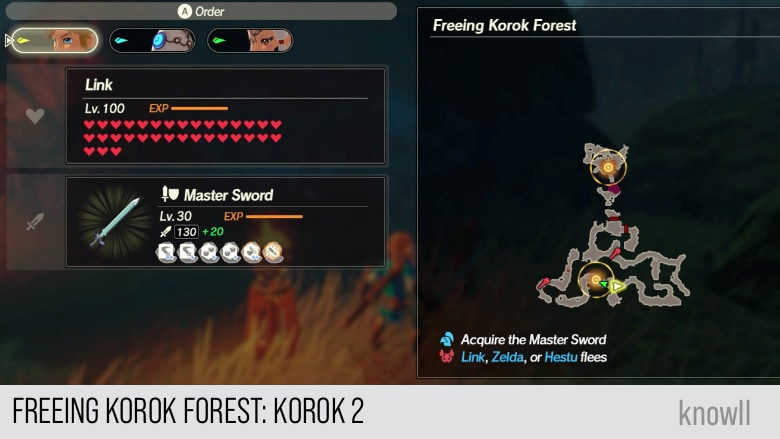
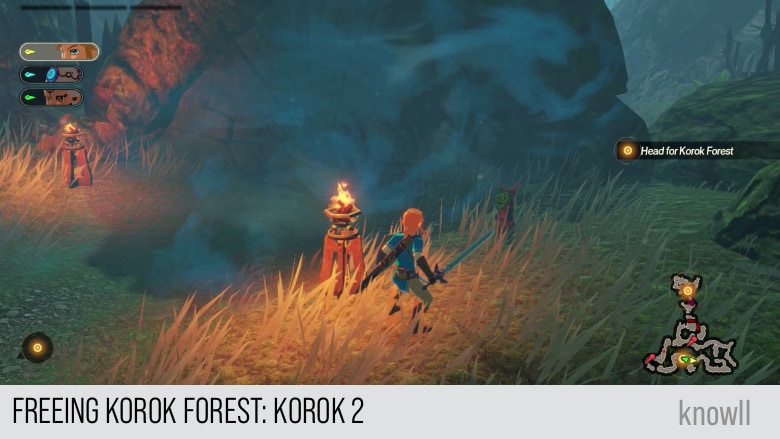
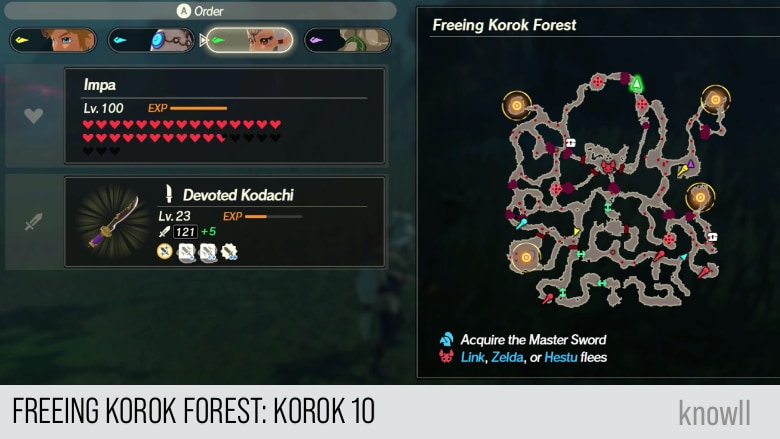
Total Koroks: 10
Freeing Korok Forest Korok 1

Freeing Korok Forest Korok 2
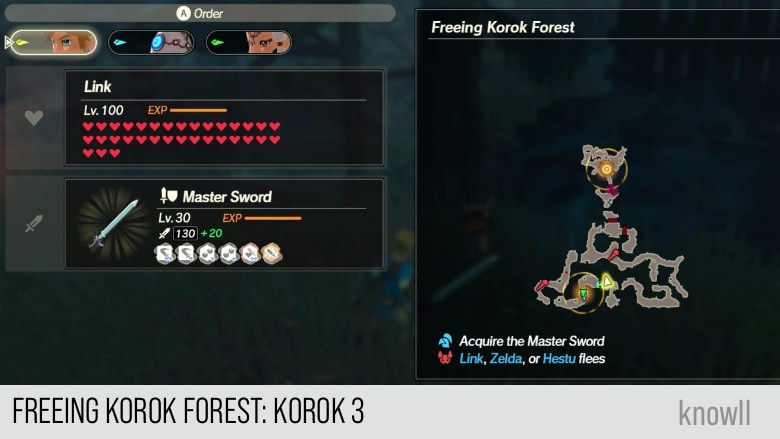
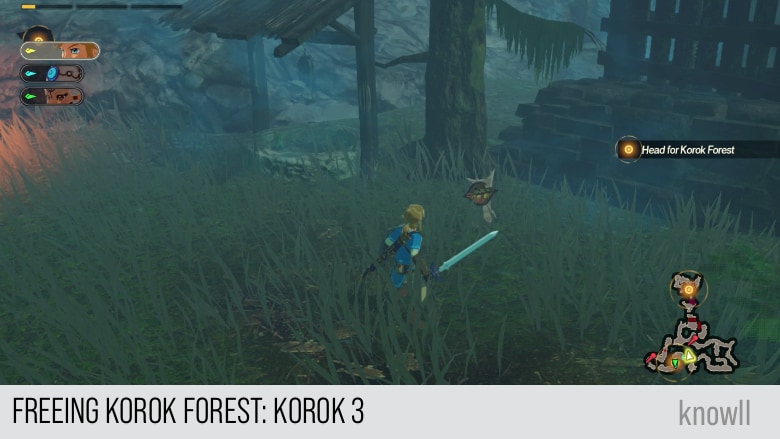
Freeing Korok Forest Korok 3
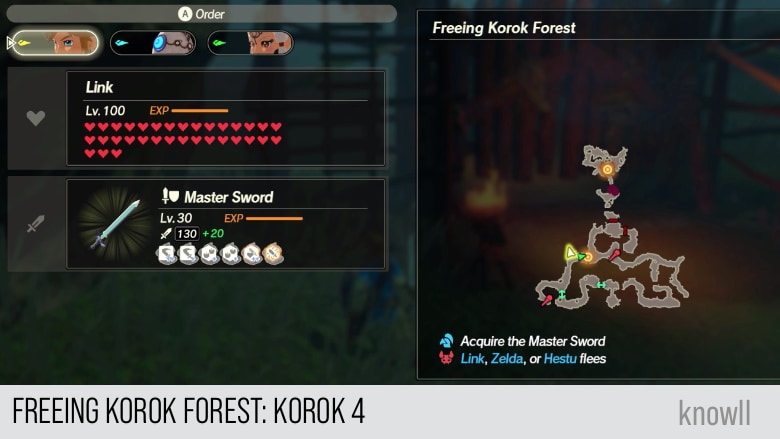
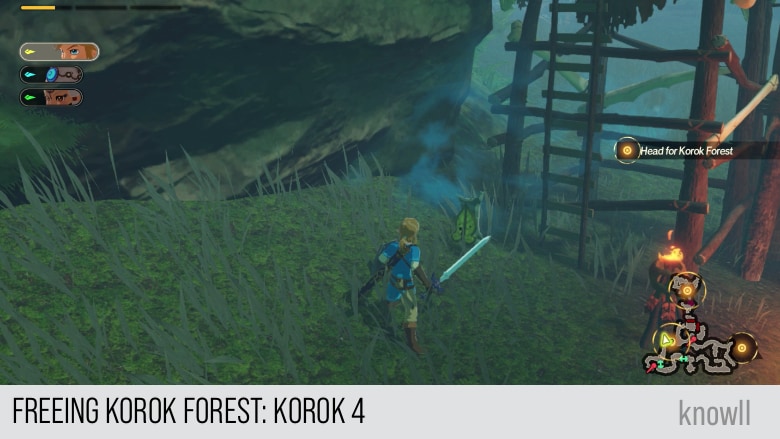
Freeing Korok Forest Korok 4
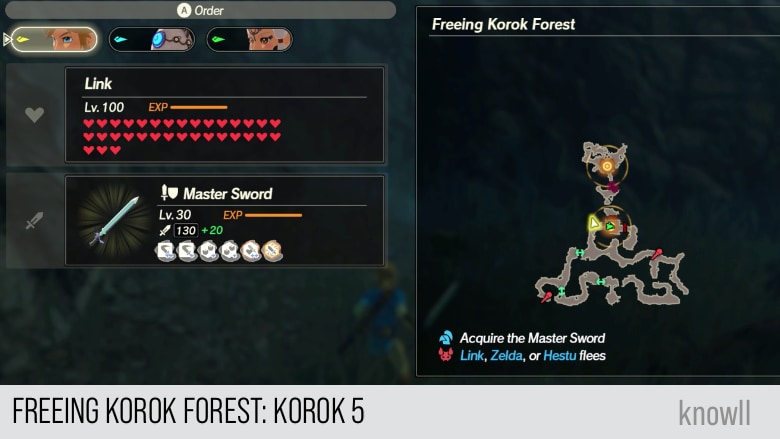
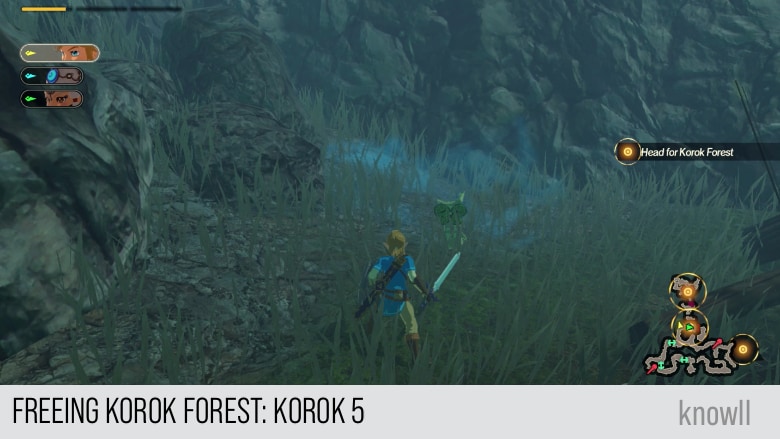
Freeing Korok Forest Korok 5
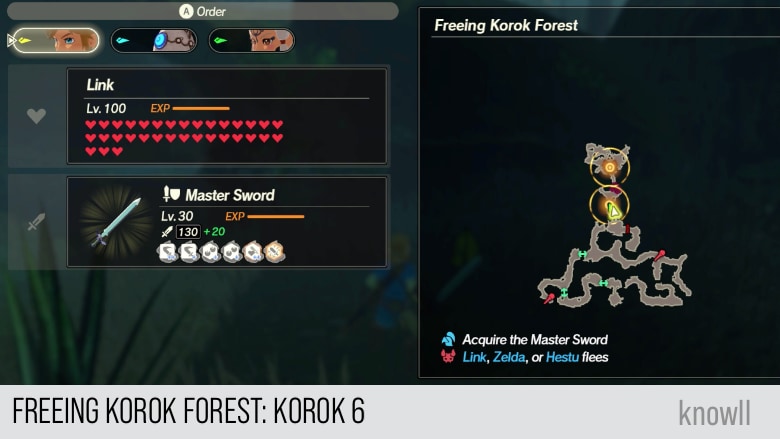
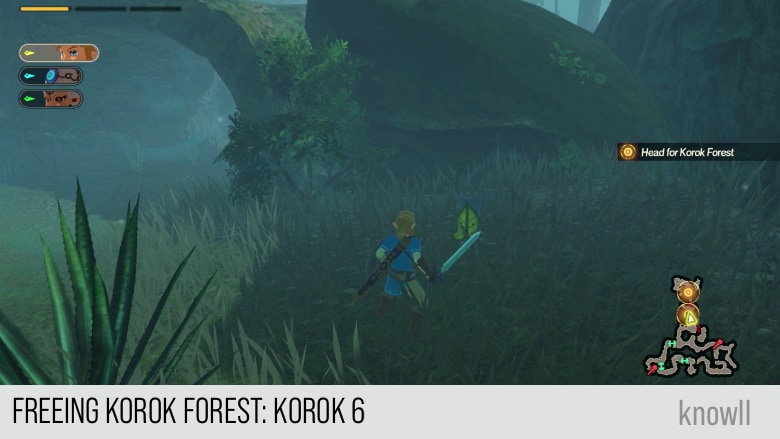
Freeing Korok Forest Korok 6
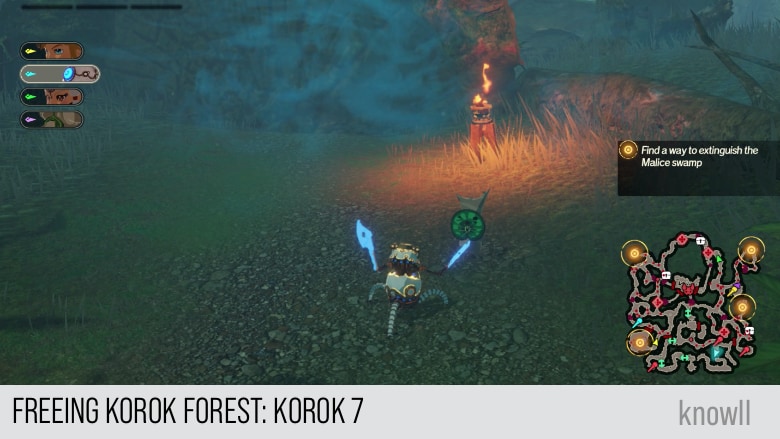
Freeing Korok Forest Korok 7

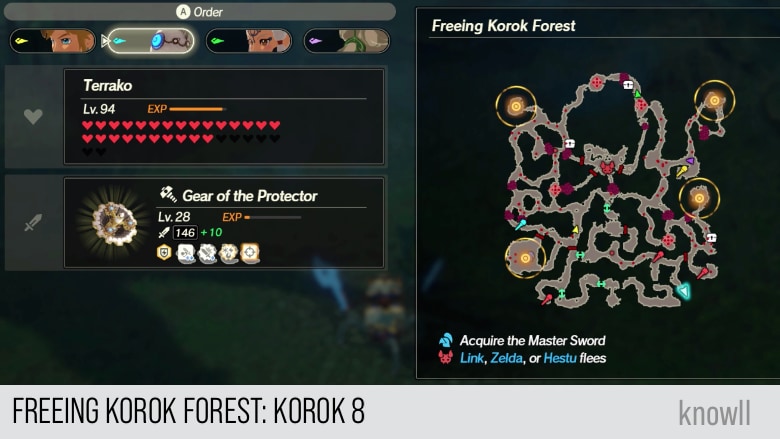
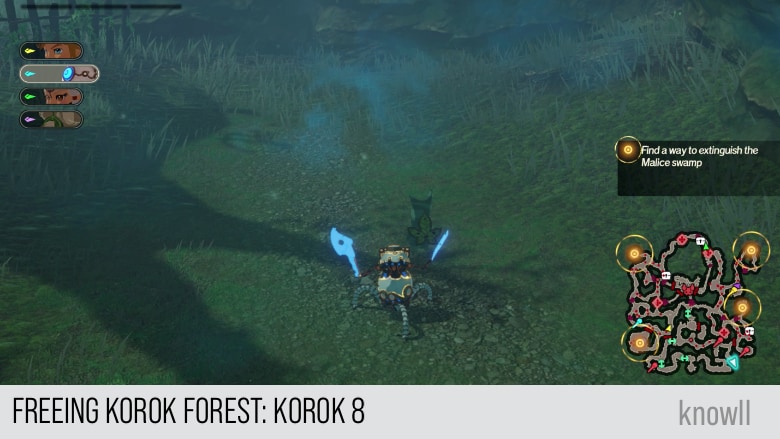
Freeing Korok Forest Korok 8
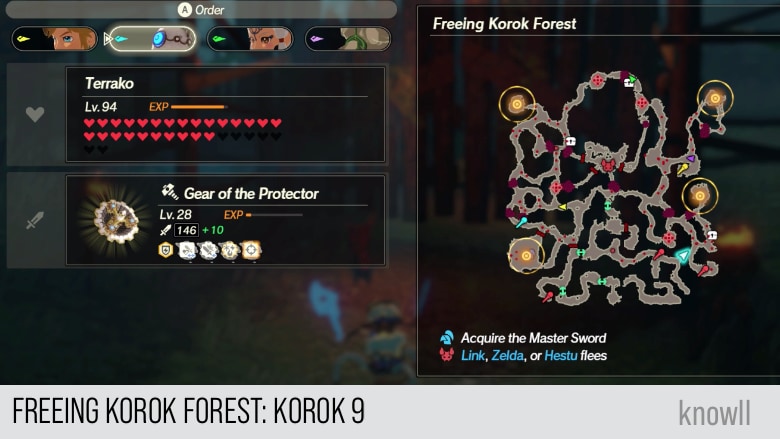
Freeing Korok Forest Korok 9
Freeing Korok Forest Korok 10
Continue the adventure with our next Chapter entry The Road Home, Besieged.