
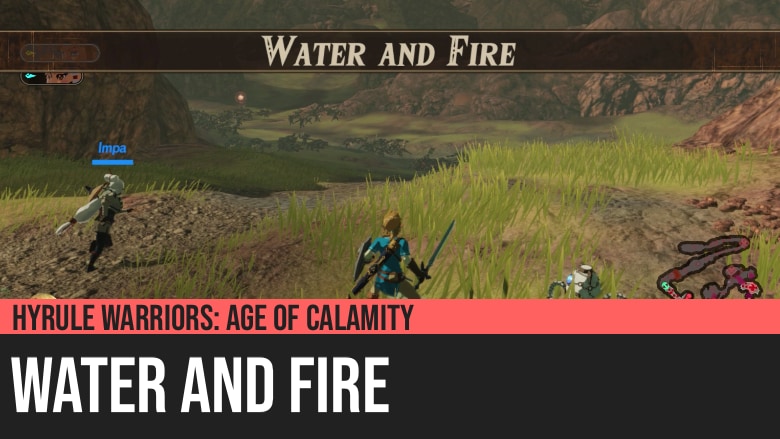
Hyrule Warriors: Age of Calamity - Water and Fire
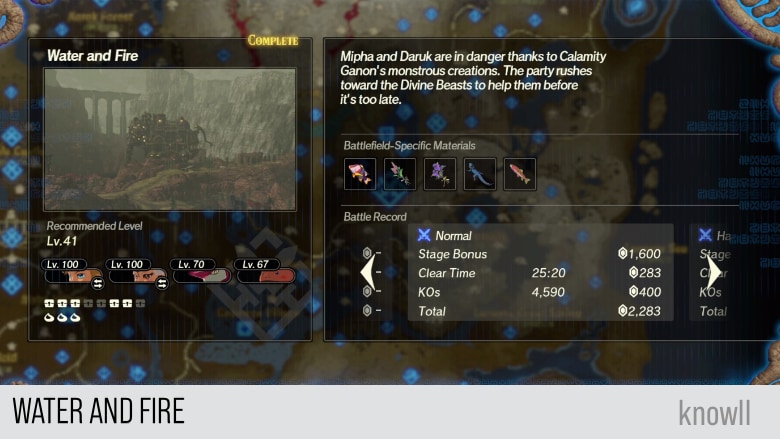
Hyrule Warriors: Age of Calamity - Water and Fire is the second part of Chapter 5 of the game. Mipha and Daruk are in danger thanks to Calamity Ganon's monstrous creations. The party rushes toward the Divine Beasts to help them before it's too late.
This Chapter entry, together with Air and Lightning, is one of the best and most exciting Chapter entries in the whole game. It gives you two excellent boss fights with Waterblight Ganon and Fireblight Ganon while providing two new characters to unlock with Sidon and Yunobo. Also, it's the entry where you first fight specific elemental versions of large enemies like Ice Lynel and Fire Lynel.
Treasure Chests and Koroks
- 3 Koroks
- 8 Treasure Chests
Battlefield-Specific Materials
- Mighty Porgy
- Warm Safflina
- Swift Violet
- Hearty Lizard
- Sizzlefin Trout
Special Rewards
Fate of the Divine Beasts
Having witnessed images of the Divine Beasts under the control of Calamity Ganon, the party hurried to the Champions, praying it was not too late.
To the east of Hyrule, preparations to content with Calamity Ganon were under way. Vah Ruta and Vah Rudania stood at the ready, as monsters pressed in from all sides.
The monsters threatened to overwhelm them, but Mipha and Daruk battled relentlessly within their Divine Beasts. Meanwhile, Link and the others began to cut a path directly through enemy ranks.
Rescue Across Time: Water and Fire
Mipha and Daruk both lock themselves in challenging battles against the powerful phantoms created by Calamity Ganon. Just as all seems to be lost, however, mysterious figures arrive from the most unexpected place to save them...
Sidon Joins the Fight
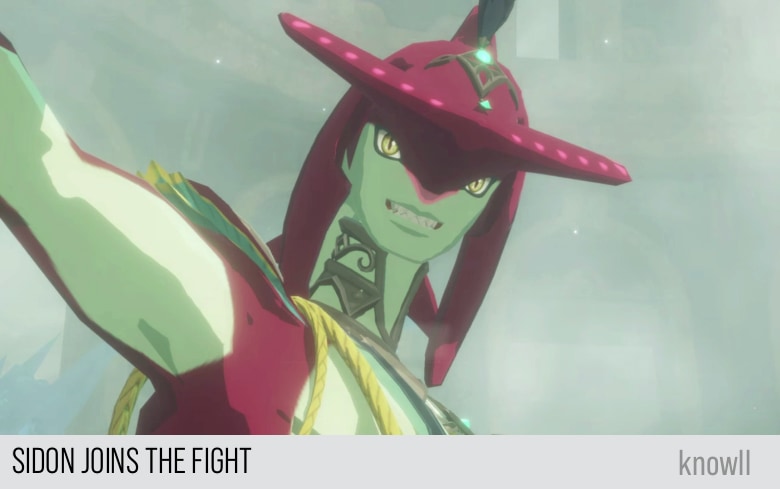
Mipha struggles in fighting a monster in Vah Ruta.
Mipha: So, this is how it ends?
Out of nowhere, another hero helps Mipha.
Sidon: NO! I will not allow you to take her again.
Mipha: Huh? Sidon?
Yunobo Joins the Fight
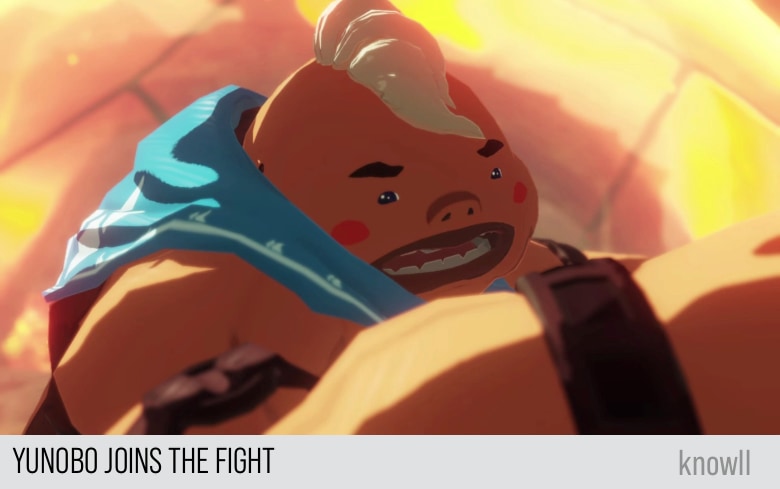
Daruk struggles in fighting a monster in Vah Rudania.
Daruk: No way, monster!
Out of nowhere, another hero helps Daruk.
Daruk: Wait. That's my power... Who are you?
Yunobo: Um, well... Don't worry about that. I'm here to help!
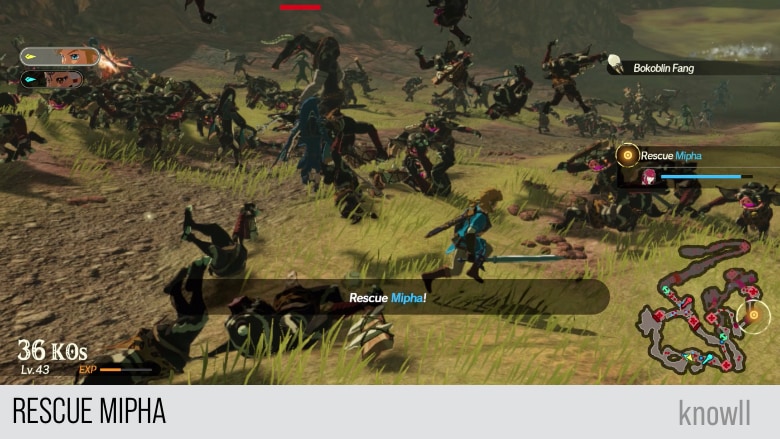
Objective: Rescue Mipha
This objective is similar to the one in Freeing Korok Forest, where you need to reach a destination, but you are blocked by a pool of malice, which you need to clear gradually. By defeating certain enemies, the pool of malice will be completely cleared.
Zelda: Mipha and Daruk are in danger. We have to help them now.
Impa: About Daruk... Reports say his Divine Beast is surrounded by lava. We can't get near.
Zelda: In that case, let's rescue Mipha first. Vah Ruta's rain may be able to cool the lava.
Zora Captain: You made it in one piece! Hurry now. Lady Mipha is inside the Divine Beast!
Zelda: Let's approach Vah Ruta first.
After capturing the first outpost, the quest for clearing the pool of malice will be given.
Zora Captain: Thank you. You are a true friend to the Zora.
Impa: This swamp... Is this the Calamity's doing? In any case, we can't get close to Vah Ruta like this.
Zelda: There might be a way to clear it. Let's investigate the vicinity.
Objective: Find a Way to Extinguish the Malice Swamp
As shared above, by defeating certain enemies, the malice swamp will get extinguished little by little.
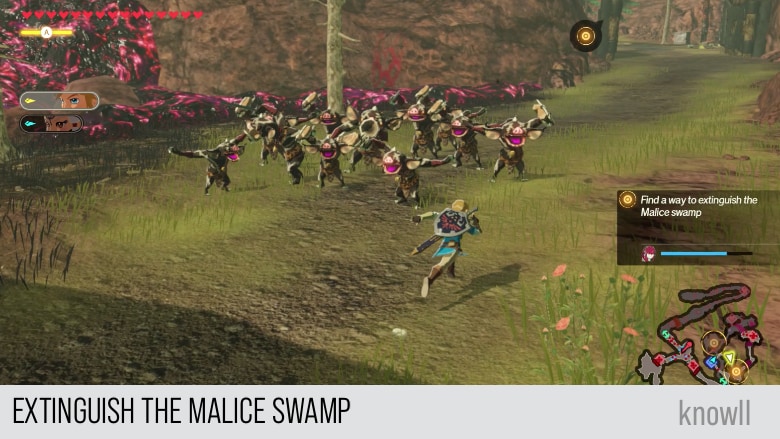
Follow the target position on the map. Once you reach it, the means for clearing the malice pool will be known. Defeat the Black Moblin that appeared.
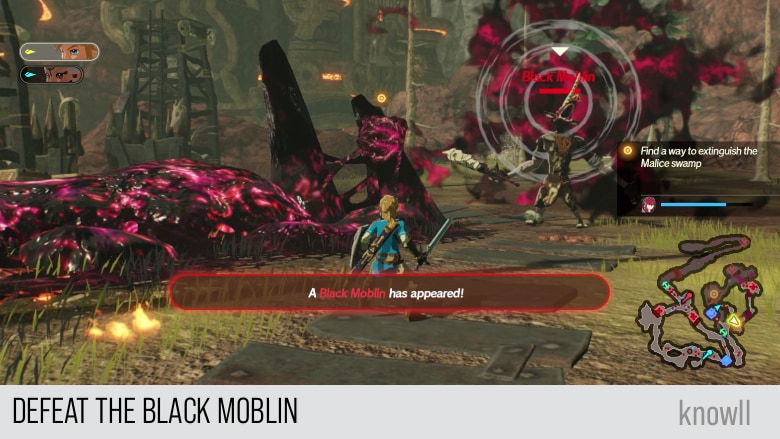
Mipha: Just as I feared, the tide of battle is not in our favor. But we must persist.
After defeating the Black Moblin, a malice eye will appear. This has the same mechanic as in BOTW. By attacking the malice eye, the pool it controls gets cleared.
In BOTW you have to shoot the eye to kill it. In this game, you can damage it with your normal attacks.
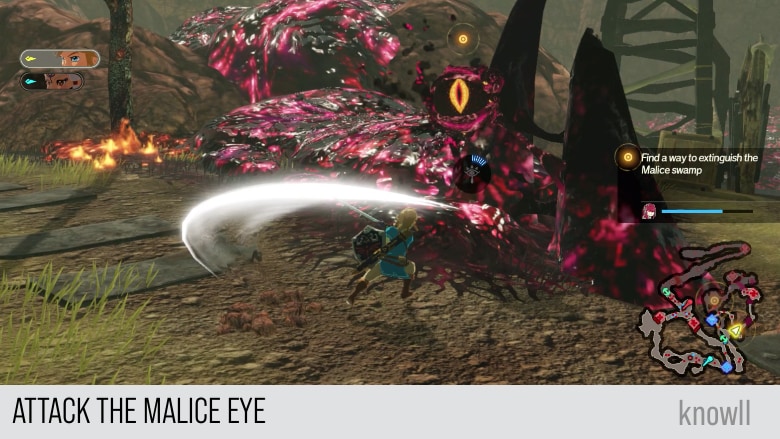
Part of the Malice swamp disappeared after the Eye of Malice's defeat!
Zelda: It seems destroying the... eyes... makes the swamp vanish. I'm certain there are more, so stay sharp.
Objective: Seek out and Defeat the Eye of Malice
Follow the target position on the map and you will find the next malice eye. Before you can damage it, one or more enemies will always get summoned.
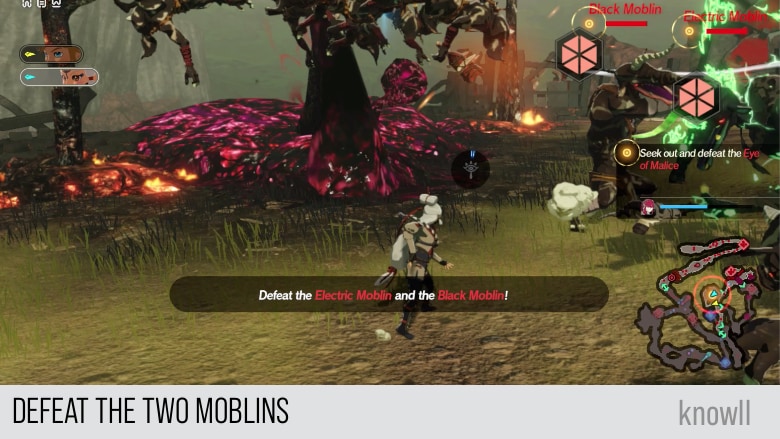
After defeating the Electric Moblin and the Black Moblin, attack the eye.
Mipha: I am bent... but not broken. Even as my body grows weak... I will stand strong!
More of the Malice swamp has disappeared upon the Eye of Malice's defeat!
There is one more left, follow the map to reach it.
This final malice eye will summon the hardest enemy so far, an Ice Lynel. This is the first time the game lets you face this elemental enemy.
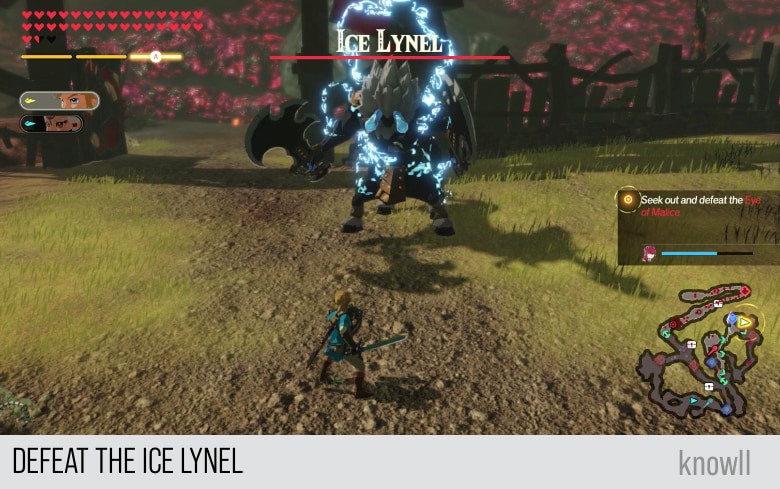
Fighting the Ice Lynel
We have covered the moveset and attacks of multiple Lynels in previous chapters. To see their summary, view our Enemies Guide. However, as this is the first time we face an Ice Lynel, we will cover its attack patterns.
This Ice Lynel is unique because it's also Dual-Wielding swords. So we will cover those attack patterns as well, though they might not be elemental.
Dual Slice Attack - Inward
The first attack pattern we will cover is the Dual Slice Attack. It is a non-elemental attack that is unique to Lynels with two swords.
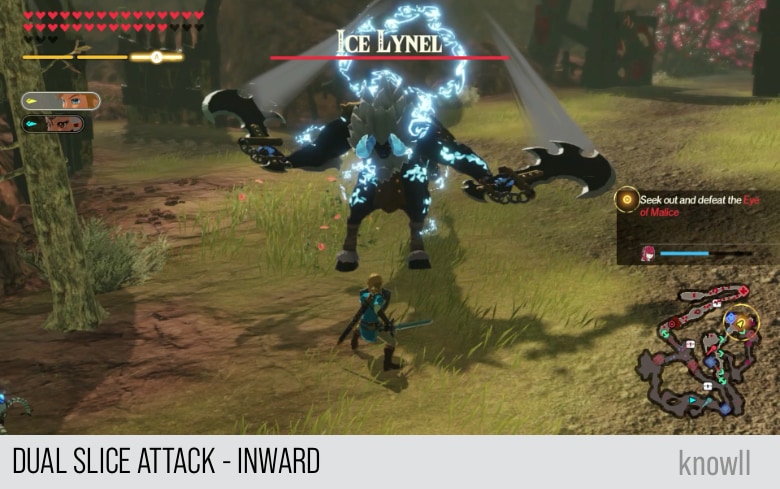
In this attack, the Lynel raises up its two swords as below and then rushes towards you to slice inwards.
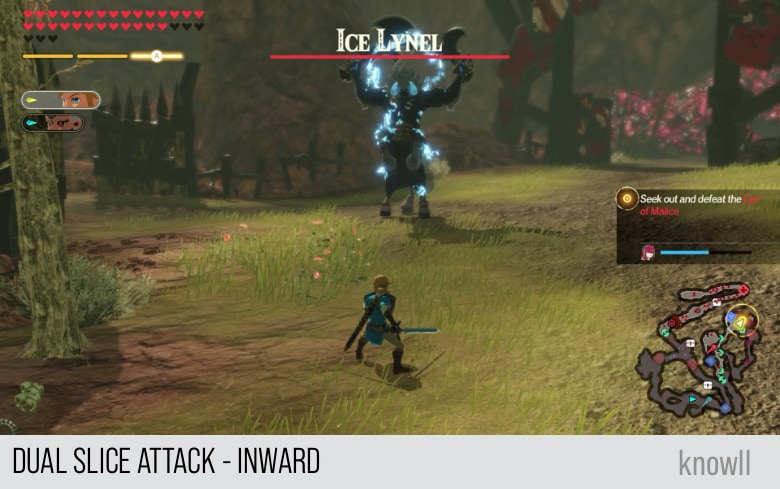
You can see the direction is from outwards closing in.
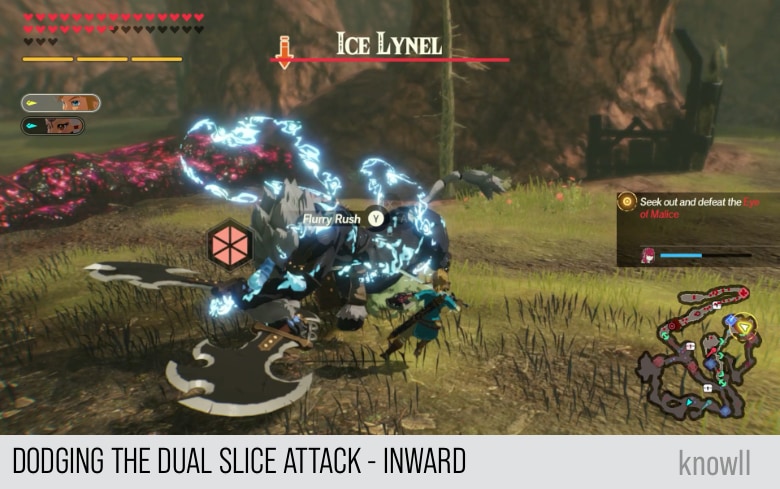
You can easily punish this attack by doing a dodge to your side, so you can gain a Flurry Rush on the Lynel.
Dual Slice Attack - Outward
This is similar to the earlier attack, except it from inside moving out. This attack actually follows the earlier attack. They belong to the same combo that the Lynel always follows.
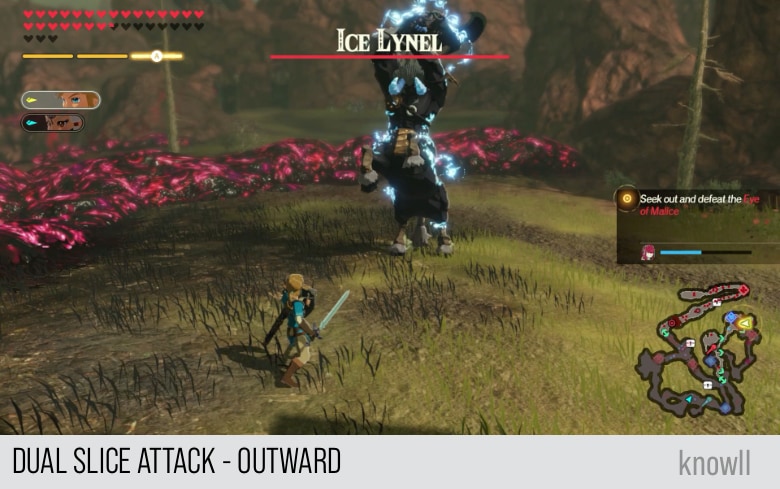
You can see the direction of the blades, they are moving from being close to each other to being separated.
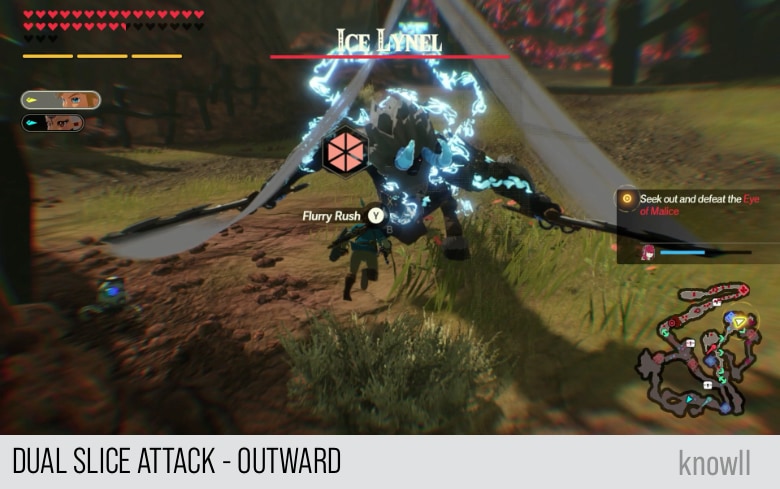
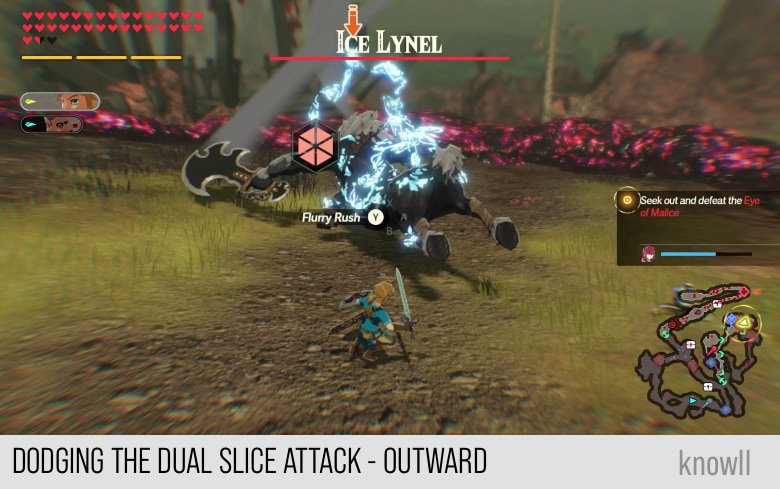
Similar to the first attack, you can punish this by doing a side dodge, as shown below.
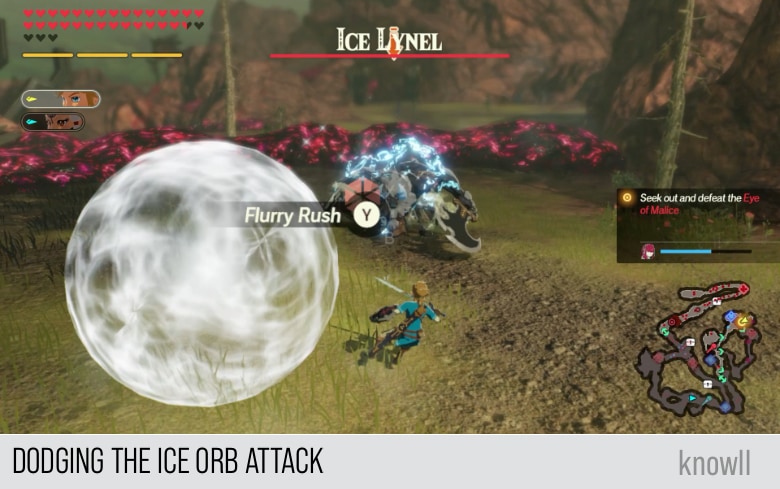
Ice Orb Attack
Every Lynel has a projectile attack. For the Ice Lynel, it becomes an Ice Orb. He will release three orbs, each of which can freeze you.
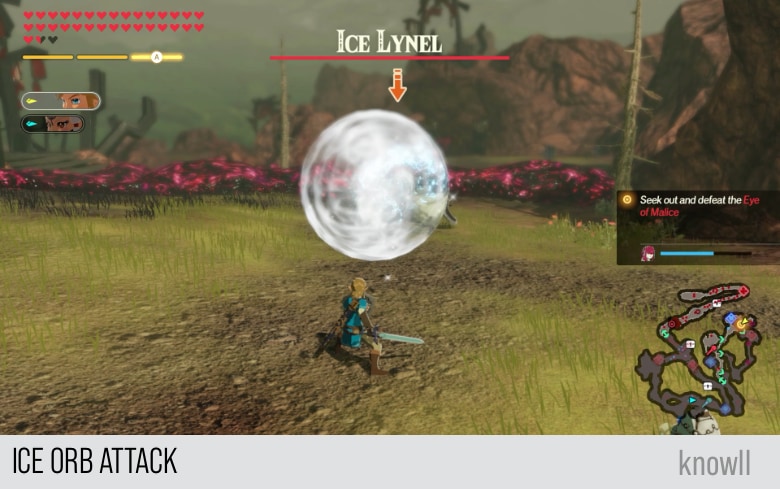
You can punish this attack by doing a side dodge, as the orb is about to hit you.
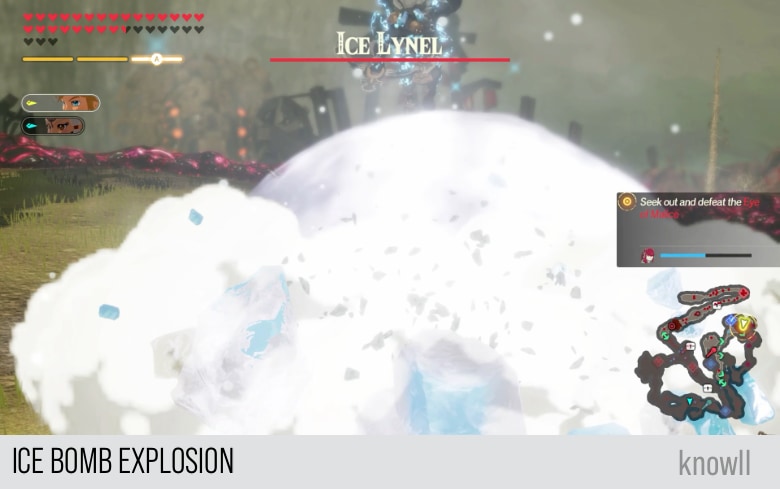
Ice Bomb Attack
Every Lynel has an attack where it jumps and shoots one or more arrows at you. The Ice Lynel uses an Ice Bomb that he aims at you while it is up in mid-air.
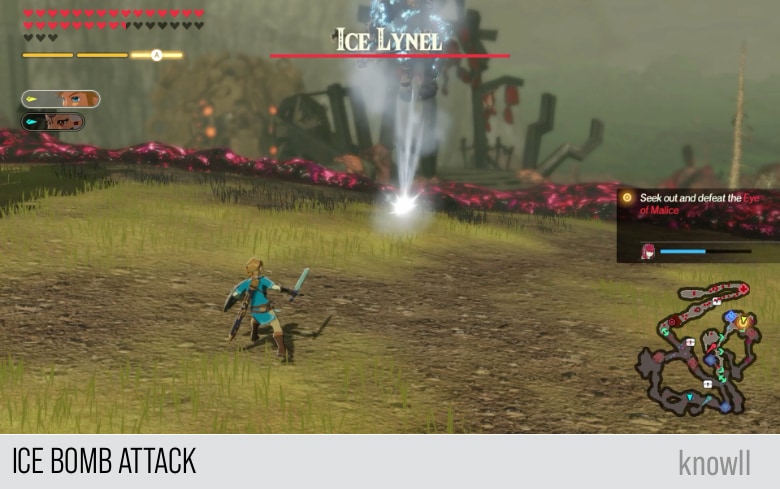
The ice bomb will then explode into a large sphere of freezing ice.
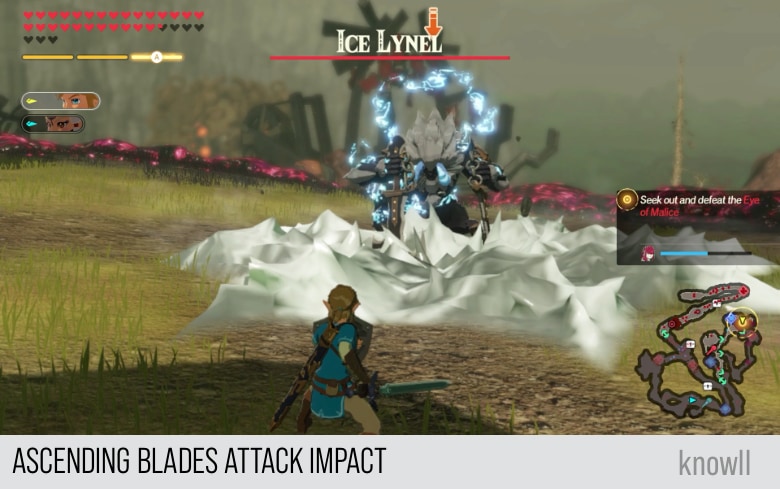
Ascending Blades Attack
The Ascending Blades is one of the most beautiful attacks in the whole game. This attack is unique to Lynels who are dual-wielding swords.
It has two parts: the ascent attack and the slam attack.
Like all powerful attacks in the game, this one has a wind up. The Lynel first makes the pose below, where it gathers its strength and prepares its momentum.
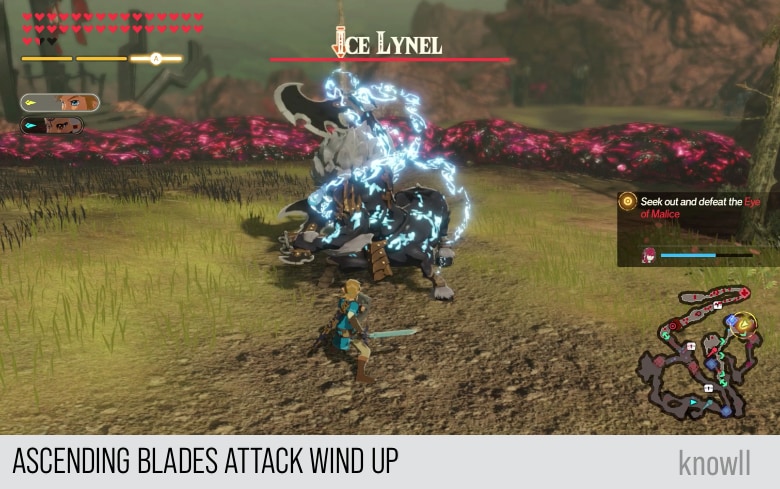
And then it will swing its two blades in 360 degrees, making it fly up in the air. Once it has reached a few meters up, it will reposition itself in midair, target you, and then slam its two blades on your position.
If you didn't move or dodge, you will receive the full force of his attack, which causes an AOE as shown below.
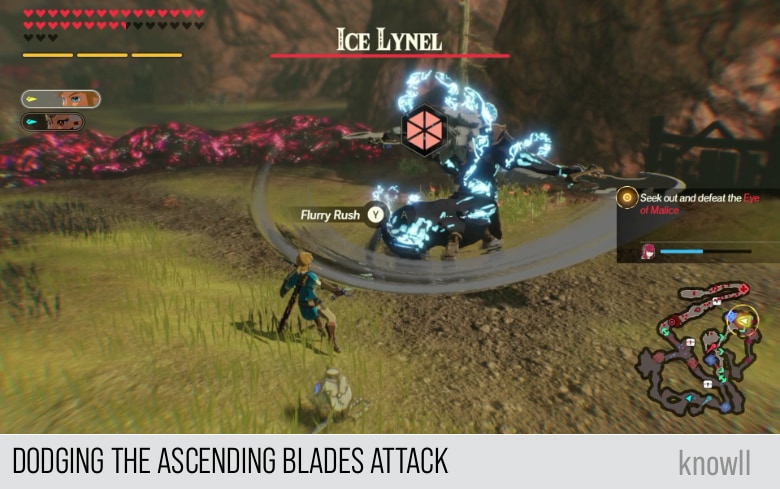
You can punish this attack while it's doing the first part of the combo, while it is ascending. You can dodge the ascent by doing a backflip dodge.
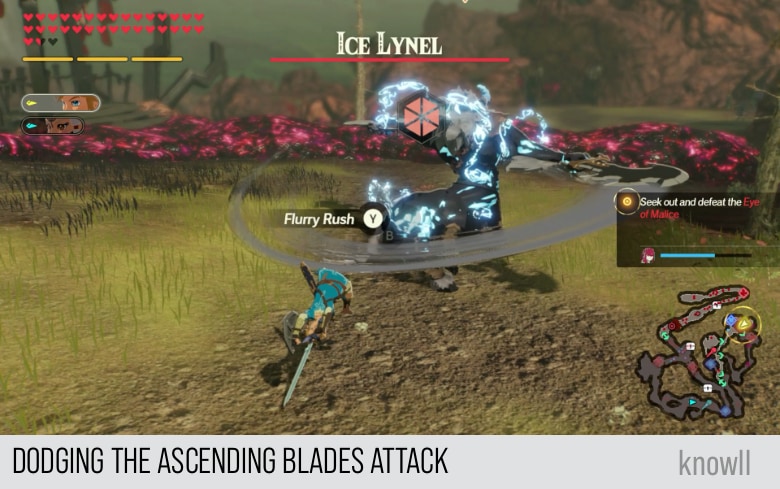
You can also gain a Flurry Rush by doing a side dodge, as shown below.
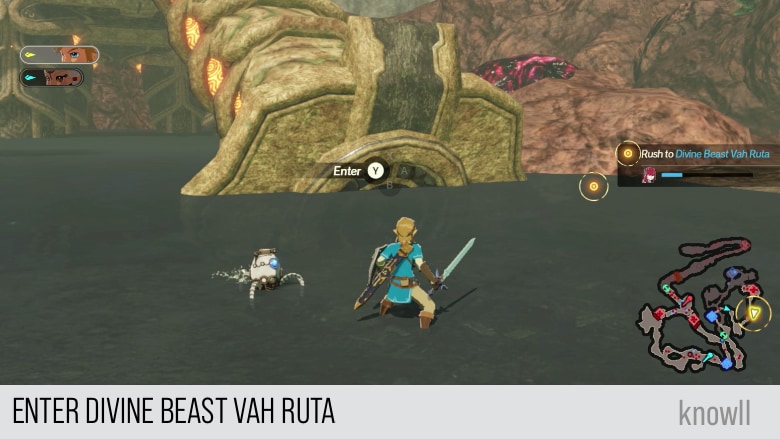
Once you have defeated the Ice Lynel, you can enter Vah Ruta.
Divine Beast Vah Ruta can now be entered!
Zelda: Looks like the swamp has disappeared. Let's go help Mipha.
Objective: Enter Divine Beast Vah Ruta
Zelda: It appears the little one's power has allowed people other than the pilot to enter Vah Ruta.
Note that you can only bring one hero inside the Divine Beast, so choose carefully.
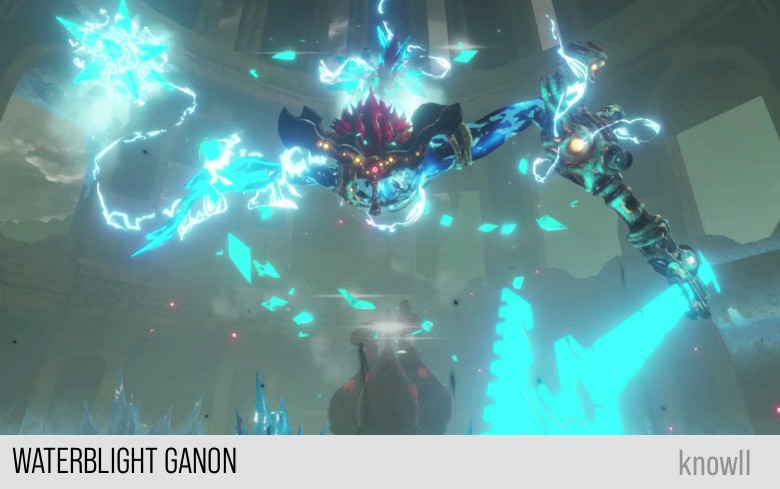
Avatar of the Calamity: Waterblight Ganon
Waterblight Ganon, a phantom created by Calamity Ganon within the Divine Beast Vah Ruta, pushes Mipha and Sidon to their limits. Nearly at the end of their strength, aid finally arrives to rescue them.
Mipha: Such strength...
Sidon: Sister! Please, don't!
Sidon: Oh! You've come at last!
Objective: Defeat Waterblight Ganon
Mipha: Link! I knew you would come!
Sidon: Aha! So it was you, my friend! Exquisite!
Notice that Sidon recognized Link. That means he already met Link's counterpart in his own world.
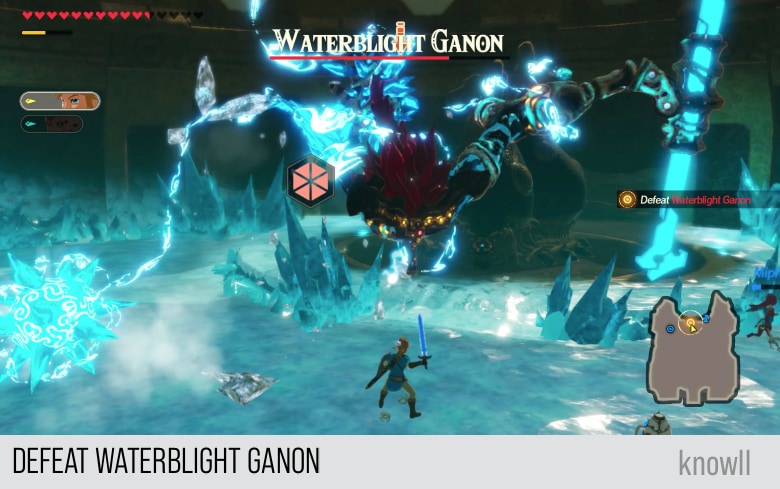
Fighting Waterblight Ganon
Waterblight Ganon is a melee fighter as shown by his choice of weapons, a spear, and a flail. He has only a few ranged attacks that do not include these weapons.
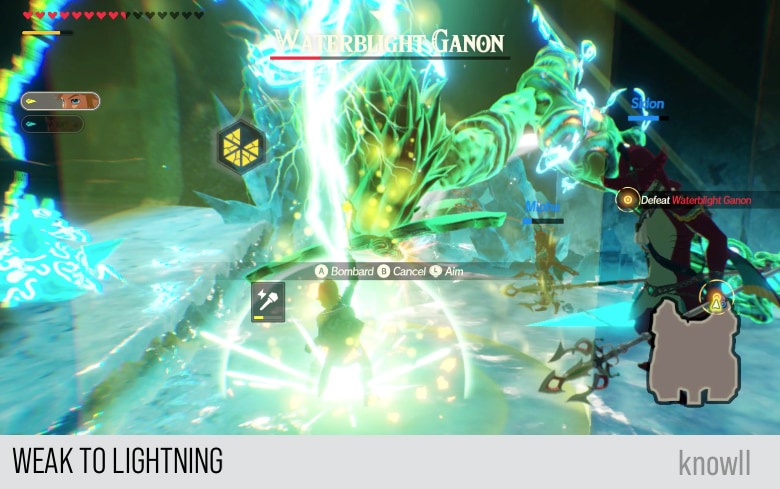
Before fighting this monster, it's best to know its weakness. Waterblight Ganon is weak to lightning attacks. You can clear his whole WPG in one usage of the Lightning Rod.
You can observe that his WPG when struck by lighting is brittle and can easily break.
We will now go through the attacks of Waterblight Ganon.
Ice Spear Attack
This attack uses the left-hand weapon of Waterblight Ganon, the spear. In its wind up, the monster pulls his left arm to prepare the attack.
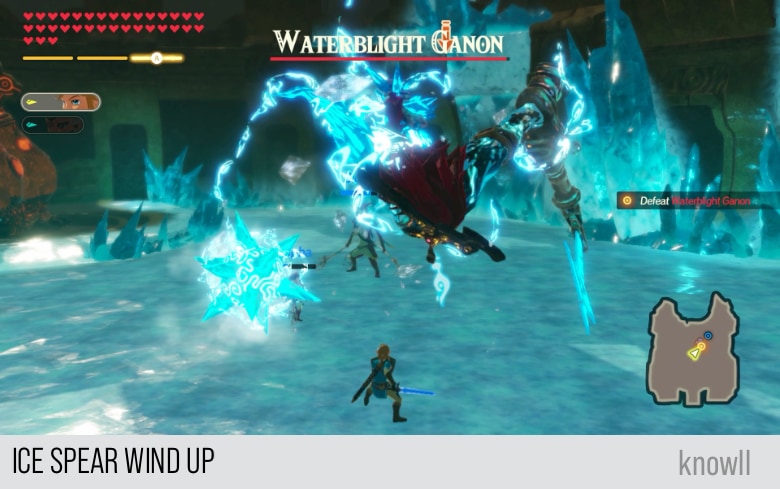
And then he will immediately thrust it forward in your direction, as shown below. You can block this attack. This attack does not have any follow-up, so you can guard it safely.
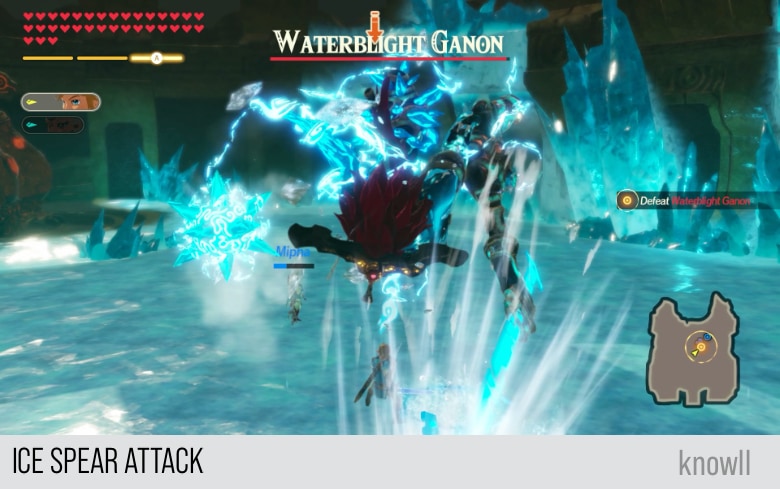
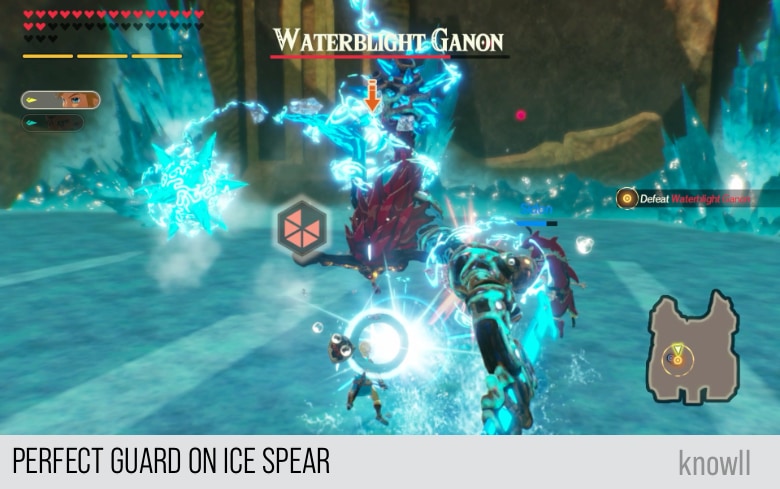
You can easily avoid this by dodging to your side. And if you are confident, you can do a perfect guard on it as well.
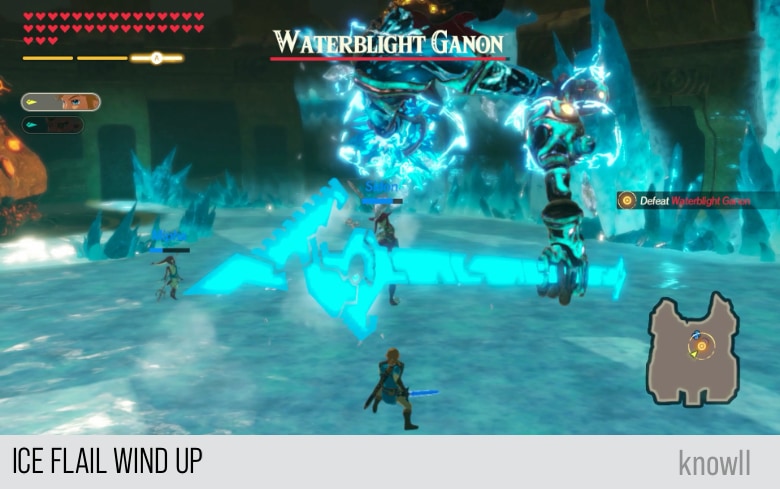
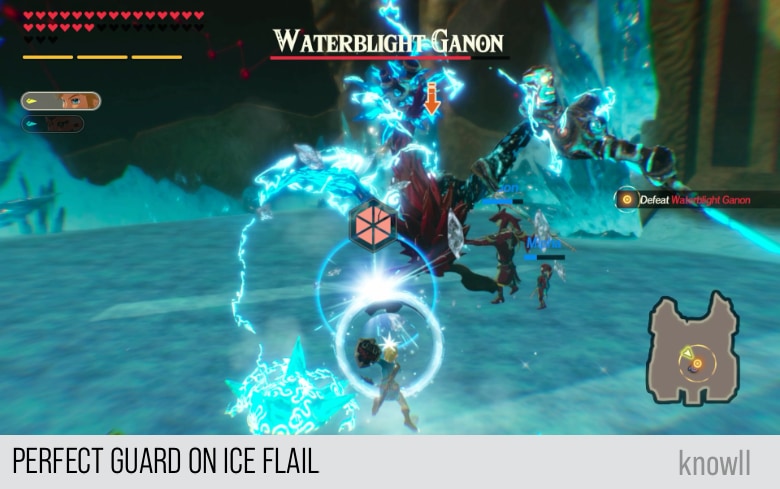
Ice Flail Attack
This attack uses the right-hand weapon of Waterblight Ganon, the flail. In its wind up, the monster pulls his right arm and raises it up.
And then he will swing the flail with full force towards your direction. This can flatten you like a pancake if it hits.
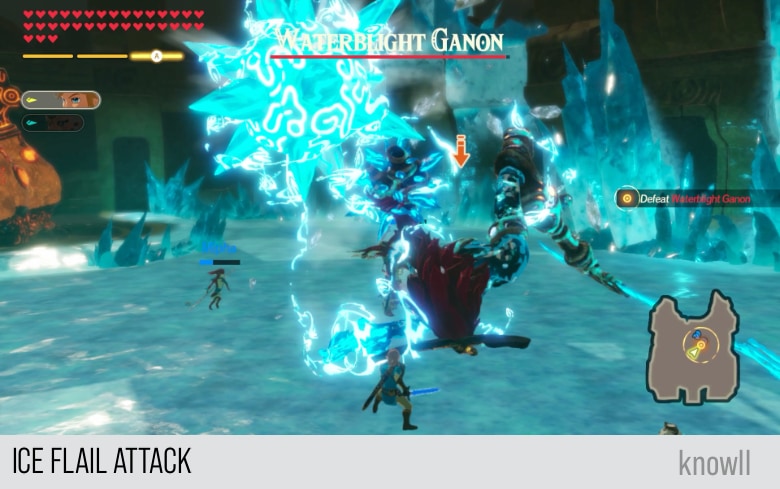
Similar to the earlier attack, this can be easily avoided by dodging to your side, as shown below.
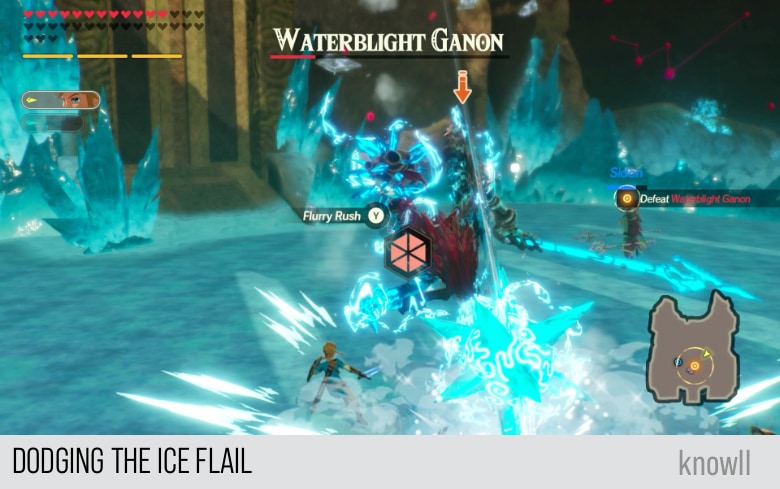
And if you are confident, show Ganon who is the boss by doing a perfect guard on the ice flail like below.
Ice Swipe Attack
This attack uses the spear as well, but instead of doing a thrust, the monster swipes the spear in a 180 degrees direction. This can easily trip enemies in front of Waterblight Ganon.
In the attack's wind up, Ganon raises his left arm to his right side. That is the sign for you to get ready for a swipe.

He will then immediately swing it in his front, swiping the enemies in a large arc.

You can punish this attack by doing a backflip dodge as shown below.
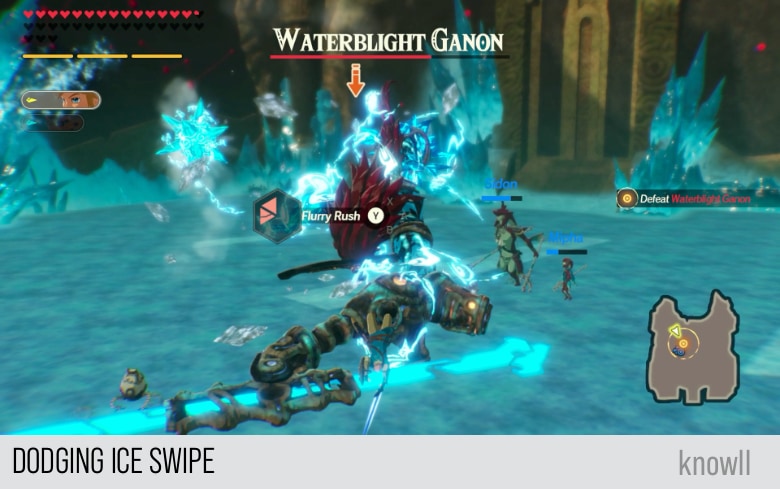
Alternatively, you can do a perfect guard on it and show him who is the boss.

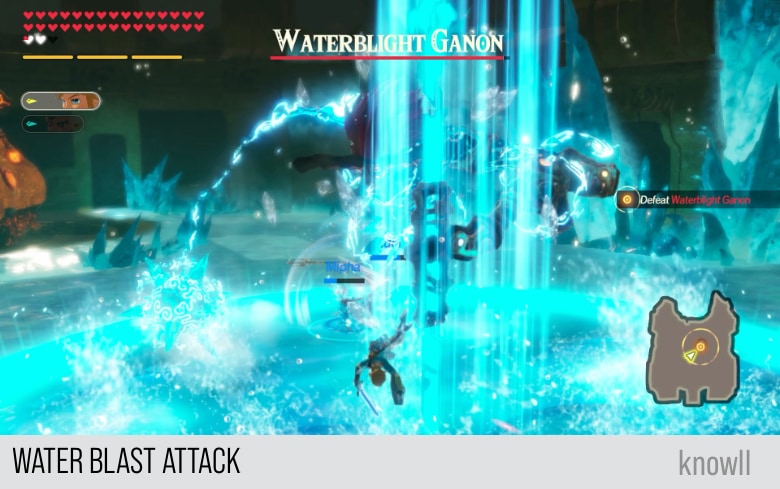
Water Blast Attack
The Water Blast is one of the special attacks of Waterblight Ganon.
In the attack's wind up, he positions his spear pointing to the floor, where circles start to appear.
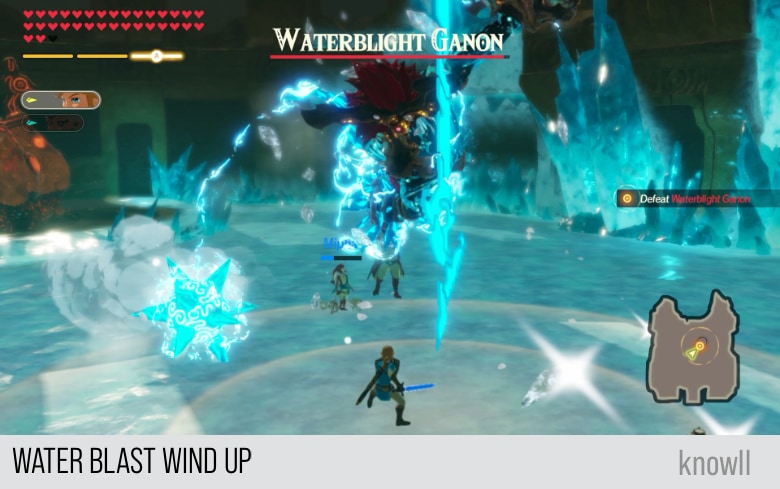
After a few seconds, he will slam the spear towards the circle, and a blast of water will go up, damaging everyone within the circle.
You can avoid this by getting out of the circle, the moment the wind up is telegraphed.
Water Teleport Attack
This is a non-damaging attack, where Waterblight Ganon disappears in a ball of sphere, and then appears somewhere nearby.
Note that he will always do an attack after showing up. So the moment he disappears, expect an attack coming next and either guard or dodge.

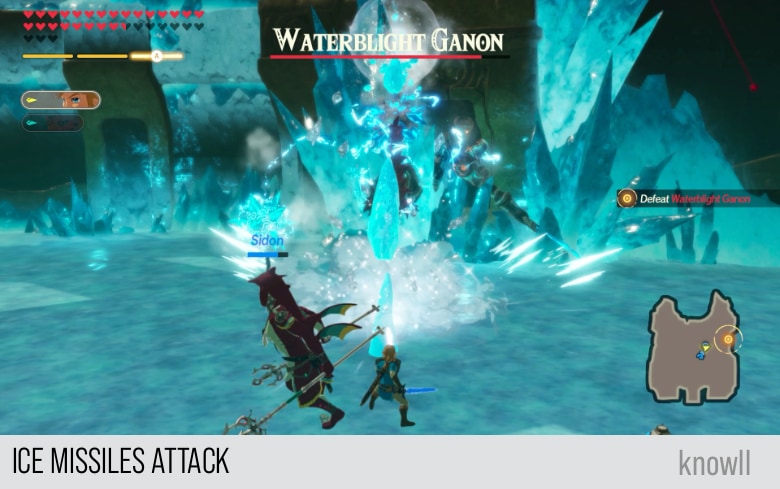
Ice Missiles Attack
This is one of the few non-melee attacks that Waterblight Ganon has. In the attack's wind up, the monster will show a sphere forming on top of its head.
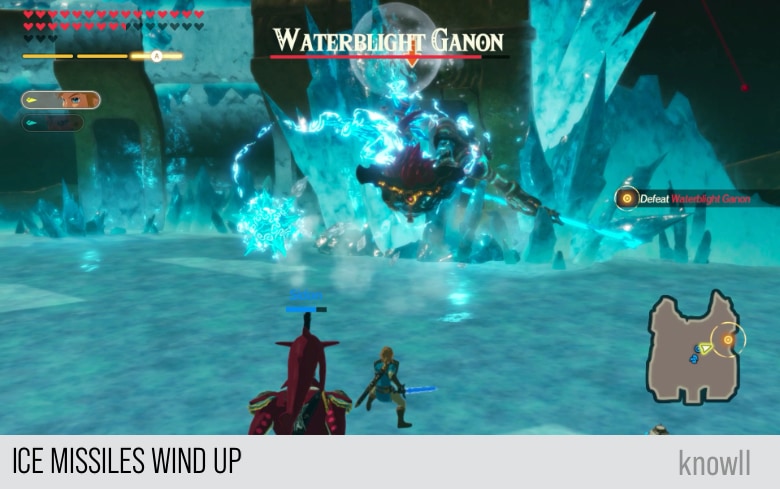
Immediately after that, ice missiles will attack you in a straight direction. You can easily dodge to your side to avoid getting hit.
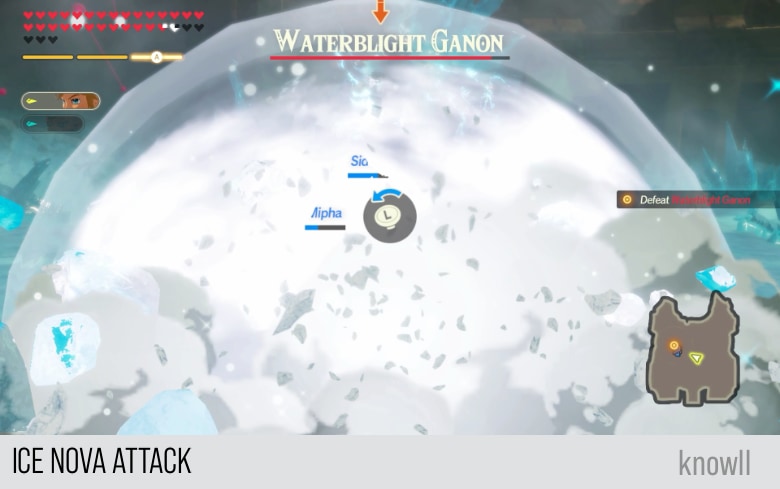
Ice Nova Attack
This is another rare ranged attack by Waterblight Ganon. In the attack's wind up, he pulls both of his arms and weapons inwards, as though coiling himself into a ball.
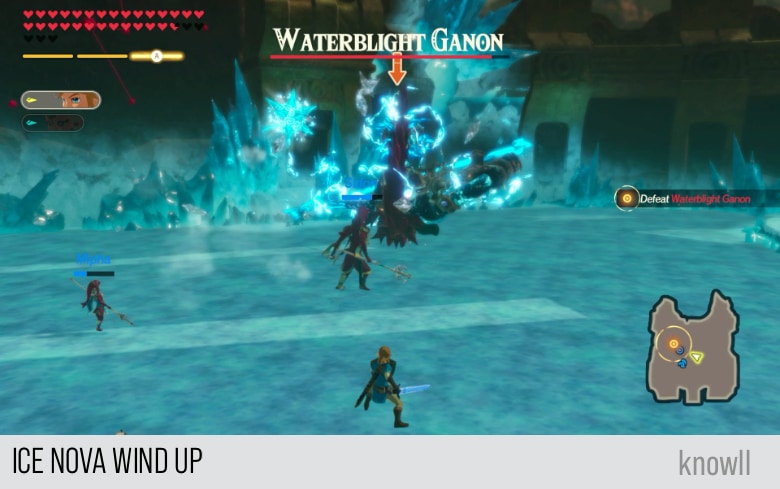
Then he will immediately raise his head and release both of his arms. An ice bubble will start forming with you inside.
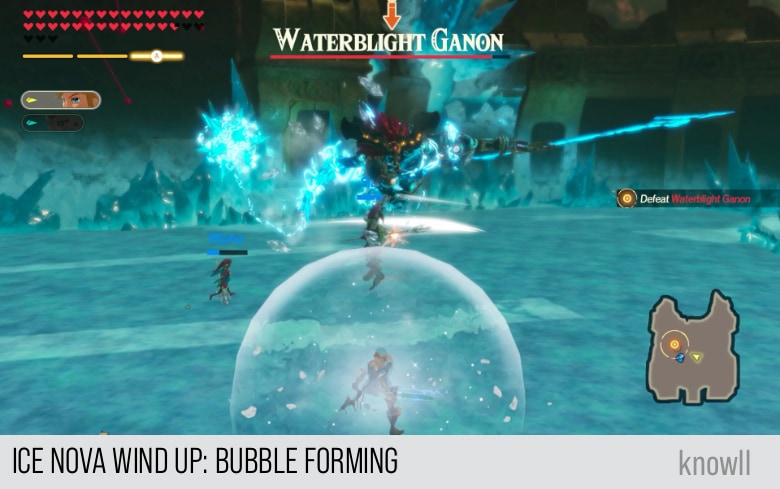
Once the bubble reaches a large size, it will explode, damaging and freezing everyone in it.
Ice Rush Attack
This is one of Waterblight Ganon's flashy attacks, next only to the Flailstorm Attack. This attack not only does have a wind up, but it also has a telegraph that you counter with Cryonis.
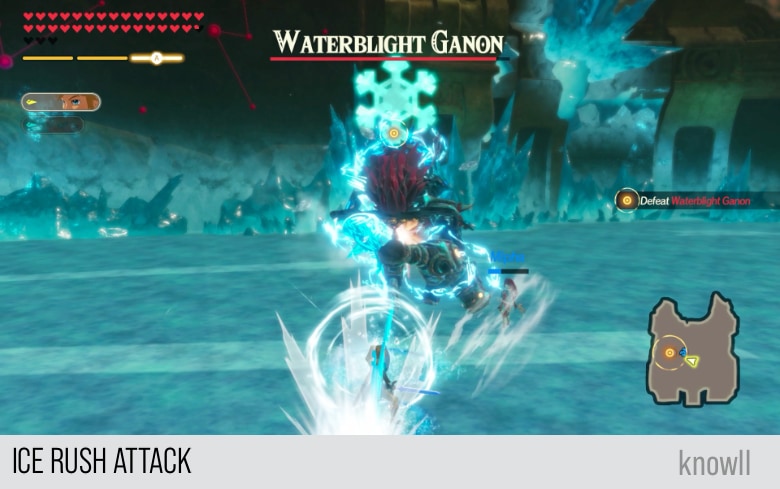
As this is a thrust attack, your goal is to stop it using ice pillars created with Cryonis. In the wind up, the monster pulls both of his weapons, as through preparing their momentum.
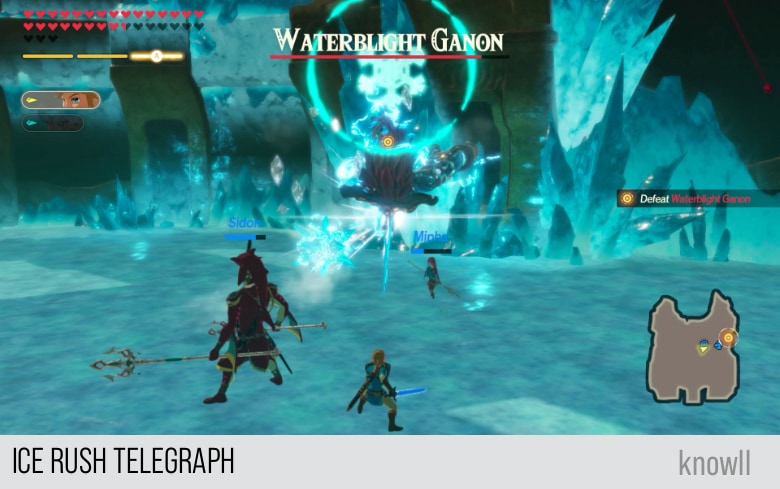
Then the monster will forcefully blast towards your direction, using his spear to impale you.
To avoid getting damage, you can either block or dodge to your side.
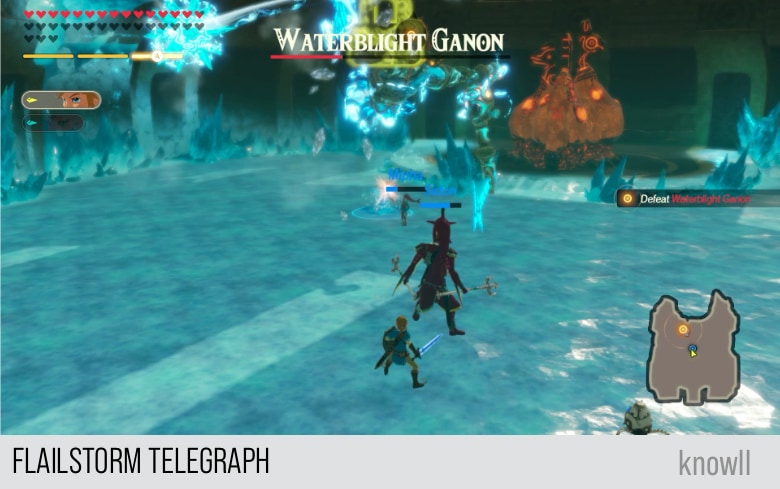
Flailstorm Attack
This is the flashiest and most impressive melee attack of Waterblight Ganon. It is also very rare. You might fight the monster and not see this attack. He typically does it after receiving significant damage to his health.
The attack has a telegraph, which you can counter using Statis. In the attack's wind up, the monster spins his flail menacingly, as through increasing the impact it will create once he decides to start hammering it towards you.
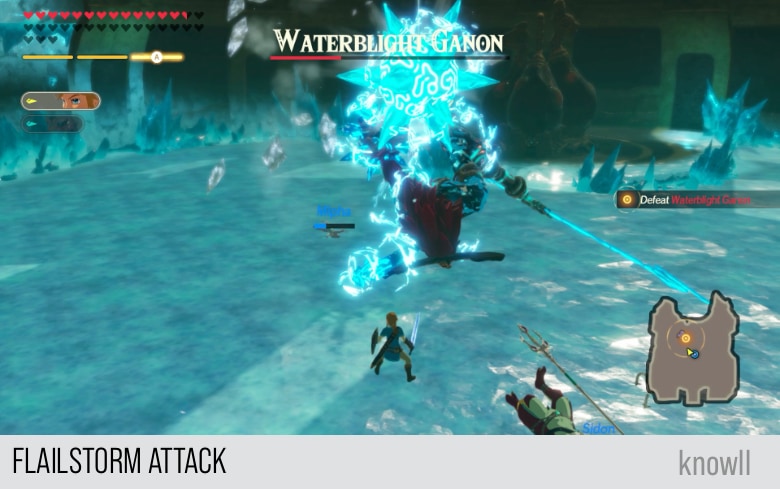
After a few swings, he will start pounding the flail in your direction multiple times. You can easily avoid it though, by dodging to your side. As the attack has multiple follow-ups, don't block as you will get guard-broken, hence taking damage after the first blocked attack.
Using all the tips shared above, go ahead and defeat Thunderblight Ganon.
Mipha: It seems I was right to place my faith in you, Link.
Sidon: What a feeling... to have aided my beloved sister. Ah, and to fight at your side again was delightful!
Mipha: Come now, we must rescue Daru - Gah!
Sidon: Sister! Your body is succumbing to exhaustion. Please, rest. I shall rescue our ally!
Sidon: I have long awaited this moment... I shall help my dear sister and Link as best I can!
You can now play as Sidon!
Objective: Head Toward Divine Beast Vah Rudania
Now that Sidon got unlocked, you can use this chance to become familiar with his moveset and attacks.
You can visit our Sidon Guide for more tips. While moving to the target position, you will discover the next enemy you have to defeat.

Sidon: Hmm, an Igneo Talus is replenishing the lava... Vah Ruta's rain will be ineffective if this keeps up.
Zelda: Vah Ruta seems not to be fully functioning, either. I doubt it can produce enough rain.
Sidon: That settles it! Let us go and make quick work of that Igneo Talus.
Goron Captain: Let's do this thing! Smash 'em to bits!
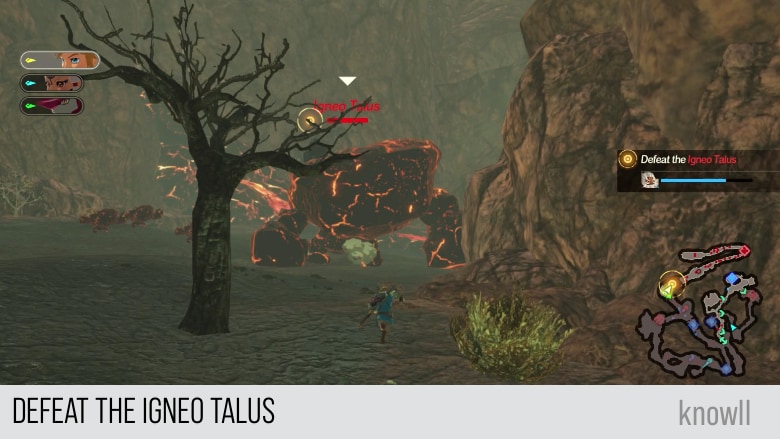
Objective: Defeat the Igneo Talus
Proceed to the target position and defeat the Igneo Talus. We have covered the attacks and moveset of the Igneo Talus in Daruk, the Goron Hero. You can view our Enemies Guide for more tips.
While fighting the Talus, you can see the plea for help of Daruk.
Daruk: Guh... This could be a tough rock to swallow.
After defeating the Igneo Talus, you can continue onboarding Vah Rudania.
Sidon: That, as they, is that! The Igneo Talus is no more!
Mipha: In that case - Vah Ruta, it is time!
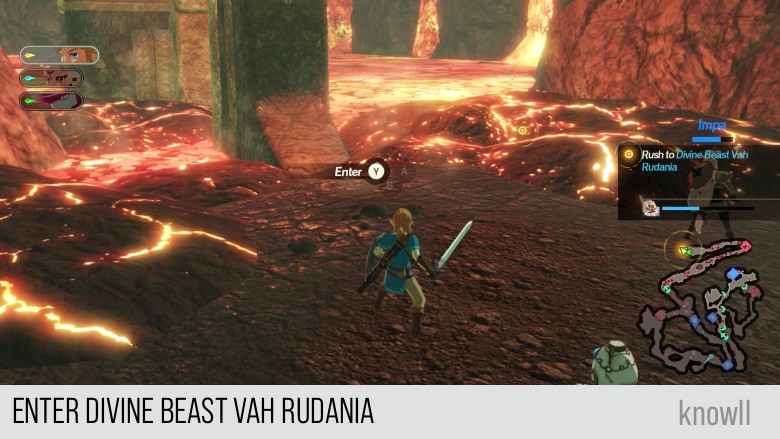
The lava has cooled down and it's possible to enter Divine Beast Vah Rudania!
Zelda: Now we should be able to board Vah Rudania. On to help Daruk!
Objective: Enter Divine Beast Vah Rudania
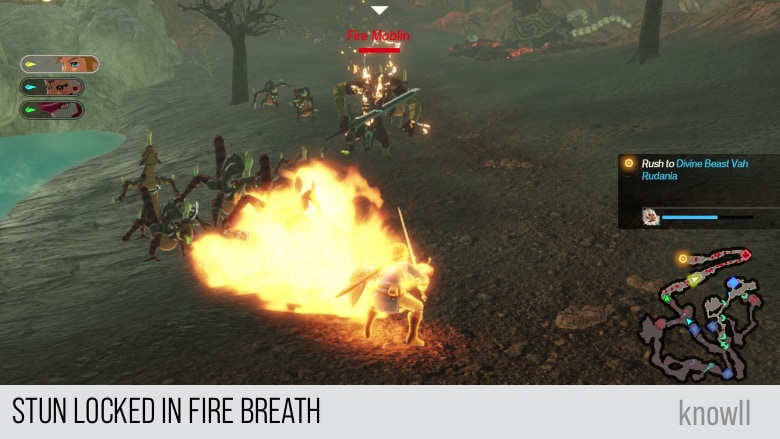
On your way to the target position, you will face aggressive monsters that are normally not that much active in stopping you from your movement.
An example is the scene below, where multiple Lizalfos start doing their fire-breath attack, which is very rare, even with one of them. To see them doing it as a group is interesting.
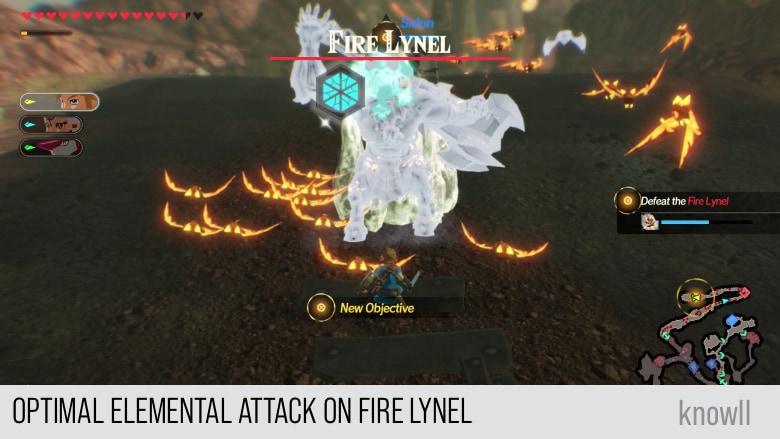
You will face the most aggressive enemy though once you reach the target position, a Fire Lynel.
A Fire Lynel has appeared!
Zelda: This can't be!
Objective: Defeat the Fire Lynel
We have covered the moveset and attacks of multiple Lynels in previous chapters. To see their summary, view our Enemies Guide. However, as this is the first time we face a Fire Lynel, we will cover its attack patterns.
This Fire Lynel is unique because it has a Two-Handed weapon. So we will cover those attack patterns as well, though they might not be elemental.
Just note that if you want to do an optimal elemental attack on this Fire Lynel, you can use the Ice Rod. It will cause the WPG of this monster to become brittle and easier to clear.
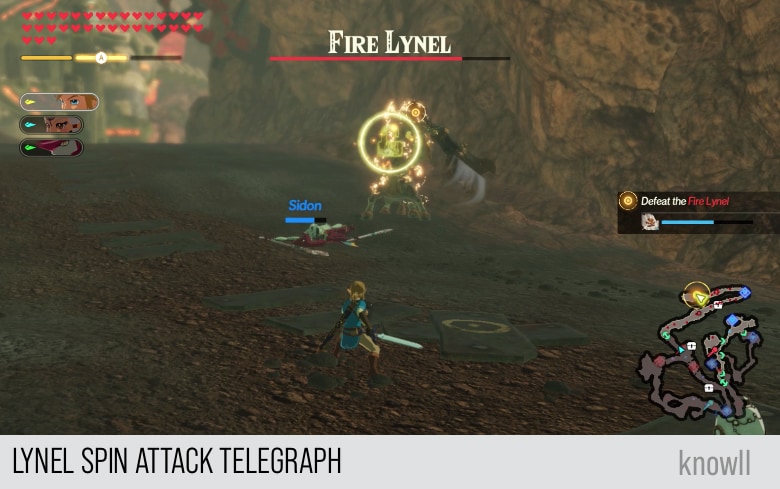
Spin Attack
The Spin Attack for Lynels is unique to those who are using a Two-Handed weapon. It does not gain an elemental attribute though, unlike the Spear when handled by an Electric Lynel.
As this is a spinning attack, it shows a telegraph that you can counter with Stasis.
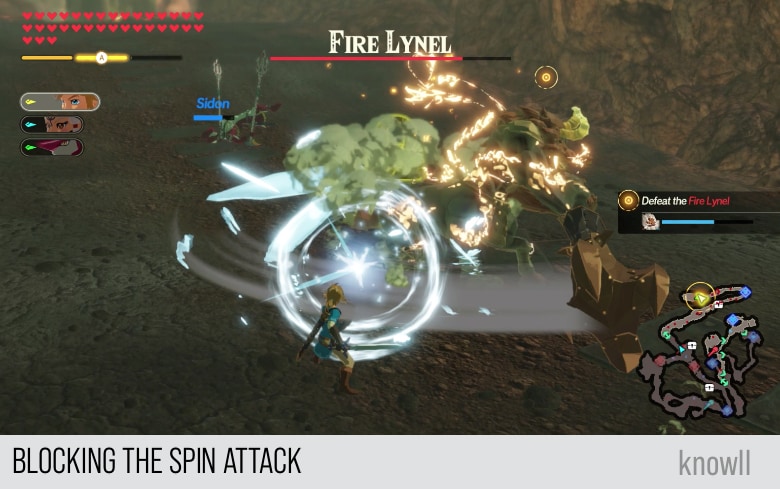
You can block this attack, but it will break your guard on the first hit. If the monster is still spinning after that, you will take damage.
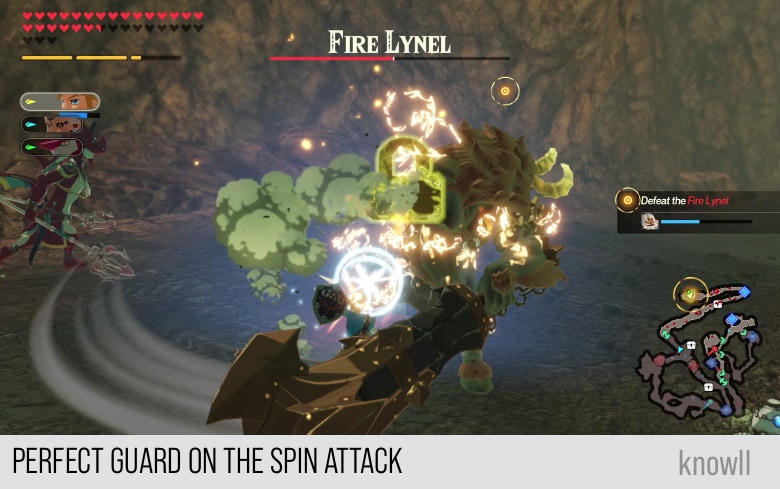
If you are confident and feeling lucky, you can do a perfect guard on the spin attack, which will cause the attack to get interrupted. This will leave the Lynel vulnerable for a brief moment.
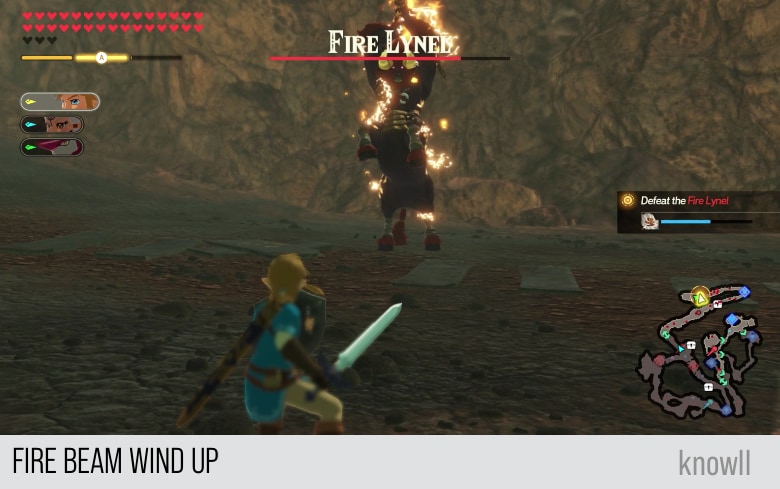
Fire Beam Attack
The Fire Beam attack is common among Fire elemental enemies, like the Fire Moblin and the Fire Hinox. They all have the Fire Beam.
In the Lynel's attack, the wind up shows when he raises his legs and positions the weapon as shown below. Once you see this, you know something highly damaging is coming.
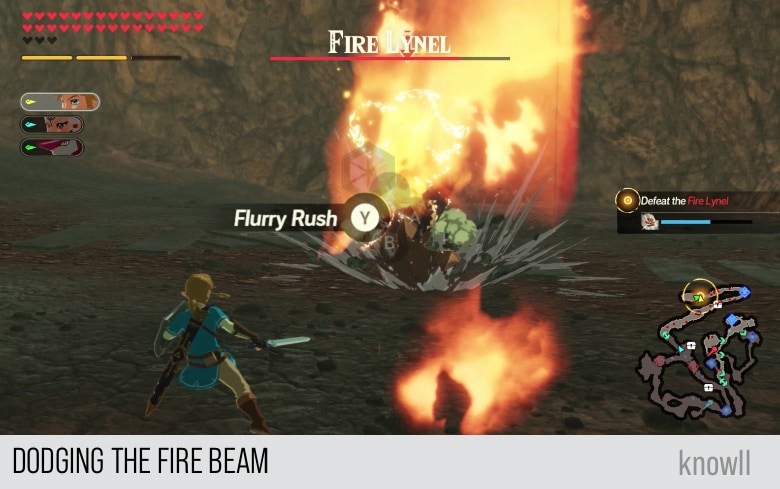
The Fire Beam gets emitted the moment the Lynel crusher hits the ground. The beam will approach and will cause damage and burning. You can easily avoid it by dodging to your side, as shown below.
Fire Orb Attack
The default projectile attack of Lynels is fire-based. With the Fire Lynel, the projectile becomes stronger and more explosive.
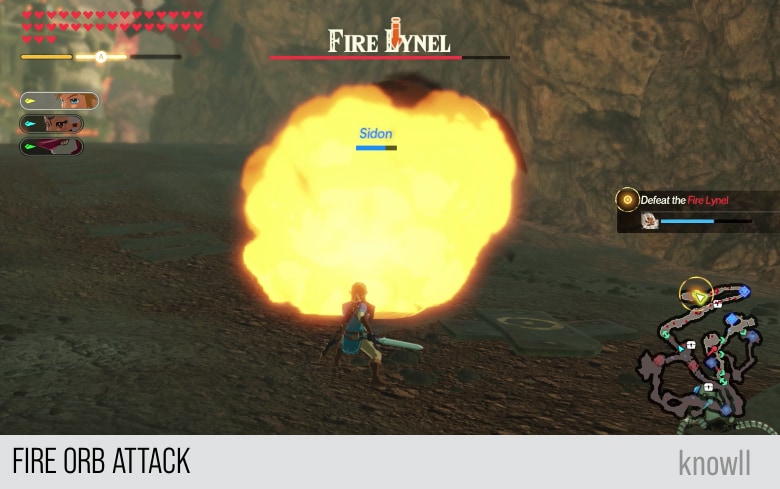
If you block this attack, it will break your guard and cause burning. This will leave you vulnerable to the next Fire Orb, as Lynels always emit three projectiles.
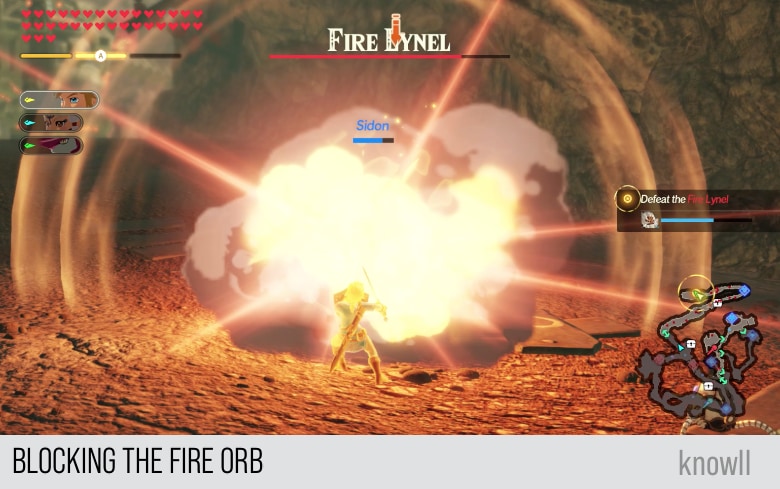
If you are confident, you can do a perfect guard on the Fire Orb, which will send it moving in a different direction. We do not suggest it though, as there will be two more Fire Orbs flying your way. The best way to avoid this attack is by dodging to your side.

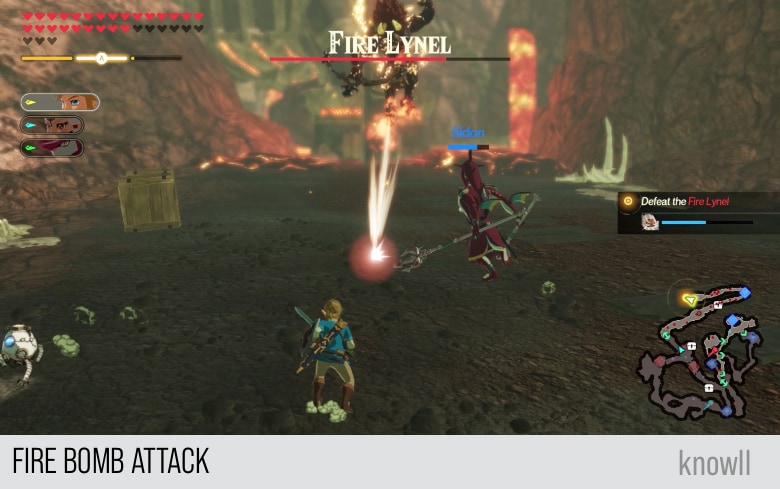
Fire Bomb Attack
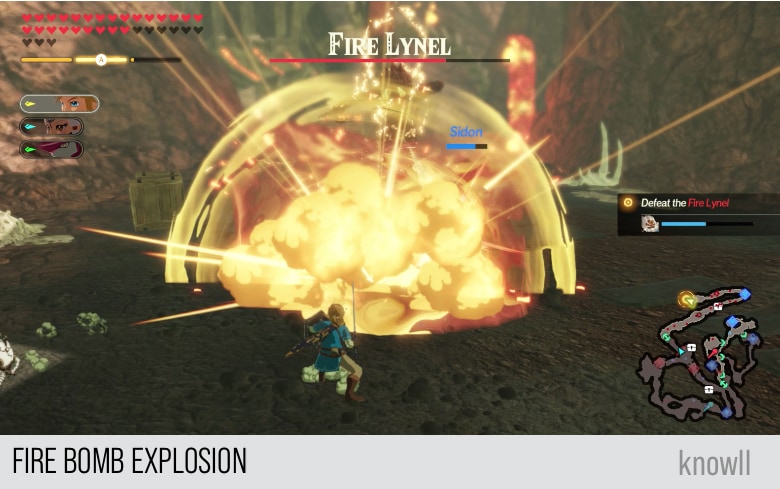
Every Lynel has an attack where it jumps and shoots one or more arrows at you. The Fire Lynel uses a Fire Bomb that he aims at you while it is up in mid-air.
The Fire Bomb will then explode into a large burning sphere.
Fire Swipe Attack
This is one of the attacks of the Fire Lynel that gained an elemental attribute. In this attack, the Lynel swings his crusher in a 360 degrees arc.
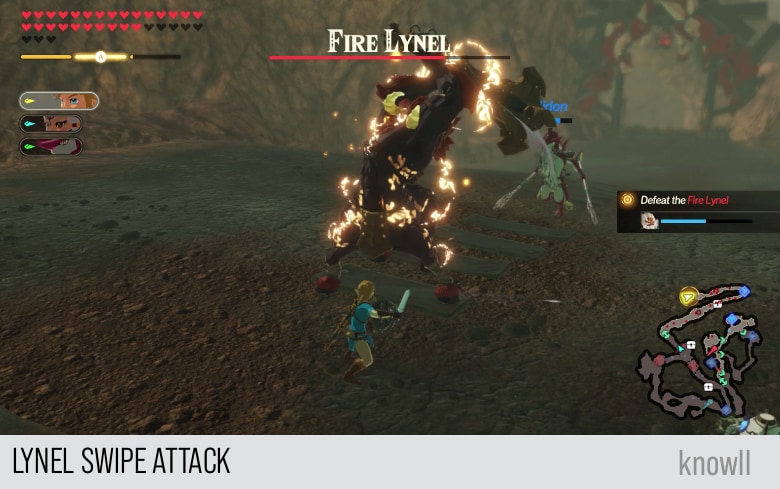
Near the end of the attack, the swipe will cause a large explosion, burning everything within the radius of the attack.
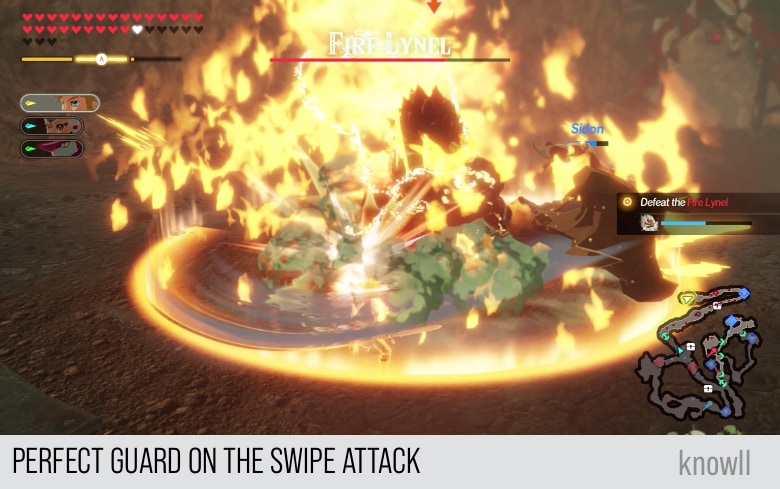
Though it's very risky, you can do a perfect guard on this swipe, as shown below.
It's easier to just do a backflip dodge and fish for a Flurry Rush.
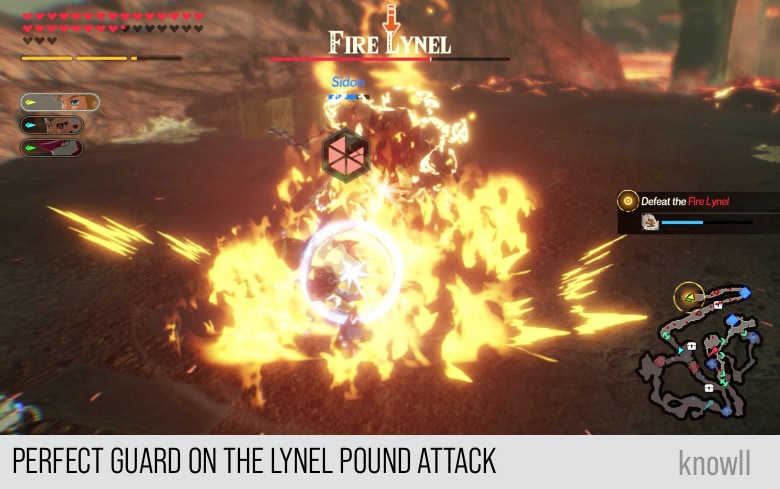
Fire Pound Attack
This is another attack that gained an elemental attribute. In this attack, the Lynel pounds the target multiple times using his crusher.
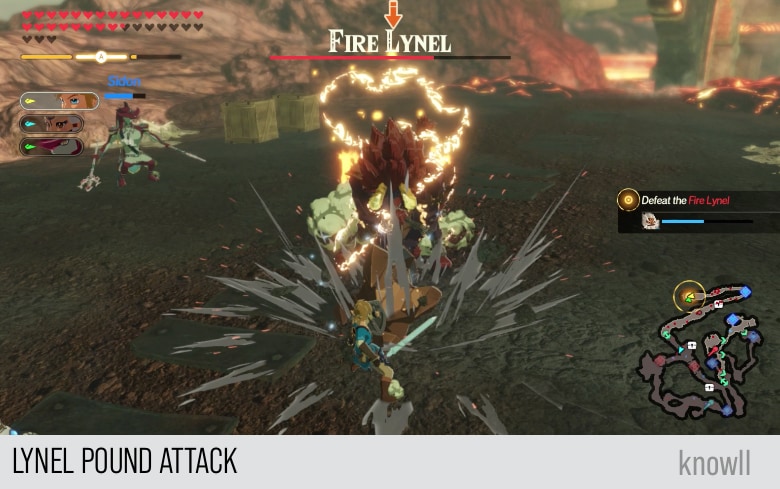
In the last part of the attack, the crusher will cause an explosion of fire, similar to the Swipe Attack.
If you are confident, you can do a perfect guard on the attack, which will interrupt it and stager the Lynel for a brief moment.
After you have defeated the Fire Lynel, you can continue onboarding Vah Rudania.
Avatar of the Calamity: Fireblight Ganon
Aboard the Divine Beast Vah Rudania, Daruk and Yunobo lock into a fierce battle with Fireblight Ganon, a phantom created by Calamity Ganon. Nearing the end of their strength and quickly losing hope, support finally arrives to rescue them.

Daruk: Stay calm, kiddo.
Yunobo: You're right, sir. I will!
Yunobo: If I came here to save you but you have to same me, then what's the point?!
Daruk: Yes! That's the spirit!
Daruk: Ohhh... All right. Let's that again from the top!
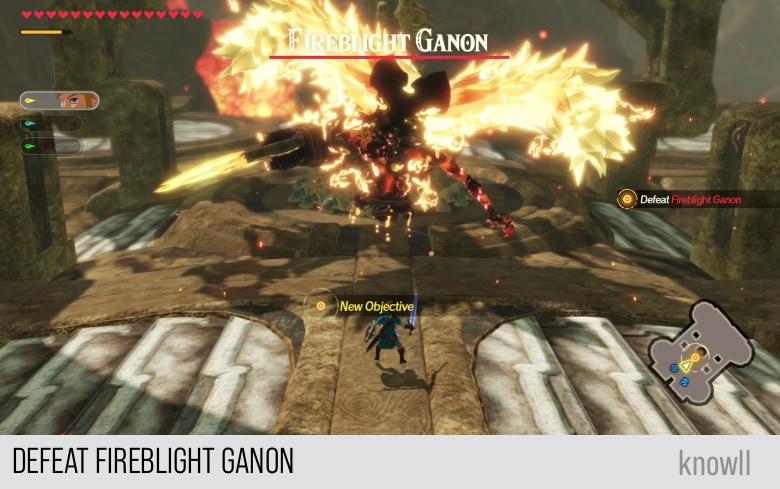
Objective: Defeat Fireblight Ganon
In the original BOTW version of Fireblight Ganon, the boss fight has a gimmick where you have to throw a Remote Bomb when it's charging for a big attack. Exploding the bomb then staggers the boss, leaving it open for your attacks.
Such gimmicks have been removed from all the Blight boss fights. Hence, it's not also here. What you will get instead is an excellent fight with a challenging boss.
Fighting Fireblight Ganon
Like Waterblight Ganon, Fireblight Ganon is a melee fighter that uses a weapon in most of its attacks.
Unlike the other Blight monsters though, Fireblight Ganon gets an upgrade when it reaches below 50% of its health. Its weapon will start getting enveloped in flames, and all of its attacks will have more fire in them.

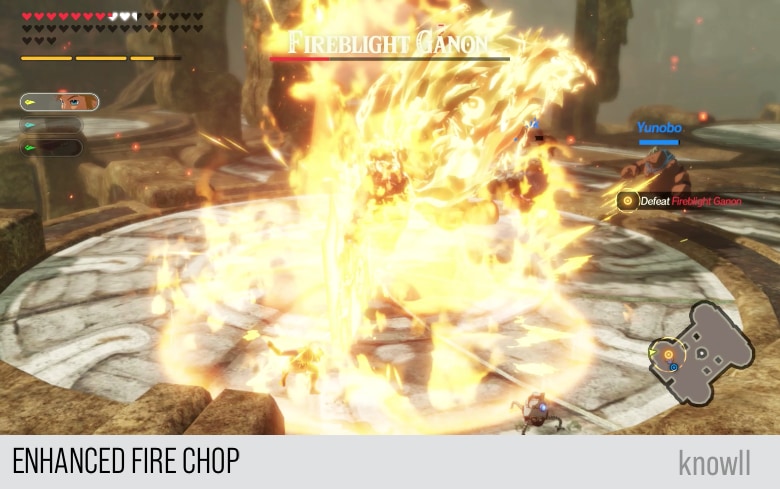
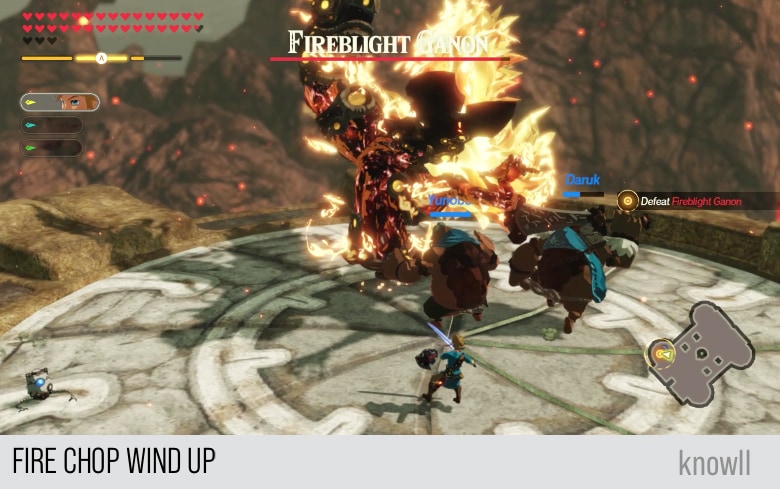
As an example, Fire Chop is one of the most common attacks of this monster. After losing 50% of its health, the Fire Chop will have an AOE that will burn targets inside the radius of impact. This was not there before.
Fire Swipe
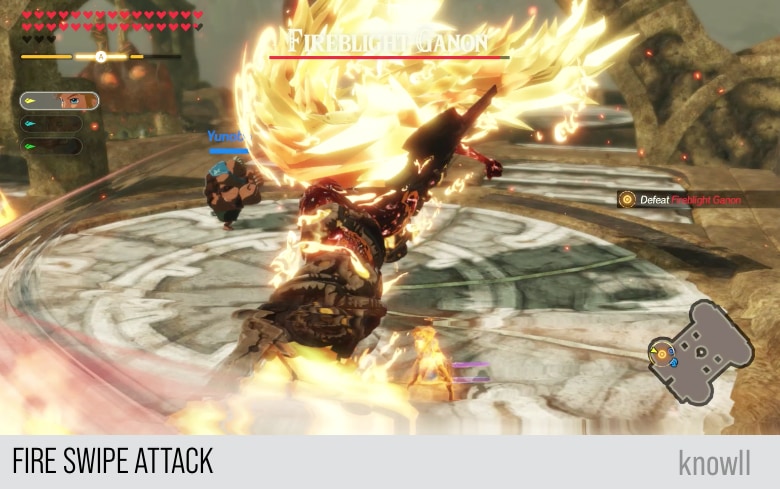
The Fire Swipe is one of the common attacks of Fireblight Ganon. In the wind up of the attack, he pulls back his right arm, preparing it for the actual attack.
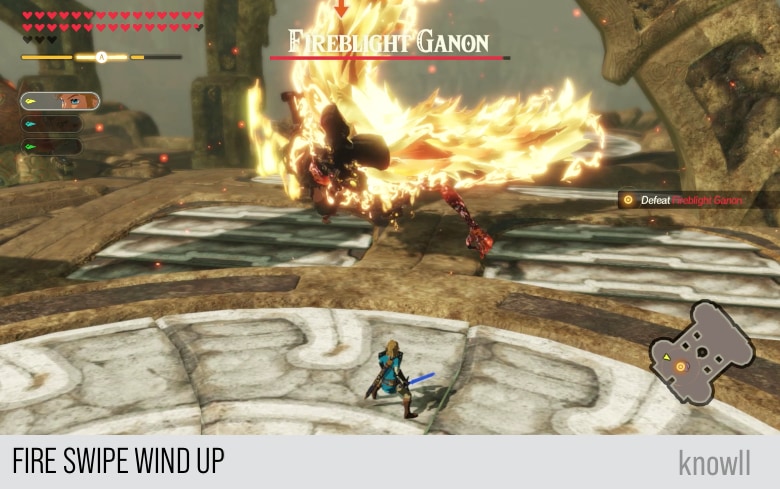
He will then immediately swing it in a 270 degrees arc, burning everything that gets hit. This is analogous to Waterblight Ganon's Ice Swipe attack.
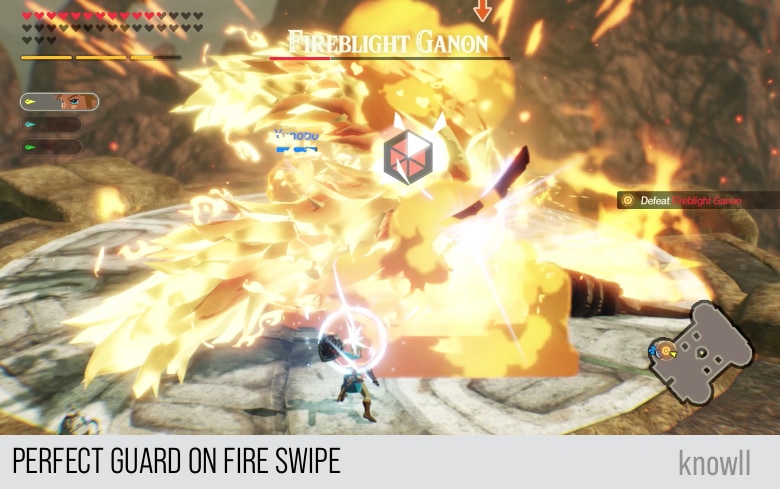
If you are confident, you can do a perfect guard on this attack, as shown below. This damages the monster a little and makes him briefly vulnerable.
Fire Chop
In the Fire Chop wind up, the monster moves up his arm as shown below. The moment you see this, get ready to either guard or dodge.
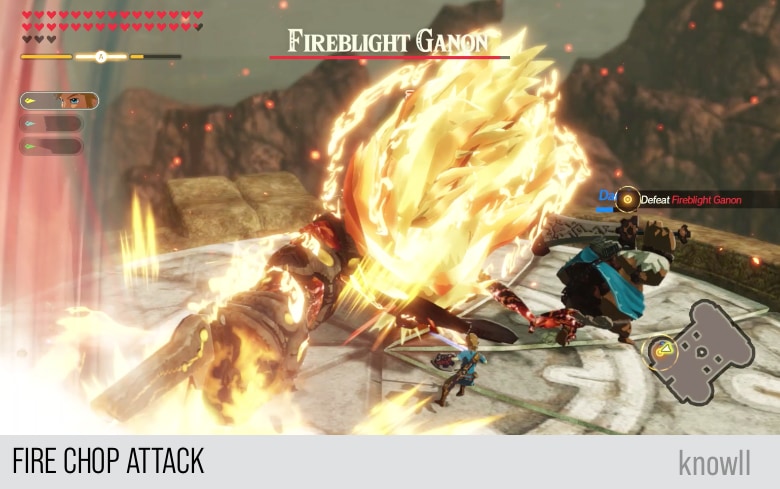
The monster will then immediately slam the weapon down in your direction.
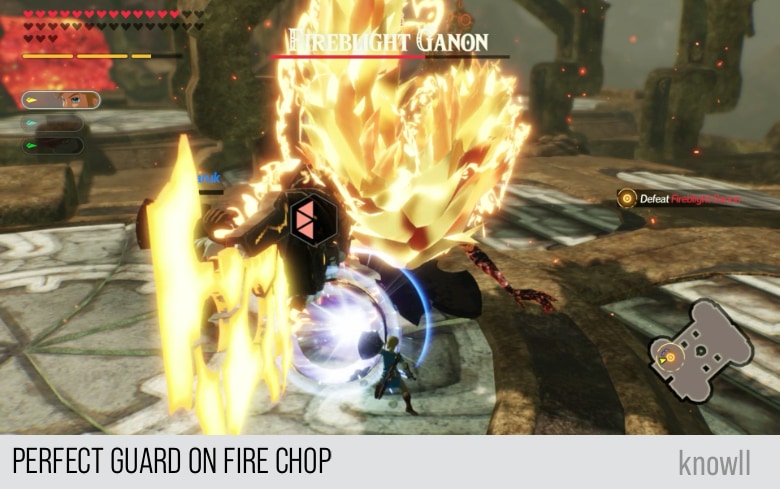
If you are confident, you can anticipate the chop and do a perfect guard on it.
As shared earlier, this attack becomes more powerful when Fireblight Ganon loses much of its health.
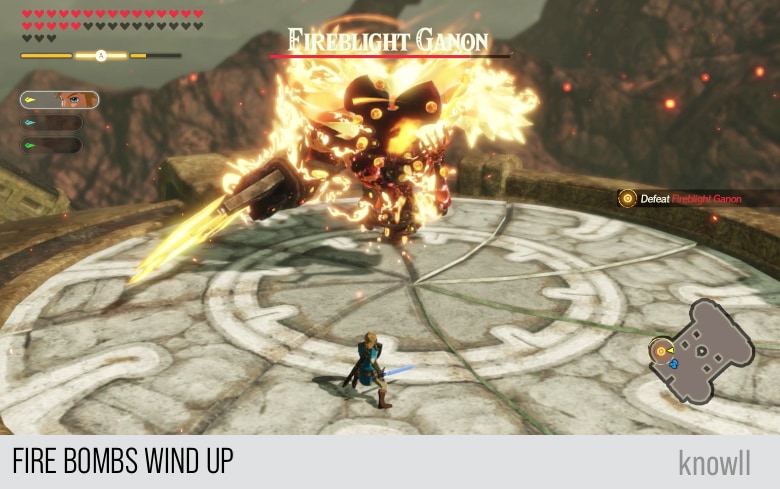
Fire Bombs
This is one of the few non-melee attacks of the monster. In the attack's wind up, the monster summons small spheres with his left hand. Once you see them, prepare to guard or to dodge.
He will then immediately throw the bombs, causing explosion and damage to anyone who gets hit.
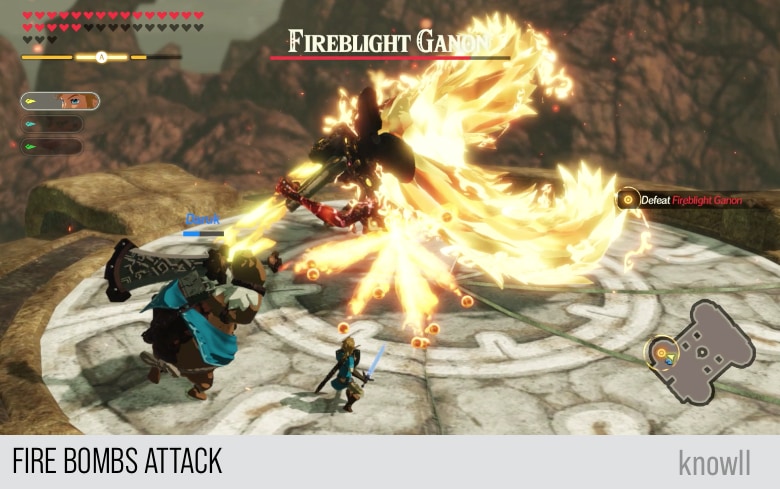
Your best course of action is to dodge in your side. This is the easiest approach as well.
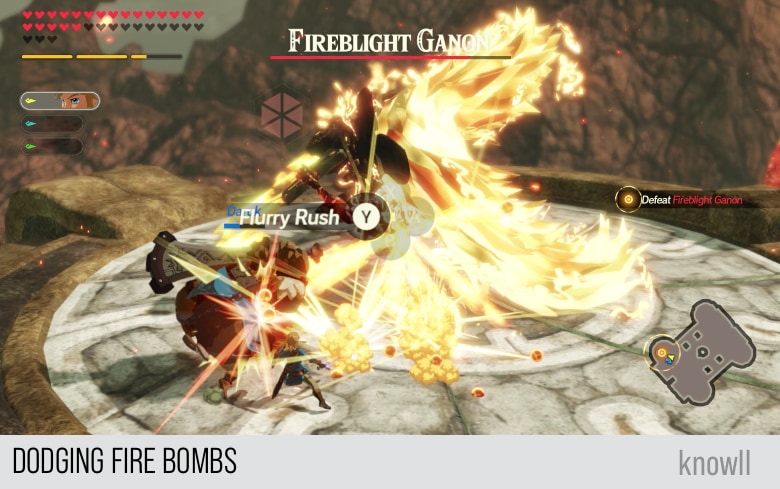
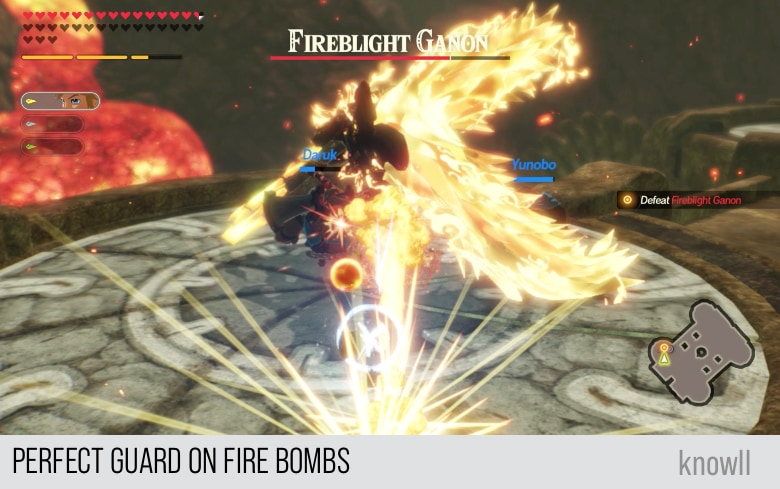
Show the monster you are the boss by doing a perfect guard on the bombs. This will cause them to move in another direction and explode there.
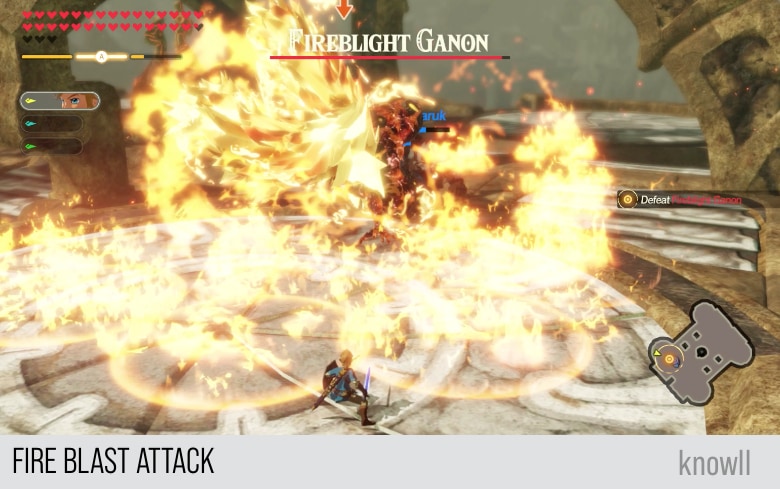
Fire Blast
This attack is analogous to the Fire Swipe. In the Fire Blast wind up, the monster pulls his left arm, as though preparing for the attack.
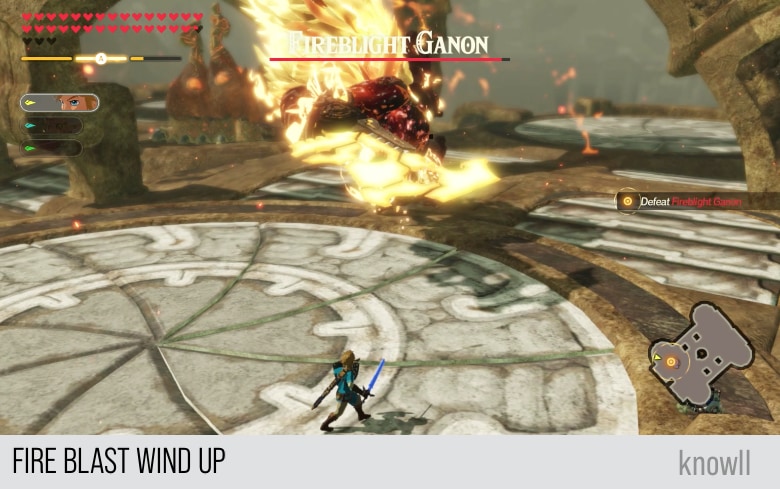
He will then immediately swing it in an arc, creating fire circles in the process, which will all burn afterward.
Avoid getting damage by getting out of the circles, the moment you see them.
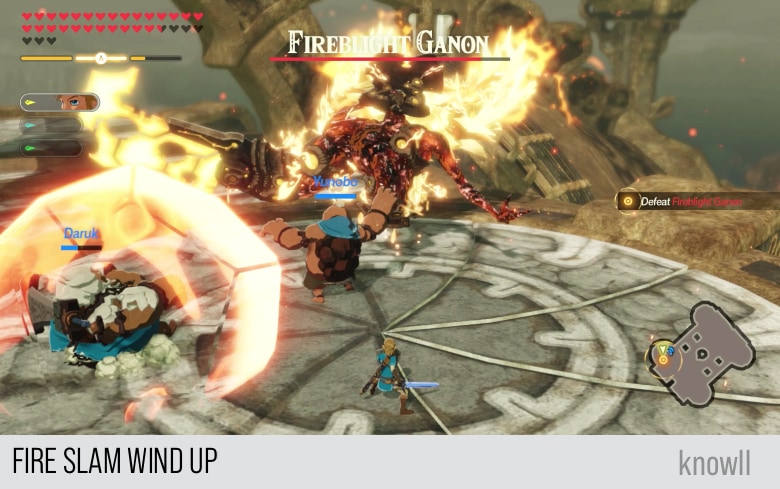
Fire Slam
The Fire Slam could be the most dangerous attack of Fireblight Ganon, not because of its impact, but of how often he does it. He has other stronger attacks, but he rarely does them. But this one, he spams it a lot.
In case Fireblight Ganon defeats you in the future, it is most probably because of getting too much damage from this attack. So it's best to learn how to handle it.
You will know that it is coming due to its wind up. The monster will put back his head as shown below.
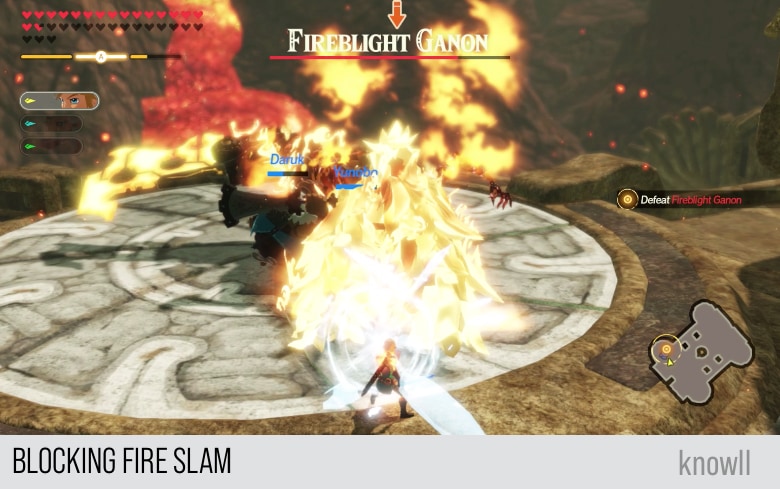
And then he will immediately start slamming its head, multiple times. If you don't get hit by the first try, you might get hit by the second, or the third, as he will be approaching nearer to you after every slam.
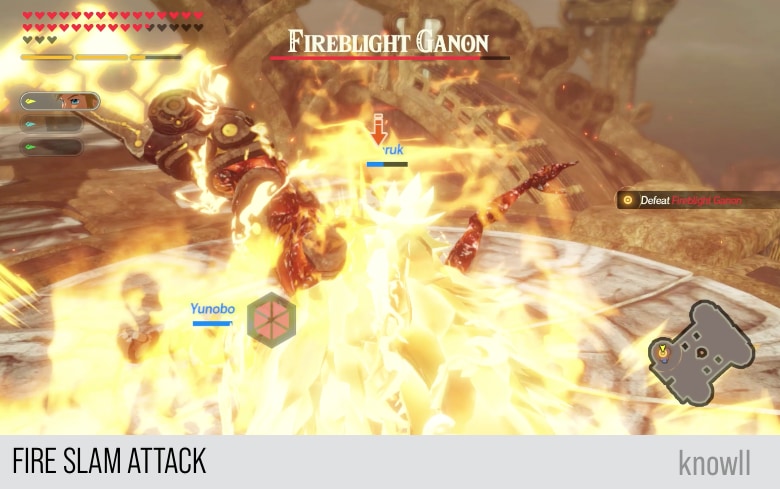
If you try to guard against this, the first hit will break your guard. That will leave you vulnerable to the next slam attacks. So the best approach to handle this is to dodge to your side, approaching the monster on his back.
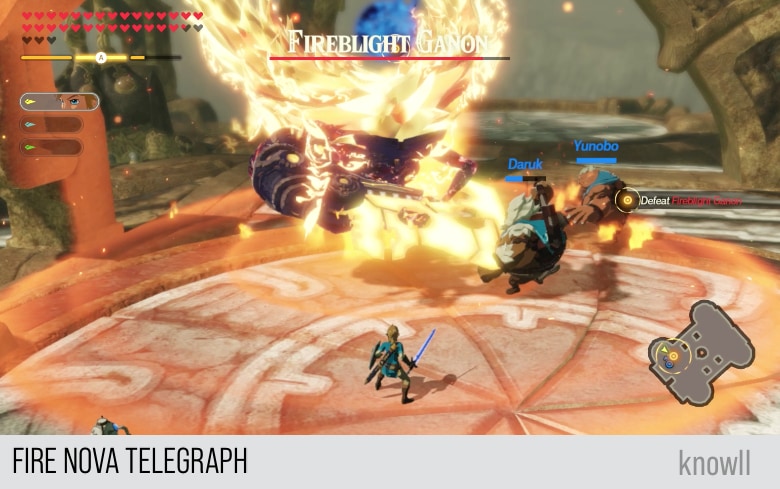
Fire Nova
This is one of the strongest attacks of Fireblight Ganon, but he rarely does this. This attack also has a telegraph that you can easily counter, unlike the Fire Slam discussed above.
In the wind up of the attack, the monster pulls back his arms to himself, as though meditating and charging his power.
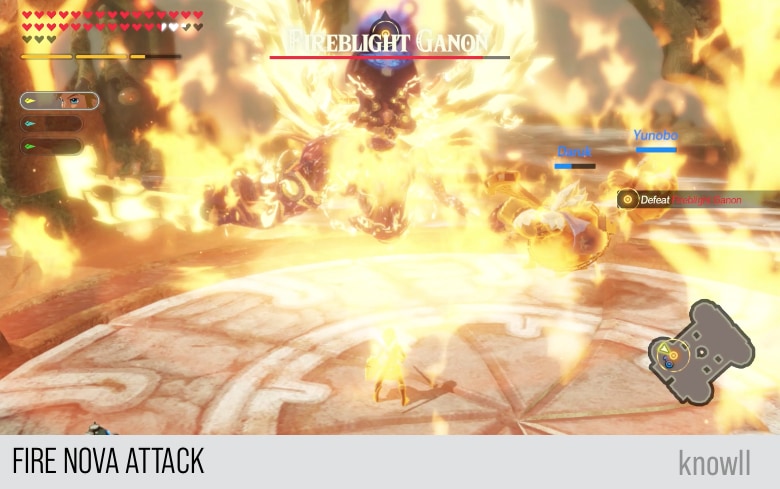
Immediately after that, he will spread his arms and unleash a powerful blast that can repell almost all targets in the vicinity. Note that Daruk and Yunobo are next to the monster, just before the attack.
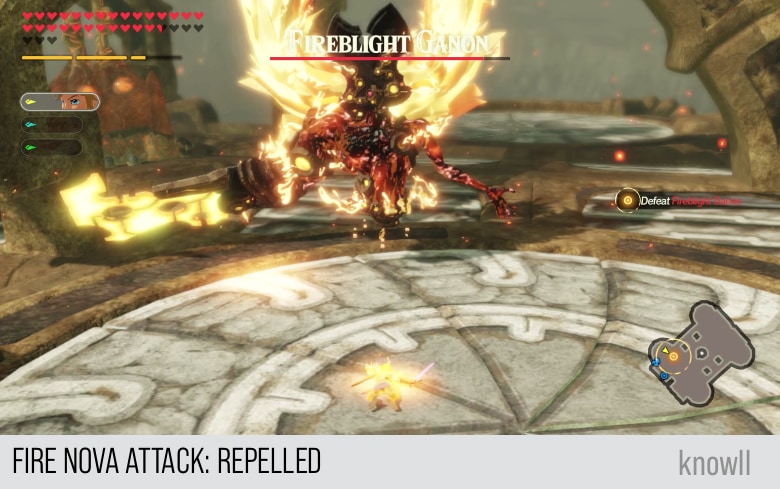
After the attack, the targets are nowhere to be found. They got completely repelled.
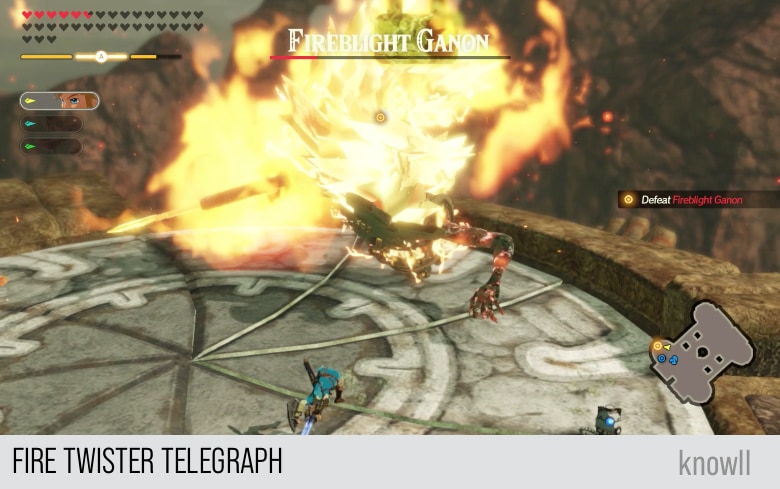
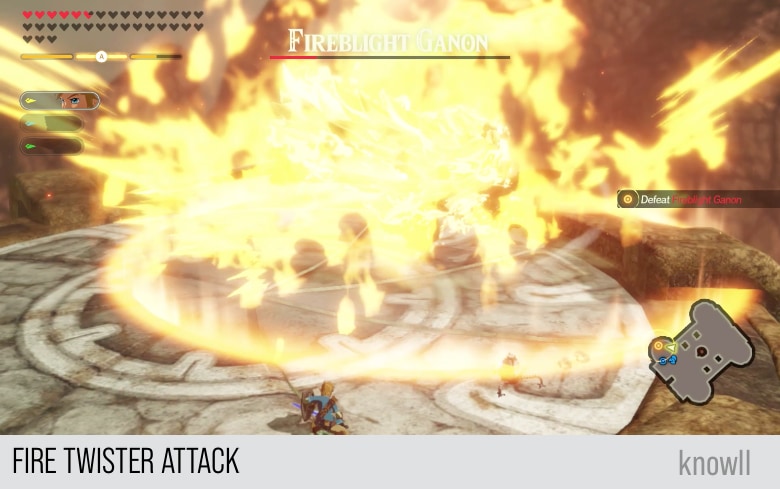
Fire Twister
This is the most interesting and rarest attack of Fireblight Ganon. It is too rare that you might fight him multiple times and never see him doing this attack. He does it when he has received much damage.
This attack has a telegraph that you can counter using Stasis.
In the wind up of the attack, Fireblight Ganon pulls his arms as shown below, and then positions his hair menacingly, twisting like a coil.
He will then start spinning, not his body, but his head. Every revolution of his hair will cause an explosion with a large fiery AOE. He will do the revolution multiple times, causing multiple explosions.
With the tips shared above, go ahead and defeat Fireblight Ganon.
Yunobo: Oh, wow! That was touch and go for a bit!
Daruk: Hahaha, you kiddin' me?! Workin' together like that, it was waaay too easy!
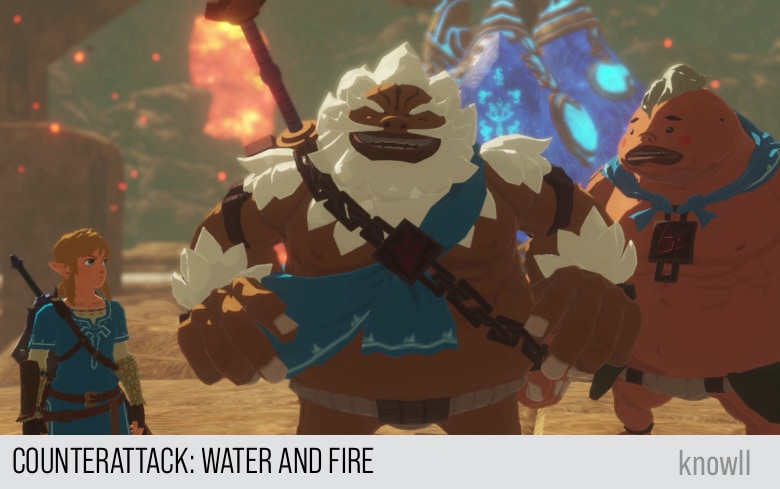
Counterattack: Water and Fire
With the arrival of reinforcements, the party is able to subdue both Waterblight and Fireblight Ganon. There is little time to celebrate, however, as Zelda shares news of the fall of Hyrule Castle.
Daruk: Well, the deed is done! We should all thank you. You really came through, little guy!
Daruk: Yunobo, wasn't it? I owe you some thanks too! Without your help, I'd have been in deep trouble.
Mipha: Sidon... It's all so mysterious. Is it truly you, my brother?
Sidon: Yes, it is yours truly! I... know this is hard to swallow, but I journeyed here from the future.
Daruk: None of this makes any sense, but oh well. We have bigger rocks to roast.
Daruk: Princess, please tell us. What happened at the castle?
Zelda: I'll tell you...
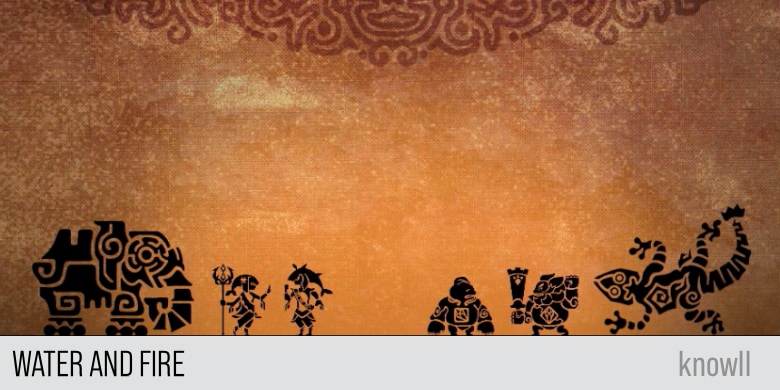
Water and Fire
With the aid of Sidon and Yunobo, who had appeared within the Divine Beasts, Mipha and Daruk emerged from the battle unscathed.
Safe for the moment, the Champions would only enjoy a brief respite. Upon discovering that Hyrule Castle had fallen into enemy hands, Mipha and Sidon headed to Akkala Citadel to aid the soldiers who were still holding the line.
Meanwhile, Daruk and Yunobo prepared to confront the incoming wave of Guardians head on, stepping once more into Vah Rudania.
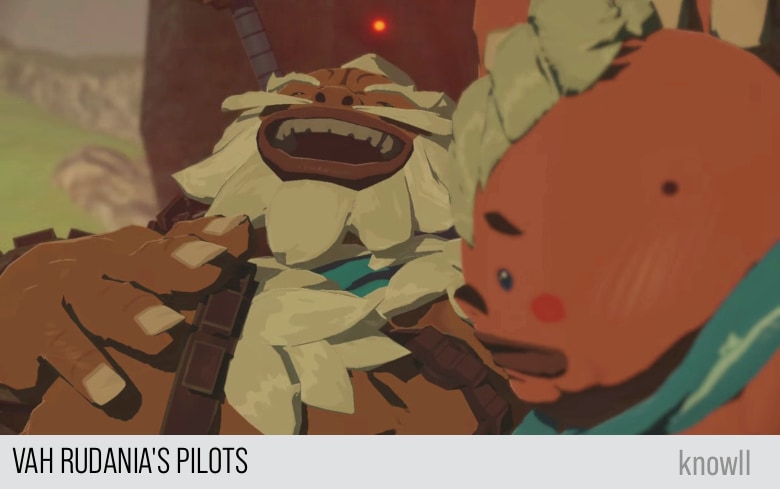
Vah Rudania's Pilots
Having heard the news of Hyrule Castle's fall to Calamity Ganon, Daruk takes Yunobo and boards the Divine Beast. Together, they hope to stop the horde of Guardians rapidly advancing on Eastern Hyrule.
Yunobo: That's why you're the Great Daruk!
Daruk: I told you to drop the formalities, Yunobo.
Yunobo: Sorry, but I don't think I can.
Daruk: Fine, let's go. Hyrule needs us, kid!
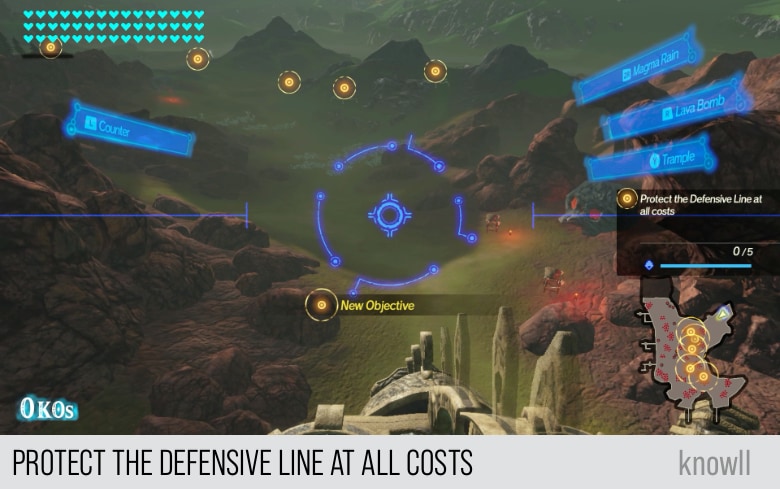
Objective: Protect the Defensive Line at All Costs
Your goal is to destroy the five Guardians scattered on the field. With the powers of the divine beast, you can easily achieve this.
We have covered in the entry Daruk, the Goron Hero how to effectively fight enemies with Vah Rudania. You can view our Vah Rudania Guide for more tips.
Daruk: Gang up if ya want - it makes no difference. You'll never get by me!
Yunobo: I'll let you know what the nearby enemies are up to. You focus on fighting, Great Daruk!
Yunobo: Wowie! Such strength!
Daruk: With you on board, our buddy here is workin' its tail off. Makes it easy to wreck stuff up!
Yunobo: You're not getting by! No way - not ever!
Possibility of Failing the Quest
Before we continue with the guide, let's share in advance that there is a possibility that you might fail this quest. We consider this Vah Rudania quest to be the second most challenging, next to the Vah Medoh quest in the entry Air and Lightning. That quest is the most challenging Chapter quest in the whole game.
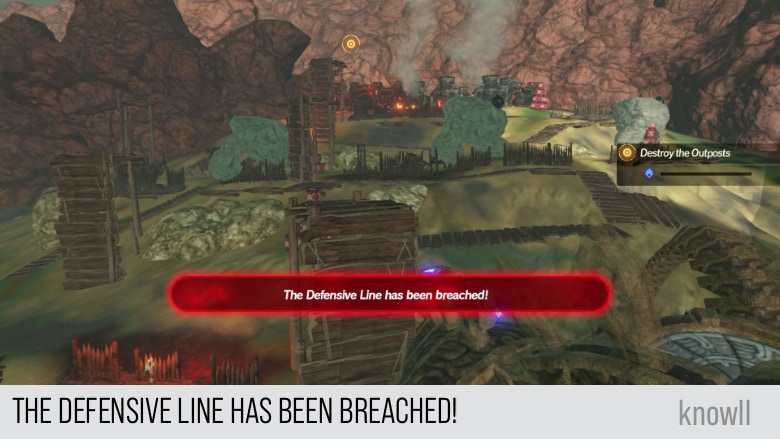
Even though this quest does not have a timer, there is a base you need to protect. You can see the health of that base on the screen. Once it gets empty, that means it has been breached and then you will get the below comments from the heroes.
Daruk: Gah! I guess... that's it for me.
Yunobo: Noooo... I came to help everyone, but I didn't end up being useful after all, goro...
Tips for Success
To increase your chance of success, always ensure there are no Guardians that get near to your base. And when you start to fulfill the secondary objectives, like destroying bridges and others, make sure not a single Guardian is able to slip and sneak into the base.
With that and the rest of the guide below, you should be able to clear this quest.
The Guardians Increase
Once you have defeated around 3 Guardians, the target numbers will increase to 8.
More Guardians have appeared!
While moving towards the Guardians, attack as well the hundreds of minor enemies on the ground, to quickly fill up your special attack gauge.
Take note of your Defensive Line though, don't let any Guardian's to get near it.
Protect Your Defensive Line
If any Guardians get the chance to get near and attack your base, you will get this message:
Yunobo: Bad! It's bad! They're targeting our defensive line!
The Defensive Line is under attack!
Yunobo: Ugh... No matter how many we defeat, there's always more.
Daruk: If we stay on the defense, this will go on forever. Let's take out the bridges and stop 'em for good!
Yunobo: Great Daruk! Tons of Guardians are incoming from the southern bridge!
Daruk: Ready! Southern bridge, right? I'll head 'em off from here!
Objective: Destroy the Bridge
When you go for the bridge, ensure you cleared any stray Guardian otherwise it will go to the base, while you go to the bridge.
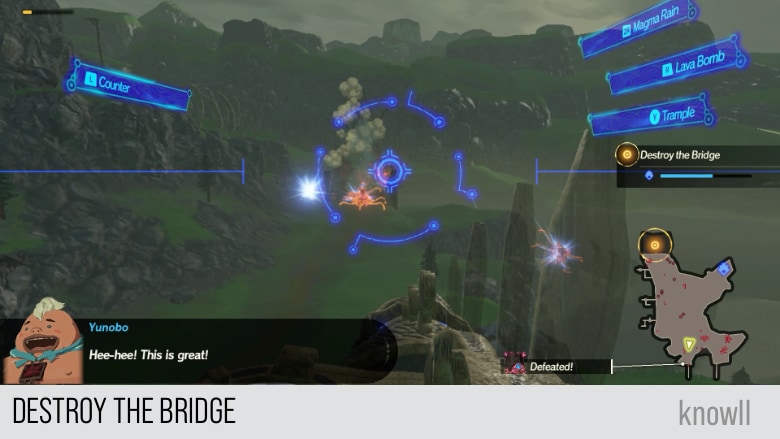
Yunobo: Hee-hee! This is great!
Yunobo: More Guardians! They're coming from the bridge on the other side!
Daruk: They're on that side now, eh? OK, Yunobo, I'm heading that way!
Destroy the Bridge to block the advance of the Guardians!
Daruk: Hahaha! Score one for the Great Daruk!
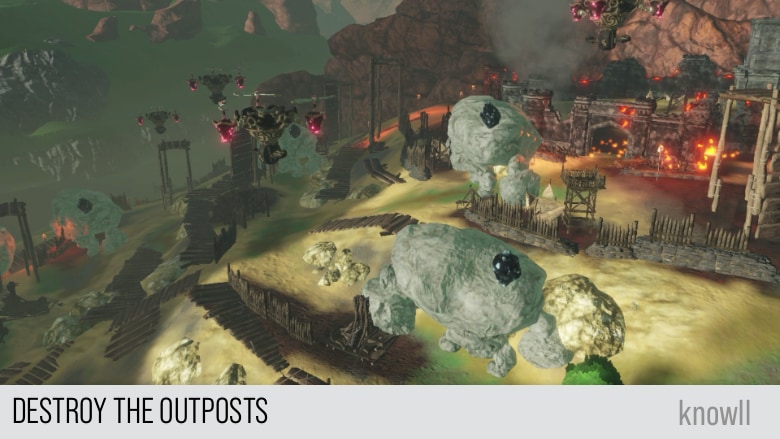
Yunobo: Are those all monster outposts?! Bah! Oh, um... I can see a big building to the north!
Daruk: OK, it's time. Now I can smash 'em to bits!
Objective: Destroy the Outposts
At this stage, you have two choices, go to the outposts immediately or destroy first any possible stray Guardian that can sneak into the base. The choice is clear, this quest does not have any timer, hence you can take all the time you want to ensure nothing disturbs the base. Clear first any Guardian that can sneak in.
Daruk: Heh, I've got some enemies to play with here, too. Time to finish this!
Yunobo: Yeah! OK! I'll show you how strong I am, goro!
Daruk: We managed to protect it! Thanks for helpin' me out there, Yunobo!
Yunobo: Oh! Heheh... I... don't know how to react to such high praise from the Great Daruk!
Daruk: Haha, calm down, little fella. Now, let's keep it up and send that Calamity Ganon creep packing.
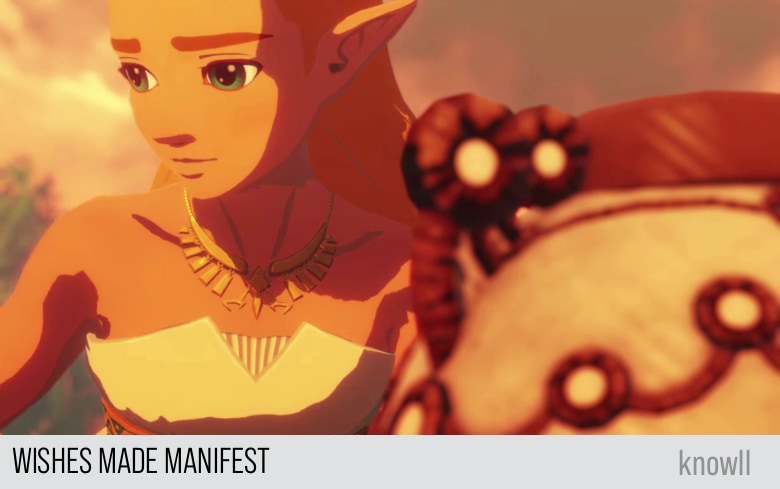
Wishes Made Manifest
Sidon describes having been summoned by a voice, and Zelda realizes that the arrival of these new heroes is a result of the time-traveling abilities the little Guardian has. Zelda offers her thanks to the little Guardian, though she remains aware of her own shortcomings.
Zelda remembers the words of Sidon.
Sidon: When it happened, I could faintly hear a voice calling to me.
Sidon: As I searched for who it was, I suddenly saw my dear sister under attack.
Sidon: My only thought was that I had to help her. Next thing I knew, I was inside Vah Ruta.
Zelda talks to the little Guardian.
Zelda: That was your doing, wasn't it?
Zelda: Thank you.
Zelda: Now... we must hurry to Akkal Citadel.
Impa talks to the little Guardian that stopped walking.
Impa: What's the problem? Hurry it up!
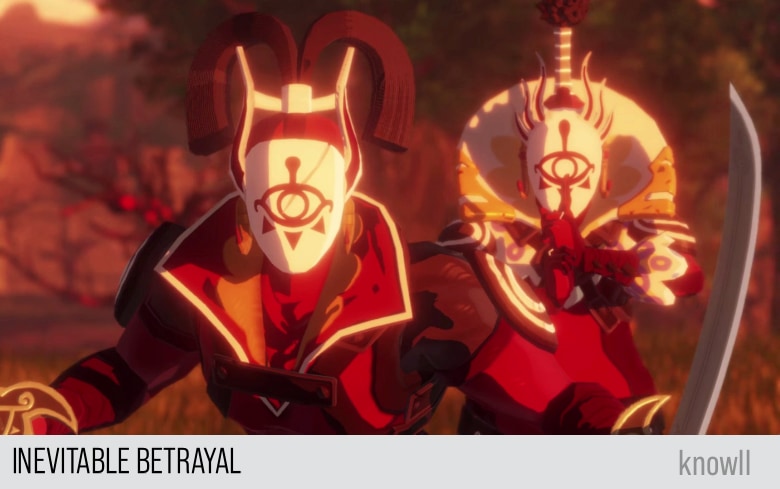
Inevitable Betrayal
Astor's plan to betray the Yiga Clan has been revealed. As he mercilessly sacrifices clan members to revive the Blight Ganons, Sooga and Master Kohga steel themselves to fight against him. Astor sicks a Hollow on the pair without hesitation.
Master Kohga: What's your game, three-eyes?!
Astor: My, you really are slow. Despite our best efforts, the enemy has only grown stronger. To succeed... we must adjust our strategy.
Astor: Finally, the two of you can actually be of some use - for once in your lives!
Sooga: Master Kohga! Quickly, make your escape!
Master Kohga: I can't split - you're my best lackey!
Sooga: In that case... I will protect you, even if it costs me my life.
Astor: A blood sacrifice for the Calamity... Fate gives you this role... and you will play it!
Characters Unlocked
As you move through the Chapters and later on with the Challenges and Quests, you will be unlocking characters that you can use for your party. This Chapter entry that you just completed rewards you with Sidon and Yunobo.
If you would like to learn Sidon's moveset and combat guide, view our Sidon Guide.
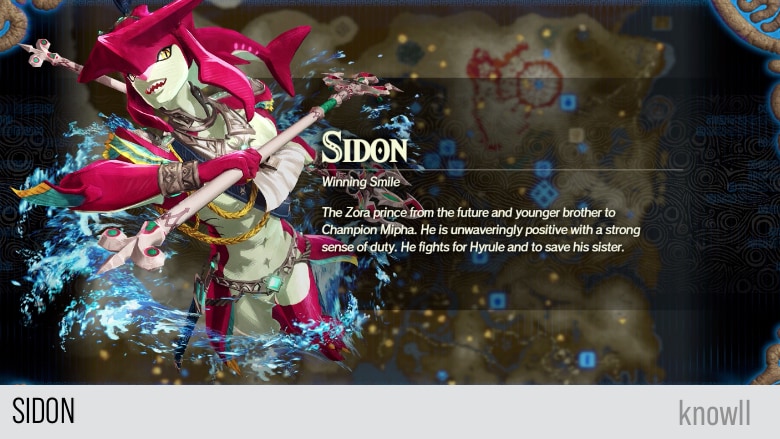
Winning Smile. The Zora prince from the future and younger brother to Champion Mipha. He is unwaveringly positive with a strong sense of duty. He fights for Hyrule and to save his sister.
If you would like to learn Yunobo's moveset and combat guide, view our Yunobo Guide.
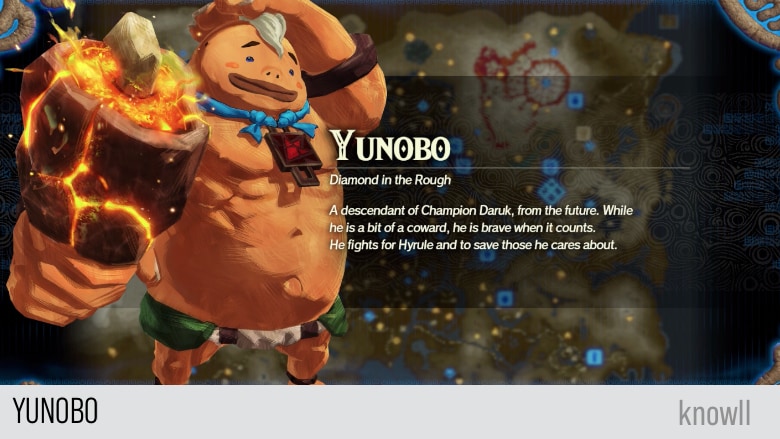
Diamond in the Rough. A descendant of Champion Daruk, from the future. While he is a bit of a coward, he is brave when it counts. He fights for Hyrule and to save those he cares about.
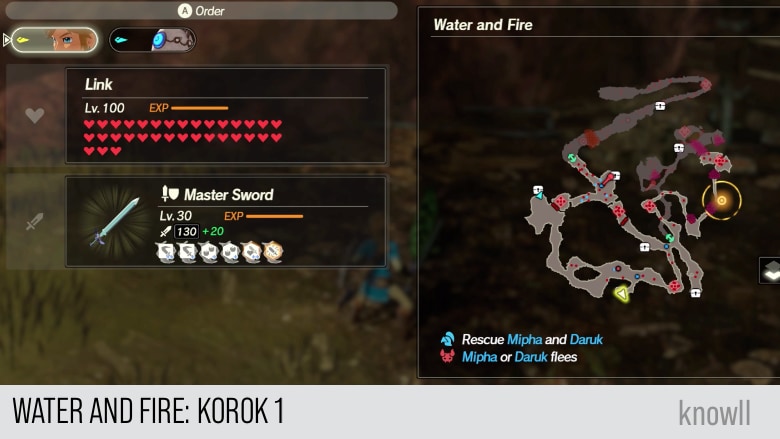
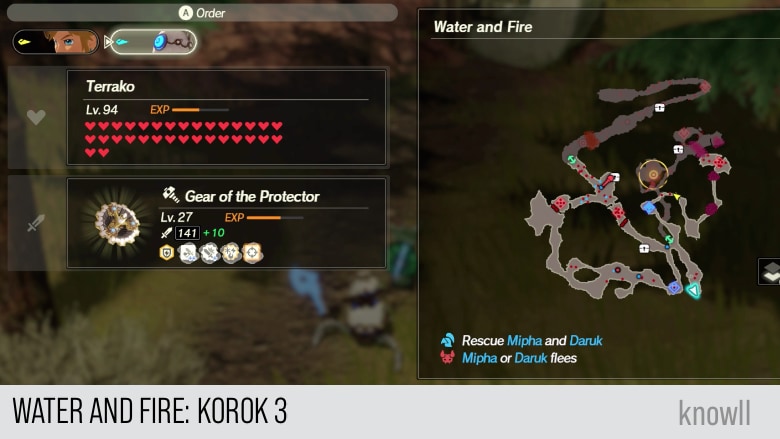
Korok Locations
Every Chapter in the game contains Koroks. The main challenge is that there is no feature in the game that will make them appear on the map.
Hence, we provide all their locations on the area as well as on the map.
Total Koroks: 3
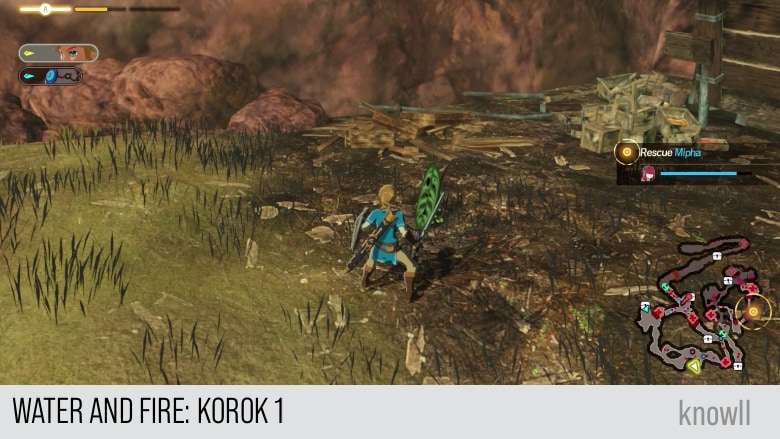
Water and Fire Korok 1
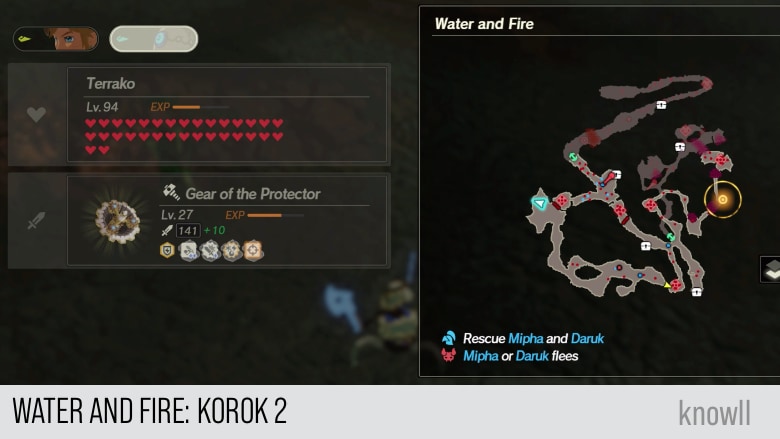
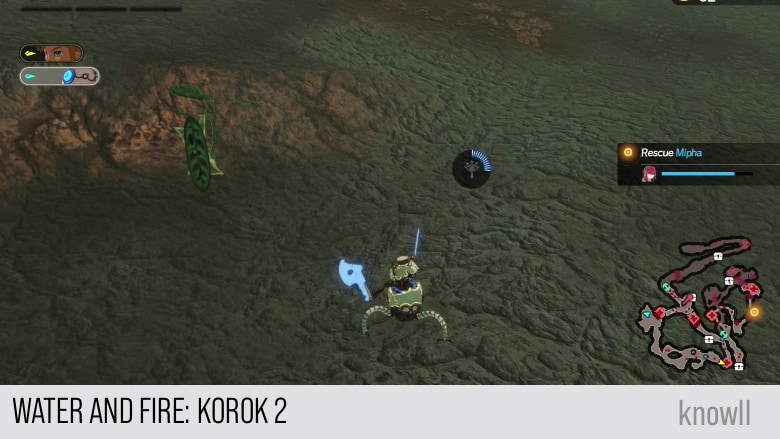
Water and Fire Korok 2
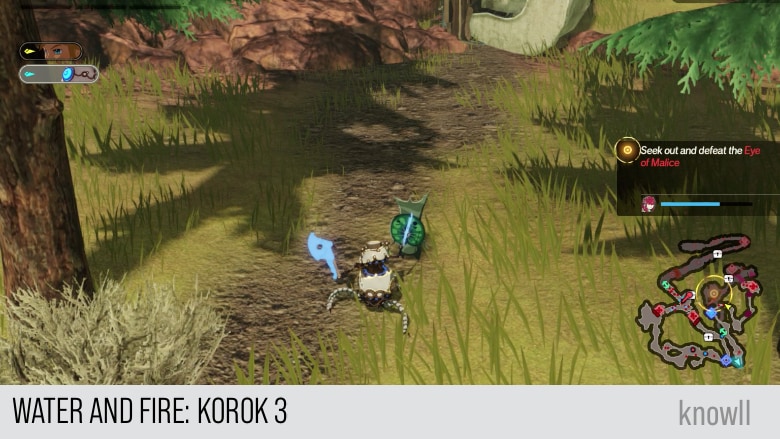
Water and Fire Korok 3
Continue the adventure with our next Chapter entry Air and Lightning.