
Hyrule Warriors: Age of Calamity - Each Step Like Thunder
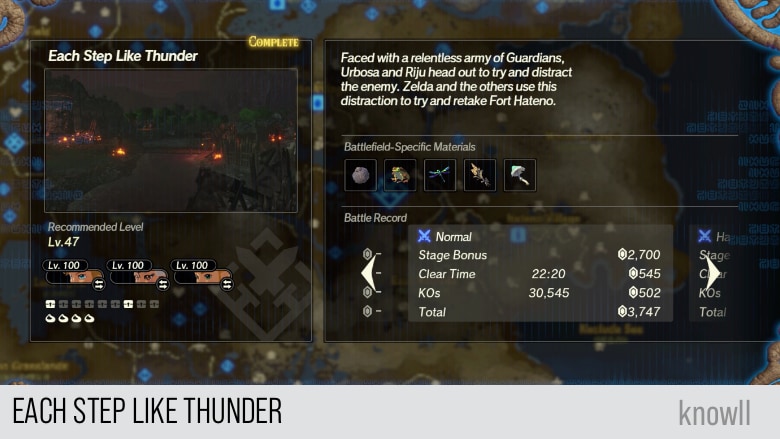
Hyrule Warriors: Age of Calamity - Each Step Like Thunder is the second part of Chapter 6 of the game. Faced with a relentless army of Guardians, Urbosa and Riju head out to try and distract the enemy. Zelda and the others use this distraction to try and retake Fort Hateno.
Among all the Chapter entries in the whole game, this is the most challenging as it truly tests your familiarity with the game mechanics and mastery of your playable heroes as well as the enemies in the game. It's the only Chapter entry where you can fail the quest repeatedly if you don't pay attention to what's happening in the objectives. It's the pinnacle of a quest in a Warriors game.
This entry introduces new large enemy varieties as well, like the Ice Guardian and the Electric Guardian. But aside from that, it's the way the challenges were structured that makes this entry exciting and exhilarating once you have overcome the challenges.
Treasure Chests and Koroks
- 4 Koroks
- 9 Treasure Chests
Battlefield-Specific Materials
- Hearty Truffle
- Tireless From
- Cold Darner
- Electric Safflina
- Silent Shroom
Special Rewards
Akkala Citadel Recaptured
Working together, they successfully recaptured the citadel. Shortly thereafter, they found Robbie, who had barely escaped from the laboratory after the Yiga Clan infiltrated its walls.
The party soon learned from Robbie that Purah had also escaped the laboratory, making her way to Fort Hateno in Necluda. The stronghold, however, was besieged by enemies.
Link and the others departed promptly for Fort Hateno. But who would quell the ceaseless onslaught of Guardians pouring onto Hyrule Field during this time?
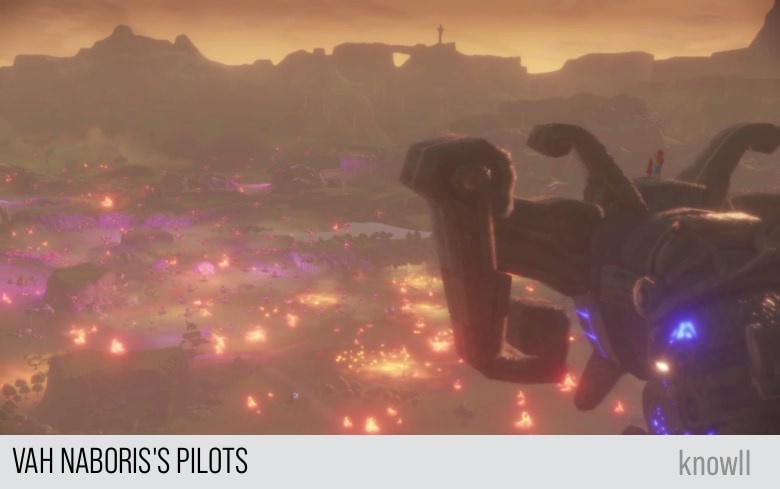
Vah Naboris's Pilots
As Zelda and the others travel to support Fort Hateno, Urbosa and Riju attempt to distract the Guardians that are surging forth from Hyrule Castle. The pair leap aboard Vah Naboris and throw themselves into a pitched battle.
Riju: This is like a nightmare.
Urbosa: You needn't sound so defeated. Together, we'll put a stop to it.
Riju: But how? Look how many there are!
Urbosa: I would likely have died if it wasn't for your courage. But I'm still here, and Naboris still has its pilot. I'd wager nothing can stop us.
Riju: We will triumph.
Urbosa: Exactly.
Urbosa: Well then, let's begin. Will you take my hand?
Riju: Yes.
Urbosa runs with Riju.
Riju: Wha - Huh?
They jump into the control center of Vah Naboris and begin the assault.
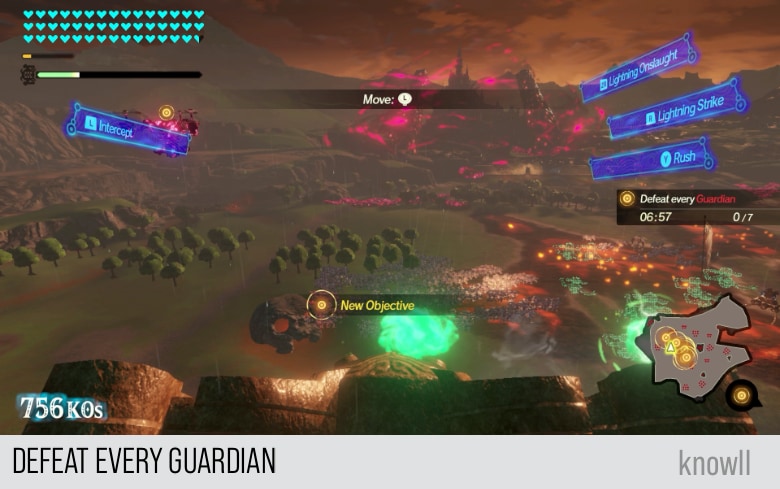
Objective: Defeat Every Guardian
We have shared in the entry Destroy the Yiga Clan! how overpowered and extremely destructive Vah Medoh is, among all the Divine Beasts. So this objective of defeating all Guardians, plus a large number of enemies, within seven minutes should come as a breeze.
You can view our Vah Naboris Guide if you need more tips on its combat details.
Urbosa: A pack of Guardians against two Gerudo vai? I like our chances. Come on!
Riju: OK! Though I lack experience, I swear to do my best to help!
Riju: I will not fail. Gerudo pride is at stake!
Riju: Since throwing myself into this conflict, I've battled with my lack of experience...
Urbosa: Nonsense! I have never felt more certain that the Gerudo will thrive after I am gone.
After defeating the initial 7 Guardians, the target will be changed to 13 Guardians.
Even more Guardian units have appeared.
Riju: Long ago, my mother would tell me stories about Vah Naboris as a guardian deity of the Gerudo...
Urbosa: Naboris is named after an ancient sage... and just like the sage, it helps us fight Calamity Ganon.
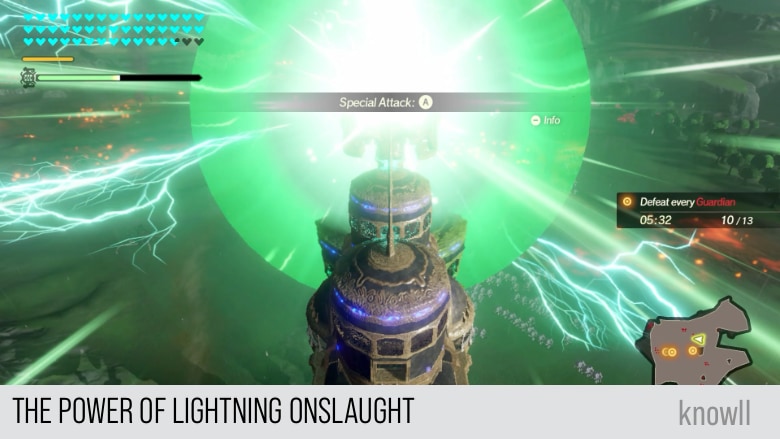
Just keep on using Lightning Onslaught. It will clear enemies from the map indiscriminately.
Urbosa: That is most of the ones headed for Fort Hateno dealt with. You are a powerful ally, Riju!
Riju: I hope one day I can ascend to your heights, Lady Urbosa. I will never stop trying to keep up with you. As your successor, I must not fail!
After defeating the 13 Guardians, a new batch will appear.
A huge Guardian force has appeared.
Urbosa: Come on! These contraptions will not let up, so neither can we!
Riju: Right! We'll do whatever is necessary to stop them!
Objective: Defeat many Enemies
The objective has changed to defeating a total of 30,000 within the remaining time. With Vah Medohs powerful AOE, this is not difficult to achieve.
At this stage, do not focus anymore on chasing Guardians, but instead, go for the large packs of Bokoblins which contribute more to the count of enemies defeated.
With Vah Medoh running, he does not even have to attack to destroy the enemies. Using Rush kills them as well.

Also, you will need to use Rush to reach enemy areas as fast as possible.
Urbosa: Brilliant, Riju! One last push! We cannot afford to get bogged down. Too much is at stake!
Even more Guardian units have appeared!
Riju: Oh no... There are countless Guardians. Are they really taking aim at us?
Urbosa: You are far from alone, remember. If we persist, a path will open.
And finally, you will be able to defeat the required 30,000 enemies.
Riju: We did it! We really did it!
Urbosa: Yes. Marvelously done, Riju. You showed true courage today.
Riju: Oh! Only because I had your help, Lady Urbosa. Now let's go take out the remaining Guardians!
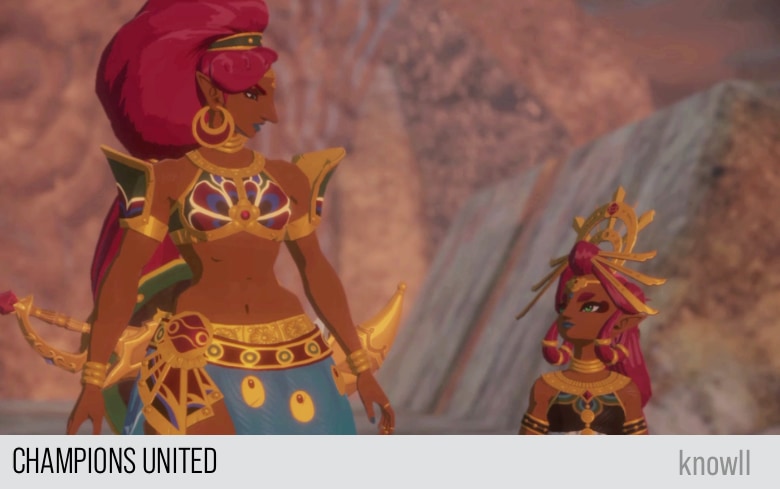
Champions United
While the diversion was successful, a massive number of monsters emerge as night falls. Urbosa and Riju prepare themselves for the worst but are saved from that fate as the Champions from the other regions arrive to aid them.
Urbosa: They're not making this easy.
Riju: Lady Urbosa!
Riju: We have come so far. We must persevere until the battle's done!
Urbosa: A vai after my own heart. You never give in, huh?
Urbosa and Riju notice the remaining Divine Beasts join the fight.
Urbosa: It's about time! What took them so long?
Urbosa and Riju
Urbosa and Riju took control of Vah Naboris, working to stem the never-ending flow of Guardians.
Taking advantage of the opening Urbosa had provided, Link's party began their assault on the enemies surrounding the periphery of Fort Hateno.
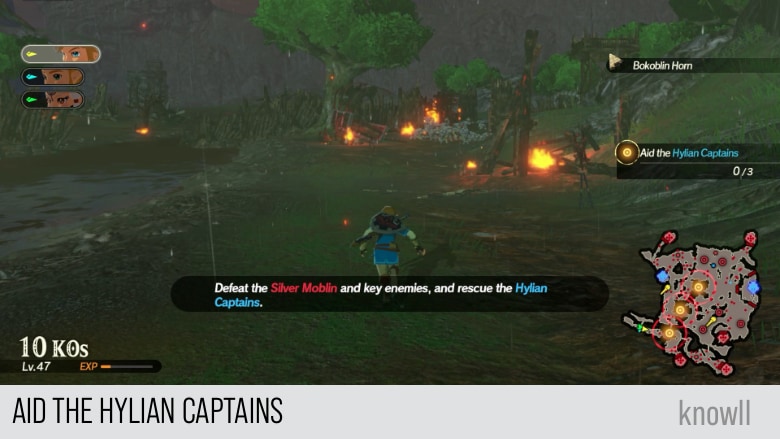
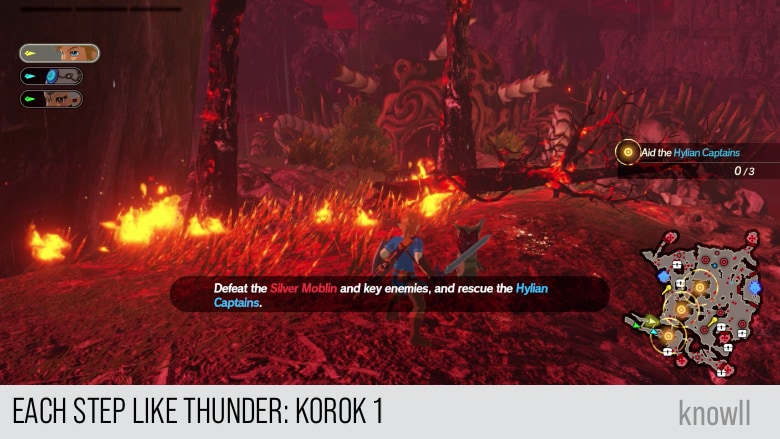
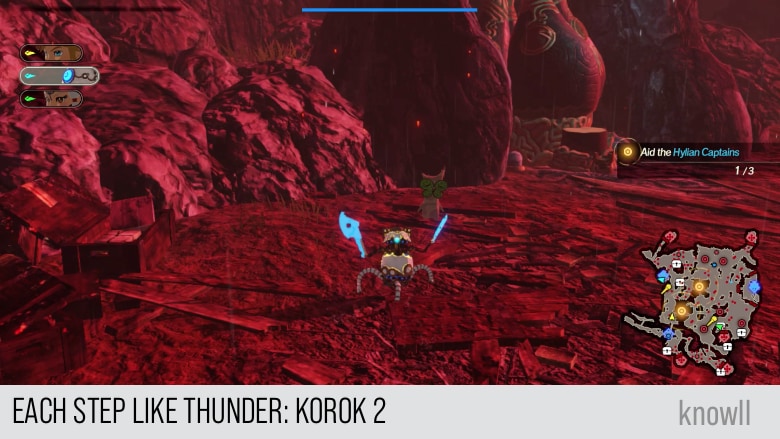
Objective: Aid the Hylian Captains
As there are three outposts to clear, you might want to distribute your playable heroes among them.
Impa: Princess... The way forward is too dangerous. Please, try to avoid doing anything reckless.
Zelda: I am going. You cannot stop me. Now then, we must aid the soldiers who are in trouble.
Hylian Captain: We're not going down that easy!
A Guardian army is approaching Fort Hateno!
Zelda: Fort Hateno is an inch away from falling. There isn't a moment to lose.
Hylian Captain: Gah! We can't take much more of this!
Zelda: Do not give up! We are on our way!
Zelda: We must hurry to their aid at once!
After aiding the second captain, he will encourage you to move to the center outpost.
Zelda: For the time being, we've removed the enemies. Quickly, let's see to the soldiers' wounds.
Hylian Captain: No... Please, don't worry about us. The outpost at the center of the plain needs your help.
Zelda: I understand. I'll head there immediately.
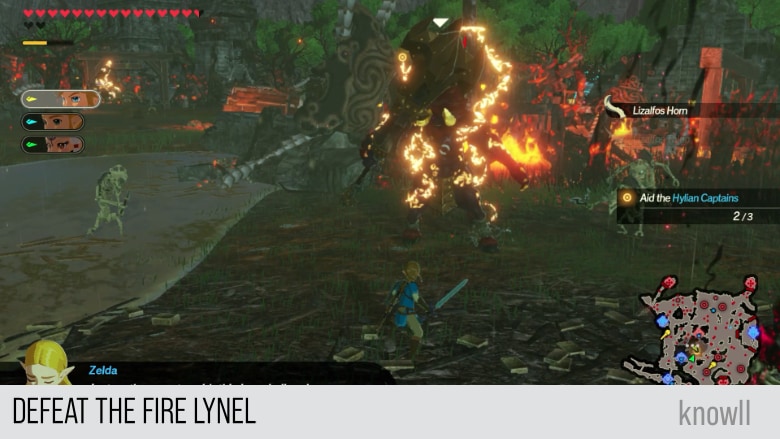
Fighting the Fire Lynel
The first two outposts have easy minibosses, but the third one has a Fire Lynel. We have covered its moveset and attack patterns in the entry Water and Fire. You can view our Enemies Guide for more combat tips with Lynels.
Zelda: Just as the reports said, this is a challenging situation.
Hylian Captain: Princess?! This outpost is doomed - please, make your escape before it's too late!
Zelda: Never. I will do my part - no matter the cost.
After defeating the Fire Lynel, you will get the next objective.
Hylian Captain: An explosion! Was that the Guardian from before? It sounds like Fort Hateno is in grave danger.
Zelda: Oh no... I must be swift.
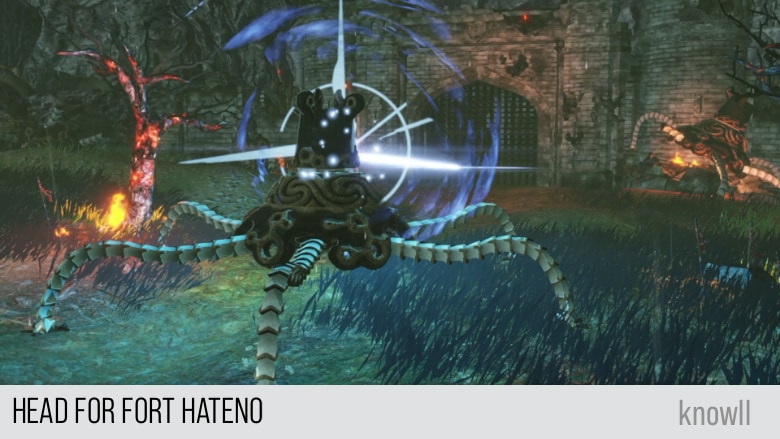
Objective: Head for Fort Hateno
There are three Guardians attacking Fort Hateno, two fliers, and one crawler. They are all positioned in front of the entrance.
Hylian Captain is in a tough battle.
Zelda: Guardians... So many...
Impa: Stand down, Princess! I beg of you!
Objective: Defeat the Guardians
While approaching the three Guardians, be careful with your positioning. You do not want to attract all of their attention and end up receiving laser blasts one after another. These monsters working together can stun-lock you.
You can view our Enemies Guide on how to handle flying as well as crawling Guardians.
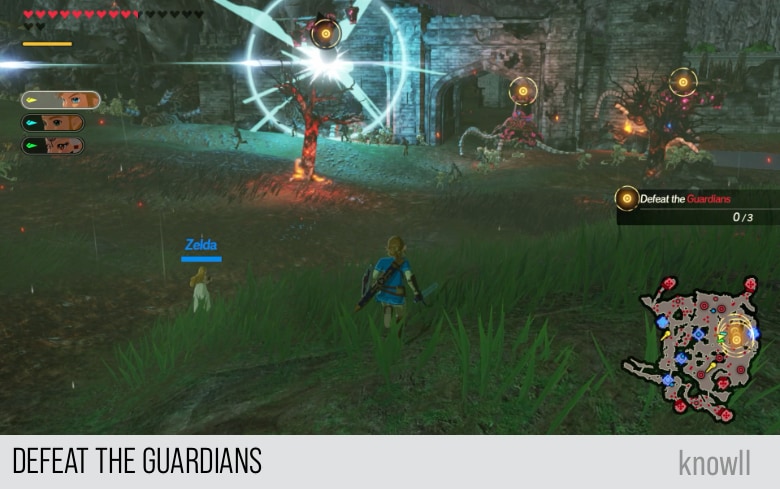
We suggest you focus on one of the flying Guardians on the side. Begin with that one enemy and defeat it, before getting the attention of the one in the middle. The flying Guardians are much weaker than the crawler.
Go ahead and defeat them in sequence.
Zelda: Quickly! We must hurry and save those within the fort!
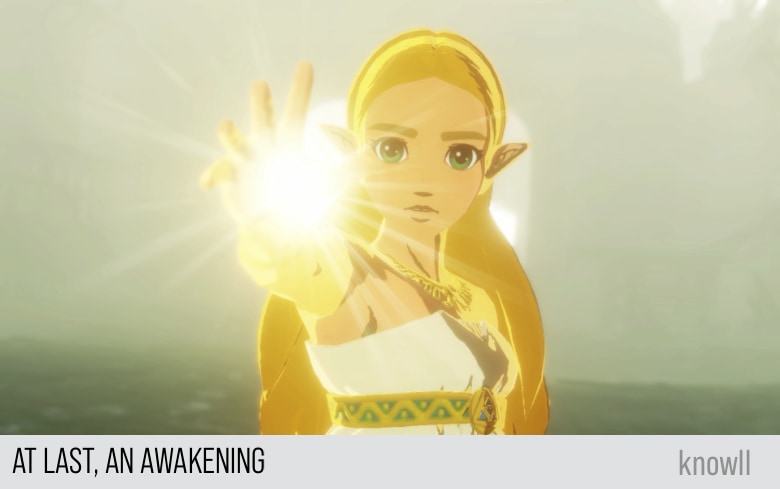
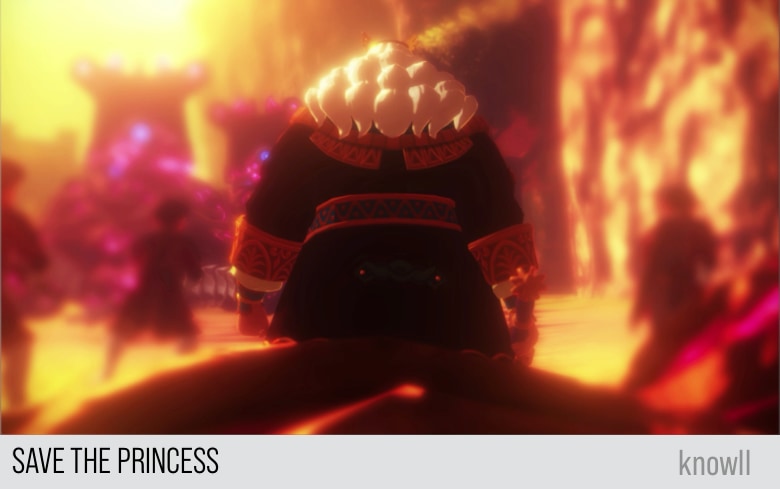
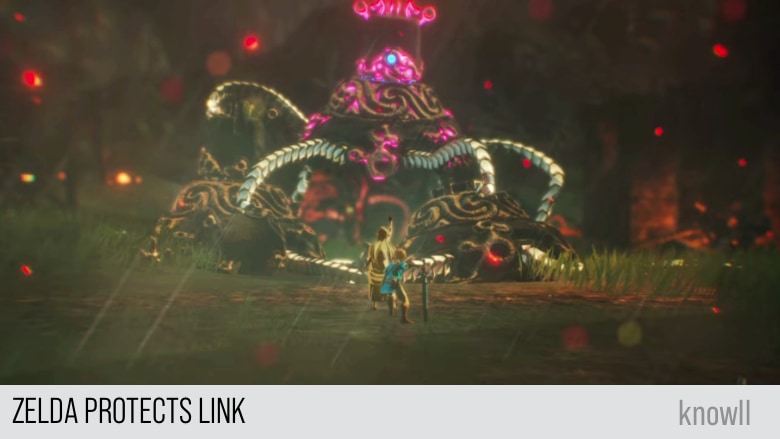
At Last, an Awakening
Astor, who had orchestrated the attack on Fort Hateno, sets Blight Ganon's phantoms on the party as revenge for their intervention. As Link struggles to hold them off, Zelda refuses to flee again, and her strong desire to save Link finally awakens the power she had long been seeking.
Astor: Hehehe...
Astor: Your thread will be cut here, Your Highness.
Astor resurrects the Blight Ganons.
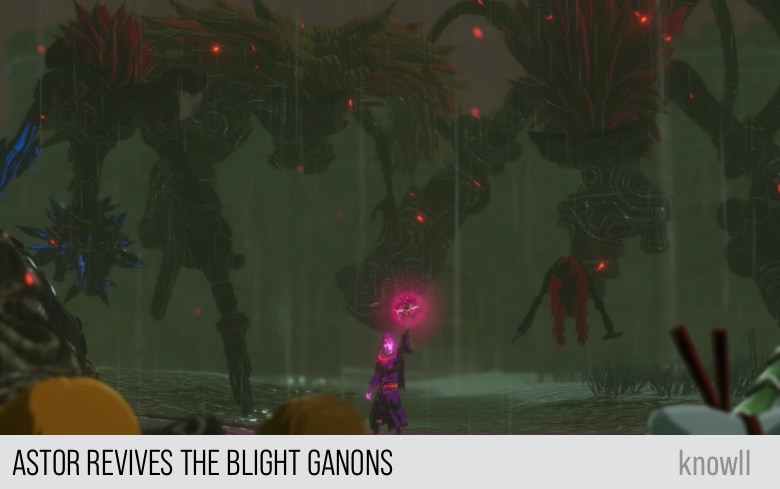
Zelda: Impossible!
Link nods to Impa.
Impa: Princess! Come with me!
Zelda: We can't leave him!
Zelda: I must act!
Impa: Princess!
Zelda: Link...
Zelda: LIIIIIINK!
Astor: That light!
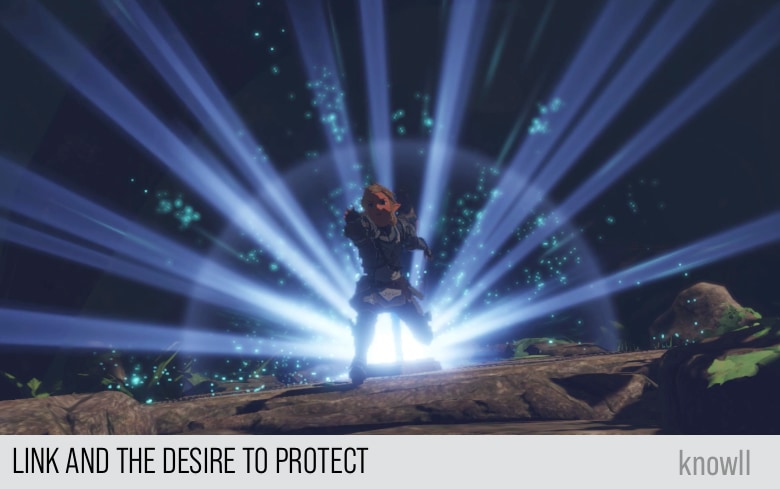
Zelda and the Desire to Protect
After Link gives the nod to Impa, she knows what he meant, that she needs to protect Zelda and bring her to safety. The escape of the Princess is now her highest priority, not to aid Link nor to linger in that dangerous area.
Meanwhile, Link desperately fights the four Blights, in a similar scenario where he had to simultaneously fight the four Hollows last time in Korok Forest.
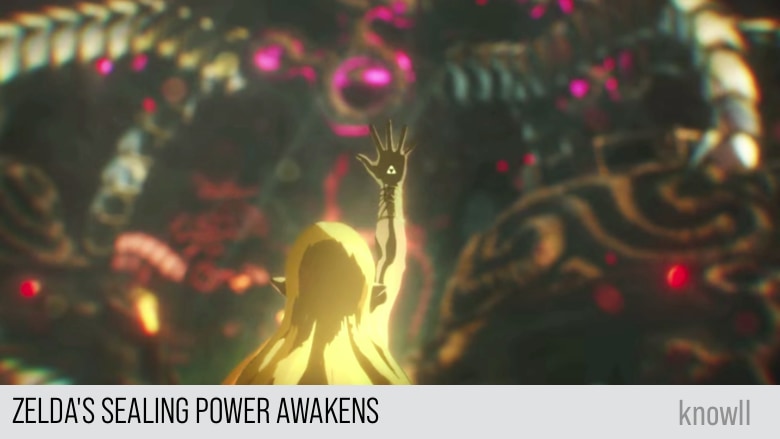
Zelda watches Link while Impa drags her in their attempt to escape Astor. As the Blights are about to close in and deliver a fatal blow on Link, Zelda gets a flashback of her father and decides to run towards Link and protect him.
This act is on the borderline of hope and despair. It is when you still exert effort knowing that you can't do anything and yet you cling to your hope that you can make an impact.
This burning desire of Zelda to protect Link, knowing that she is powerless and does not have any means of defeating the enemies, is what awakened her sealing power.
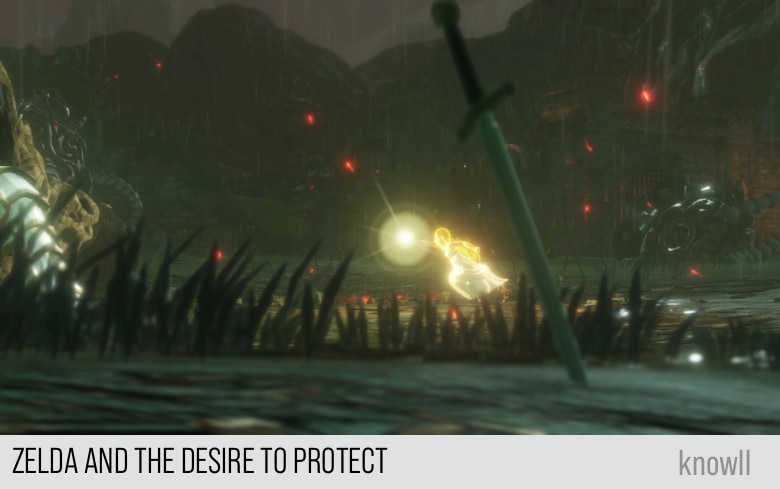
This is no different from that time in BOTW, when Zelda, between hope and despair, decides to shield Link from the Guardian's attack, knowing that she does not have any power and that could be her last act before they both get killed, by protecting Link.
It is this burning desire of Zelda to protect Link, at a moment when she is at her weakest and they are at their most desperate situation, that awakened her Sealing Power.
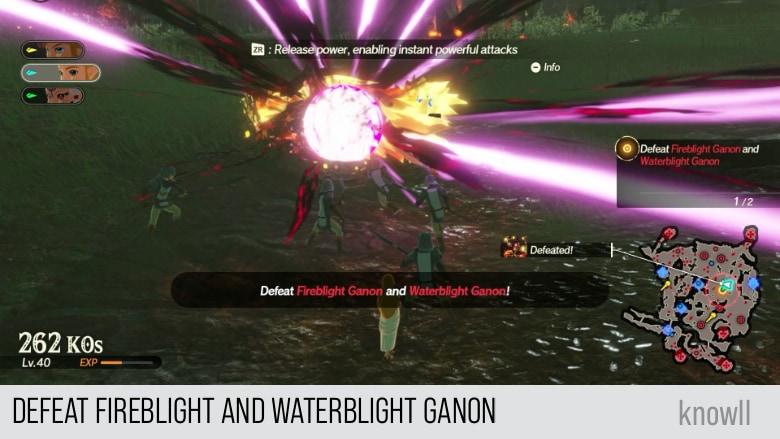
Objective: Defeat Fireblight Ganon and Waterblight Ganon
Zelda: I... I...
Astor: That light, it looks like... No! NO!
Astor: Awaken, Blight Ganons! Consign that wretched princess to oblivion!
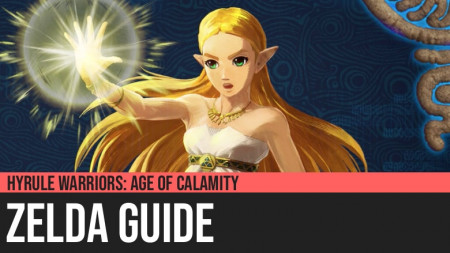
You can now play as Zelda with her awakened powers. Her weapon changes as well as her moveset. This is your chance to learn her attacks and her combos.
You can view our Zelda Guide for more combat tips on using her awakened powers.
Impa: The monsters are in pain... Princess? Could it be?
Zelda: We must strike now! Don't allow them to regroup. It's time to eradicate them from Hyrule!
You will observe that Fireblight Ganon and Waterblight Ganon do not give a fight. After defeating both of them, Purah appears and gives the next objective.
Purah: Ahahaaa! That was tip-top, Princess! You gave it 110 percent, didn't ya?
Zelda: Purah! You're all right!
Hylian Soldier: The surge is not over yet. More Guardians are headed this way!
Purah: Hehe! As it happens, I'm prepared to get us out of exactly this pickle. Folks, LISTEN UP!
Purah: Those outposts crawling with monsters? I need ya to take 'em back and secure the devices there.
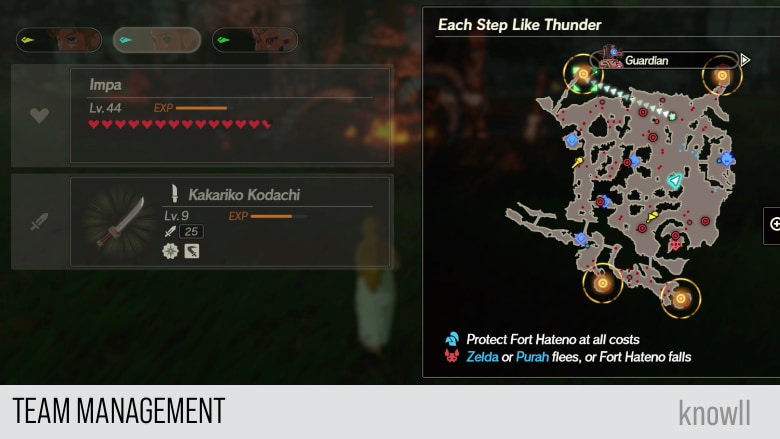
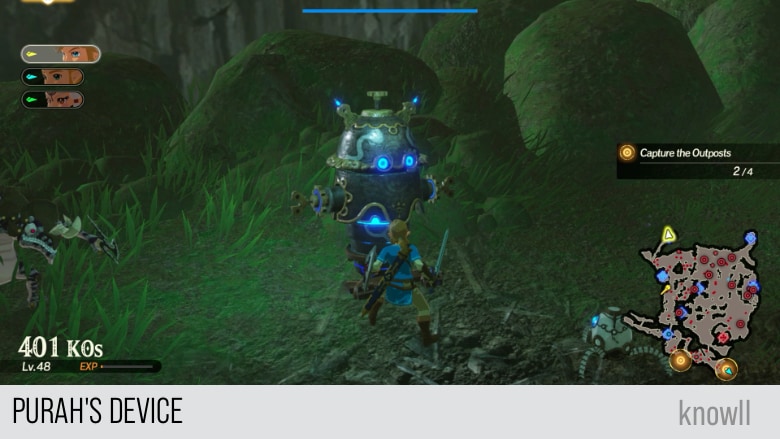
Objective: Capture the Outposts
This is the part where things can easily go haywire. The objective begins with a typical capture-the-outposts goal, but there are a few things happening in parallel that can make things harder later on.
Note the large red dots on the map below. These are minibosses that are just bidding their time to cause chaos and havoc later on. Do you need to fight them now? No, but you need to be aware of them and be expectant of them.
They are going to do a combined attack on the primary outpost of Fort Hateno, which is currently not being highlighted. However, you can identify it as the rightmost blue outpost. We suggest you park one of your heroes there for easy switching later.
Zelda: Understood. We'll capture the outposts. Everyone, let's divide and conquer!
Impa: That power... Princess, I knew you could do it!
Zelda: Yes, I'm fine. I've worried you, haven't I?

The monsters have begun moving to Fort Hateno!
Impa: The monsters are out in force. Let's be on guard so that Fort Hateno does not fall!
As shared by Zelda, it's best to do team management and distribute your characters among the outposts, so you can save time running to and fro. Do not forget to park a hero in Fort Hateno, the right-most blue outpost.
Easily Defeat the Elemental Guardians
The sequence on how you capture the outposts does not matter. What matters is how much time you spend on clearing the outpost. Hence, it is best to learn the optimal attacks on their minibosses.
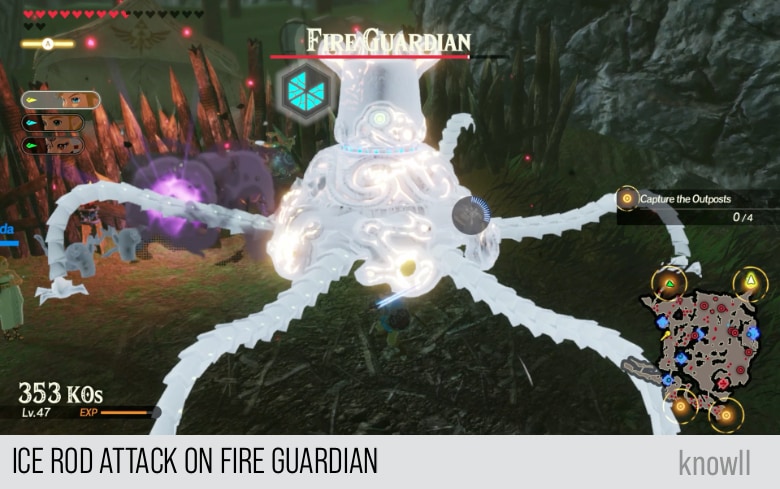
As most of these minibosses are elemental Guardians, use the tips below to do optimal elemental attacks on them.
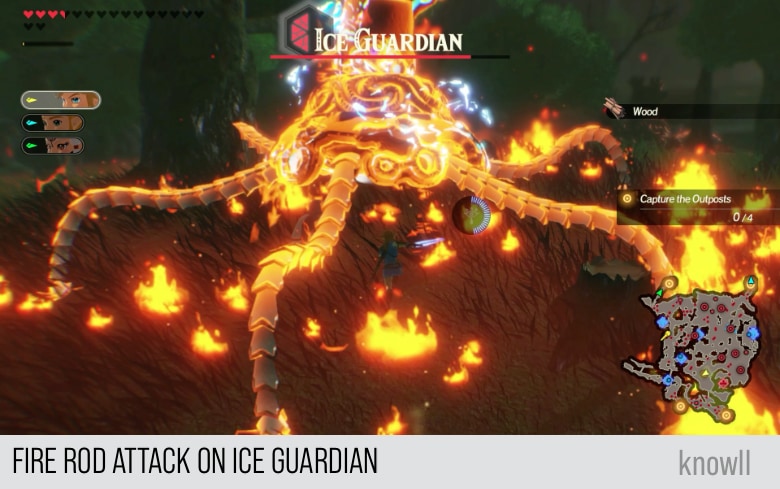
For the Ice Guardian
Use the Fire Rod to do the optimal attack on the Ice Guardian. As shown below, its WPG became brittle and easier to break.
For the Fire Guardian
Use the Lightning Rod to do the optimal attack on the Fire Guardian. As shown below, its WPG became brittle and easier to break.
For the Electric Guardian
There is one Electric Guardian in Fort Hateno and it stands on top of a pool of water. Use the Ice Rod to freeze it and break its WPG.
Capturing the First Outpost
With the tips above, you should be able to clear the outposts with minimal time. Remember, when you kill an elemental enemy, it also drops an elemental crystal. So don't worry about using the Rods. You get something for what you lose.

Purah: Good going! Now that that's done and dusted, you can activate the device!
Purah: Yup, that's it! Also, we don't have any spares, so be veeery gentle...
Hylian Captain: Report! Multiple Guardians making their approach from Dueling Peaks!
Zelda: Leave the Guardians to me. Focus on recapturing the outposts and on defense.
The monsters have begun moving to Fort Hateno!
Impa: Even with Vah Naboris's feint, there are still so many. I hope Lady Urbosa is safe.
Capturing the Second Outpost
Notice on the map that there are now multiple red dots inside Fort Hateno, they just keep on accumulating. if you parked a hero there as suggested above, switch to that hero and fight, before the minibosses become too many.
Purah: That there's a modified Guidance Stone, capable of amplifying ancient energy from the ground.
Purah: It's for my research, but if we use it wrong in juuust the right way, we'll overload their systems.
Purah: Yowch! Back me up over here, will ya?!
Keep an eye on the health of Purah!
Capturing the Third Outpost
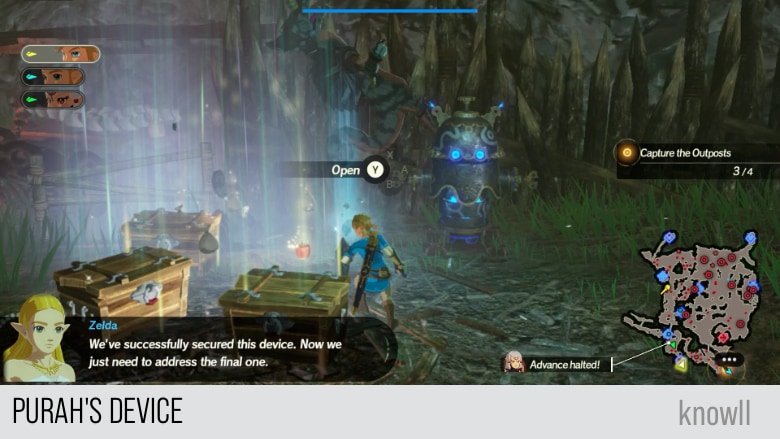
Zelda: We've successfully secured this device. Now we just need to address the final one.
Purah: Restoring the Guardians to normal is another matter, but for now, this will at least knock 'em out.
Purah: I based the device off tech inside your tiny automation. Remember, it's a one-time-only gambit.
Capturing the Fourth Outpost
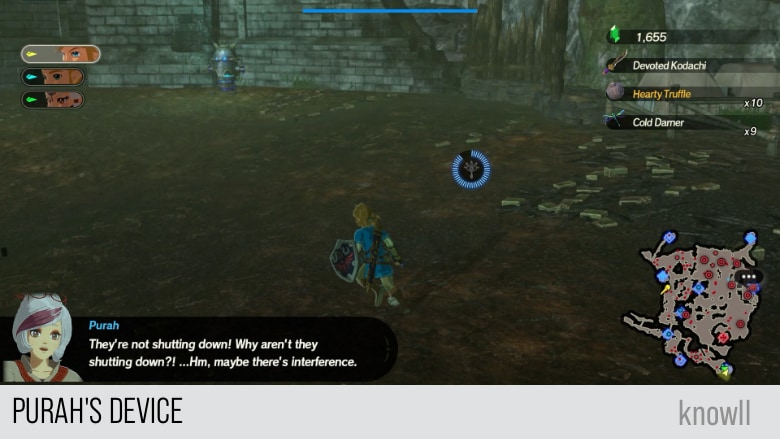
Zelda: Purah, we've completed our task. With this, the Guardians will -
Purah: They're not shutting down! Why aren't they shutting down?! ...Hm, maybe there's interference.
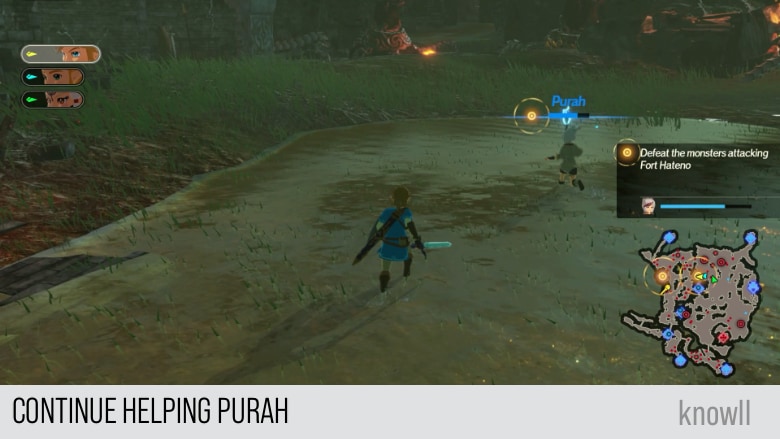
Purah: Something might be jamming the devices' power supply. I'll head for the lab and try rebooting them!
Purah is moving toward the Research Lab!
Zelda: Moving alone across this battlefield is a death sentence. Let's escort Purah!
Objective: Help Purah Make Their Way to the Targeted Position
The moment you see the alert that Purah is moving to the Research Lab, drop anything you are doing in the game and move to her location.

Purah: Oh, gears and screws! Something's coming!
Thunderblight Ganon has appeared!
Zelda: That monster! There must've been more...
Purah: I bet that's why my devices are on the fritz. Hurry up and get rid of these bozos!
As suggested above, you should now be next to Purah and Thunderblight Ganon is near you.
We suggest that you do not leave this location until you defeat Thunderblight Ganon. Your only goal right now is to defeat this enemy, even if other alerts start showing on your screen. You can view our Thunderblight Ganon Guide for more combat tips.
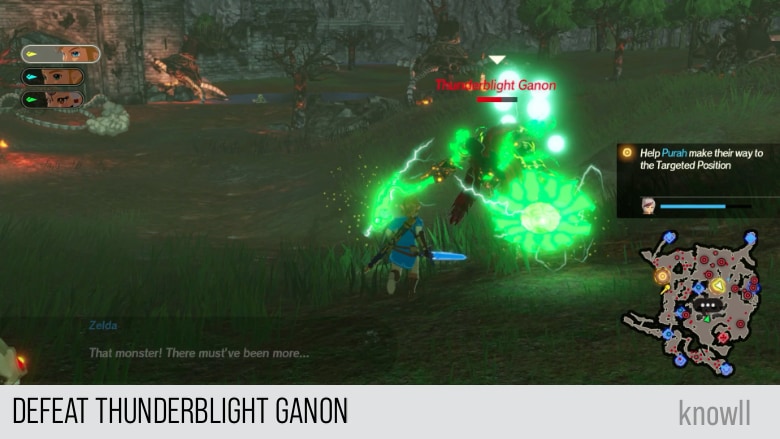
Do not leave Thunderblight Ganon even if you start seeing alerts like this.
Fort Hateno is under attack!
Fort Hateno is about to fall!
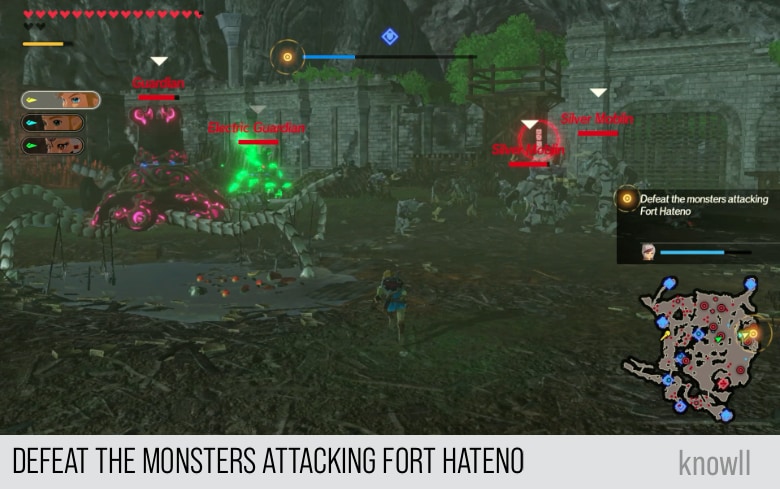
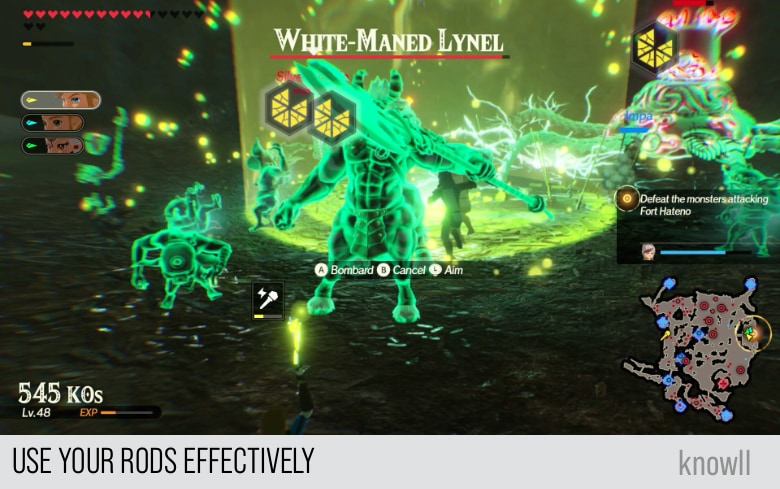
Objective: Defeat the Monsters attacking Fort Hateno
There is a reason why we recommend defeating Thunderblight Ganon before helping Fort Hateno. This is because he will follow you wherever you go on the map, making things more difficult and the fights harder to win.
Note that the chance of failure in this quest is very real, it can happen and might happen repeatedly, until you succeed. So as a warning in advance, this is how it looks like to fail in this quest.
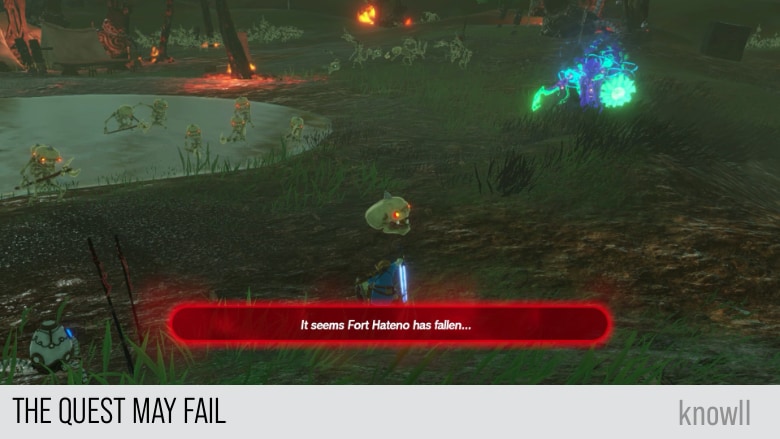
And this is the message you get when you fail:
Hylian Captain: The Guardians broke through our defenses. Fort Hateno has fallen.
Hylian Captain: In other words... it's over. They'll move on to the village, and then...
How Things Can Go Wrong
The moment you see the objective to Defeat the Monsters in Fort Hateno, your first inclination might be to rush there and start fighting the enemies.
The truth is, the attack on Fort Hateno was already happening while you were capturing the four Outposts. The map just didn't highlight it with a yellow marker, but it is just as urgent as the other outposts.
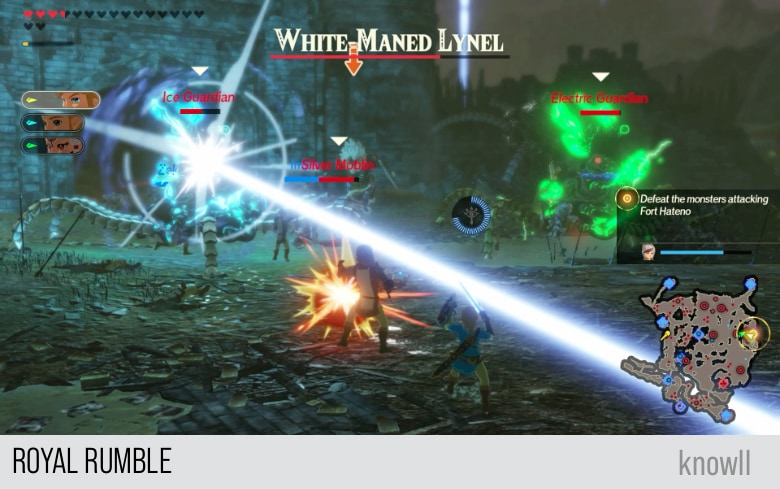
By the time Fort Hateno gets highlighted on the map, there is already a large number of monsters there causing havoc:
- 2 x Silver Moblins
- 1 x White-Maned Lynel
- 1 x Guardian
- 1 x Electric Guardian
- 1 x Ice Guardian
- 1 x Thunderblight Ganon
If you didn't fight Thunderblight Ganon earlier and you rushed to Fort Hateno immediately, he will be joining the Royal Rumble with all of them fighting against you.
This is why we recommended you defeat Thunderblight Ganon first before going inside the fort. And that is why you needed to maintain a hero inside the fort while capturing the four outposts.
What Makes Fort Hateno Fall?
Your main question might be - what causes Fort Hateno to fall? The factor that determines the health of the Fort is the number of soldiers alive inside. Yes, they get killed and reduced the more monsters there are and the longer the monsters stay inside.
So one strategy is to bring out these monsters outside the Fort, using yourself as bait. Alternatively, you can prevent their accumulation inside by parking a hero there and switching to battle them as they come.
Regardless, your goal is to keep the soldiers alive.
One other method is to embrace the challenge of the Royal Rumble and battle the accumulated monsters. You need to be prepared and do optimal elemental attacks so you can clear them fast. Be generous on using your Rods as this is the last batch of challenging enemies in this whole quest.
Note the pools of water inside the Fort, Lightning Rod and Ice Rod should be effective on those near the water.
With the tips above, go ahead and clear the enemies inside Fort Hateno. Finally, once you are done, Purah will continue moving.
Purah: All right, I can keep going!
Purah is moving again.
Windblight Ganon has appeared!
Purah: Just as I thought, they're gumming up the works! Take 'em out so I can reboot the devices!
Hylian Captain: A horde of Guardians is headed this way!
The Ice Guardian and their allies have begun an assault!
Your focus now is to just defeat Windblight Ganon. Do not leave him as he will follow you. You can view our Windblight Ganon Guide for more combat tips.
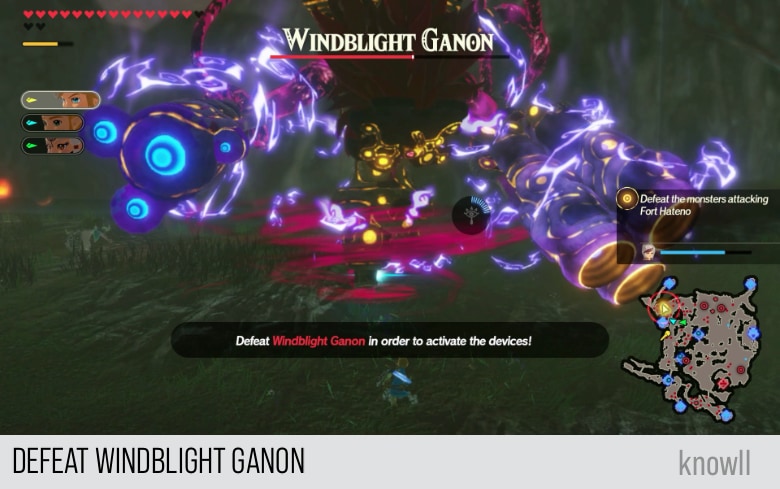
Once you have defeated Windblight Ganon, Purah will continue disabling the remaining Guardians.
Purah: Aw, yeah! That's what they get for messing around with my lab! Thanks for bustin' em!
Purah: Yeah, yeah. Put the lecture on ice, will ya? It's time to see what my toys can do!
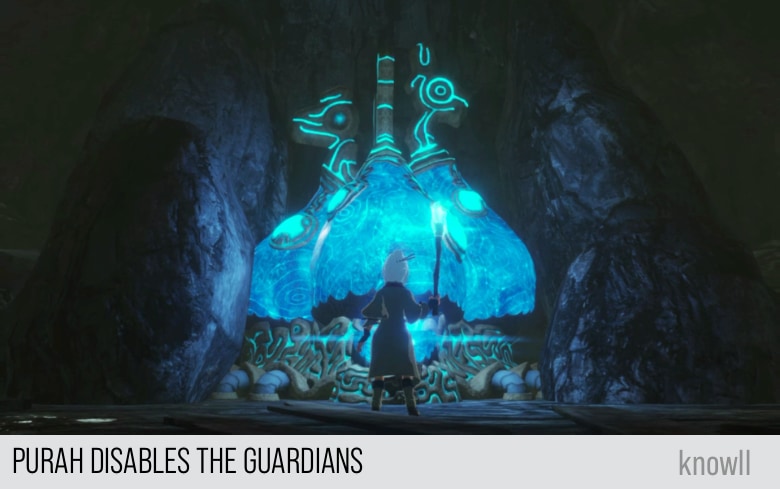
The Guardian and their allies have stopped moving toward Fort Hateno!
Purah: A smashing success! And luckily, our little buddy here is still up and running!
Purah: Howeeeever! The effect is temporary. If you get close to the Guardians, they'll attack, so don't!
Impa: There's no use lingering. Let's use this time to withdraw... Hm?
Hylian Captain: Report! An unusual Guardian has appeared on the plain, and there's nothing we can do to stop it!
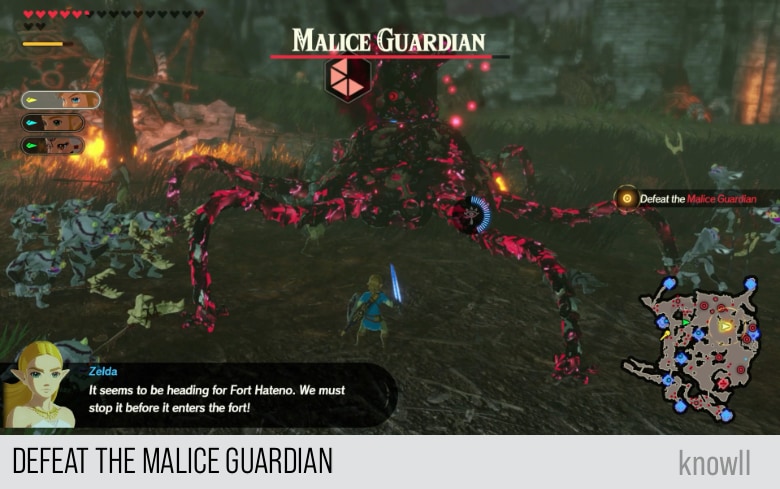
A Malice Guardian has appeared!
Purah: I shoulda known it wouldn't be so simple. Welp, good luck hacking and slashing, all! Purah, out!
Objective: Defeat the Malice Guardian
This is the second Malice Guardian that you face in the game. The first was in the entry Relentless as a Waterfall. You can view our Enemies Guide for more combat tips on Malice Guardians.
Zelda: It also showed up in Akkala Citadel...
Purah: Calamity Ganon's power at work. Even ancient energy is no match for that malign influence...
Zelda: It seems to be heading for Fort Hateno. We must stop it before it enters the fort!
This is the last enemy for the entire quest. Go ahead and defeat it.
Impa: It's over, isn't it?
Zelda: No. Until we can seal Calamity Ganon, there will be no rest for us.
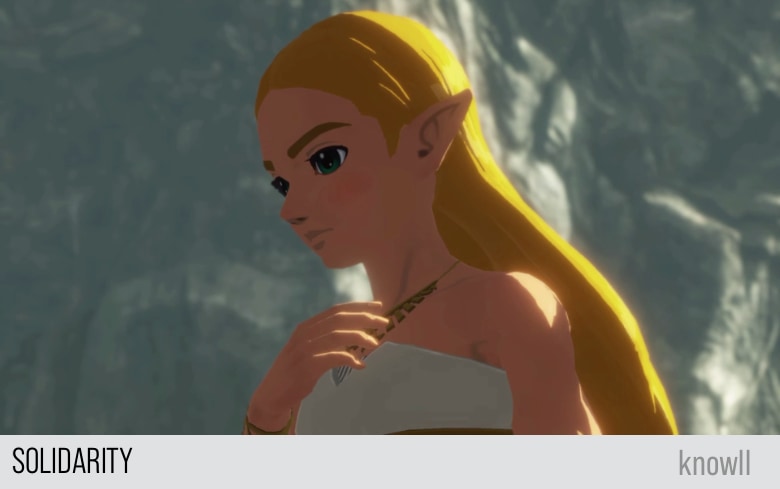
Solidarity
Zelda speaks to the soldiers gathered at Fort Hateno, projecting a renewed confidence that reflects her role as a member of Hyrule's royal family. With spirits bolstered, Zelda takes the time to speak with one soldier in particular. The man turns out to be an unexpected guest...
Zelda: Everyone, hear me now. With Calamity Ganon now awakened, here we stand at the threshold of the unimaginable.
Zelda: Despite that... we must not give in to defeat. We must not despair.
Zelda: We must stand and fight!
Zelda: Hyrule wields the Divine Beasts and their Champions. We are armed with the knight whose sword will seal the darkness.
Zelda: And... we shall strike with you. You, brave soldiers!
Zelda: Everyone, you are mine to lead now.
Zelda: Calamity Ganon... will be sealed away forever with the power I possess!
Zelda: Together, standing in strength, we begin our march.
Zelda: Hyrule's fight - to rescue all within it - is now!
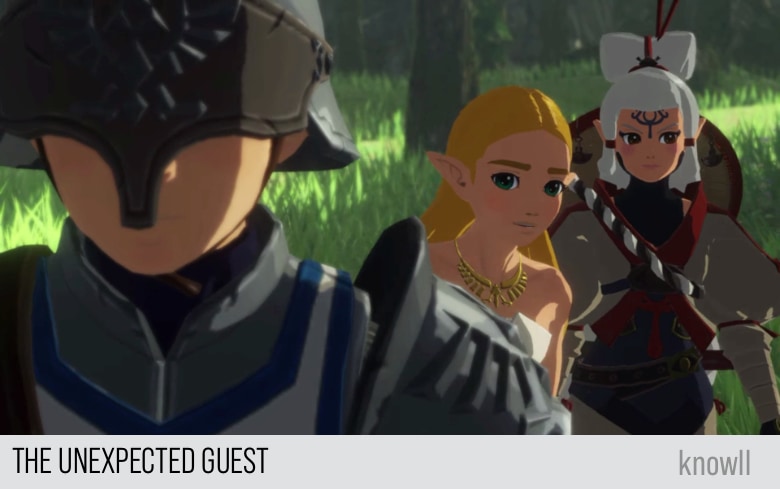
Sometime after Zelda gave her speech.
Zelda: Well then, what did you want to tell me?
The soldier jumps up and transforms into Master Kohga.
Impa: Huh? What're you -
Master Kohga performs the kowtow in front of them. This act is the highest sign of reverence.
Impa: Huh?
Characters Unlocked
As you move through the Chapters and later on with the Challenges and Quests, you will be unlocking characters that you can use for your party. This Chapter entry that you just completed rewards you with Master Kohga.
If you would like to learn Master Kohga's moveset and combat guide, view our Master Koha Guide.
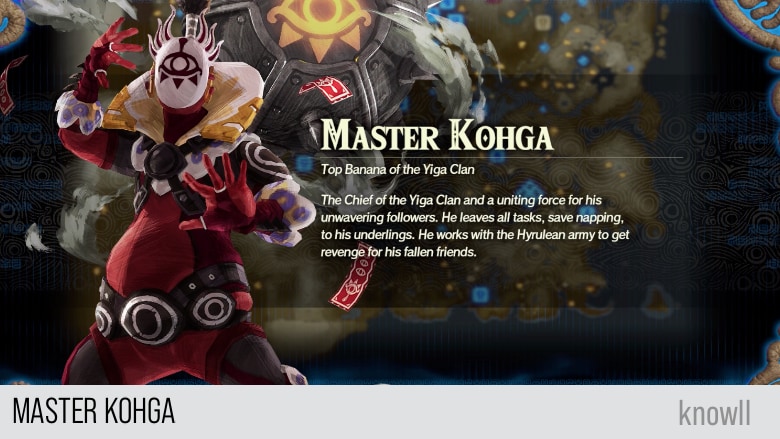
Top Banana of the Yiga Clan. The Chief of the Yiga Clan and a uniting force for his unwavering followers. He leaves all tasks, save napping, to his underlings. He works with the Hyrulean army to get revenge for his fallen friends.
Korok Locations
Every Chapter in the game contains Koroks. The main challenge is that there is no feature in the game that will make them appear on the map.
Hence, we provide all their locations on the area as well as on the map.
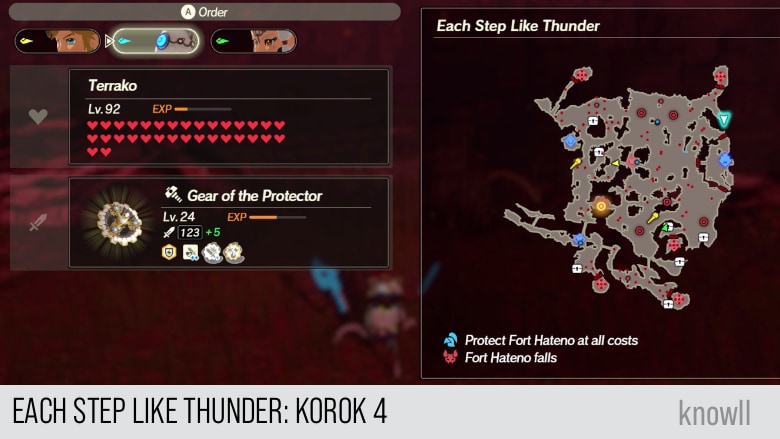
Total Koroks: 4
Each Step Like Thunder Korok 1

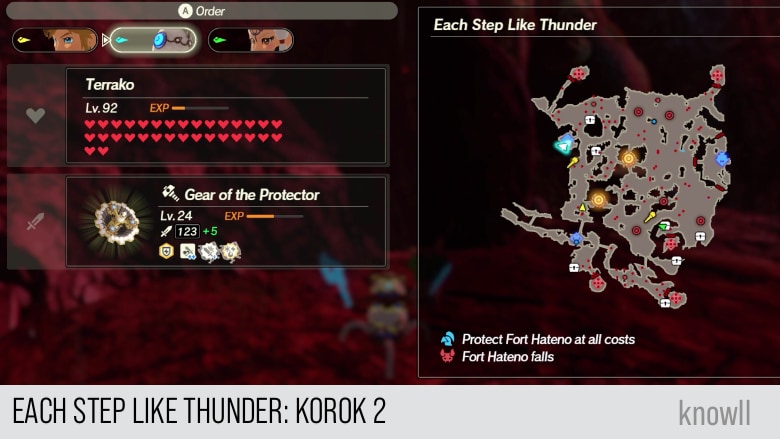
Each Step Like Thunder Korok 2
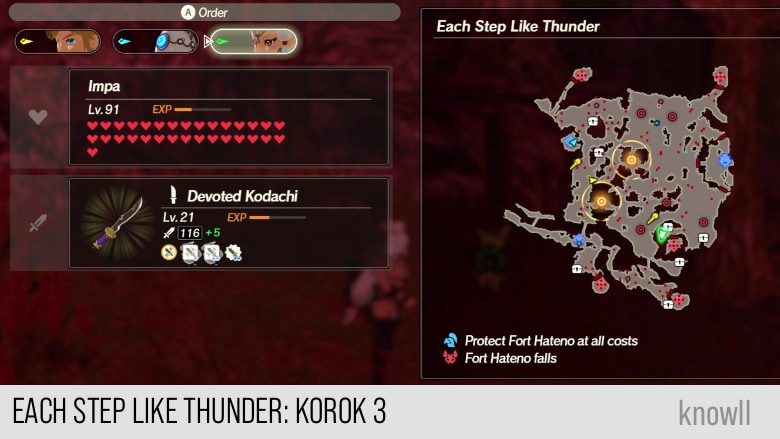
Each Step Like Thunder Korok 3

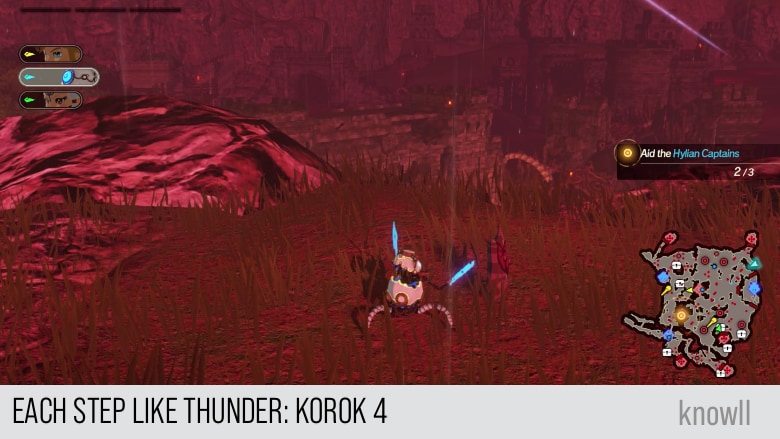
Each Step Like Thunder Korok 4
Continue the adventure with our next Chapter entry The Great Plateau.