

Hyrule Warriors: Age of Calamity - The Future of Hyrule
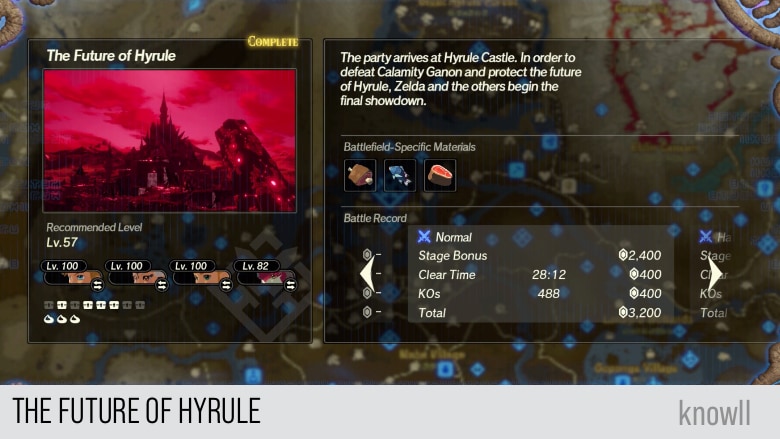
Hyrule Warriors: Age of Calamity - The Future of Hyrule is the third part of Chapter 7 of the game. The party arrives at Hyrule Castle. In order to defeat Calamity Ganon and protect the future of Hyrule, Zelda and the others begin the final showdown.
In terms of boss fights, this Chapter entry is the best in the whole game, as it gives you a chance to re-fight all the previous main bosses you have fought like Astor and the four Blight Ganons, as well as introducing two new excellent bosses, like Harbinger Ganon and Calamity Ganon, plus a secret boss that you will fight only once in the whole game.
Treasure Chests and Koroks
- 3 Koroks
- 8 Treasure Chests
Battlefield-Specific Materials
- Raw Gourmet Meat
- Armored Porgy
- Raw Prime Meat
Special Rewards
- Recipe for Vegetable Omelet
- Recipe for Monster Cake
- Recipe for Monster Curry
- Recipe for Spicy Pepper Steak
Threads of Fate
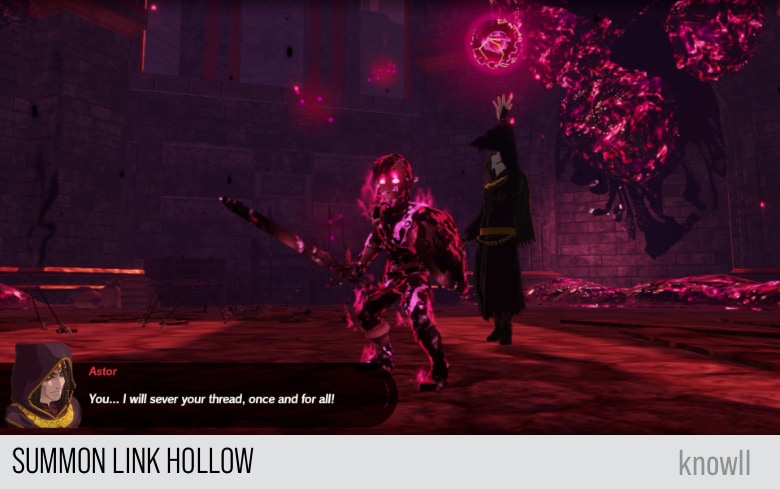
The party blazes a path through battle, at last reaching Hyrule Castle. There they encounter Astor, as well as a Guardian eerily similar to the one that has stood by Zelda throughout her adventure. This new Guardian is black and seethes with Malice...
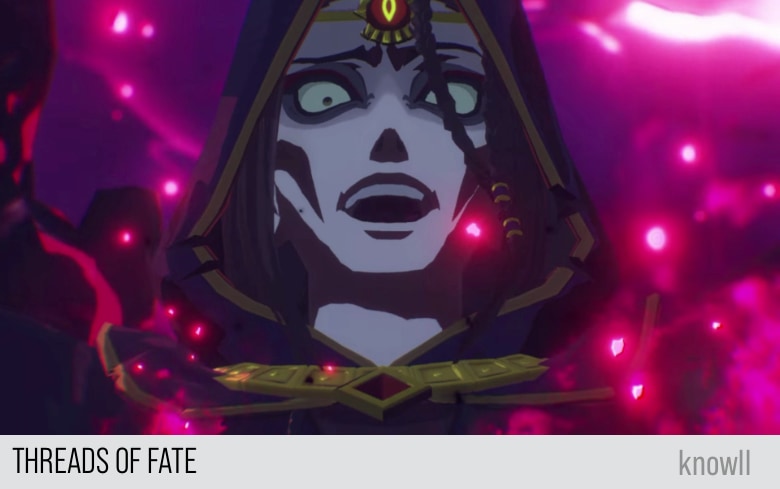
Zelda: Is that -
Astor: So, here you all are... All of you despicable pests!
Zelda: But that looks like -
Astor: I will crush you beneath my heel... That is... MY FATE!
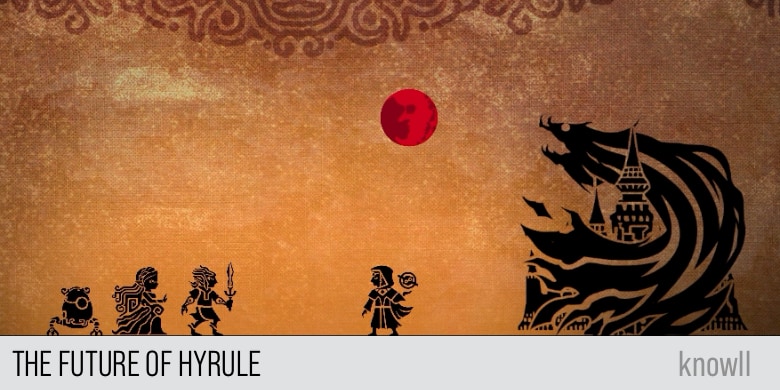
The Future of Hyrule
Through their perseverance, Link and the others overcame the monsters who had been revived by the Blood Moon, thus clearing the way to Hyrule Castle. Before them, their final confrontation awaited.
This battle that would determine the fate of all Hyrule - how might it end?
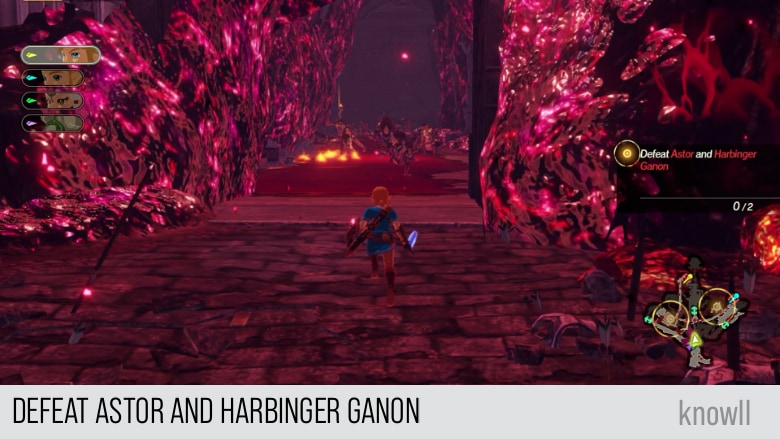
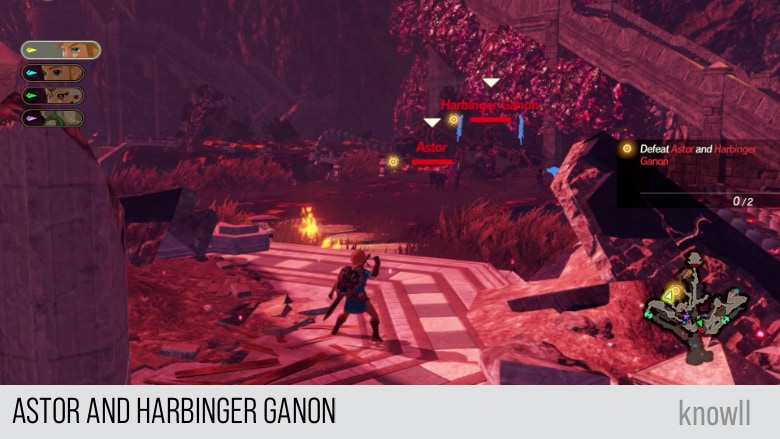
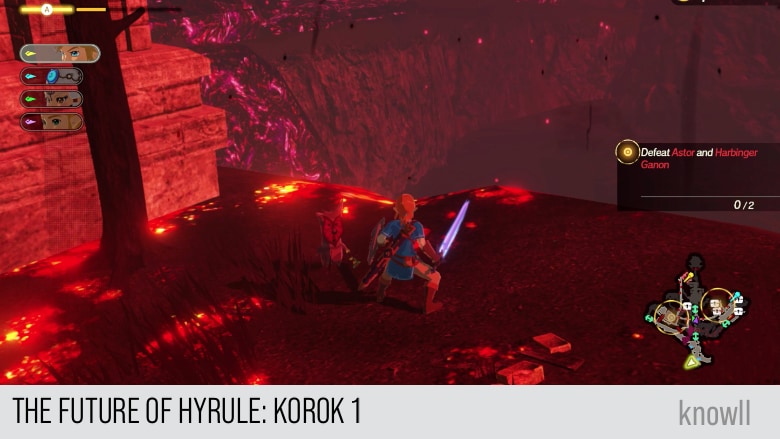
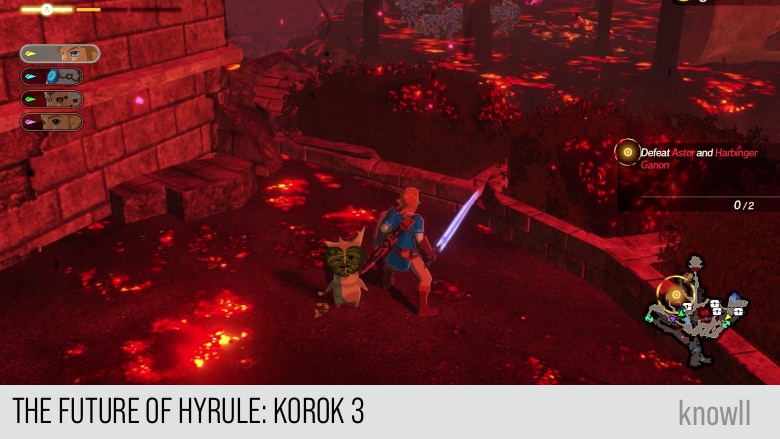
Objective: Defeat Astor and Harbinger Ganon
Finally, it's time to fight the big bosses of the game. There are two target positions, explore them both.
You will find the two bosses in these two markers:
- The right side will have the boss fight with Astor
- The left side will have the boss fight with Harbinger Ganon
You can fight these bosses in any order.
Zelda: The final battle is upon us. We unit our power to a sharpened point and seal Calamity Ganon!
Zelda: The ones from before seem to be lying in wait in the back of the castle...
Zelda: They disappeared in the direction of the first and second gatehouses. We must defeat them first!
After entering the main hall, lots of skeletal monsters will come alive.
Zelda: A trap! We'll defeat them and soldier on!
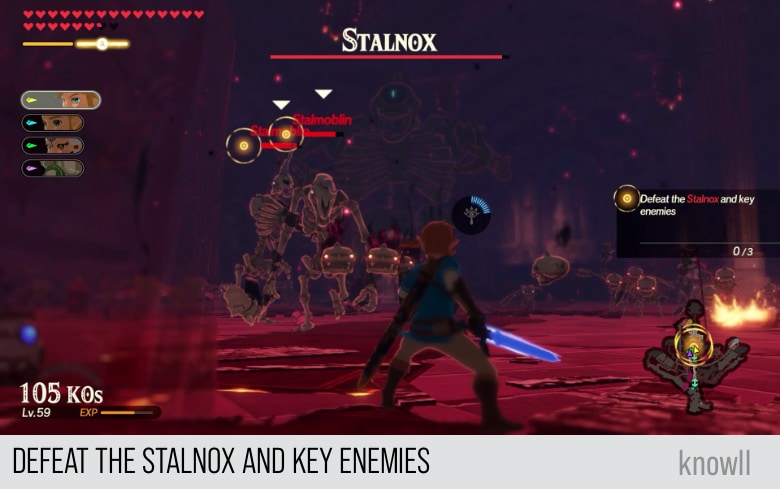
Objective: Defeat the Stalnox and Key Enemies
In the main hall, you will fight two Stalmoblin and a Stalnox. We have covered these monsters in our Enemies Guide.
After defeating the skeletal monsters, you will be facing again the Blight Ganons.
Astor: A valiant effort! But not enough, you'll find. This was over long before it began.
Astor has summoned the Blight Ganons!
Zelda: We need not fear. We will not lose.
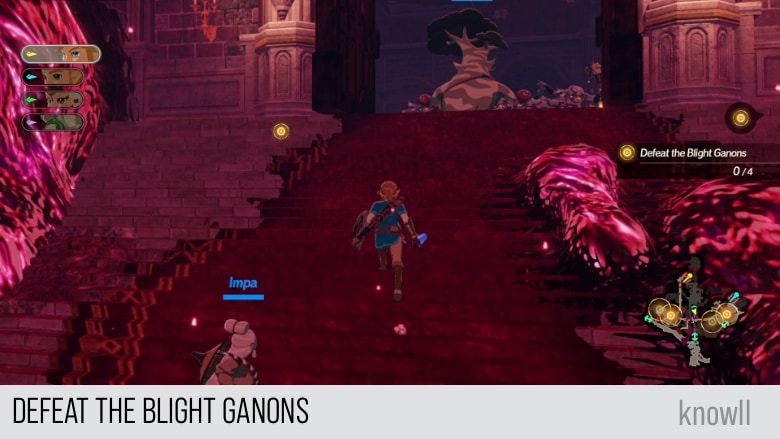
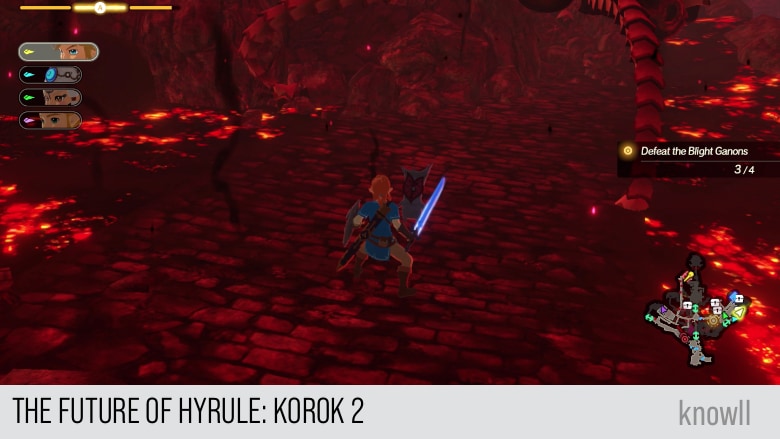
Objective: Defeat the Blight Ganons
Time to re-fight the previous big bosses. The locations of the four Blight Ganons are shown on the map. You can distribute your heroes among them and command them to go to the target positions.
Daruk and their allies have appeared!
Daruk: So the big bad monster's here. Good timing! You're gonna pay for everything you've ever done!
Daruk and their allies have begun moving!
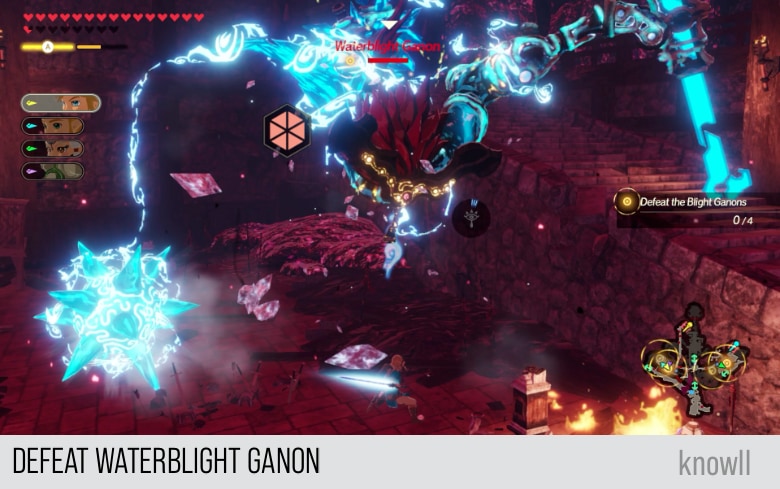
Defeat Waterblight Ganon
We have covered the moveset and attack patterns of Waterblight Ganon in the entry Water and Fire. You can view our Waterblight Ganon Guide for more tips.
After defeating your first Blight Ganon, you will get this message.
Astor: Hmph! Irritating fools! This will put a stop to your meddling!
The Guardian was reinforced by Astor!
Harbinger Ganon has activated the Guardians!
Zelda: Guardians approaching from behind! Everyone, take great care.
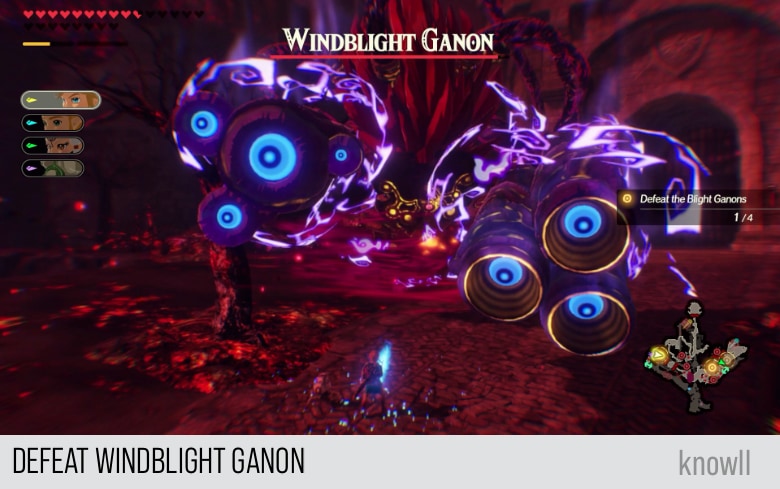
Defeat Windblight Ganon
We have covered the moveset and attack patterns of Windblight Ganon in the entry Air and Lightning. You can view our Windblight Ganon Guide for more tips.
Sidon and their allies have appeared!
Sidon: We'll draw away the pesky enemies. The rest of you, continue onward!
Sidon and their allies are moving to defend against the enemy!
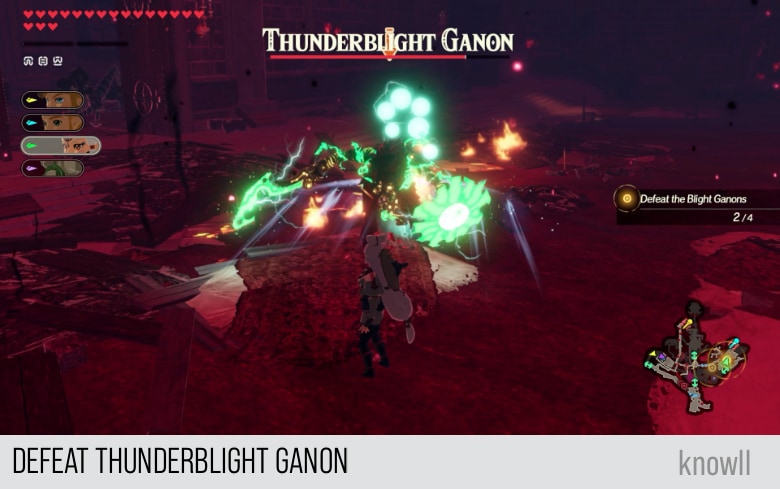
Defeat Thunderblight Ganon
We have covered the moveset and attack patterns of Thunderblight Ganon in the entry Air and Lightning. You can view our Thunderblight Ganon Guide for more tips.
Once you have defeated three out of the four Blight Ganons, you will see this message from Zelda.
Zelda: To strike down Calamity Ganon and restore peace. That is my destiny. It is my true calling!
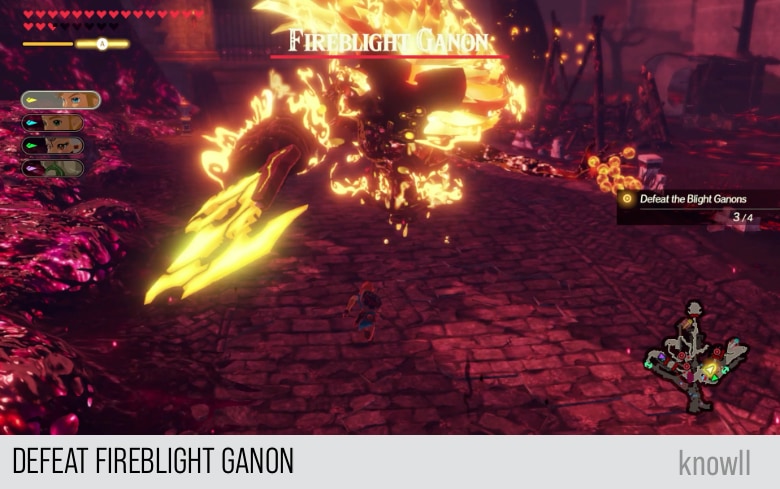
Defeat Fireblight Ganon
We have covered the moveset and attack patterns of Fireblight Ganon in the entry Water and Fire. You can view our Fireblight Ganon Guide for more tips.
After defeating the four Blight Ganons, you can resume the search for Astor and Harbinger Ganon.
You will find Astor in the hall next to Fireblight Ganon.
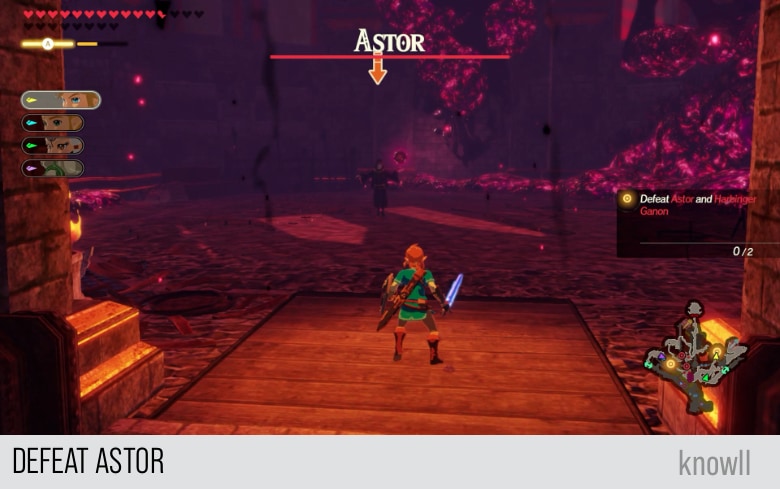
Objective: Defeat Astor
We have covered the moveset and attack patterns of Astor in the entry Freeing Korok Forest. You can view our Astor Guide for more tips.
In this re-fight, Astor gains new attacks, so we will cover them as well.
Fighting Astor
As shared in the entry Freeing Korok Forest, Astor is a ranged fighter. He is the only boss in the game without any melee attack.
He has two new attacks though, which we cover below.
Summon Link Hollow
The moment you enter the room, the first thing Astor does is summon a Link Hollow. This is very similar to the last fight in the Korok Forest, but this time, he is not invincible while there is a Hollow present.
The summoned Link is weak though, and you can easily defeat him. Once his WPG is cleared, he can be killed.
If you have an unused special attack, using it can easily defeat Link Hollow.
Once Astor loses more than 50% of his health, he might summon Link Hollow again.
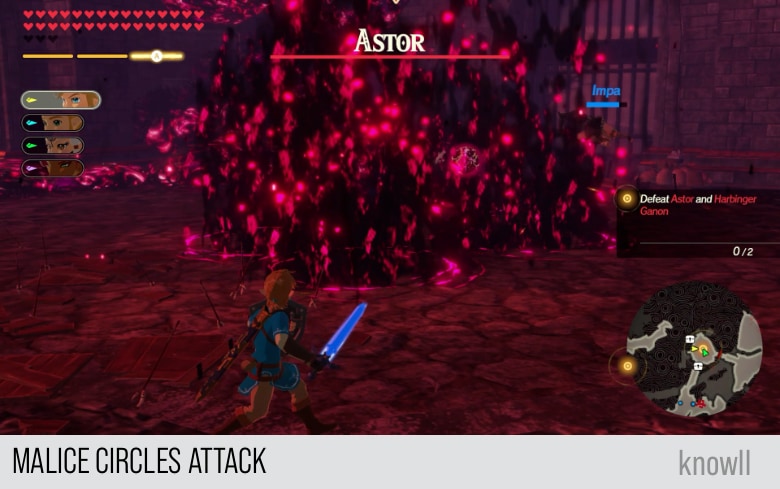
Malice Circles Attack
In the wind up of this attack, Astor summons five Malice Circles around him.
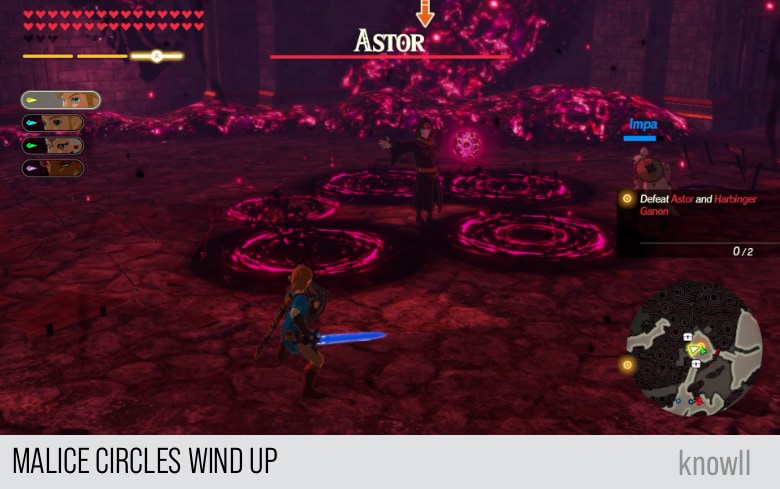
Immediately after that, he will move his hands and cause the five circles to explode, causing damage to any targets inside them.
After Astor loses 25% of his health, there will be some Guardian activities just outside the room where you are fighting him.
Guardians have appeared!
Zelda: Enemies from behind too! We must act quickly before they flank us!
King Rhoam and their allies have appeared!
King Rhoam: Leave the rearward enemies to us. You must keep moving forward!
King Rhoam and their allies are moving to defend against the enemy!
Once you have defeated Astor, he will escape.
Astor: The story of my triumph was writ long ago! How dare you try to efface it!
Astor has withdrawn for now!
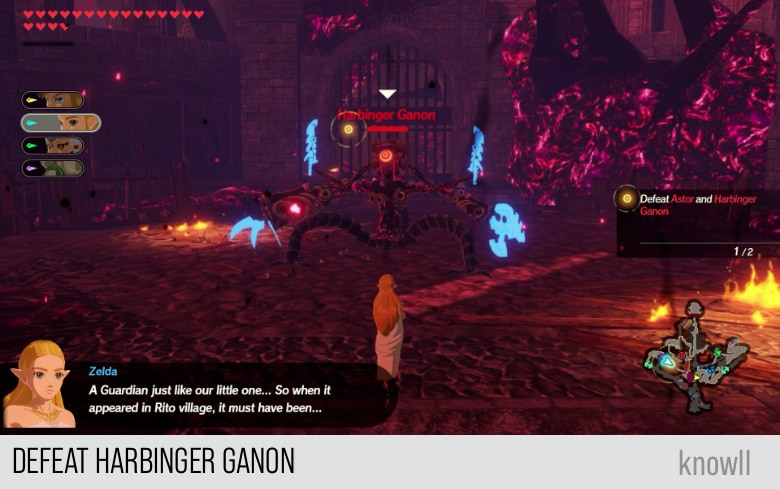
Objective: Defeat Harbinger Ganon
Time to search for Harbinger Ganon. You can find him on the left side target position.
Zelda: A Guardian just like our little one... So when it appeared in Rito village, it must have been...
Fighting Harbinger Ganon
Harbinger Ganon is an aggressive melee fighter with some ranged attacks as well. In combat style, he is very similar to Thunderblight Ganon, fast and aggressive.
You can find below his moveset and attacks. We also created a separate Harbinger Ganon Guide.
Color of Weapons
Before we proceed with the attack types, there is a combat mechanic that is unique to Harbinger Ganon. When the monster is preparing an attack, the color of the weapon he will use will change from light blue to light pink.
For melee attacks, he will always do an attack with a weapon that has a light pink color.
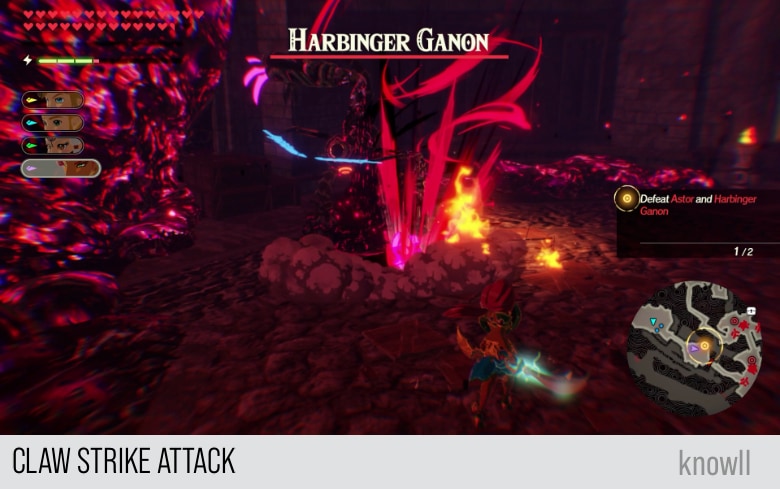
Claw Strike Attack
In the wind up of this attack, the monster raises his left arm as though preparing to strike you with it.
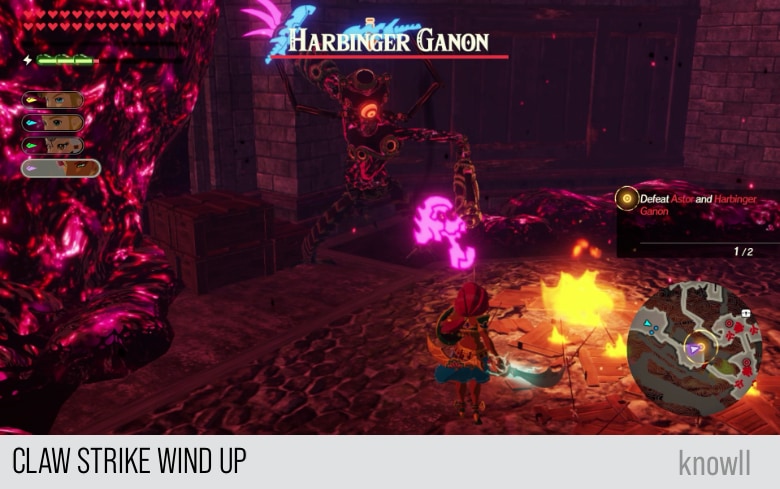
Then he will immediately a combo attack where he strikes first with his left weapon and then with his right weapon.
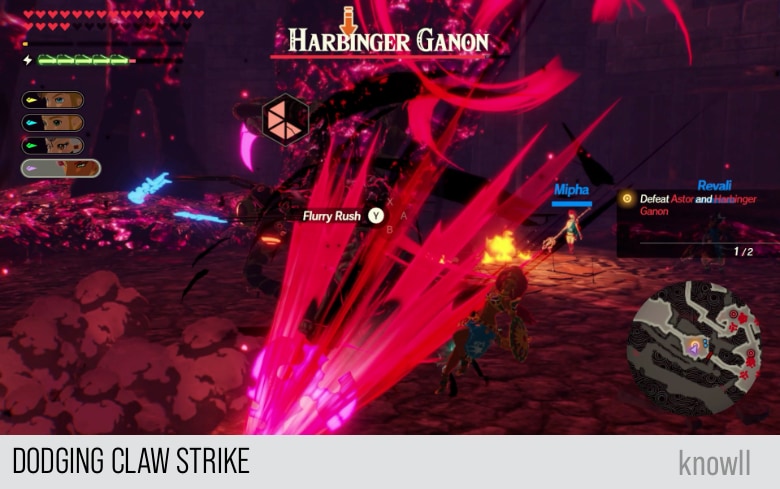
You can dodge either of these strikes as shown below.
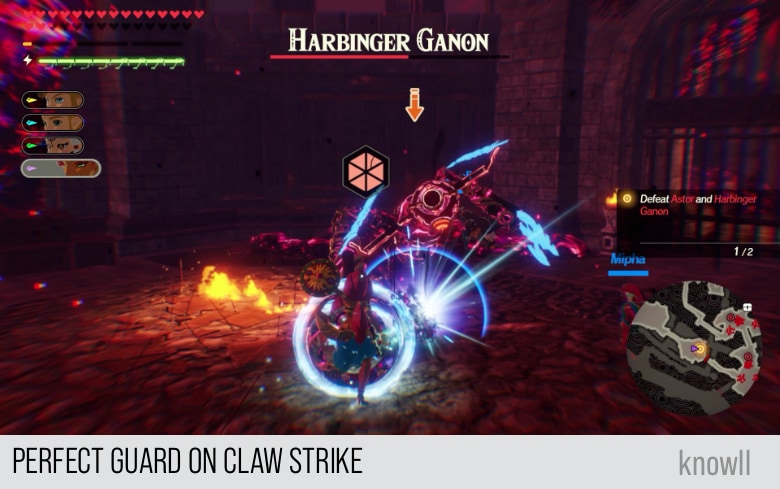
If you are confident, you can perfect guard on them as well.
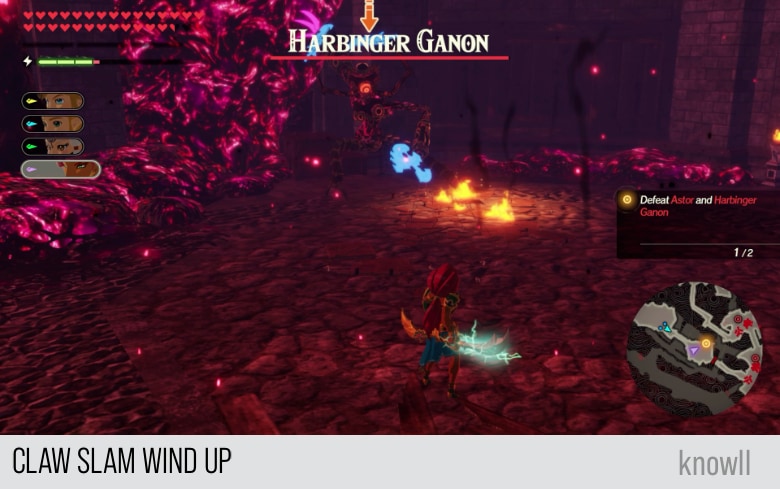
Claw Slam Attack
The initial wind up of this attack is very similar to Claw Strike, however, this is more powerful and is slower. As a rule in this game, fast attacks without much wind up or telegraph are weaker in damage. The reverse is also true.
Immediately after doing the pose, the monster will slam the ground only once, which creates Malice Pools that will erupt and damage you.
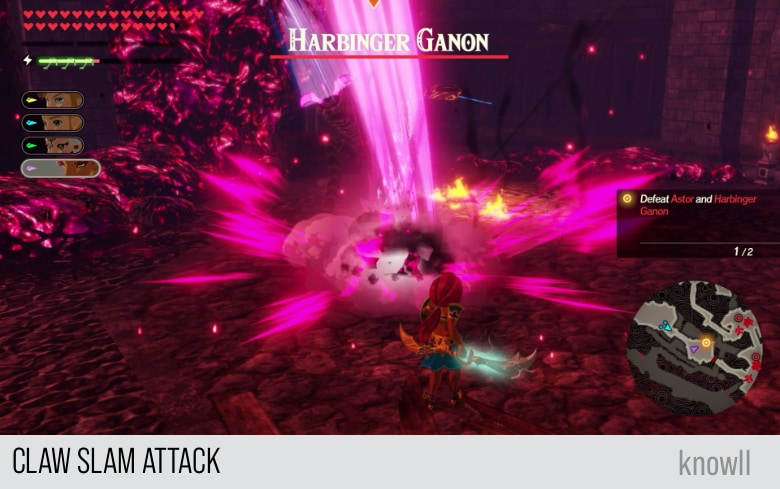
So this is a combination of both a melee and ranged attack. You might not get hit by the slam part, but the Malice Pools can track you.
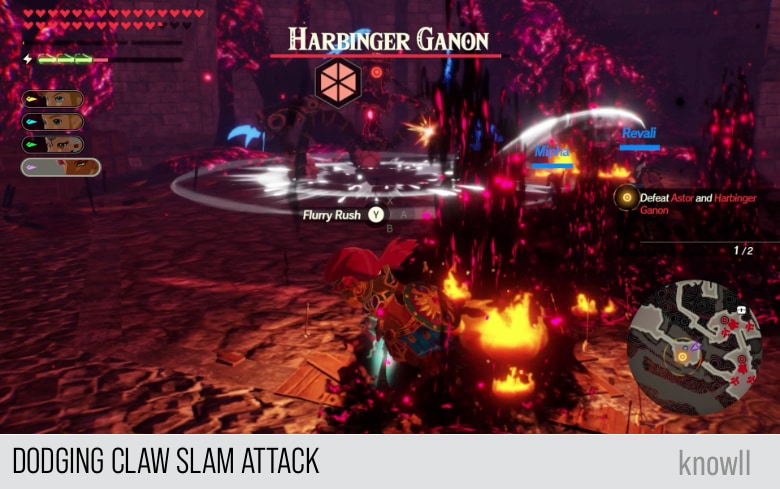
You can still dodge these Malice Pools though, as shown below.
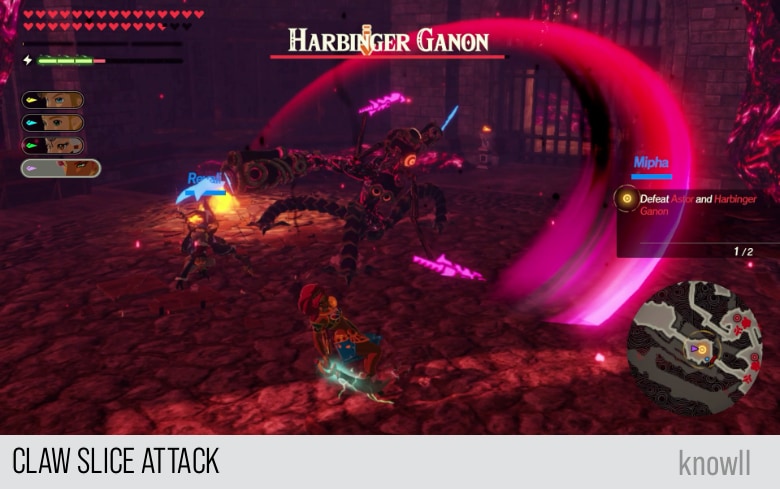
Claw Slice Attack
In the wind up of this attack, the monster prepares two of his sword weapons, as though it is about to strike you. As shared earlier, they will also change into light-pink color.
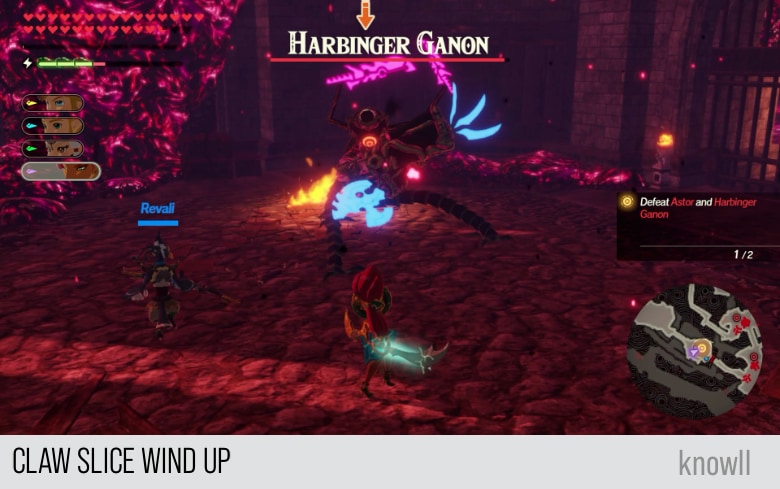
Then he will immediately do slicing attacks. one for each weapon.
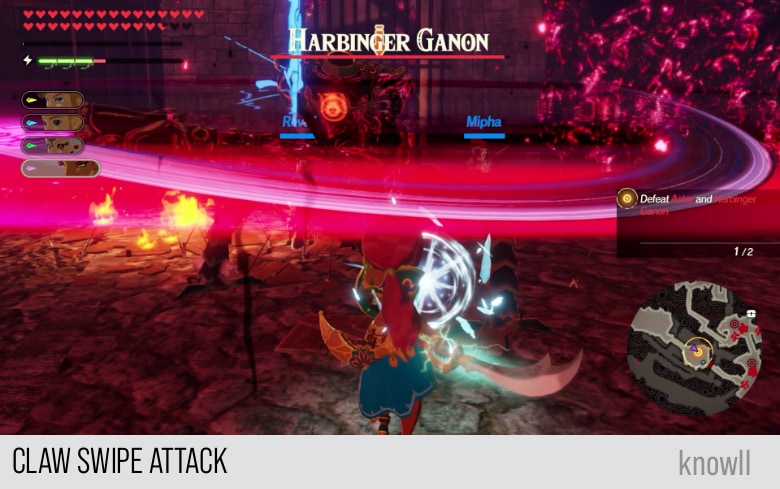
Claw Swipe Attack
In the wind up of this attack, the monster pulls back his left arm, making its weapon glow in light-pink color.
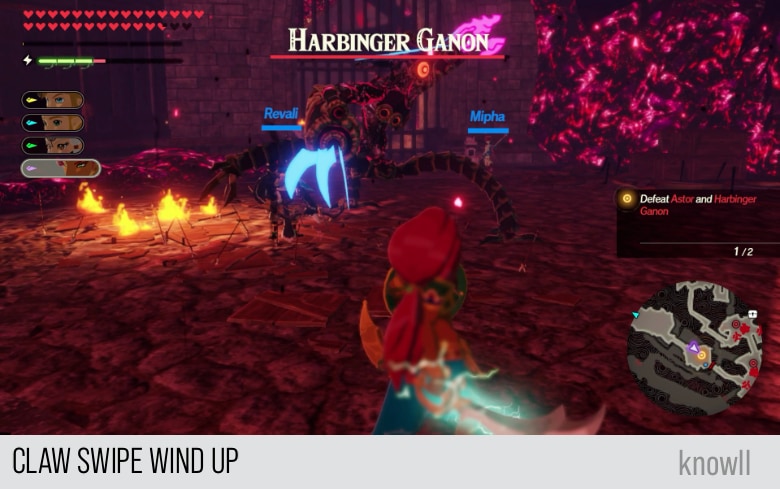
Then he will immediately make a horizontal swiping attack that covers a 180 degrees arc. As this attack has no follow-up, you can safely block it.
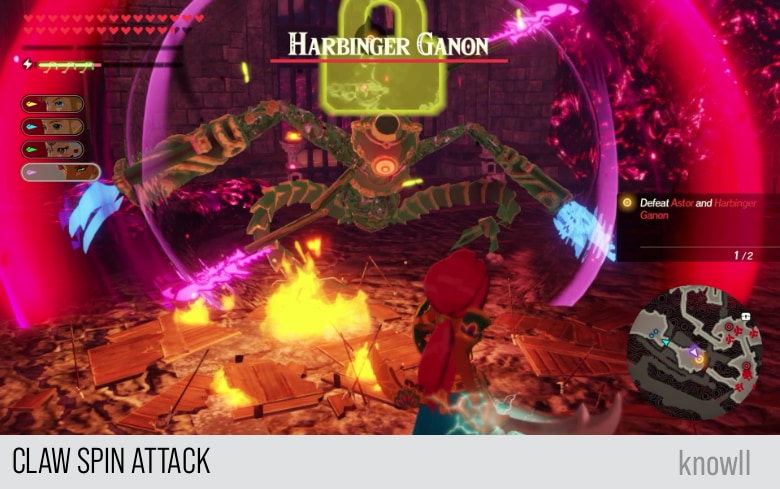
Claw Spin Attack
This is a powerful spinning attack with a very obvious telegraph, which you can counter with Stasis.
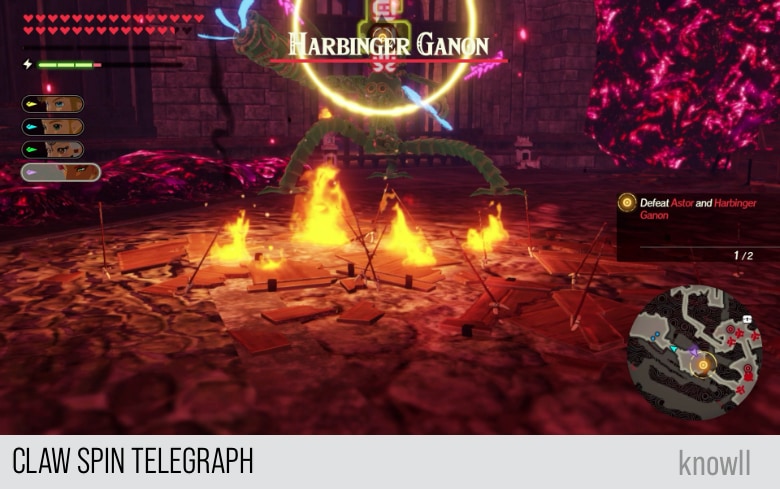
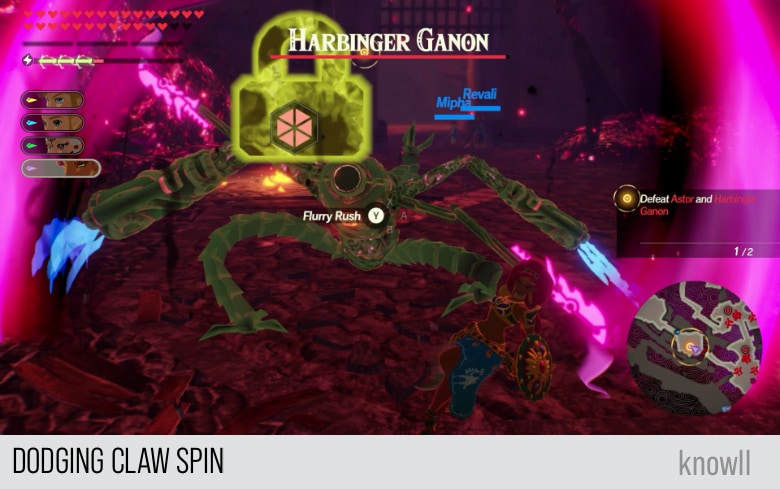
After the wind up, the monster will approach you with his two pink swords spinning and slicing menacingly.
You can do a side dodge to avoid getting damaged and gain a Flurry Rush.
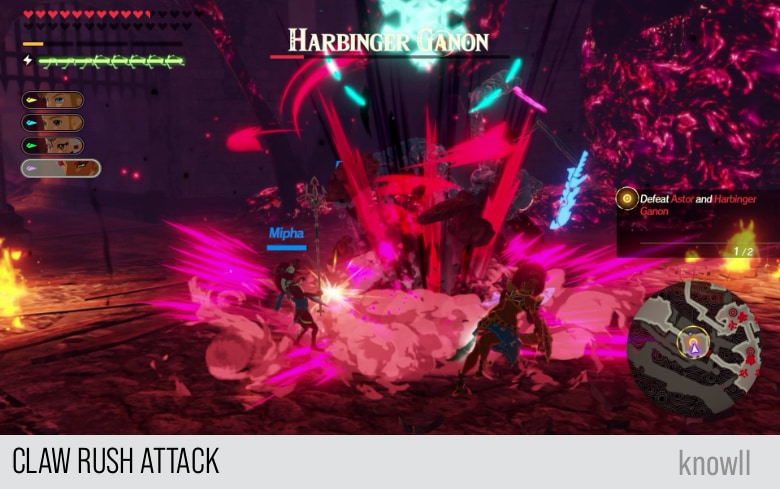
Claw Rush Attack
This attack is the slower and stronger version of the Claw Strike attack. It has a telegraph that you can counter with Cryonis.
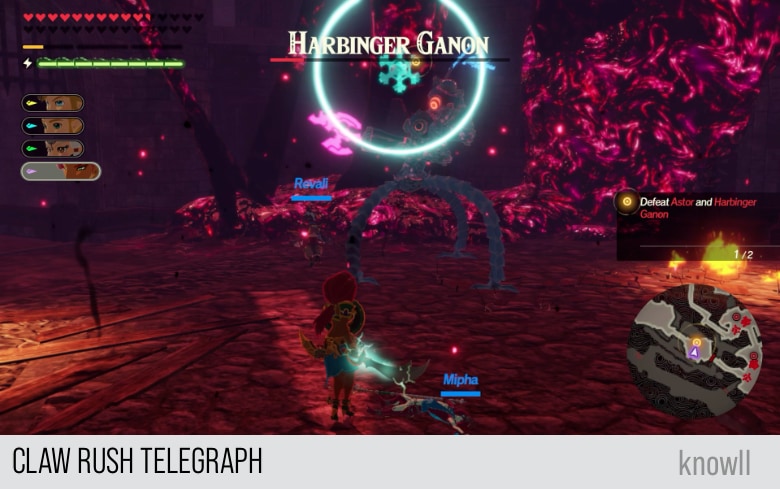
Immediately after showing the telegraph, the monster will start striking and combing the floor as it approaches you. This creates large explosions and damage to any target that gets hit while is mowing the floor.
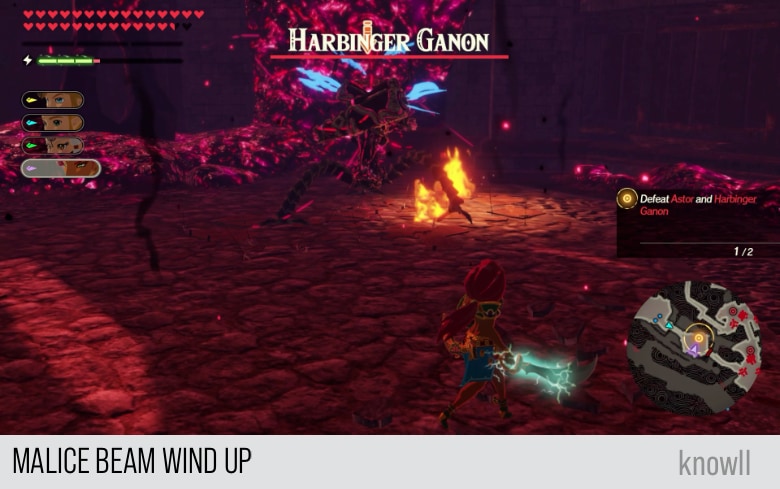
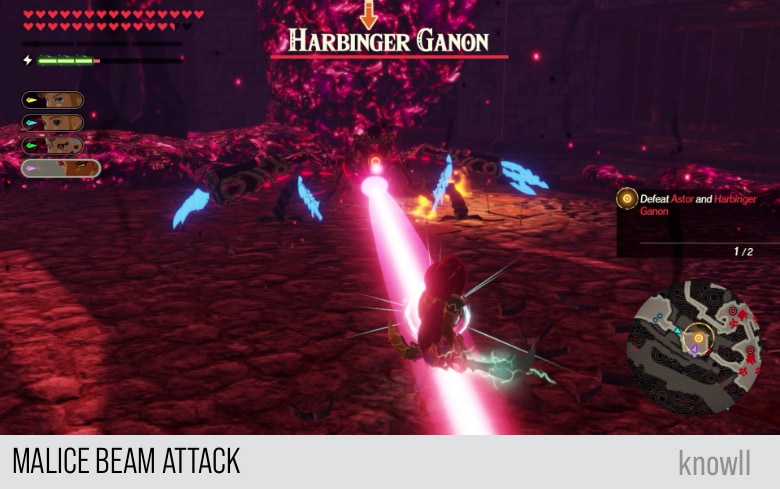
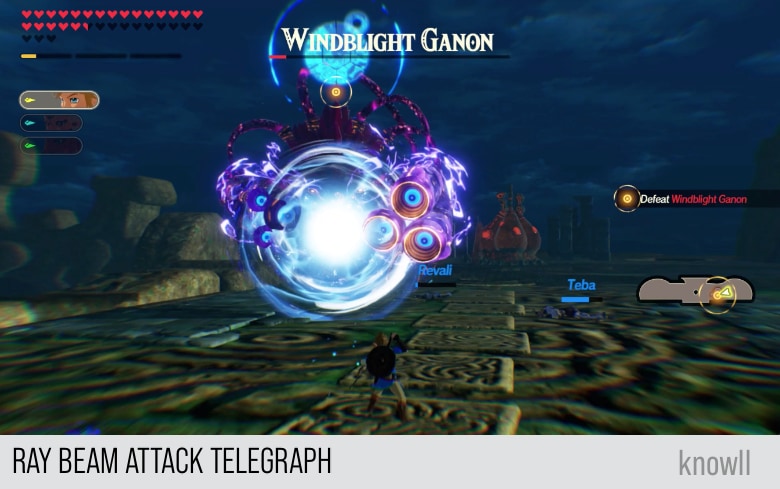
Malice Beam Attack
This ranged attack is the equivalent of the Laser Beam of a Guardian. In the attack's wind up, the monster pulls all of his arms as though charging his energy.
Then he will immediately open up his arms and blast the target with a Malice Beam.
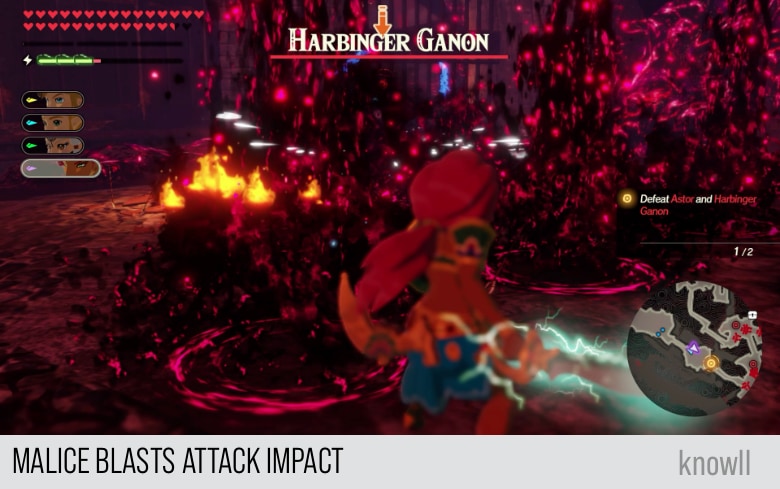
Malice Blasts Attack
This ranged attack has a very identifiable pattern. In its wind up, the monster jumps high and disappears.

You will immediately see blasts of light aimed at the floor, which will later cause Malice Pools to form and explode.

These Malice Pools will cause damage to anyone within them.
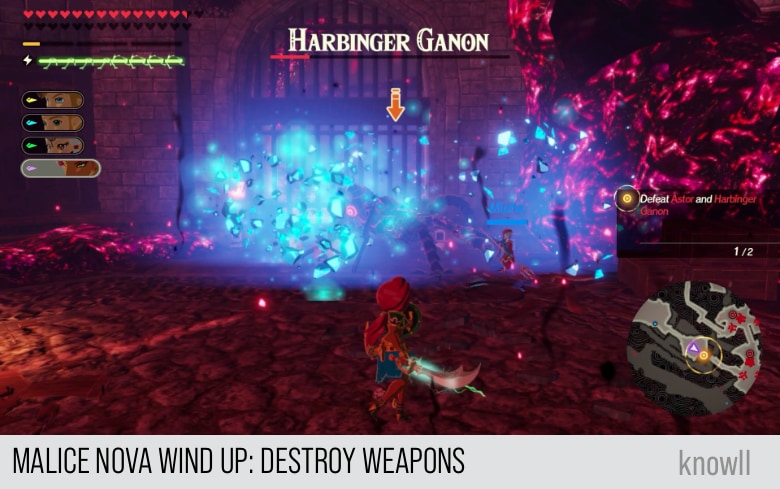
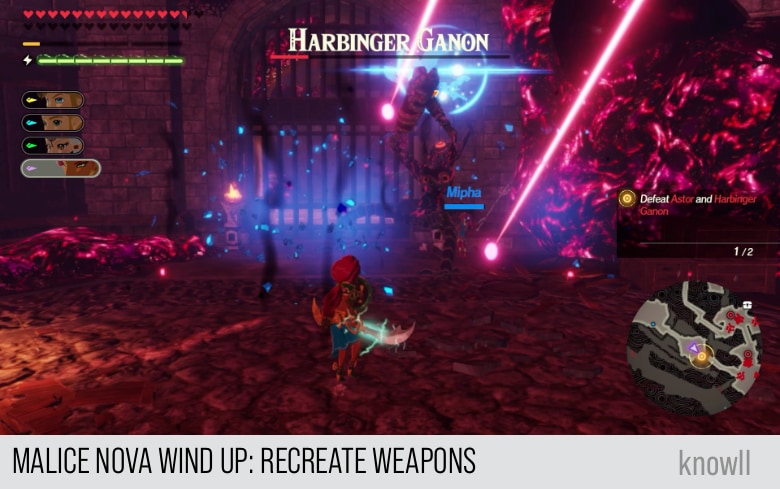
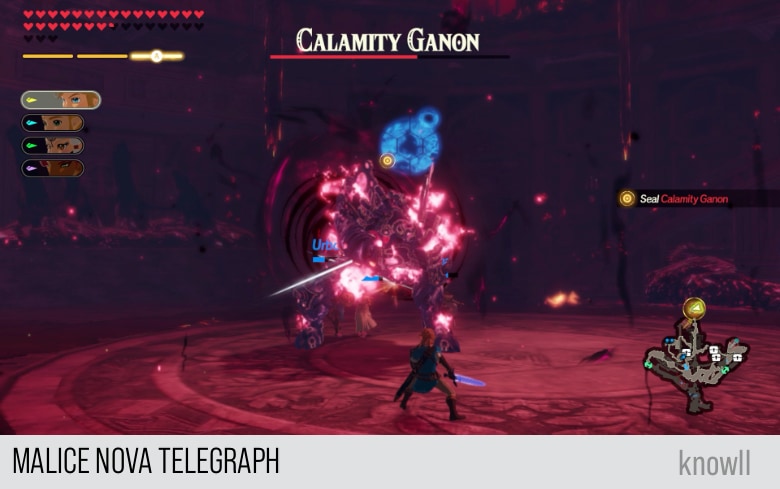
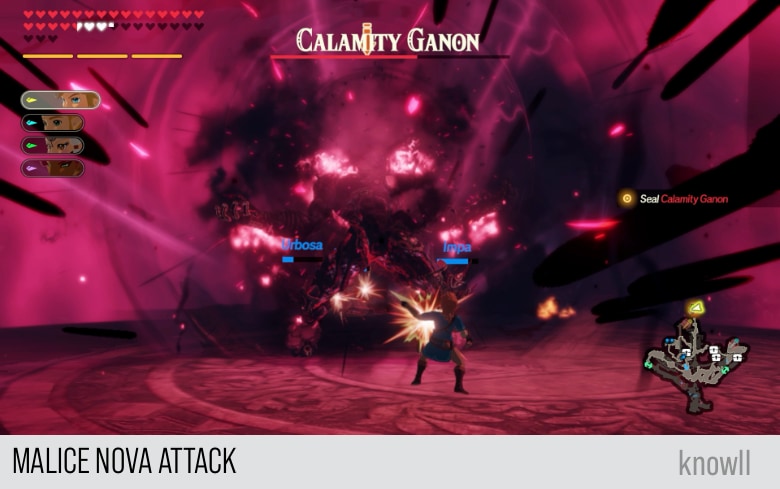
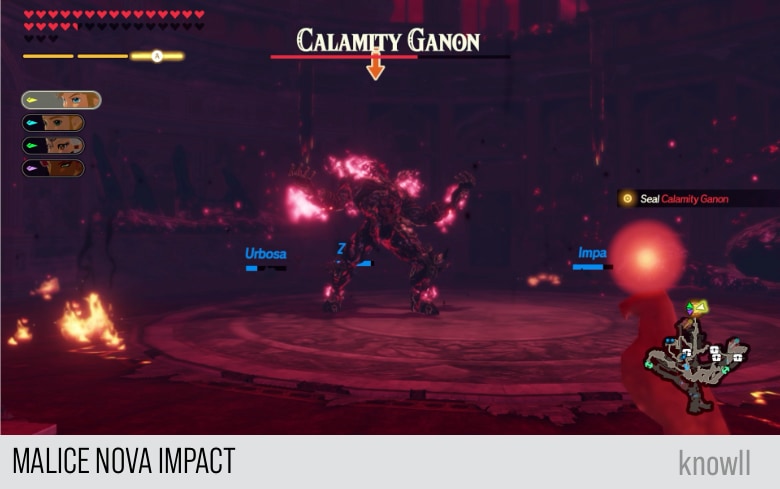
Malice Nova Attack
Among all of the attacks of Harbinger Ganon, this is the slowest as well as the most powerful. It is also interesting how it behaves, as it is very different from any attacks in the game.
In the attack wind up, the monster intentionally destroys his weapons into fragments, as shown below.
Then he will recreate them, as though putting up a show for you to get mesmerized.
However, while watching this show, concentric circles of Malice Pools will start showing up in your position. You might notice them, or not.
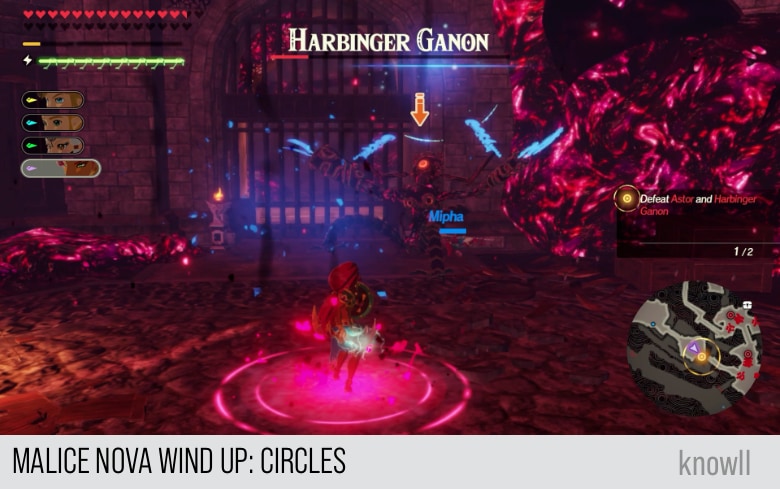
By the time Harbinger Ganon is done with his show, the Malice Pools would have exploded. Note that all of them can hit you, causing the highest damage of all his attacks.
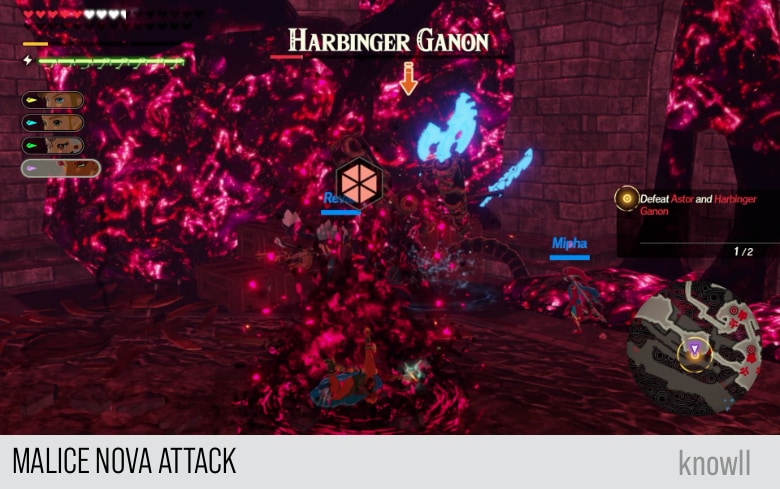
In the image below, it removed three and a half hearts from a character that is way beyond the level requirements of this Chapter entry. That is how damaging this attack is.
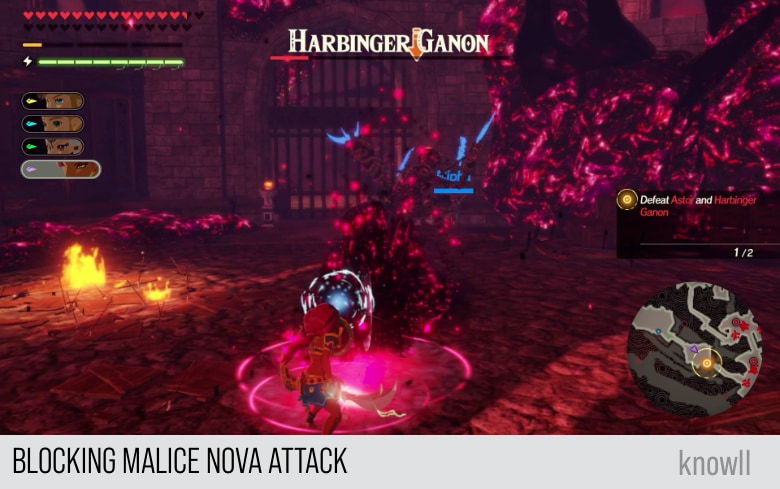
Since the Malice Pools erupt in sequence, you can safely block all of them. The net effect is that you only get pushed backward, but not get damaged. The key is raising your guard and blocking early, as the moment the attack begins hitting you, it's hard to get out of the stun-lock from this attack.
With the tips shared above, go ahead and defeat Harbinger Ganon.
Like Astor earlier, he will escape once he gets defeated.
Harbinger Ganon has withdrawn for now!
The Malice Swamp has disappeared!
Astor: I am Calamity Ganon's right hand! An emissary of fate itself! I cannot be beaten!
Zelda: We cannot let this machine escape. This time, we have no option but to defeat them.
A new target position will appear, where you can continue the fight with them.
Follow the stairs and you will find both Astor and Harbinger Ganon, both weakened from their earlier fights.
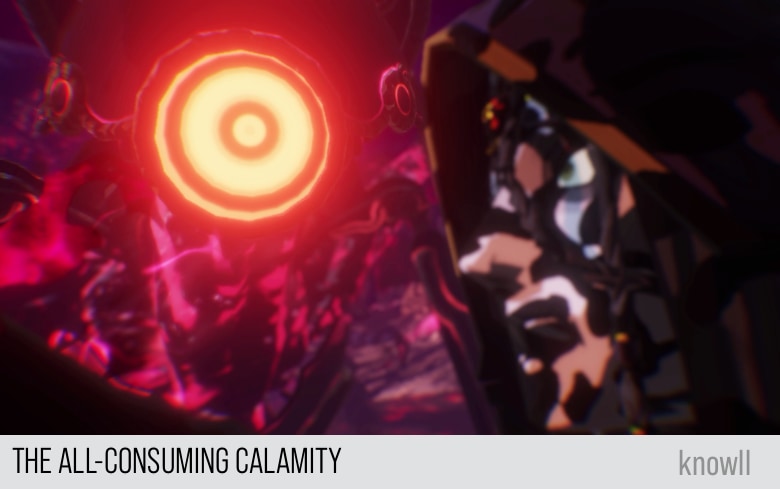
The All-Consuming Calamity
Astor and the black Guardian are on the brink of defeat, yet victory still eludes the heroes. As Astor attempts to command Calamity Ganon, the seer is instead consumed by Malice, allowing a new, terrifying form to emerge.
Astor: How? The great Calamity Ganon... selected me!
Astor: This humiliation... cannot be my destiny. It cannot be!
Astor: Hear me, Calamity Ganon! It's time for you to devour these -
Calamity Ganon devours Astor.
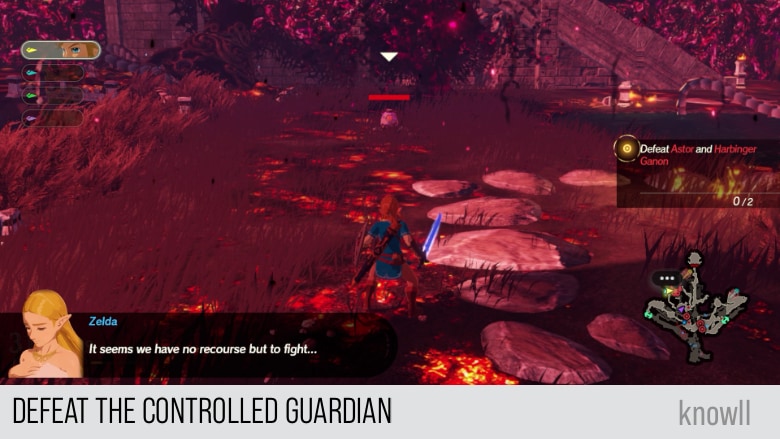
Objective: Defeat the Controlled Guardian
Due to Calamity Ganon's presence, the little Guardian got infected with Malice as well and lost control of itself. He tried to blast Zelda with a laser beam but Link protected the princess.
Zelda: It seems we have no recourse but to fight...
Fighting the Little Guardian
Like Harbinger Ganon, the little Guardian is a melee fighter with a few powerful ranged attacks.
As the little Guardian is not really a villain, you will only fight it once as a boss.
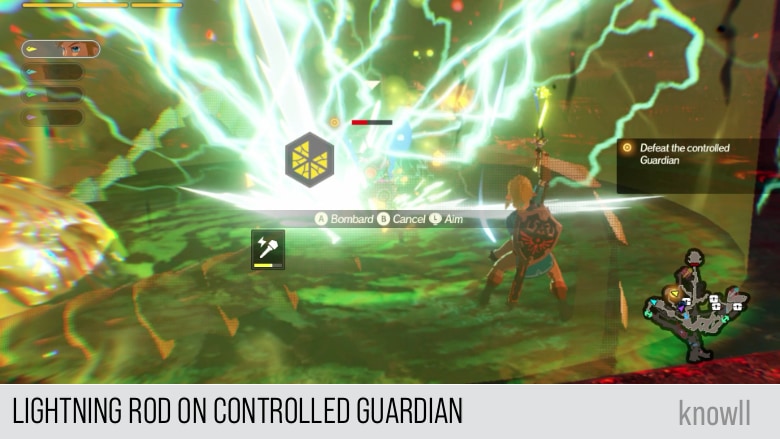
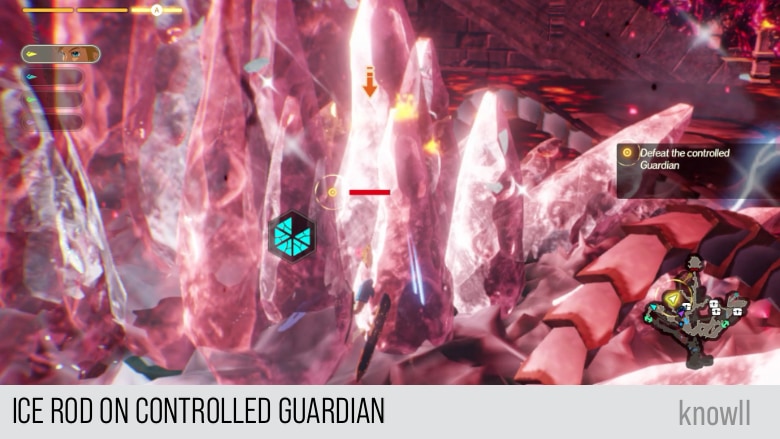
If you want to end the fight early and as easy as possible, observe the pool of water in the area where you fight the Guardian. You can use your Lightning Rod as an optimal elemental attack against it.
This will make his WPG brittle and easy to break.
Alternatively, you can use your Ice Rod to freeze the Guardian while it stands on top of the pool of water. This will have a similar effect to his WPG as well.
Now we can go through his attacks.
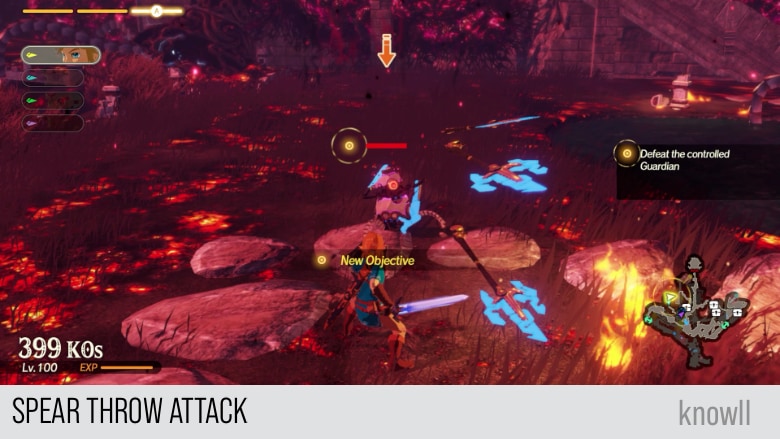
Spear Throw Attack
In this attack, the Guardian throws spears at you. This is a weak attack that you can easily block or dodge.
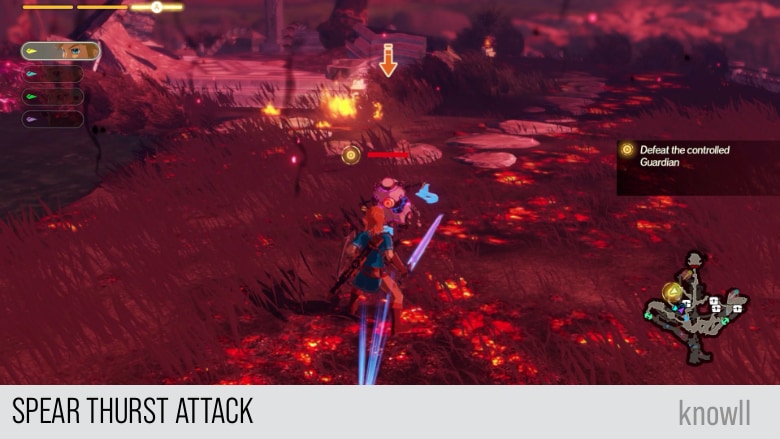
Spear Thurst Attack
In the attack's wind up, the Guardian pulls his right arm as though preparing to charge.
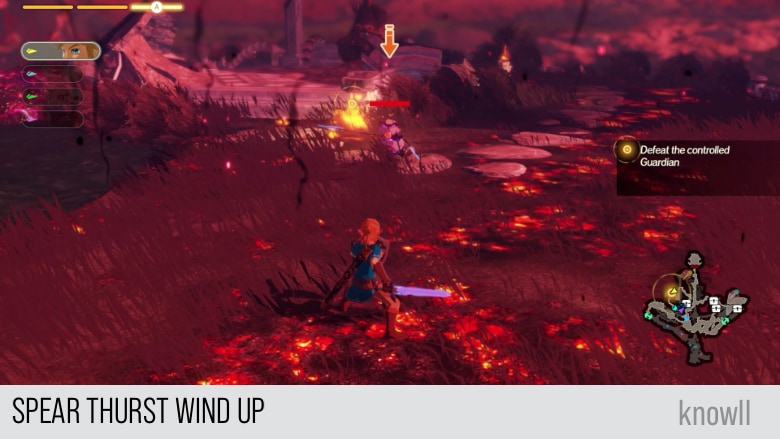
The Guardian will then immediately do a long-distance thrusting attack. You can easily punish this with a side dodge to gain a Flurry Rush.
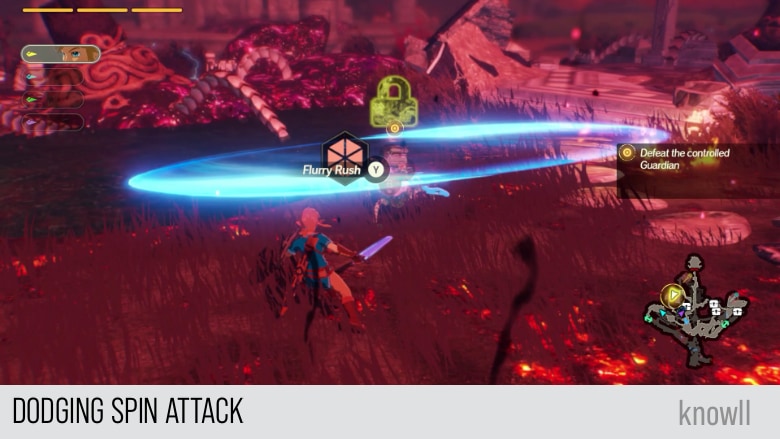
Spin Attack
Like other powerful spinning attacks, this one has a telegraph that you can counter with Stasis.

After the wind up, the Guardian will spin his two arms, causing it to levitate and fly towards you.
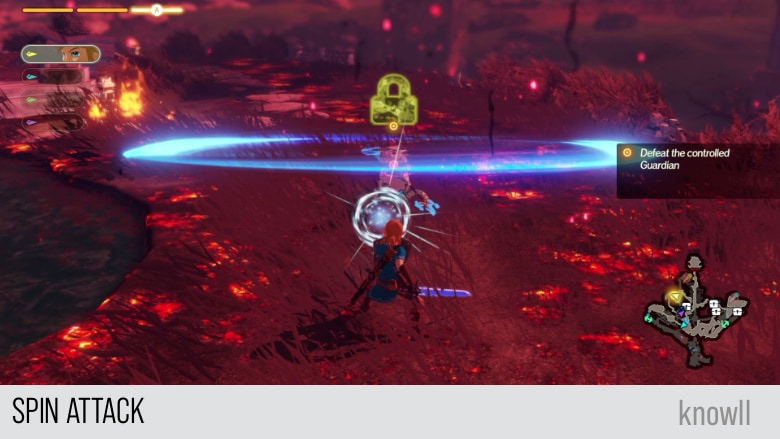
While this attack approaches you, you can do a side dodge to gain a Flurry Rush on the Guardian.
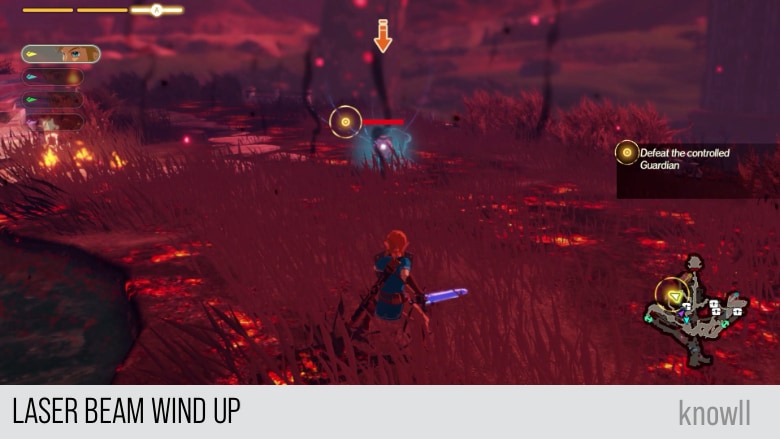
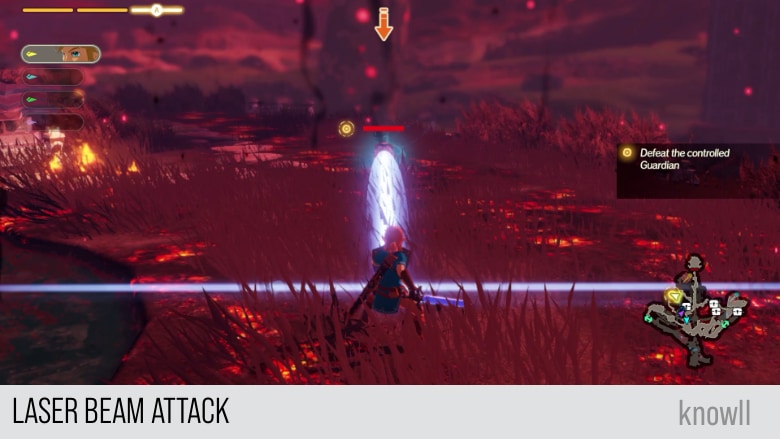
Laser Beam Attack
This is very similar to the Laser Beam attack of a large Guardian. However, you will not see a red beam during the wind up. Instead, you will see the little Guardian charging its power as shown below.
The little Guardian will then immediately blast a Laser Beam, which you can safely block.
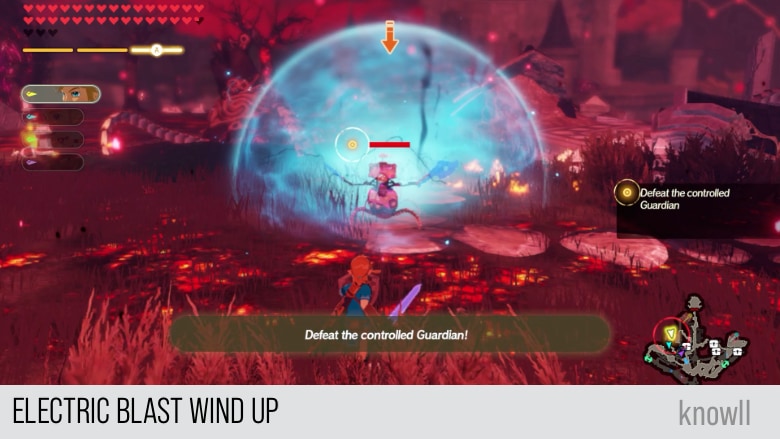
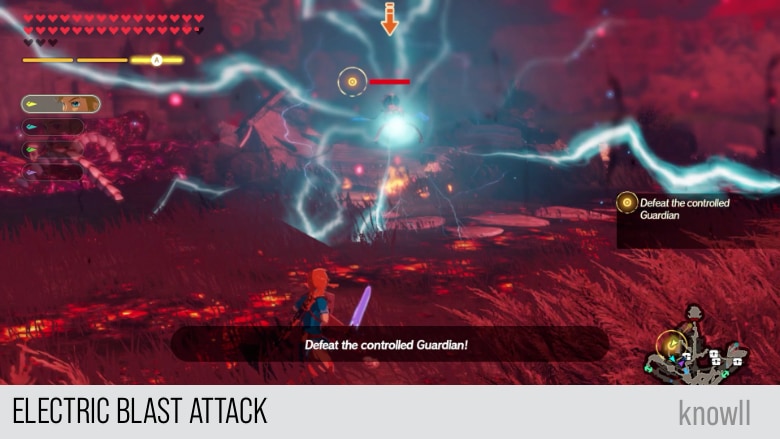
Electric Blast Attack
This large AOE attack has a very obvious wind up. The little Guardian raises its arms and surrounds itself with a sphere of light while charging.
Then he will immediately make an AOE explosion, causing itself to levitate.
Lullaby
The party is stricken with grief as the little Guardian slumps to the ground. Even in its damaged state, the little Guardian tries to comfort Zelda, playing a gentle lullaby that stirs a memory in the princess...
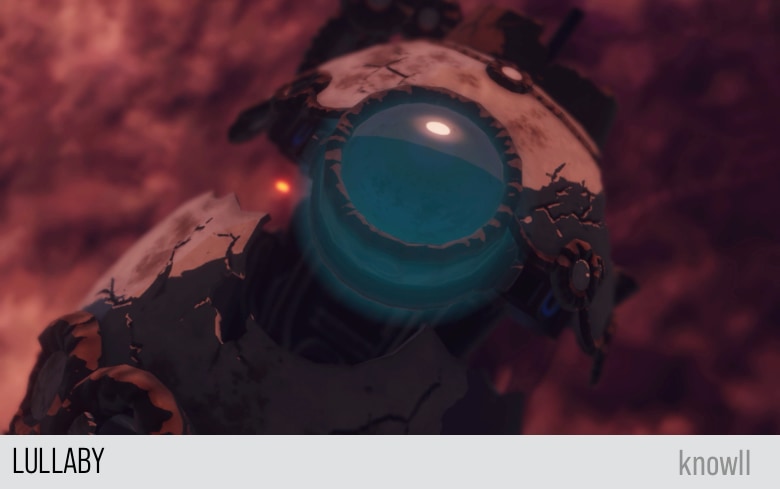
As Zelda weeps, some of her tears fall on the little Guardian, causing it to play a tune from her childhood.
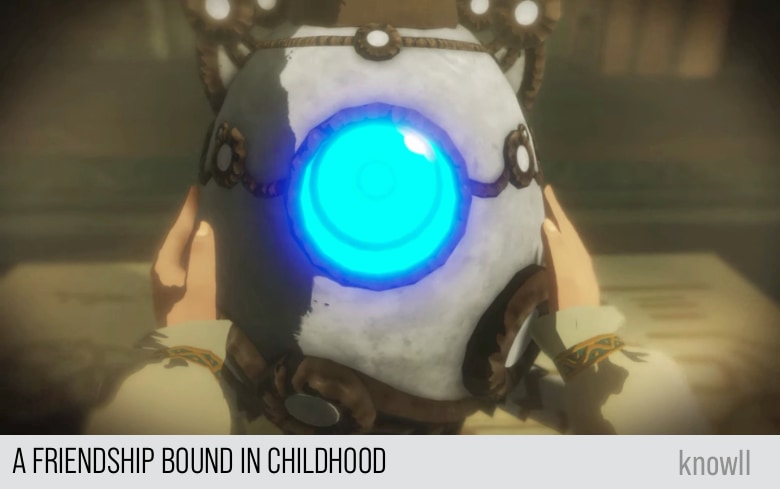
This tune made Zelda realize that the little Guardian was her childhood friend. She helped construct it when she was a kid.
Child Zelda: If I put this one here... Eee-hee! It's done!
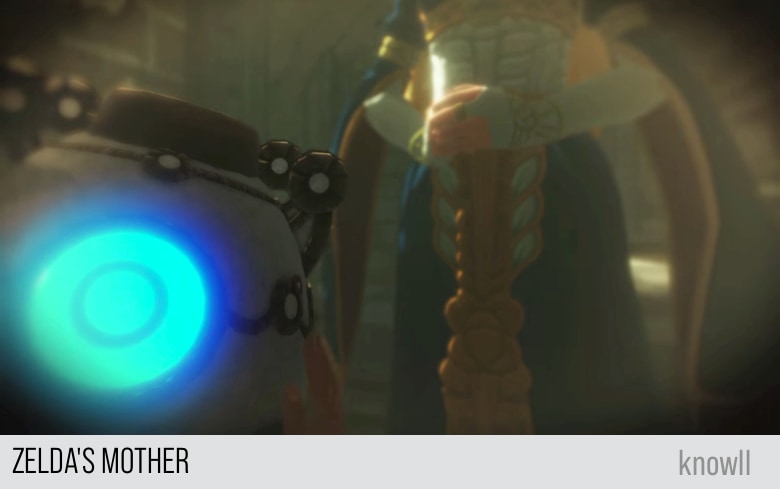
In the memory, we also got a short glimpse of Zelda's mother, wearing the same dress that the princess will later wear, shown during the early part of the game.
Child Zelda: Mother! Look, look!
In the next memory, the queen has already passed away, and child Zelda awakens looking for her.
Child Zelda: Mother? You're not going to leave me too, right, Terrako?
The name of the little Guardian has been revealed to be Terrako.
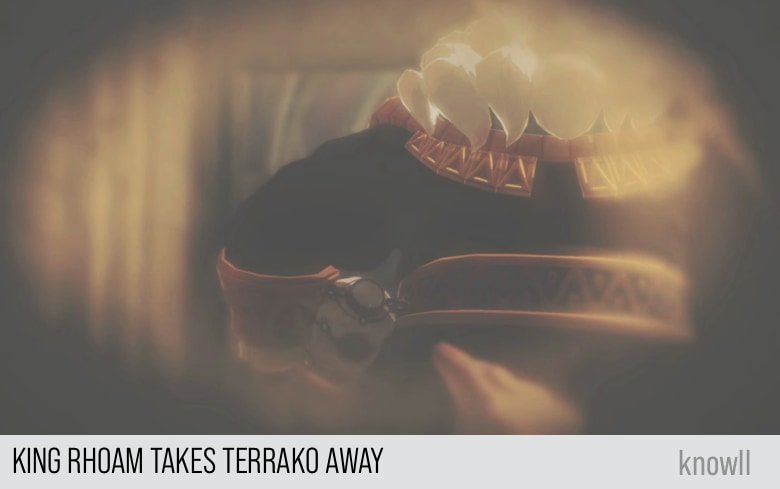
In the final memory, King Rhoam took Terrako away.
Child Zelda: Father, no! Please don't take it away!
King Rhoam: The return of the Calamity has been foretold. As the princess of Hyrule, your sole focus must be on your training. A toy such as this is merely a distraction.
Child Zelda: Please, please!
King Rhoam: I'm sorry.
From this timeline, it seems that Zelda spent some time with Terrako, from the day the Guardian was constructed and beyond the death of the Queen.
King Rhoam only took away Terrako after the prophecy for Calamity Ganon was foretold. There are many vexing things the king did, not only this, but all in reaction to the prophesy and not out of ill will towards Zelda.
Zelda: Terrako...
Zelda: Calamity Ganon... for the sake of Hyrule... for all those harmed and slain... for our future -
Zelda: ...this is where you fall!
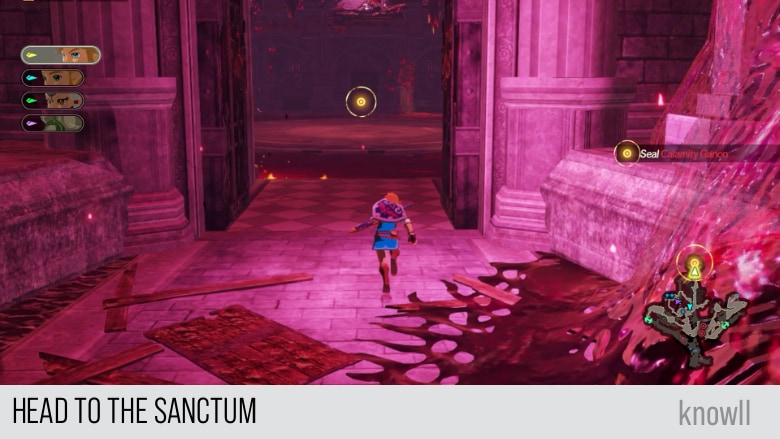
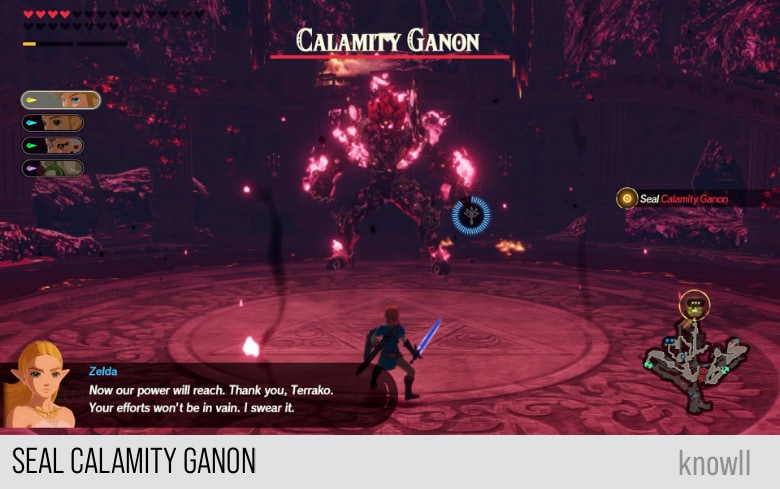
Objective: Seal Calamity Ganon
Finally, it's time to face Calamity Ganon himself. Head toward the sanctum to face him.
Zelda: Onward! We will seal Calamity Ganon with our own might!
Zelda: Calamity Ganon seems to have moved toward the sanctum, possibly to gather power. Hurry!
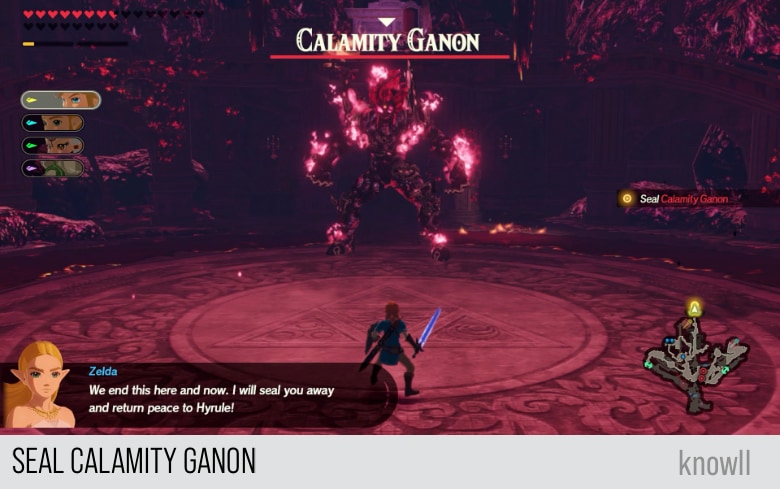
The boss fight will begin the moment you enter the hall.
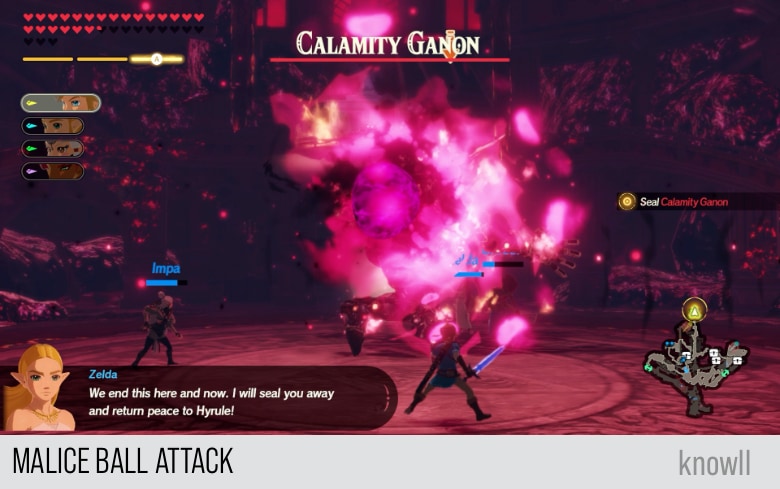
Zelda: We end this here and now. I will seal you away and return peace to Hyrule!
Invincible Calamity Ganon
Note that during this stage of the fight, Ganon is invincible. Stasis and the other runes do not have any effect on him. Your attacks will also not cause any damage. However, he can easily damage you.
Zelda: Our power cannot reach it? So this is the true might of Calamity Ganon...
Zelda: What can we do?
This is scripted, so do not panic. But be aware as well, do not use any of your Rods as they will be wasted only.
In fact, do not attack Ganon at this stage. Just dodge, guard, and block any of his attacks.
The next cutscene and event will happen even if you do no attack Ganon.
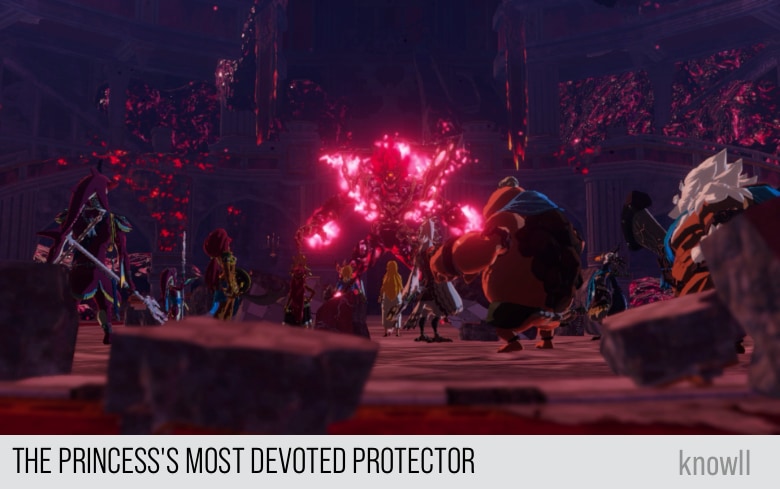
The Princess's Most Devoted Protector
In the face of Calamity Ganon's devastating power, the party is pushed onto the defensive. As Zelda desperately fights to protect everyone, the little Guardian, now recognized as Terrako, musters every last ounce of its strength to deliver one final attack against Calamity Ganon.
Zelda: I must protect... everyone!
While Ganon is in an invincible state, Zelda protects everyone. However, her power is not enough to stop Ganon.
We have seen multiple times in the story that the core strength of the heroes does not come from their power, but from their desire to protect, amidst despair and weakness.
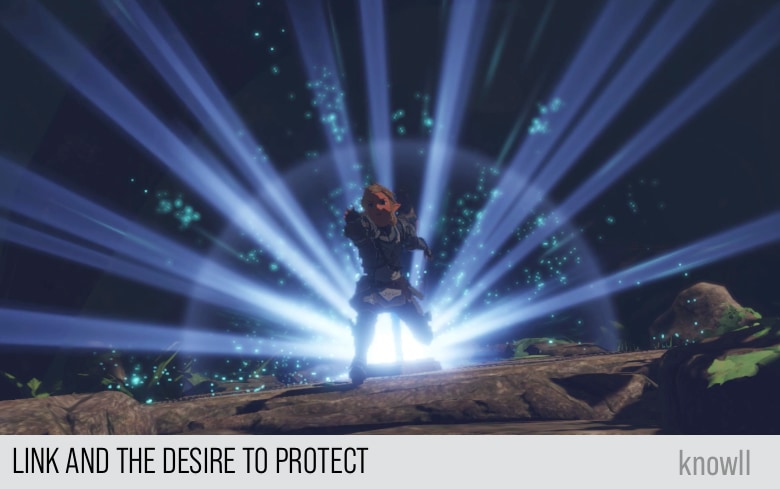
Link was already defeated by the Hollows in Korok Forest when he overcomes them. He was at his weakest when he tried to reach out and protect Zelda before the Hollows could kill her.
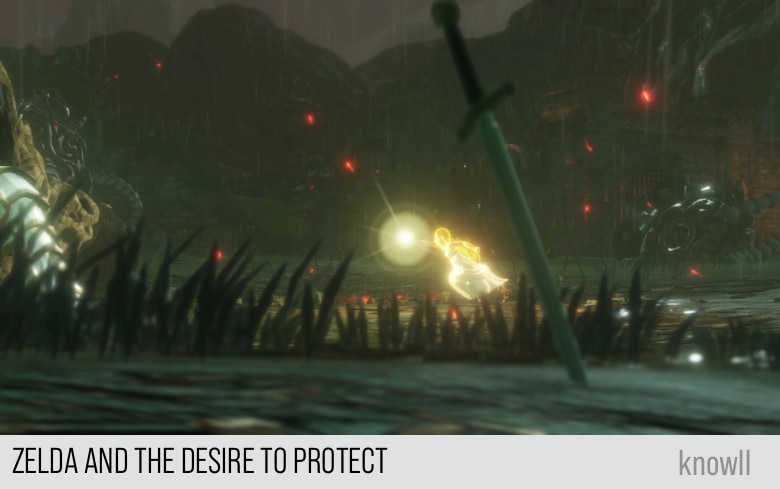
Similarly, when Zelda saw that the Blight Ganons were about to kill Link, she threw all caution aside, and despite knowing she has no means to fight back the Blights, she reached out to protect Link.
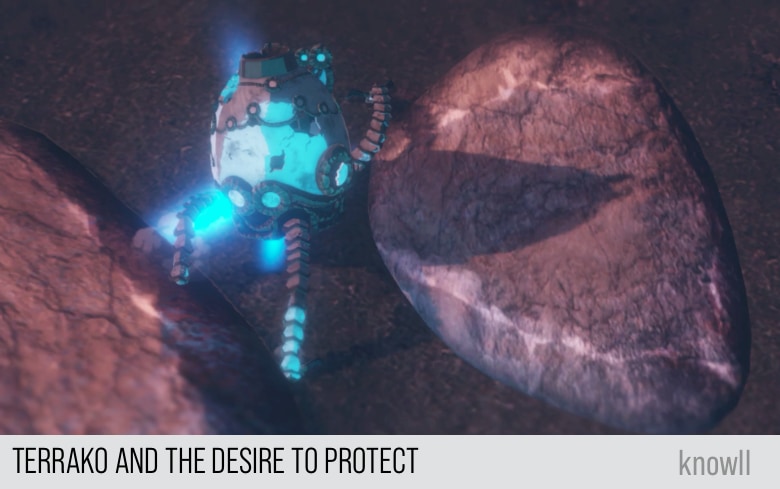
In a similar context, the little Guardian that has been battered and severely damaged, crawls forward, in its desire to protect Zelda and the heroes, as they are all in a state of peril at the hands of the invincible Ganon.
Terrako has never been in a weaker position and despite its desperate situation, it pushed forward to do the ultimate sacrifice.

The attack caused an explosion that severely damaged Ganon, removing his invincibility, at the price of the Guardian's life. Zelda picks up the remaining part of Terrako.
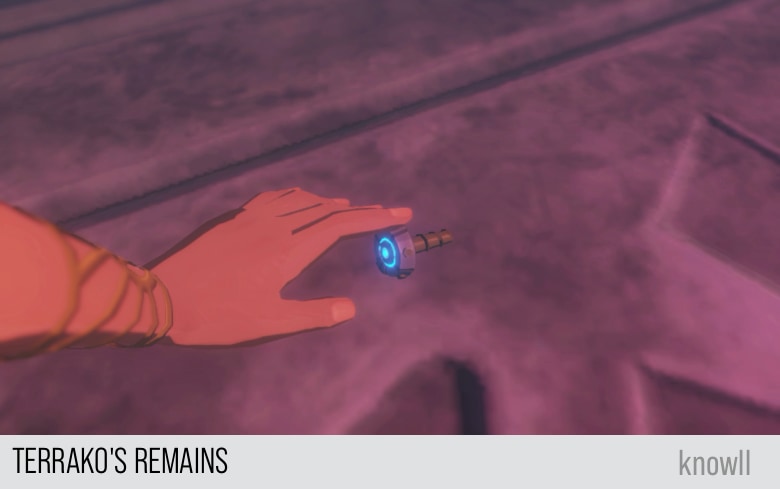
Zelda: No more.
Zelda: It is time... to end this!
Zelda: Now our power will reach. Thank you, Terrako. Your efforts won't be in vain. I swear it.
Fighting Calamity Ganon
Calamity Ganon is, without a doubt, the best-designed boss in the whole game in terms of combat. Consequently, he provides the best boss fight in the game as well.
Calamity Ganon is a melee fighter, being the most aggressive of them all. Despite that, he has some of the most powerful ranged and AOE attacks in the game.
Zelda: It's time, Calamity Ganon! Time to settle this once and for all!
50% Health Loss Mechanic
Before we go through Ganon's attacks, just note that he has a mechanic where his attacks will have more Malice in them once he loses at least 50% of his health bar.
This is the same mechanic you observed in Firelibight Ganon, which we covered in Water and Fire. For this Blight, once he loses at least 50% of his health, his weapon is enveloped with more flame, causing his melee attacks to have a fiery AOE.
As an example, here is before 50% health loss for Malice Ball.
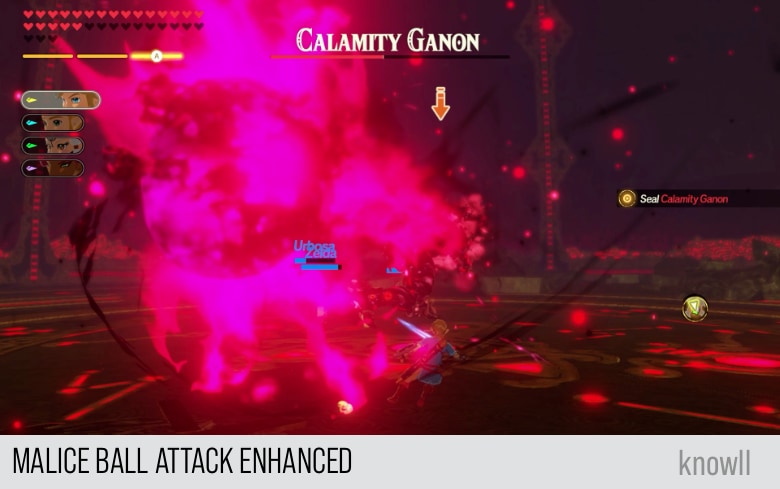
And here is the same attack after losing 50% of health.
Also, once Ganon loses half of his health, he will destroy the floor and bring the fight to the final arena.
Ganon is an extremely well-designed boss, even if compared to the best boss designs of FromSoftware present in the Dark Souls series, Sekiro, and Bloodborne.
In fact, the moveset of Ganon is so varied that it exceeds even some of those in FromSoftware's games.
Ganon is the only boss with a complete set of attacks that can be countered with the four rune skills:
- Rush Attack - counter with Cryonis
- Spin Attack - counter with Stasis
- Lightning Blast Attack - counter with Magnesis
- Malice Nova Attack - counter with Remote Bombs
Melee Attacks
- Punch Attack
- Slam Attack
- Trample Attack
- Stomp Attack
- Malice Claw Attack
- Malice Wings Attack
- Malice Flail Attack
- Rush Attack
- Spin Attack
Ranged and AOE Attacks
- Lightning Blast Attack
- Malice Ball Attack
- Malice Cannon Attack
- Malice Nova Attack
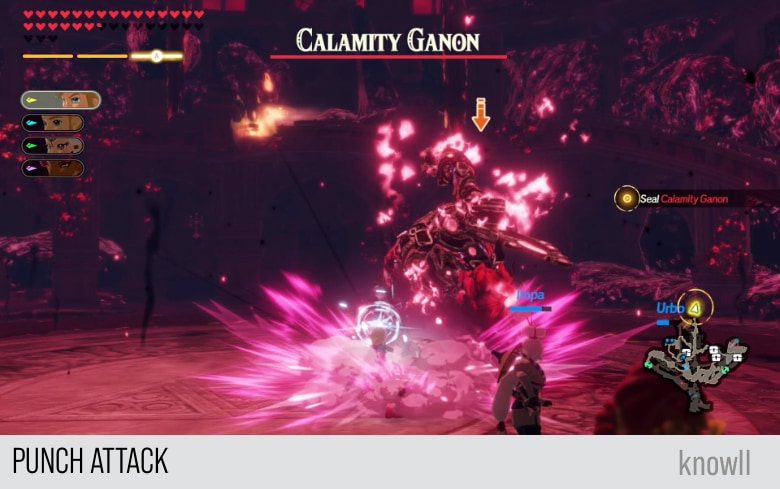
Punch Attack
In this attack's wind up, Ganon jumps high and raises his right arm to the top, like he is going to dunk a basketball with one hand.
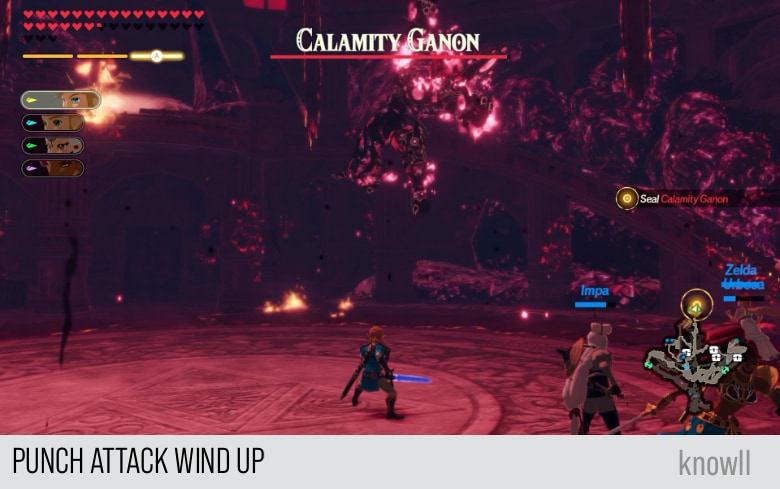
He will then forcefully punch the floor once he lands in front of you.
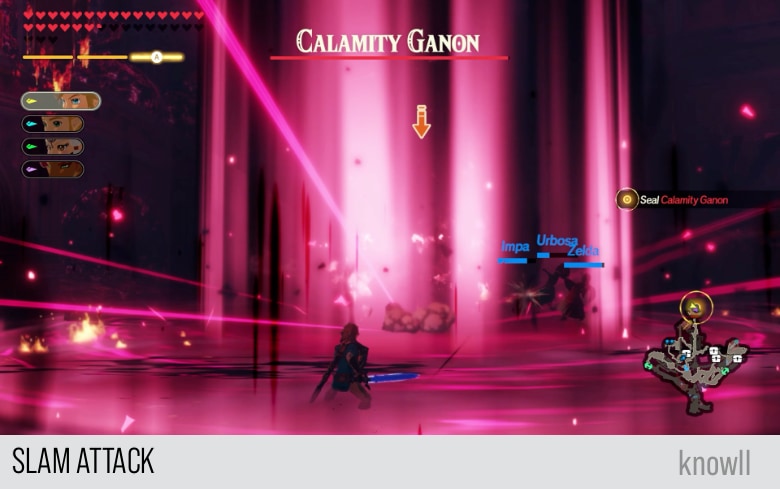
Slam Attack
In this attack's wind up, Ganon jumps high and raises his both of his arms to the top, like he is going to dunk a basketball with two hands.
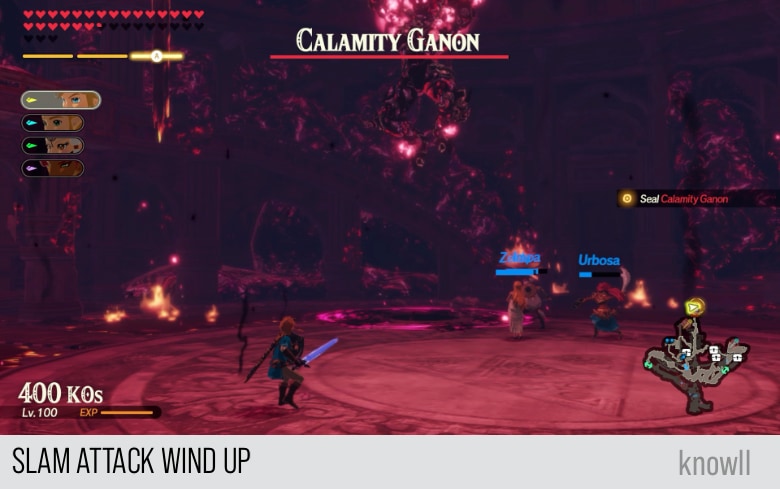
He will then slam both of his hands to the floor, causing a very large AOE, causing damage and knockback on all targets hit.
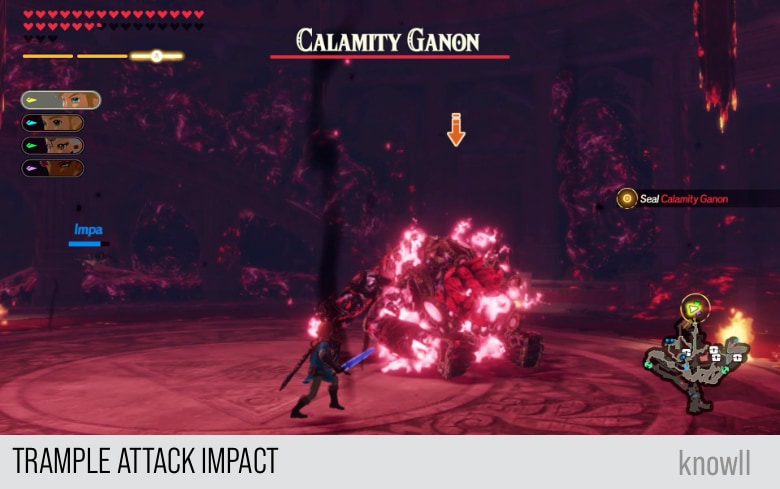
Trample Attack
In this attack's wind up, Ganon raises his two arms and left leg and then angles his body as shown below.
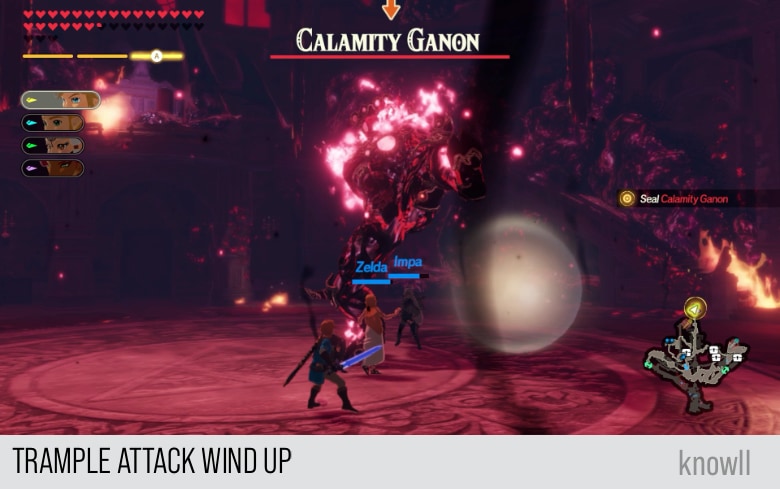
He will then slam his two arms to the floor, causing a large spherical explosion of Malice.

This attack has a very powerful knockback effect. In the first image shown above, Zelda and Impa are next to Ganon. The moment the attack completes, they could no longer be seen on the screen, because of the attack's powerful knockback.
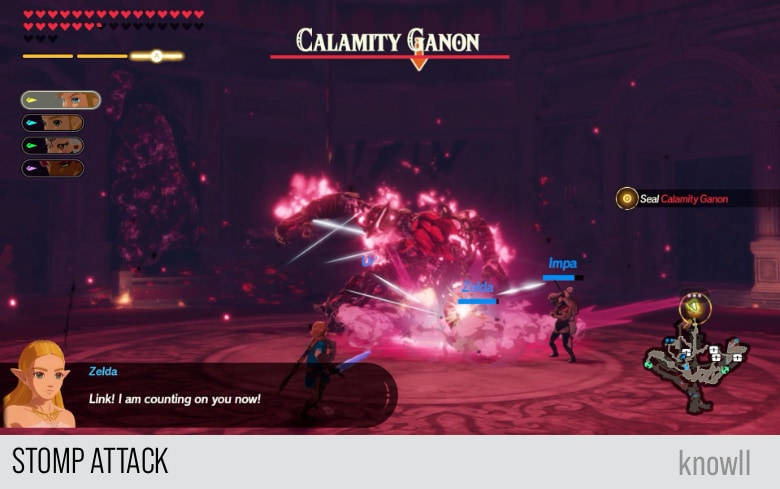
Stomp Attack
This attack's wind up is very similar to that of Trample Attack, but instead of raising his two arms, Ganon only raises his left leg. Though similar, the visual difference is obvious.
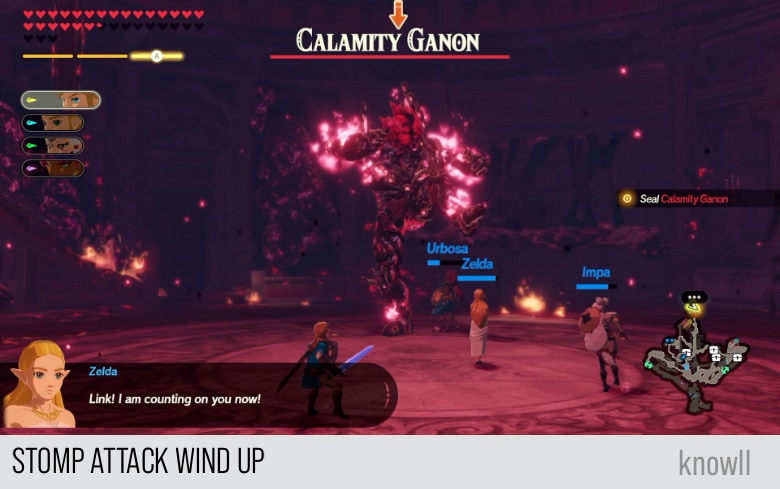
He will then slam down this raised leg on his target, causing damage and a smaller AOE, as compared to Trample Attack.
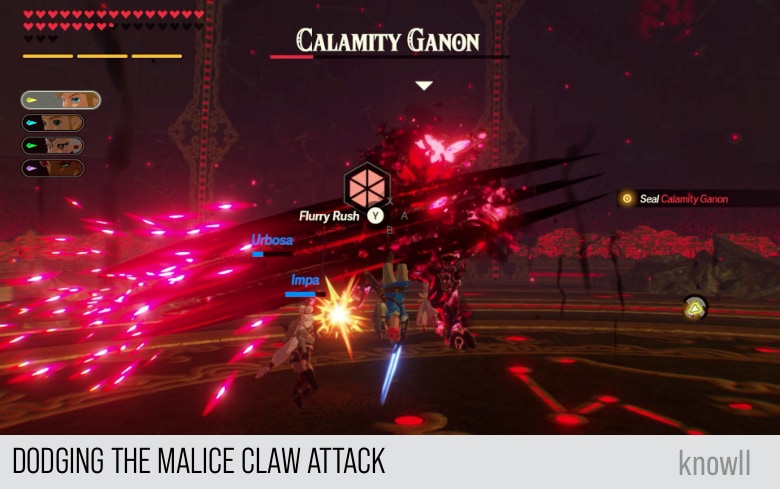
Malice Claw Attack
This is a combo attack, consisting of three moves. The first two moves have Ganon swiping his target with his claws, first with his left hand, then the right. After that, he punches the floor in front of him.
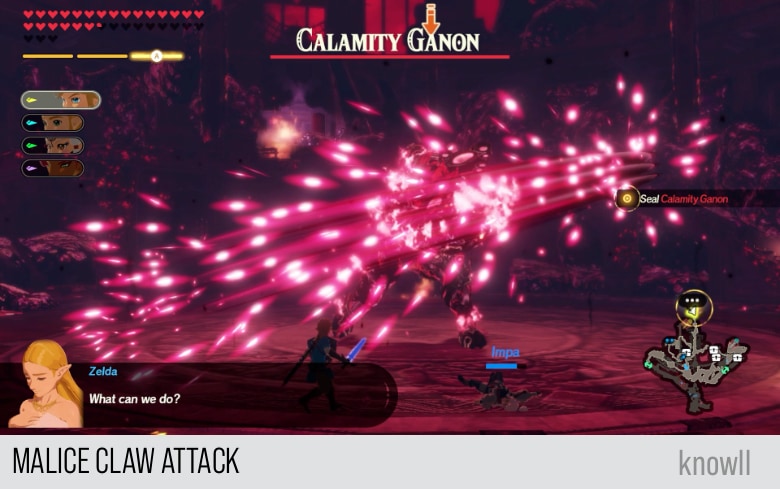
You can punish this attack by a backflip dodge, so you can gain a Flurry Rush.
Malice Wings Attack
This is one is visually memorable and impressive. The attack wind up has two parts. First, he transforms both of his hands into Malice crystals that look as though they are wings.
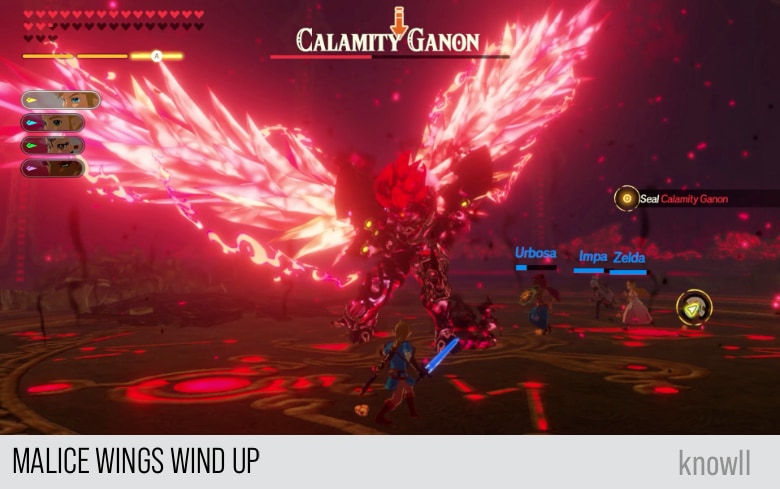
Then he jumps high as though he is flying using those two wings.
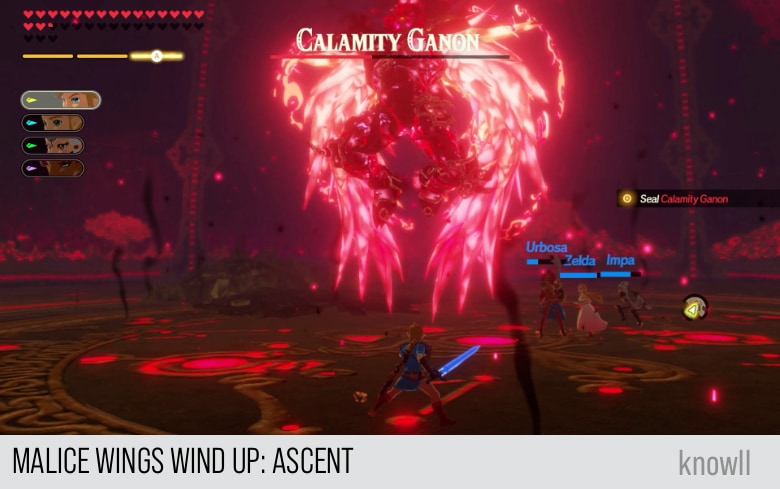
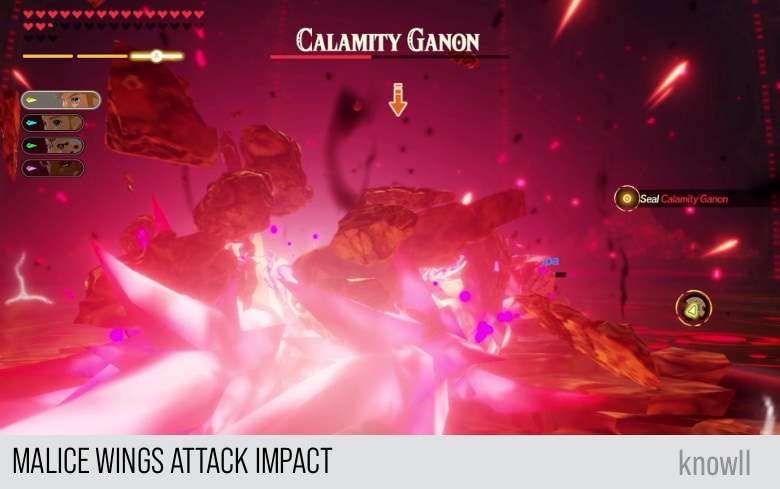
He will then land next to his target and slam those two wings on the target.
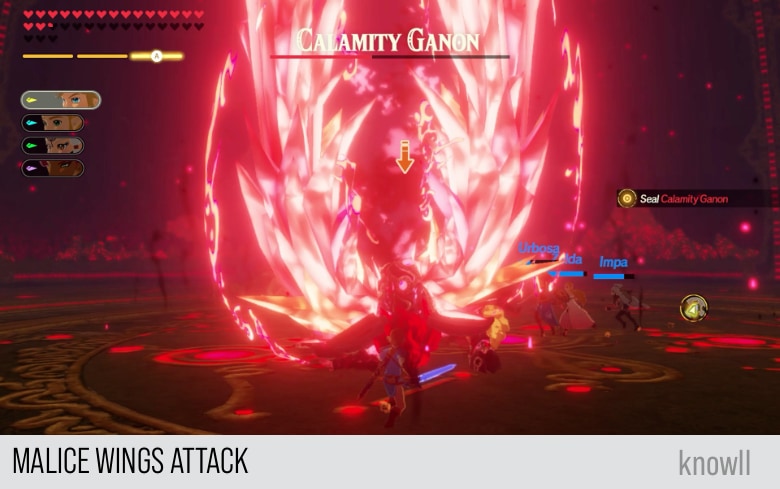
The effect is an earth-shattering explosion that causes damage and knockback.
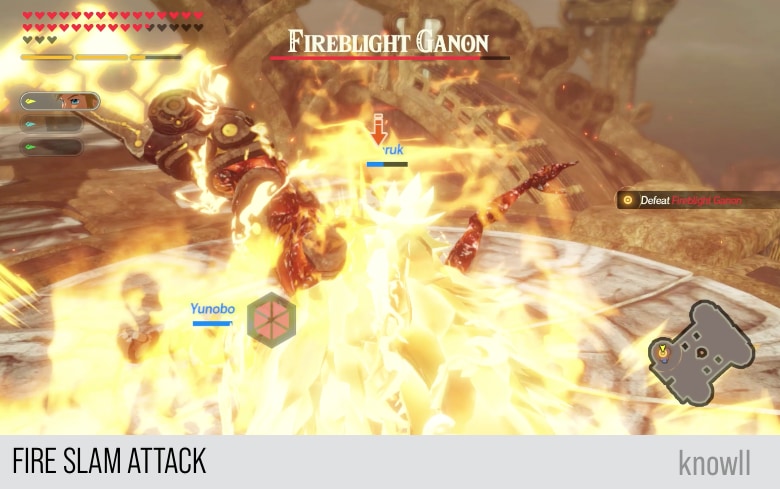
This attack is very similar to the signature attack of Thunderblight Ganon, Fire Slam Attack. If you want to see more details, view our Fireblight Ganon Guide.
Malice Flail Attack
In the wind up of this attack, Ganon summons a Malice Flail, which he then swings to his back to gain momentum and force.
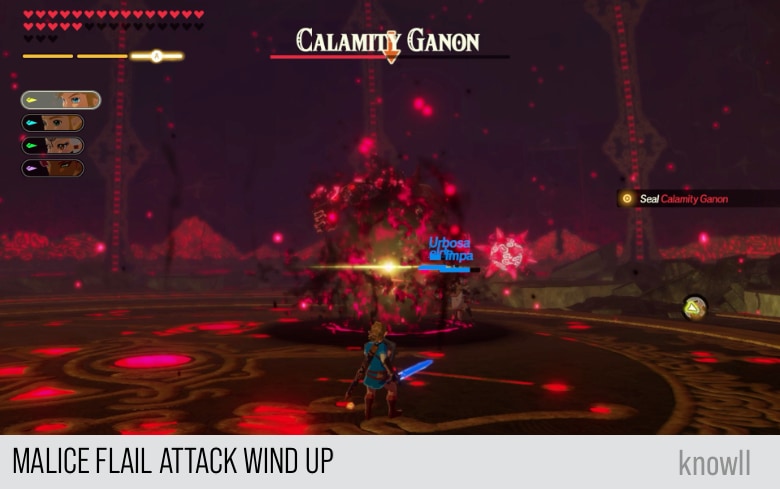
Then he will savagely swing the Malice Flail on his target multiple times.
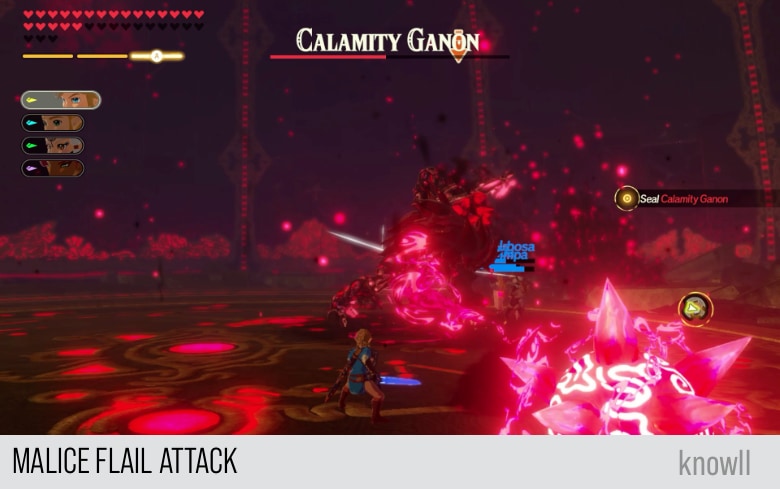
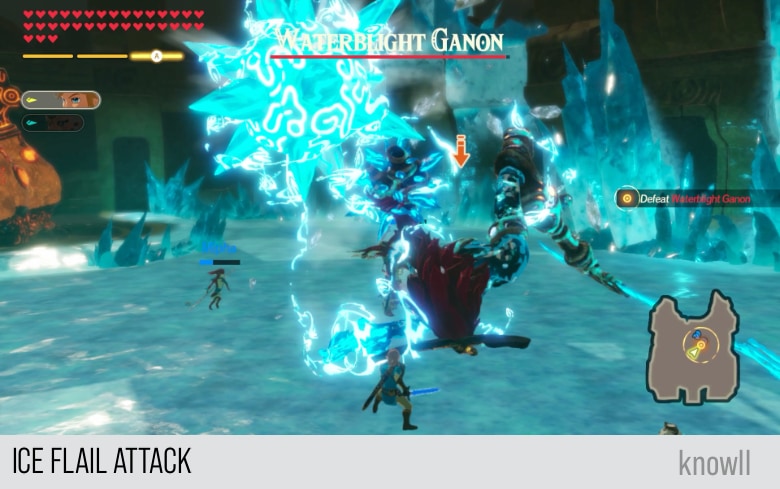
This attack is very similar to the signature attack of Waterblight Ganon, Ice Flail Attack. If you want to see more details, view our Waterblight Ganon Guide.
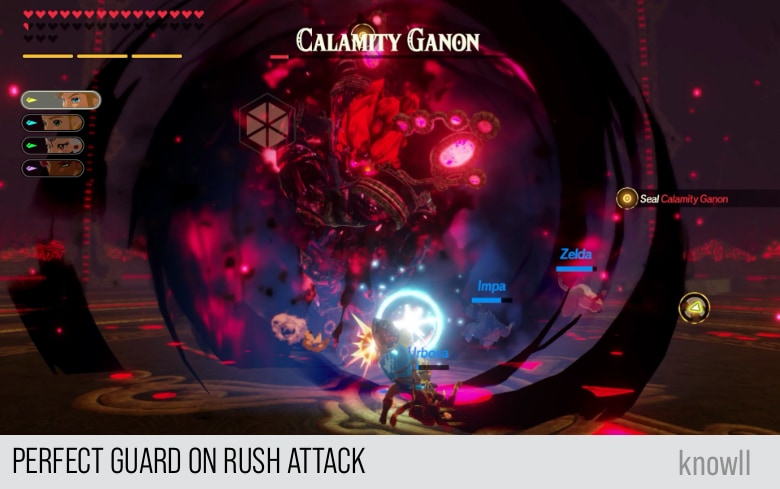
Rush Attack
In the wind up of this attack, Ganon poses as though he is about to run. Like other strong attacks, it shows a very visible telegraph, which you can counter using Cryonis.
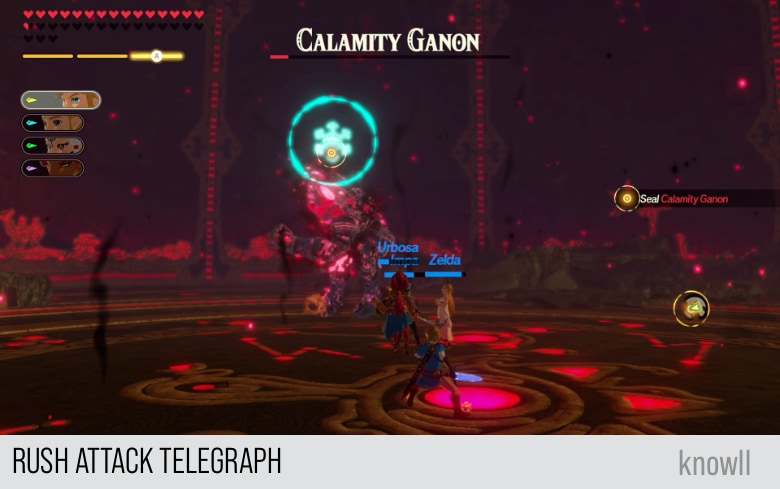
Then he will immediately run towards his target, causing damage and knockback to anyone who gets hit.
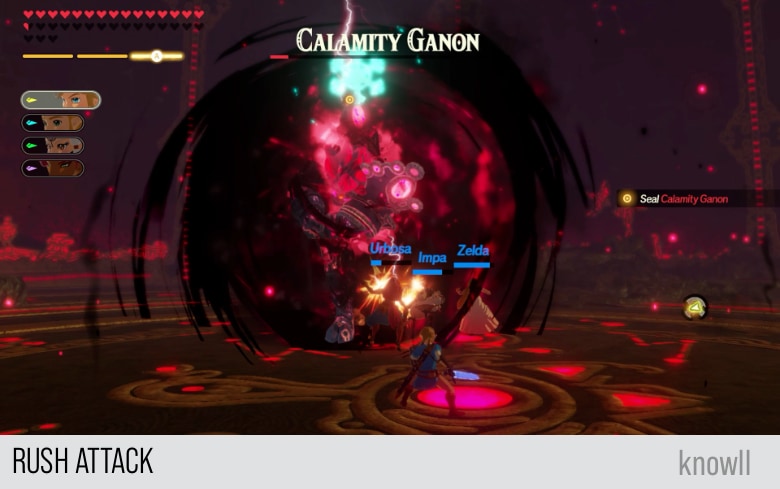
If you are confident, you can do a perfect guard on this while he approaches you. This will cause minor damage to him and stagger him, giving you the chance to clear his WPG.
Spin Attack
The wind up of this attack is similar to the Rush Attack, but instead of posing for a run, he poses for a spin.
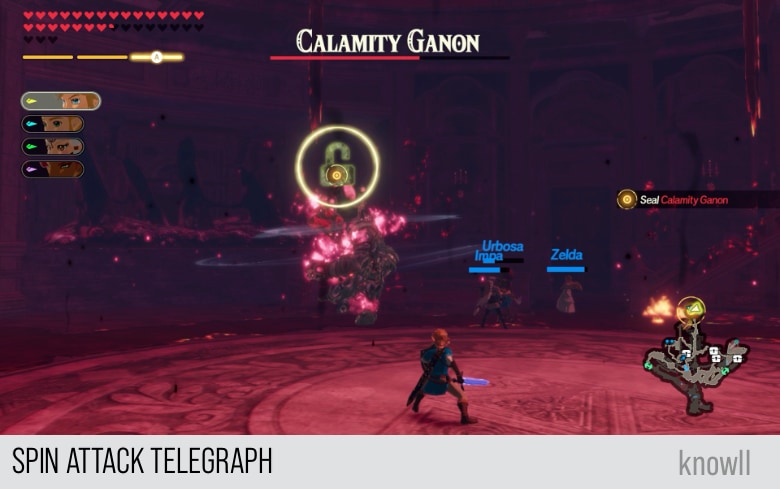
Once the attack begins, he spreads both of his arms and uses them to spin, while approaching his target. This is very similar to how Terrako and Harbinger Ganon do their Spin Attacks.
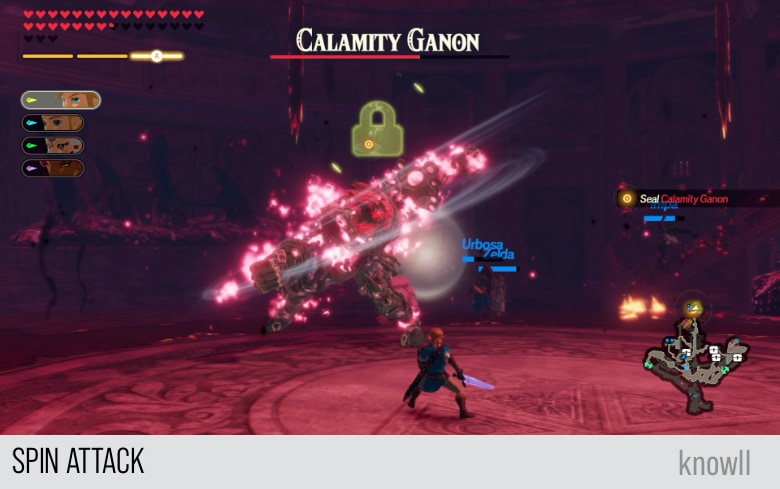
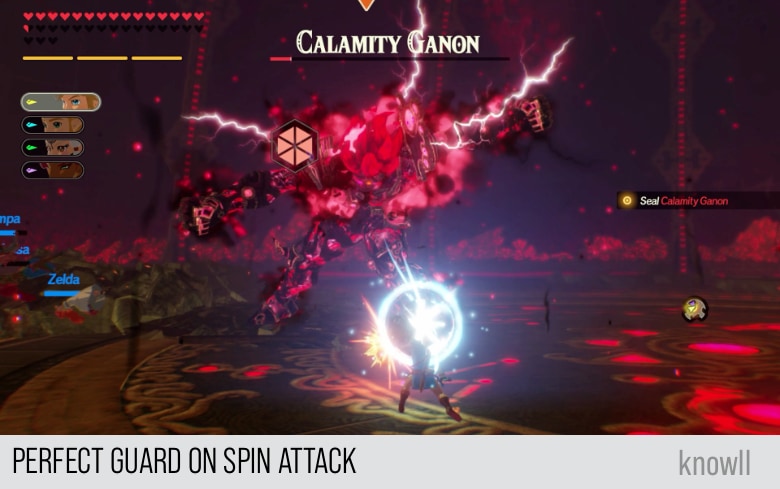
Show Ganon who is the boss, by doing a perfect guard when his spin reaches your position. This will give him a knockback and stagger him.
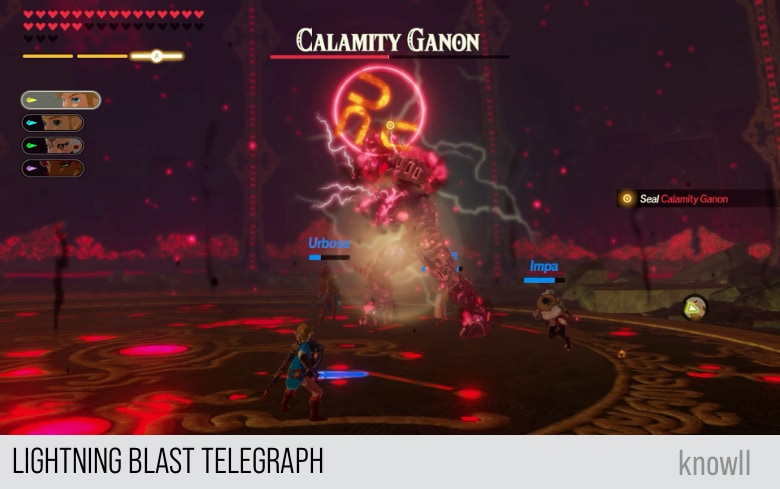
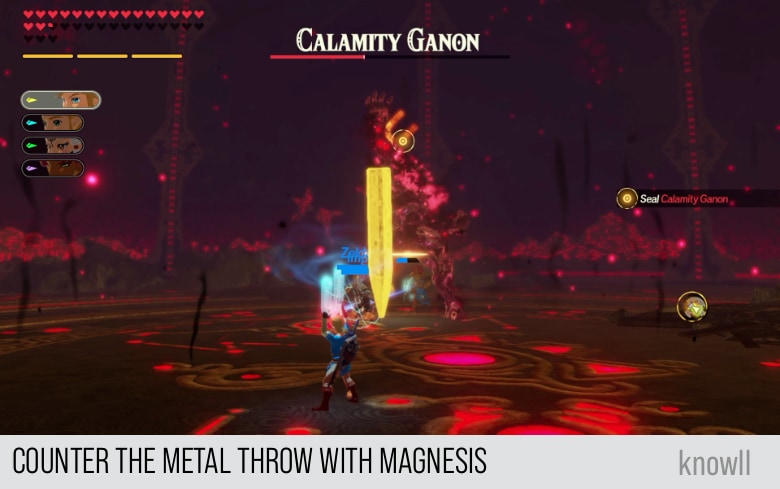
Lightning Blast Attack
Do you remember the hardest Blight boss in BOTW? Yes, that would be Thunderblight Ganon. And what made this boss fight challenging is the stage where you have to return a metal object to him while he is doing his lightning storm attack. That exact mechanic has been removed in the new Thunderblight Ganon but has been improved and returned to Calamity Ganon.
The Lightning Blast attack has several stages. It begins with a telegraph that Ganon is about to throw something metallic. You can counter this with Magnesis.
If you do not counter the first part, it will progress with Ganon throwing a large metal to the target. You can block this and it will not do you damage, as shown below.
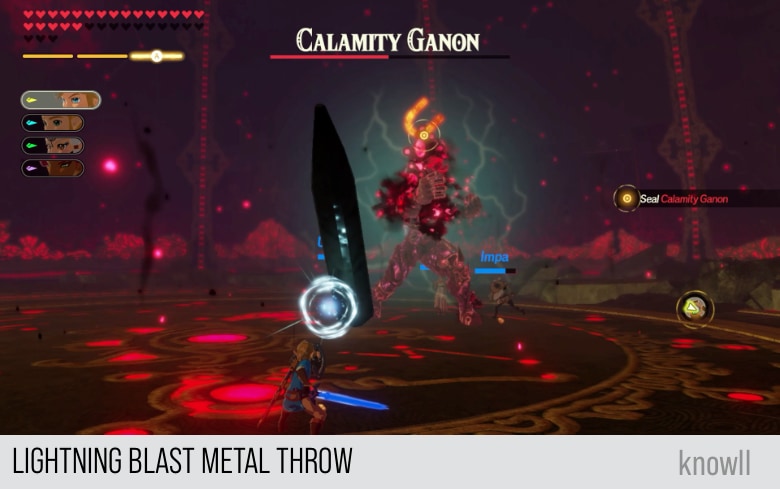
Once the metal lands next to the target, it will explode and cause some damage.
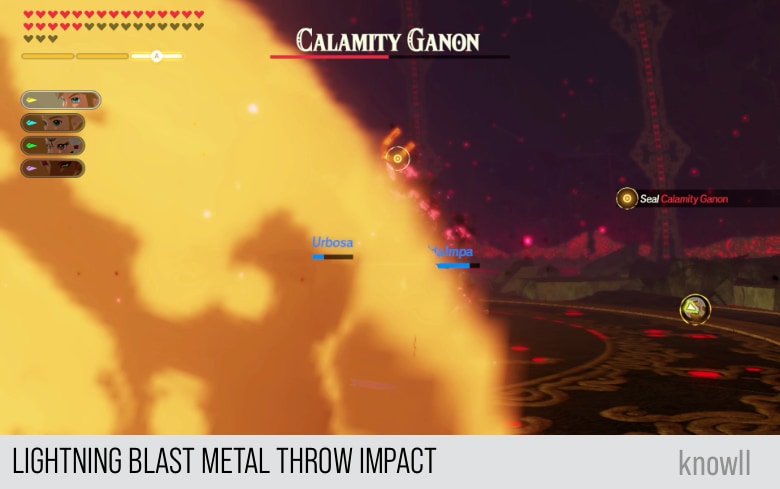
Ganon will then trigger a Lightning Blast that will cause a storm of lightning everywhere, including to the metal that just landed next to you. This will electrocute and knockback all targets hit.
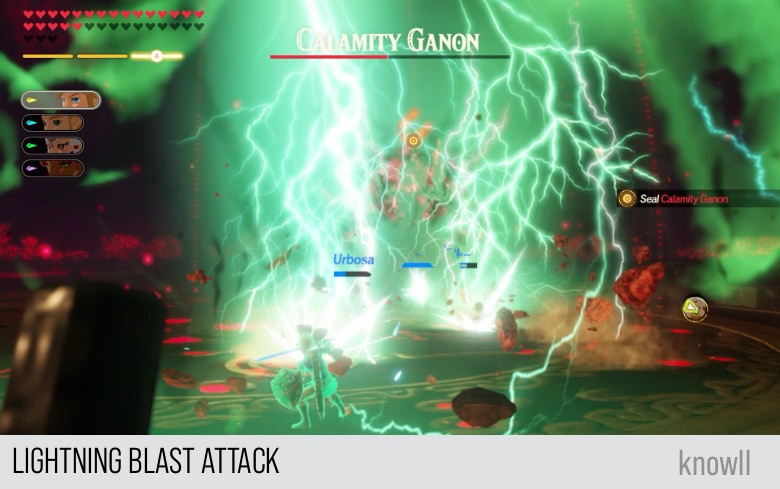
You can prevent all of these from happening by countering the first throw with Magnesis, as shown below. This will return the metal to Ganon and explode next to him.
Malice Ball Attack
In this attack's wind up, Ganon poses as though he will throw at you a baseball.

Then he will immediately throw at you a Malice Ball, which causes damage and minor knockback when it hits the target.
As shared earlier, once Ganon loses half of his health, all his attacks gain a stronger Malice envelope, making them fierier.
You can easily punish the Malice Ball by dodging to your side, so you can get a Flurry Rush on Ganon.
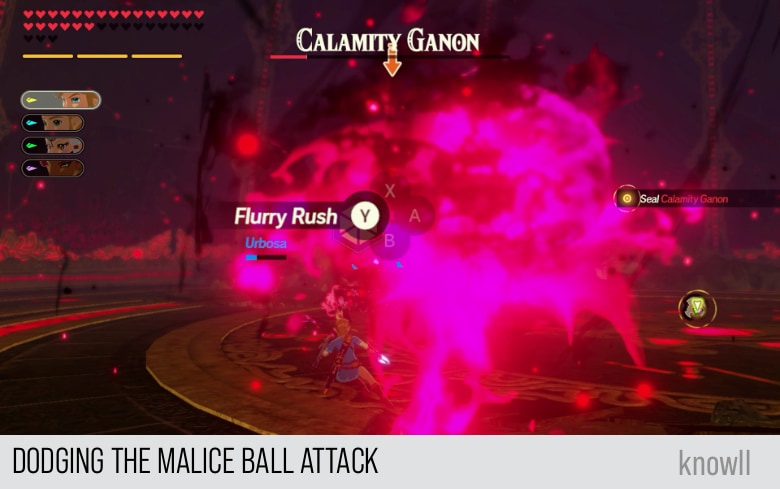
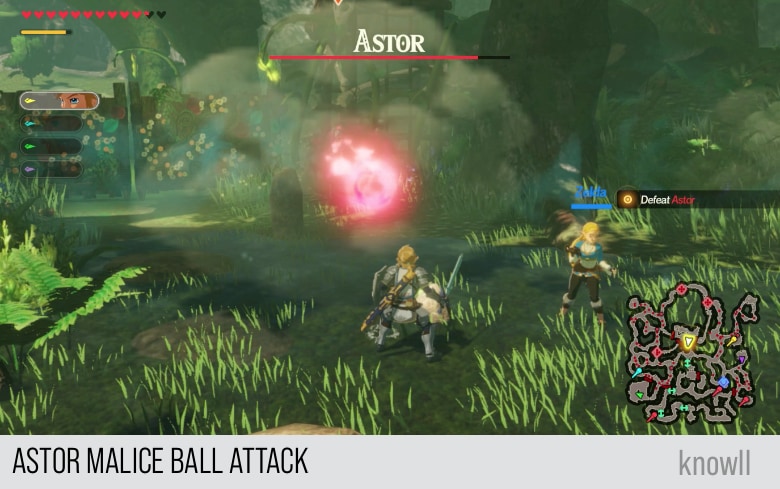
This attack is very similar to the signature attack of Astor, Malice Ball Attack. If you want to see more details, view our Astor Guide.
Malice Cannon Attack
This is another powerful ranged attack of Ganon. In the attack's wind up, Ganon jumps back high and summons a large cannon as shown below.
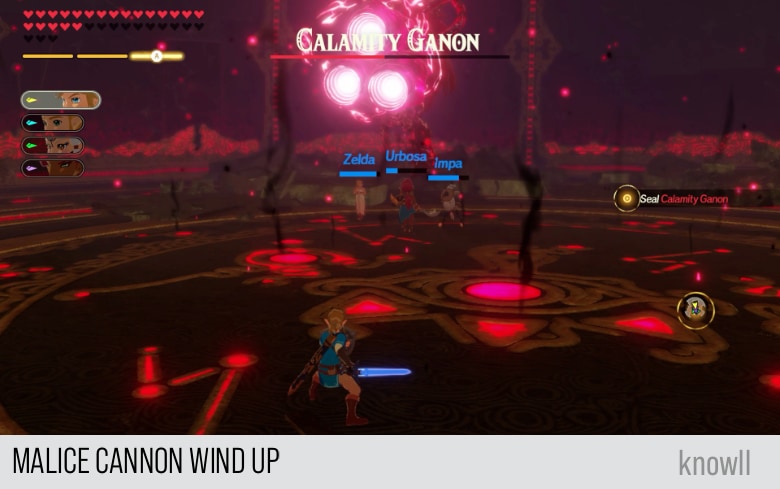
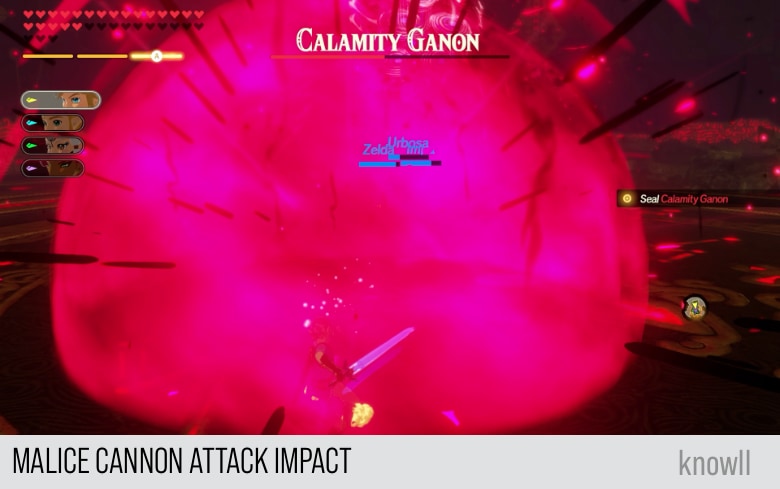
He will then fire at you a large shot.
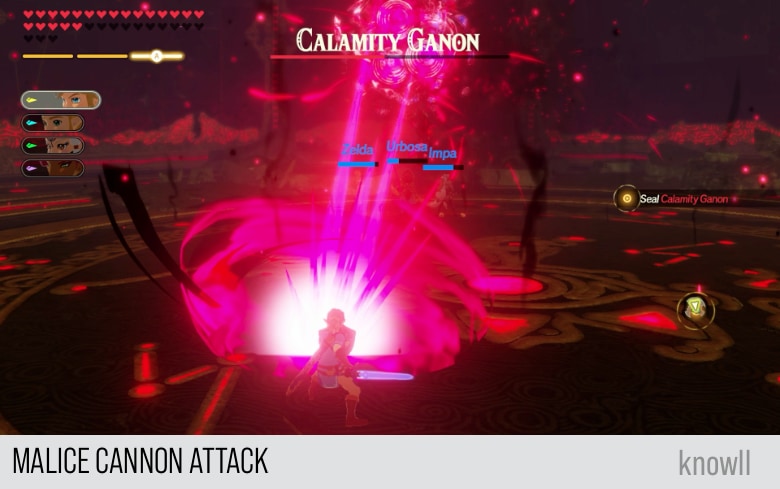
This shot will cause a large explosion, causing damage and knockback to all hit.
This attack uses a weapon that is very similar to the left-hand weapon of Windblight Ganon. If you want to see more details, view our Windblight Ganon Guide.
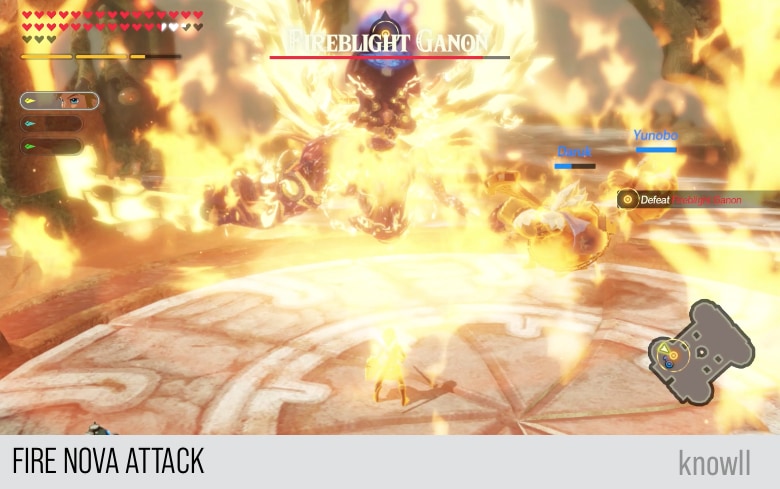
Malice Nova Attack
This could be the most devastating attack in the whole game, as it can easily remove almost three full hearts on a fully upgraded, maxed level 100 character.
Being a powerful attack, it has a telegraph that can be countered with a Remote Bomb. In the attack's wind up, Ganon pulls back his two arms and poses like he is charging energy.
Then he spreads his body and explodes in a blast of destruction.
This is one of the attacks with the strongest AOE and knockback effect. You can see below that all heroes who are initially next to him all disappeared, got repelled by the explosion.
This attack is very similar to the signature attack of Fireblight Ganon, Fire Nova Attack. If you want to see more details, view our Fireblight Ganon Guide.
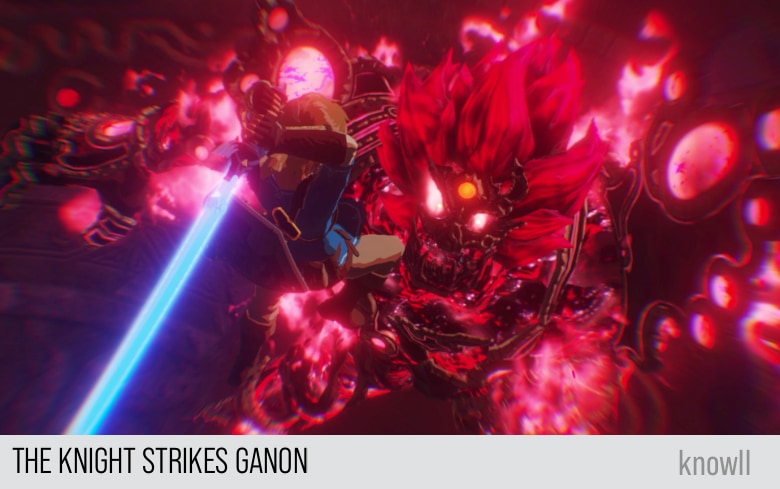
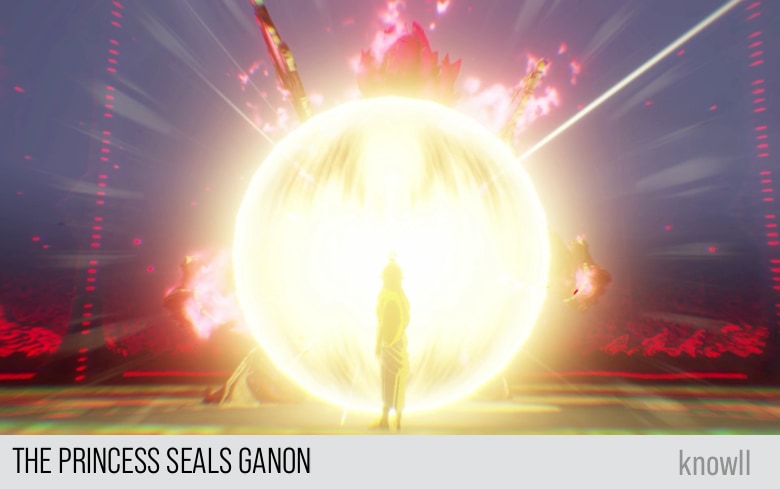
The Sealing Blow
The knight uses the sword that seals the darkness to deliver a devastating slash. The princess uses her sealing power to imprison Calamity Ganon... Thus the legend is realized, and the battle against Calamity Ganon is ended. Peace returns once more to the land.
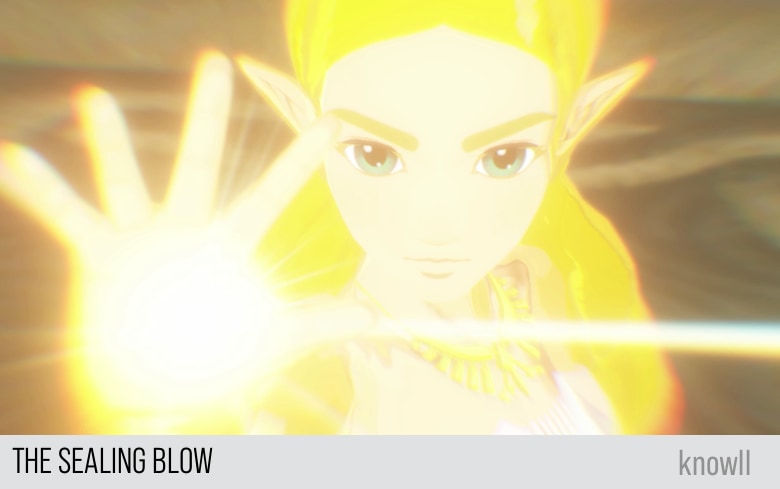
To seal Ganon, the knight and the princess must both do their role. For Link's part, he got encouragement from everyone.
Daruk: You can do it, little guy!
Revali: Don't screw this up!
And with everything that Zelda has gone through, she has found the strength to seal Ganon.
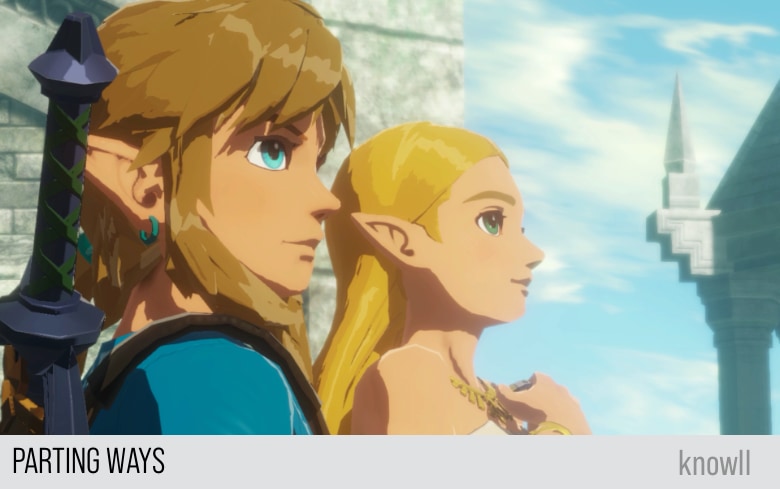
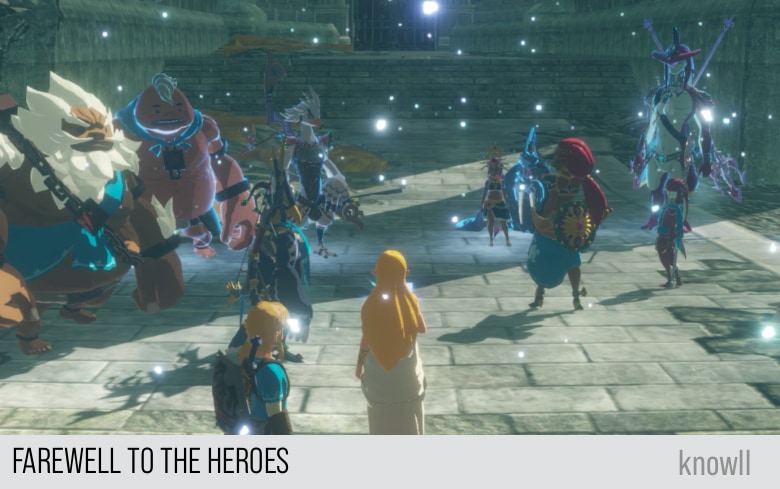
Parting Ways
The heroes who traveled across time return to their origins through the final remnants of Terrako's power. Zelda and the others bid them farewell and pray that the light stays with them in their world.
Riju: Well then, it seems the time has come. I could not be prouder. It was an honor to be of service.
Urbosa: I know you'll lead our people well, Riju.
Daruk: Thanks for everything, Yunobo. We didn't get much time together, but I'll always cherish it.
Yunobo: I will too! It was so much fun. You're the best, Daruk!
Teba: This has been enlightening. I even got to see the face behind the Champion.
Mipha: I know... that we'll meet again, dear brother.
Sidon: Yes. You're my beloved sister... and our hearts will never be apart.
Zelda: I will never forget today's miracles. How all of you fought by my side, and the trials we overcame together...
Zelda: I'll treasure... our friendship always.
Zelda: And now, as you return to your future... may the light shine upon you, for all time.
Korok Locations
Every Chapter in the game contains Koroks. The main challenge is that there is no feature in the game that will make them appear on the map.
Hence, we provide all their locations on the area as well as on the map.
Total Koroks: 3
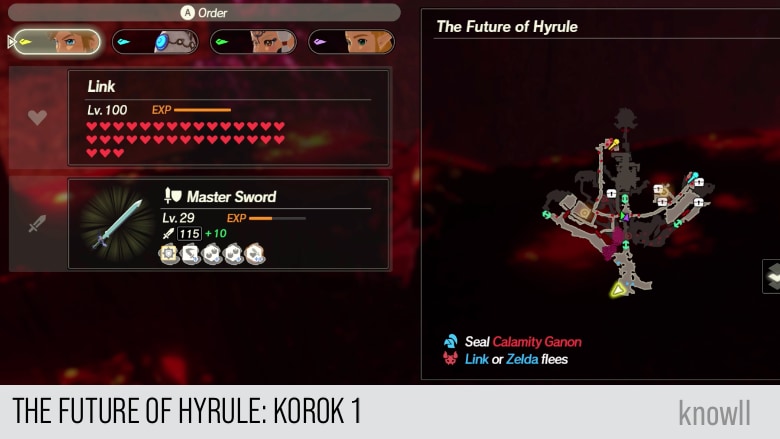
The Future of Hyrule Korok 1
The Future of Hyrule Korok 2

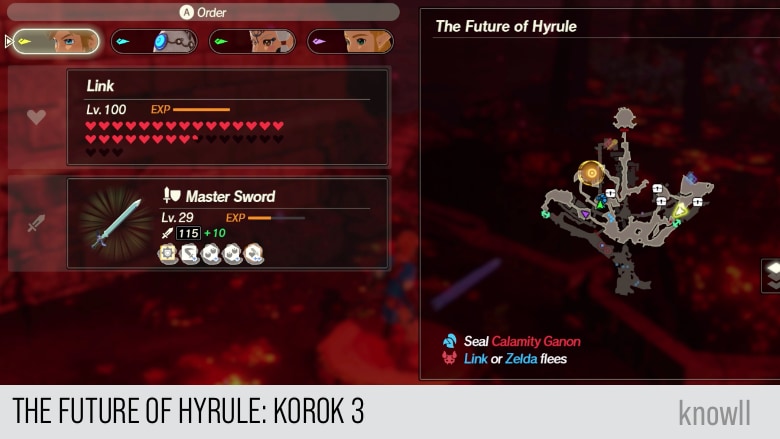
The Future of Hyrule Korok 3
With the Chapters all covered, it's time to explore in detail the Characters of the game.
You might want to view our 100% Completion Guide as well.